How To Keep A Garage Door From Freezing Shut – All Good Garage Doors


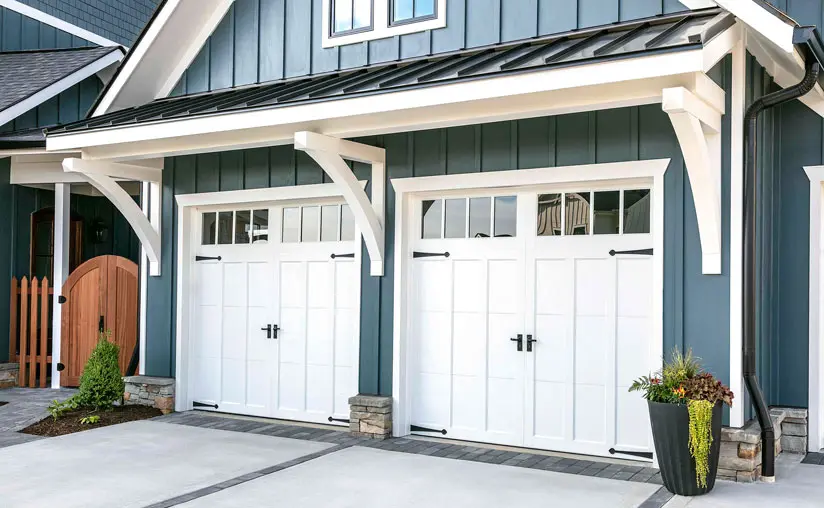
Keeping a Garage Door Las Vegas Nevada  from freezing shut is essential to ensure smooth operation and prevent damage to the door and its components during cold weather. Freezing temperatures can cause moisture and ice buildup, leading to the door sticking to the ground or tracks.

Here are several steps you can take to prevent your garage door from freezing shut:

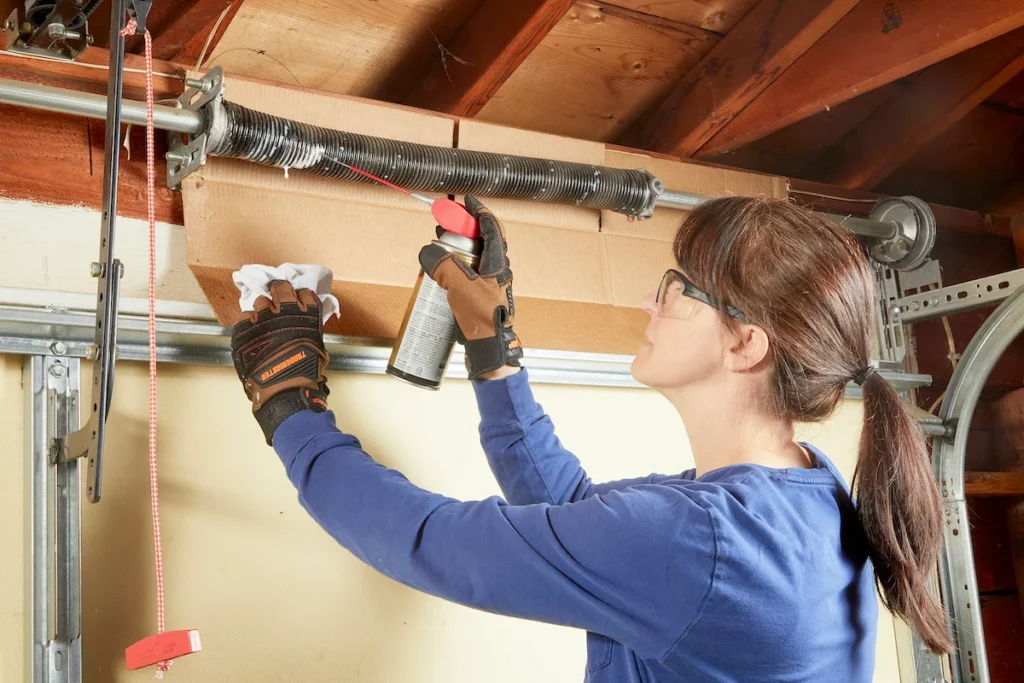
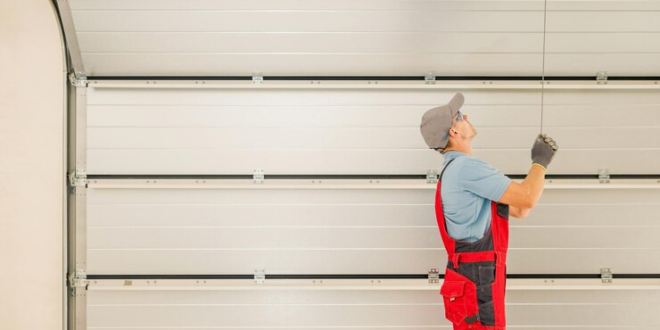
1. Apply a Lubricant: Before the onset of cold weather, apply a silicone-based lubricant to the moving parts of the garage door, including hinges, rollers, tracks, and springs. Lubrication helps reduce friction and prevents moisture from accumulating, making it less likely for the door to freeze shut.

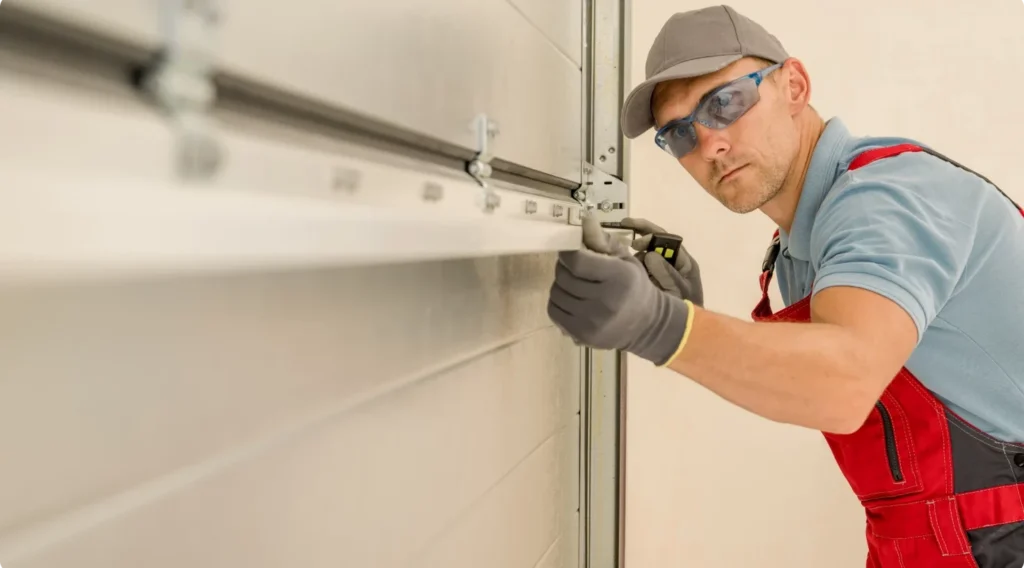
2. Clean the Tracks: Regularly clean the tracks along the sides of the garage door to remove any dirt, debris, or ice buildup. Use a stiff brush or vacuum cleaner to clear away any obstructions that may prevent the door from opening and closing smoothly.

3. Adjust the Seal: Inspect the weatherstripping and bottom seal along the bottom edge of the garage door for signs of wear or damage. Replace any worn or damaged weatherstripping and ensure that the bottom seal forms a tight seal against the garage floor to prevent cold air and moisture from entering.

4. Install a Heater: Consider installing a garage door heater or a portable space heater to keep the temperature inside the garage above freezing. A warmer garage environment helps prevent moisture from freezing on the door and tracks, reducing the likelihood of the door freezing shut.

5. Use a De-Icing Solution: Apply a commercial de-icing solution or a homemade mixture of warm water and vinegar to melt ice buildup on the garage door and tracks. Allow the solution to sit for several minutes to dissolve the ice before attempting to open the door.

6. Warm the Garage: If possible, park a vehicle inside the garage overnight to generate heat and raise the temperature inside. Alternatively, use a portable heater or heat lamp to warm the garage space before attempting to open the door in the morning.

7. Clear Snow and Ice: After a snowfall or freezing rain, clear snow and ice from the driveway and around the garage door to prevent them from accumulating and freezing. Use a snow shovel, ice scraper, or snowblower to remove snow and ice from the area to facilitate easy operation of the garage door.

8. Prevent Water Leakage: Check for any sources of water leakage or drainage issues around the garage door. Ensure that gutters and downspouts are clear and functioning properly to prevent water from pooling near the garage door and freezing.

9. Install a Threshold Seal: Consider installing a threshold seal along the bottom edge of the garage door to create a barrier against moisture and cold air infiltration. Threshold seals are designed to provide a tight seal against the garage floor, preventing water and ice from seeping under the door.

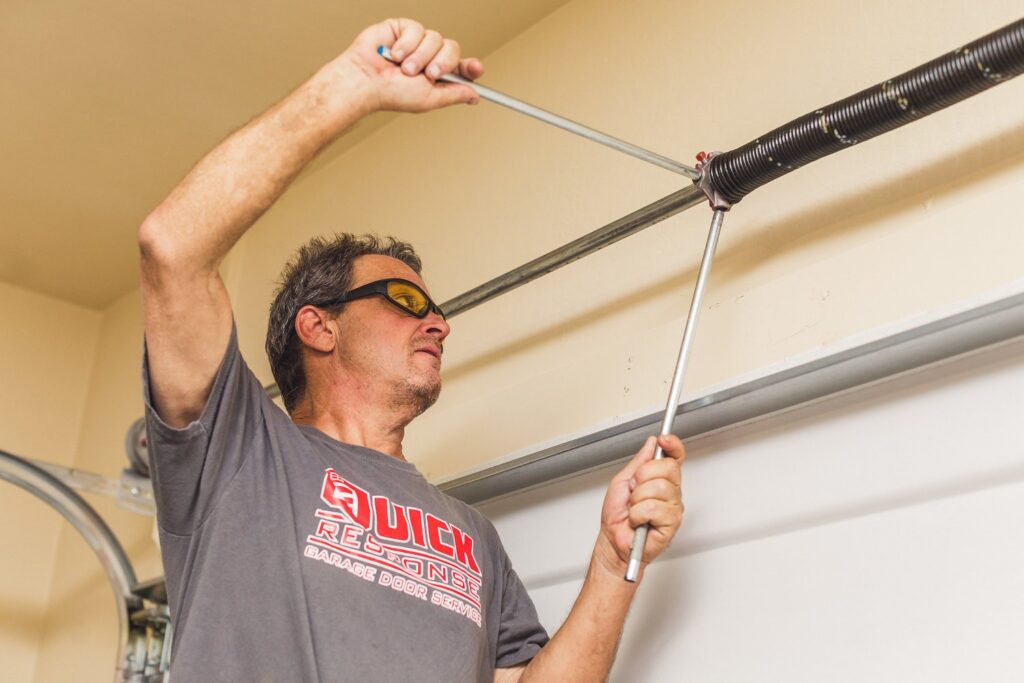
10. Regular Maintenance: Perform regular maintenance on your garage door, including lubricating moving parts, tightening hardware, and inspecting for signs of wear or damage. Addressing any issues promptly can help prevent problems and ensure that the door operates smoothly throughout the winter months.

Regular maintenance and proper care help ensure the longevity and functionality of your Garage Door Las Vegas Nevada  system, even in freezing temperatures.

All Good Garage Doors

494 Cape Alan Dr, Henderson, NV 89052, USA

702-343-2252

https://maps.app.goo.gl/Ra96tSSbVGCtGmSj7

What Are The Latest Trends In Landscaping Design – Arlington


Keeping up with the latest trends in Landscaping Arlington TX design allows homeowners and landscape professionals to stay informed and inspired, leading to innovative and contemporary landscape designs.

Here are some of the latest trends in landscaping design:

1. Sustainable Landscaping: Sustainable landscaping continues to be a dominant trend, driven by growing environmental awareness and concerns about resource conservation. Sustainable landscaping practices focus on reducing water consumption, minimizing chemical inputs, promoting biodiversity, and enhancing ecosystem health. This trend includes the use of native plants, drought-tolerant species, rainwater harvesting systems, permeable paving, and composting to create resilient, low-maintenance landscapes that support local ecosystems and mitigate environmental impact.

2. Native Plants and Wildlife Habitats: There is a growing emphasis on incorporating native plants and creating wildlife-friendly habitats in landscaping designs. Native plants are well-adapted to local climate and soil conditions, requiring less water, fertilizer, and maintenance compared to non-native species. Additionally, native plants provide essential habitat and food sources for local wildlife, including birds, pollinators, and beneficial insects. Designing landscapes with native plants and wildlife-friendly features such as bird feeders, bee hotels, and butterfly gardens enhances biodiversity and fosters a deeper connection to nature.

3. Edible Landscaping and Urban Agriculture: The trend towards edible landscaping and urban agriculture continues to gain momentum as people seek to grow their own food and reconnect with nature. Incorporating fruit trees, vegetable gardens, herb beds, and edible flowers into landscaping designs allows homeowners to enjoy fresh, homegrown produce while beautifying their outdoor spaces. Urban agriculture initiatives such as community gardens, rooftop gardens, and vertical farming systems contribute to food security, local food economies, and community resilience.

4. Outdoor Living Spaces and Multifunctional Design: Outdoor living spaces are becoming increasingly popular as homeowners seek to extend their indoor living areas into the outdoors. The trend towards multifunctional design includes creating versatile outdoor spaces that serve multiple purposes, such as dining, entertaining, lounging, cooking, and gardening. Features such as patios, decks, pergolas, fire pits, outdoor kitchens, and seating areas are incorporated into landscaping designs to enhance usability, comfort, and enjoyment year-round.

5. Low-Maintenance Landscapes and Smart Technology: With busy lifestyles and a desire for hassle-free maintenance, there is a growing demand for low-maintenance landscapes and smart technology solutions. Drought-tolerant plants, automated irrigation systems, robotic mowers, and smart lighting controls are popular choices for homeowners looking to reduce water consumption, minimize yard work, and optimize energy efficiency. Smart technology allows for remote monitoring and control of landscape features, making it easier to manage and maintain outdoor spaces.

6. Vertical and Small-space Gardening: As urbanization and population density increase, there is a growing interest in vertical and small-space gardening techniques to maximize limited outdoor space. Vertical gardens, living walls, trellises, and vertical planters are used to create lush, greenery-filled environments in small yards, balconies, and rooftops. These innovative gardening solutions allow urban dwellers to enjoy the benefits of gardening and greenery in compact urban settings.

7. Climate-responsive Design and Resilient Landscapes: Climate-responsive design principles are being integrated into landscaping practices to address the challenges of climate change and extreme weather events. Resilient landscapes are designed to withstand fluctuating temperatures, increased precipitation, drought, and other climate-related stressors. This trend includes the use of climate-appropriate plants, permeable surfaces, green infrastructure, rain gardens, and flood-resistant landscaping features to minimize vulnerability and adapt to changing environmental conditions.

8. Naturalistic and Ecological Design: Naturalistic and ecological design approaches that mimic natural ecosystems and processes are gaining popularity in landscaping design. This trend emphasizes the use of organic shapes, irregular patterns, and native plant communities to create landscapes that blend seamlessly with the surrounding environment. Features such as meadows, woodlands, wetlands, and naturalistic water features are incorporated into designs to enhance biodiversity, ecological function, and aesthetic appeal.

9. Biophilic Design and Wellness Landscapes: Biophilic design principles, which emphasize the connection between humans and nature, are being applied to landscaping to promote health, well-being, and environmental stewardship. Wellness landscapes incorporate elements such as natural materials, water features, sensory gardens, therapeutic landscapes, and outdoor retreats to reduce stress, improve mood, and enhance overall quality of life. Biophilic design fosters a deeper appreciation for nature and strengthens the bond between people and their outdoor environments.

10. Artistic Expression and Personalization: Landscaping design is increasingly seen as a form of artistic expression and personalization, allowing homeowners to showcase their individuality, creativity, and cultural identity. This trend includes incorporating art installations, sculptures, murals, and customized features into landscaping designs to reflect the homeowner’s personality, interests, and aesthetic preferences. Landscape designers collaborate with clients to create unique, one-of-a-kind outdoor spaces that reflect their vision and lifestyle.

Whether it’s integrating native plants, creating edible gardens, or designing multifunctional outdoor living areas, the possibilities for creative and sustainable Landscaping Arlington TX are endless.

Arlington

All Season Landcare Arlington TX

817-545-8590

https://maps.app.goo.gl/89F8ipXLtX938u1j6

How To Change Code On Garage Door Keypad Overhead Door – BH Garage Doors and Gates


Changing the code on your Overhead Garage Door Repair Rockwall TX door keypad is a simple process that enhances the security of your home.

By following these steps, you can easily update the access code to your garage

1. Locate the Keypad: Find the keypad mounted outside your garage door. It’s usually positioned near the entrance, either on the wall beside the door or directly on the garage door frame.

2. Enter the Current Code: Begin by entering your current access code on the keypad. This code grants you access to the programming mode. If you’re unsure of the current code or it doesn’t work, you may need to reset the keypad to its default settings before proceeding.

3. Enter Programming Mode: After entering the current code, locate the “Program” or “Learn” button on the motor unit of your Overhead Door garage door opener. Press and release this button within 30 seconds of entering the current code. The indicator light on the opener unit should flash, indicating that it’s ready to accept a new code.

4. Choose a New Code: Select a new access code for your garage door keypad. Ensure it’s a memorable combination that’s easy for you to remember but difficult for others to guess. Avoid using common or sequential codes for improved security.

5. Enter the New Code: Enter the new access code on the keypad within 30 seconds of pressing the “Program” or “Learn” button on the opener unit. Some keypads may require you to press a specific button (e.g., “Enter” or “Learn”) after entering the new code to confirm the programming.

6. Test the New Code: Test the new access code by entering it on the keypad and pressing the “Enter” or “Open” button. The garage door should respond by opening or closing, confirming that the new code has been successfully programmed.

7. Repeat if Necessary: If you have multiple garage door keypads or if you’re changing the code on multiple doors, repeat the programming process for each keypad following the same steps outlined above.

8. Secure the Keypad: After programming the new code, ensure that the keypad is securely mounted and that all buttons are functioning correctly. Check for any signs of damage or wear and replace the keypad or batteries as needed.

9. Keep the Code Secure: Once you’ve changed the code, keep it confidential and only share it with trusted individuals. Avoid writing down the code or sharing it with others to maintain the security of your garage.

10. Reset if Necessary: If you encounter any issues or if the new code doesn’t work as expected, you may need to reset the keypad and reprogram it from scratch. Refer to the manufacturer’s instructions or contact Overhead Door for assistance with resetting the keypad.

By following these straightforward steps, you can easily change the access code on your Overhead Door Garage Door Repair Rockwall TX keypad, ensuring the security of your garage and home. If you encounter any difficulties during the programming process, consult the keypad’s instruction manual or contact Overhead Door for further assistance.

BH Garage Doors and Gates

4035 N Goliad St, Rockwall, TX 75087, United States

1-214-206-5231

https://maps.app.goo.gl/iYdGkyhiGAiUXN3G7

How Many Watts Is A Garage Door Opener – 6136 Frisco Square Blvd suit 400

The wattage of a Garage Door Repair Frisco TX  can vary depending on factors such as the motor size, horsepower, type of opener, and specific features. While the exact wattage may differ between models, most residential garage door openers typically consume between 300 to 600 watts during normal operation.

Here’s a more detailed explanation of the factors that can affect the wattage of a garage door opener:

  1. Motor Size and Horsepower: The size and horsepower of the motor used in the garage door opener play a significant role in determining its wattage consumption. Larger motors with higher horsepower ratings will generally consume more power during operation, especially when lifting heavier garage doors or performing frequent cycles. The wattage rating of the motor is typically provided by the manufacturer and can vary depending on the specific model.
  2. Type of Opener: Garage door openers come in different types, including chain-drive, belt-drive, and screw-drive models. Each type of opener utilizes a different mechanism to lift and lower the garage door, which can affect its energy efficiency and wattage consumption. Belt-drive openers tend to be quieter and more energy-efficient compared to chain-drive or screw-drive models, which may consume slightly more power.
  3. Door Size and Weight: The size and weight of the garage door being operated can also influence the wattage consumption of the opener. Larger, heavier doors require more power to lift and lower, resulting in higher wattage consumption during operation. Additionally, doors with insulation or additional features such as windows or decorative panels may add extra weight, further increasing the load on the opener motor.
  4. Frequency of Use: The frequency with which the garage door is opened and closed can impact the overall energy consumption of the opener. Garage door openers that are used more frequently, such as in busy households or commercial settings, may consume more power over time due to repeated operation. Conversely, openers in less frequently used garages may consume less power overall.
  5. Efficiency and Condition: The efficiency and condition of the garage door opener itself can affect its wattage consumption. Well-maintained openers that are properly lubricated and adjusted may operate more efficiently, resulting in lower energy consumption. On the other hand, worn or damaged components may cause the opener to work harder and consume more power during operation.
  6. Operating Environment: Environmental factors such as temperature, humidity, and altitude can also impact the wattage consumption of a garage door opener. Extreme temperatures, high humidity, or low air pressure may affect the performance of the motor and electrical components, potentially leading to increased energy consumption.

Regular maintenance and periodic inspection of your Garage Door Repair Frisco TX  can help ensure efficient operation and prolong the lifespan of the equipment while minimizing energy consumption.

6136 Frisco Square Blvd suit 400

6136 Frisco Square Blvd, Frisco, TX 75034, USA

214-504-1822

https://maps.app.goo.gl/PgFgbkqB9ajK8V388

How To Remove Weather Stripping From Garage Door – 20527 Farm to Market 1093 a2


 Garage Door Repair Richmond TX Whether you’re replacing old weather stripping or making repairs to the door, here’s a step-by-step guide on how to remove weather stripping from a garage door:

  1. Gather Necessary Tools and Materials: Before starting, gather the tools and materials you’ll need for the job. You’ll likely need a utility knife or razor blade, pliers or a pry bar, a flathead screwdriver, a hammer, and a container for collecting removed weather stripping and debris. Wear protective gloves and safety glasses to prevent injuries while handling tools and sharp objects.
  2. Prepare the Work Area: Clear the area around the garage door to create a safe and clutter-free workspace. Remove any obstacles or objects near the door that could impede your movement or cause accidents. Lay down a drop cloth or old towels to catch debris and protect the floor from scratches or damage.
  3. Inspect the Weather Stripping: Before removing the weather stripping, inspect it for signs of damage, wear, or deterioration. Check for tears, cracks, or gaps in the weather stripping that may compromise its effectiveness. Note any areas that require repair or replacement, such as damaged seals or missing sections of weather stripping.
  4. Identify Attachment Points: Examine the weather stripping to identify the attachment points and fasteners securing it to the garage door frame. Weather stripping may be held in place with adhesive, nails, staples, screws, or retaining clips, depending on the installation method. Take note of the type and location of fasteners to determine the best approach for removal.
  5. Begin Removal Process: Start by gently pulling or peeling back a small section of the weather stripping to expose the attachment points underneath. Use a flathead screwdriver or utility knife to carefully loosen any adhesive or sealant securing the weather stripping to the door frame. Take care not to damage the door or surrounding surfaces while removing the weather stripping.
  6. Remove Fasteners and Adhesive: Once you’ve loosened the weather stripping, use pliers, a pry bar, or a flathead screwdriver to remove any fasteners, such as nails, staples, or screws, holding the weather stripping in place. If the weather stripping is held with adhesive, carefully peel it away from the door frame, using a utility knife to cut through any stubborn adhesive or sealant. Take your time to ensure thorough removal without causing damage.
  7. Work Methodically: Work methodically around the perimeter of the garage door, removing weather stripping one section at a time. Use a combination of pulling, prying, and cutting to release the weather stripping from the door frame. Take breaks as needed to rest your hands and avoid fatigue.
  8. Dispose of Removed Weather Stripping: As you remove weather stripping, collect it in a container for disposal or recycling. Dispose of old weather stripping according to local regulations and guidelines for handling construction debris. Avoid leaving loose nails, staples, or adhesive residue scattered around the work area to prevent injuries or damage.
  9. Clean and Prepare the Door Frame: Once all the weather stripping has been removed, clean the door frame to remove any remaining adhesive, dirt, or debris. Use a mild detergent or solvent appropriate for the surface material, such as isopropyl alcohol or mineral spirits, to dissolve stubborn adhesive residue. Wipe down the door frame with a clean cloth or sponge and allow it to dry completely before installing new weather stripping.
  10. Inspect and Repair: Take this opportunity to inspect the garage door frame for any damage, rot, or decay that may require repair or treatment. Replace any damaged or deteriorated wood, repair cracks or gaps, and treat the surface with primer or sealant to protect it from moisture and weathering.

 Garage Door Repair Richmond TX If you encounter any difficulties or are unsure about the process, consult the manufacturer’s instructions or seek assistance from a professional garage door technician.

20527 Farm to Market 1093 a2

713-248-2684

https://maps.app.goo.gl/t63qb9AmNfom8KU87

How To Put Garage Door Roller Back On Track – Veterans Garage Door


Putting a Garage Door Repair Villages FL roller back on track is a task that requires patience and attention to detail. A misaligned roller can cause the door to operate improperly or become stuck.

Here’s a detailed guide to help you put your garage door roller back on track:

: Prepare for the Task

  1. Gather Necessary Tools: You’ll need a ladder, pliers, a rubber mallet or hammer, a screwdriver, and possibly some lubricant.
  2. Ensure Safety: Before starting, make sure the area around the garage door is clear, and take necessary safety precautions, such as wearing gloves and safety glasses.

: Identify the Problem

  1. Inspect the Tracks: Carefully examine the tracks on both sides of the garage door to identify any obstructions, debris, or damage.
  2. Check Rollers: Inspect the rollers to see if they are misaligned, damaged, or detached from the track.

: Disconnect the Opener (if applicable)

  1. Safety First: To prevent the garage door from accidentally opening or closing during the repair process, disconnect the opener from power or use the manual release cord to disengage it.
  2. Test Door Movement: Confirm that the door can be moved manually along the tracks.

: Loosen Track Bolts

  1. Loosen Bolts: Use a screwdriver or wrench to loosen the bolts securing the vertical tracks to the wall. Do not remove them completely, just loosen them enough to allow movement.

: Realign the Roller

  1. Place Ladder: Position a ladder next to the misaligned roller, ensuring it’s stable and secure.
  2. Adjust Roller Height: If the roller has come out of the track completely, carefully lift the door by hand to align the roller with the track.
  3. Slide Roller into Track: Once aligned, gently guide the roller back into the track, starting from the bottom and working your way up.
  4. Check Alignment: Ensure the roller is properly seated in the track and moves smoothly along it without binding or wobbling.

: Tighten Track Bolts

  1. Secure Bolts: Use a screwdriver or wrench to tighten the track bolts securely, ensuring the tracks remain aligned and stable.

: Test Door Operation

  1. Reconnect Opener (if applicable): If you disconnected the opener earlier, reconnect it to power or re-engage it using the manual release cord.
  2. Test Door Movement: Operate the garage door manually and then with the opener to ensure smooth and proper functioning.

: Lubricate Tracks and Rollers

  1. Apply Lubricant: Use a silicone-based lubricant to lubricate the tracks and rollers, ensuring smooth operation and reducing wear and tear.
  2. Wipe Excess: Wipe off any excess lubricant to prevent accumulation of dirt and debris.

: Repeat for Other Rollers (if necessary)

  1. Inspect Remaining Rollers: Check the alignment and condition of the other rollers along the track.
  2. Repeat Process: If any other rollers are misaligned, repeat the above steps to realign them.

: Schedule Maintenance

  1. Regular Maintenance: To prevent future issues, schedule regular maintenance of your garage door, including lubrication of tracks and rollers, and inspection of all components.

: Seek Professional Help (if needed)

  1. Complex Issues: If you encounter any complex issues or if you’re unsure about performing the repair yourself, it’s best to seek help from a professional garage door technician.

Conclusion:

Remember to perform regular maintenance to prevent future issues and extend the lifespan of your Garage Door Repair Villages FL system.

Veterans Garage Door

2113 Everglades Ln., The Villages, FL 32163, United States

1-352-844-3925

https://maps.app.goo.gl/CGJVdphMK4kfWbDV6

How To Make My Garage Door Look Like Wood – DFW Garage Door Experts


Transforming your Garage Door Repair Bedford TX to look like wood can add warmth, character, and curb appeal to your home’s exterior. Whether you have a metal or vinyl garage door, you can achieve the look of real wood through various painting and staining techniques. In this comprehensive guide, I’ll walk you through the step-by-step process of making your garage door look like wood, from preparation to finishing touches.

Step 1: Gather Necessary Tools and Materials

  1. Sandpaper: Use medium-grit sandpaper (around 120-150 grit) to roughen the surface of the garage door.
  2. Tack Cloth: Use a tack cloth to remove dust and debris from the surface after sanding.
  3. Primer: Choose a high-quality primer suitable for the material of your garage door (metal or vinyl).
  4. Paint: Select paint colors that resemble the natural tones of wood, such as brown, tan, or beige.
  5. Wood Grain Tool: Purchase a wood grain tool or comb to create realistic wood grain patterns.
  6. Stain: Choose a wood stain in a color that complements the base paint color for added depth and dimension.
  7. Clear Sealer: Finish with a clear sealer or topcoat to protect the painted surface and enhance the wood-like appearance.

Step 2: Prepare the Garage Door Surface

  1. Clean the Surface: Thoroughly clean the garage door surface using a mild detergent and water to remove dirt, grease, and grime.
  2. Sand the Surface: Lightly sand the surface of the garage door with medium-grit sandpaper to create a rough texture that will help the primer and paint adhere better.
  3. Wipe Down with Tack Cloth: Use a tack cloth to remove any dust and debris left from sanding, ensuring a clean surface for painting.

Step 3: Prime the Garage Door

  1. Apply Primer: Apply a coat of primer to the entire surface of the garage door using a paintbrush or roller. Follow the manufacturer’s instructions for drying time and recoat intervals.
  2. Allow to Dry: Allow the primer to dry completely before proceeding to the next step. This may take several hours, depending on the type of primer used and environmental conditions.

Step 4: Paint the Base Coat

  1. Select Base Paint Color: Choose a base paint color that resembles the background color of the wood you want to imitate, such as light brown or tan.
  2. Apply Base Coat: Use a paintbrush or roller to apply an even coat of base paint to the entire surface of the garage door. Allow the paint to dry completely between coats, following the manufacturer’s recommendations.

Step 5: Create Wood Grain Pattern

  1. Mix Darker Paint: Mix a darker shade of paint using the base color and a darker tint to create contrast and depth.
  2. Apply Darker Paint: Use a wood grain tool or comb to apply the darker paint in long, sweeping motions, following the natural grain patterns of wood. Experiment with different angles and pressure to create a realistic wood grain effect.
  3. Blend and Feather: Blend and feather the darker paint into the base coat using a dry brush or rag to soften harsh lines and create a more natural appearance.

Step 6: Apply Wood Stain (Optional)

  1. Choose Stain Color: Select a wood stain in a color that complements the base paint color and enhances the wood-like appearance.
  2. Apply Stain: Use a clean brush or rag to apply the wood stain in a thin, even layer over the painted surface. Wipe off any excess stain with a clean rag.
  3. Allow to Dry: Allow the stain to dry completely according to the manufacturer’s instructions before proceeding to the next step.

Step 7: Seal and Protect

  1. Select Clear Sealer: Choose a clear sealer or topcoat designed for exterior use to protect the painted surface and enhance durability.
  2. Apply Sealer: Apply a thin, even coat of clear sealer over the entire surface of the garage door using a paintbrush or roller. Allow the sealer to dry completely between coats, following the manufacturer’s recommendations.
  3. Repeat as Needed: Apply additional coats of sealer as needed to achieve the desired level of protection and durability.

Step 8: Finish and Maintain

  1. Reattach Hardware: Once the paint, stain, and sealer are dry, reattach any hardware, such as handles, hinges, and decorative accents, to the garage door.
  2. Regular Maintenance: To maintain the wood-like appearance of your garage door, periodically clean the surface with a mild detergent and water and touch up any areas that may become worn or damaged over time.

Step 9: Enjoy Your Wood-Look Garage Door

  1. Admire Your Work: Step back and admire the transformation of your garage door into a realistic wood-like finish that enhances the curb appeal of your home.
  2. Share Your Success: Share your DIY project with friends, family, and neighbors to inspire others to create their own wood-look garage doors.

Conclusion:

Whether you have a metal or vinyl Garage Door Repair Bedford TX with the right techniques and attention to detail, you can create a stunning wood-look finish that will impress for years to come.

DFW Garage Door Experts

2165 Loma Alta Dr, Bedford, TX 76021, United States

https://maps.app.goo.gl/CJiQmxsf3p2hxXfYA

How Much Does It Cost To Repair A Garage Door – JT’s Overhead Doors

The cost to repair a Garage Door Repair Mesa AZ can vary significantly depending on the type and extent of the damage, the necessary repairs, and the factors specific to your situation. In this comprehensive guide, I’ll discuss the various factors that influence the cost of repairing a garage door and provide an overview of the typical price ranges for common repair services.

Factors Influencing Garage Door Repair Costs:

  1. Type of Repair:
    • The type of repair needed is a significant factor in determining the cost. Common garage door repairs include spring replacement, track realignment, panel replacement, cable repair, roller replacement, sensor adjustment, and opener repair.
    • Complex repairs requiring specialized parts, equipment, or expertise may incur higher costs compared to minor repairs.
  2. Extent of Damage:
    • The extent of damage to the garage door components directly impacts the repair cost. Minor issues such as loose hardware or minor dents may be relatively inexpensive to fix, while extensive damage or structural issues may require more extensive repairs or even replacement of components.
  3. Type of Garage Door:
    • The material, design, and construction of the garage door can affect repair costs. Wooden doors, for example, may require more labor-intensive repairs compared to steel or aluminum doors.
    • Custom or specialty doors with unique features or designs may require specialized repair techniques or replacement parts, resulting in higher repair costs.
  4. Age and Condition:
    • The age and condition of the garage door and its components can influence repair costs. Older doors or those with pre-existing damage may require more frequent repairs or replacement of worn-out parts, which can add to the overall cost.
    • Regular maintenance and timely repairs can help prevent costly issues and prolong the lifespan of the garage door system.
  5. Location:
    • Geographic location can also impact garage door repair costs. Repair services may be more expensive in urban areas with higher labor rates or where specialized expertise is in high demand.
    • Additionally, accessibility issues, such as remote or rural locations, may result in higher service charges for travel time and transportation of equipment.

Typical Price Ranges for Garage Door Repairs:

  1. Spring Replacement:
    • The cost to replace garage door springs typically ranges from $150 to $350 per spring, depending on the type of spring (torsion or extension), size, and complexity of the installation.
    • Spring replacement is one of the most common and critical repairs for garage doors, as worn or broken springs can affect the door’s balance and functionality.
  2. Track Realignment:
    • The cost to realign garage door tracks varies depending on the extent of misalignment and the time required for adjustment. Prices typically range from $75 to $200, excluding any additional parts or repairs needed.
  3. Panel Replacement:
    • The cost to replace a damaged garage door panel depends on the size, material, and design of the panel. Prices typically range from $200 to $600 per panel, including labor and materials.
    • Panel replacement is often necessary for repairing dents, cracks, or other cosmetic damage to the door.
  4. Cable Repair:
    • The cost to repair garage door cables ranges from $100 to $200 per cable, including labor and materials. Cable repair is essential for ensuring smooth and safe operation of the door, as damaged cables can cause the door to become unbalanced or jammed.
  5. Opener Repair:
    • The cost to repair a garage door opener depends on the type of repair needed and the complexity of the opener system. Prices typically range from $100 to $300 for common repairs such as motor replacement, gear or belt replacement, or circuit board repair.

Conclusion:

The cost to repair a Garage Door Repair Mesa AZ can vary based on factors such as the type of repair, extent of damage, type of garage door, age and condition, and geographic location. It’s essential to address repair issues promptly to prevent further damage and ensure the safety and functionality of the garage door system. By understanding the factors that influence repair costs and obtaining estimates from reputable garage door repair companies, homeowners can make informed decisions and budget accordingly for necessary repairs. Regular maintenance and timely repairs can help extend the lifespan of the garage door system and prevent costly issues down the line. If you’re unsure about the cost of a specific repair or need assistance with diagnosing and fixing garage door issues, consider consulting with a qualified garage door technician or repair professional for expert advice and service.

JT’s Overhead Doors

307 N Sandal, Mesa, AZ 85205, United States

1-480-662-3315

How Many Turns On A Garage Door Spring – Circle B Overhead Door

Determining the number of turns required for a Garage Door Repair Bryan TX is a crucial step in ensuring proper balance and smooth operation of the door. However, calculating the exact number of turns can be complex and depends on several factors, including the weight and size of the garage door, the type of spring system used, and the manufacturer’s specifications.

Here’s a detailed explanation of how to determine the number of turns on a garage door spring:

Understanding Garage Door Springs:

Garage doors typically use one of two types of springs: torsion springs or extension springs.

  • Torsion Springs: Torsion springs are mounted above the garage door and work by twisting to store energy. They are typically installed in pairs and are wound tightly to counterbalance the weight of the door.
  • Extension Springs: Extension springs are mounted on either side of the door and stretch as the door opens. They work by extending and contracting to provide lifting force to the door.

Factors Affecting the Number of Turns:

Several factors influence the number of turns required for a garage door spring:

  1. Door Weight: The weight of the garage door is a primary factor in determining the spring tension. Heavier doors require more tension to lift and balance.
  2. Spring Size: The size and diameter of the spring also affect the amount of tension it can generate.
  3. Spring Length: Longer springs typically require fewer turns to achieve the necessary tension compared to shorter springs.
  4. Manufacturer Recommendations: Many garage door manufacturers provide guidelines or specifications for the number of turns required based on the door’s weight and spring size.
  5. Professional Assessment: In some cases, it may be necessary to consult with a professional garage door technician to determine the appropriate number of turns for your specific door.

Calculating the Number of Turns:

While there are general guidelines for calculating the number of turns based on the door’s weight and spring size, it’s essential to follow manufacturer recommendations for your specific spring system. Here’s a basic overview of how to calculate the number of turns for torsion springs:

  1. Determine the Door Weight: Measure the weight of the garage door using a scale or consult the door manufacturer’s specifications.
  2. Consult Manufacturer Guidelines: Refer to the manufacturer’s guidelines or documentation for the recommended number of turns based on the door’s weight and spring size.
  3. Use a Winding Chart: Some manufacturers provide winding charts that correlate the door’s weight with the number of turns required for the torsion springs. These charts help ensure proper tension and balance.
  4. Professional Assistance: If you’re unsure or inexperienced, it’s best to seek professional assistance from a qualified garage door technician. They can accurately assess your door’s requirements and safely adjust the spring tension.

Importance of Proper Tension:

Proper tensioning of garage door springs is critical for safe and efficient operation. Insufficient tension can result in the door being too heavy to lift, while excessive tension can cause the door to close too quickly or put undue stress on the opener mechanism. It’s essential to follow manufacturer guidelines and exercise caution when adjusting spring tension.

Conclusion:

Determining the number of turns on a Garage Door Repair Bryan TX requires consideration of several factors, including the door’s weight, spring size, and manufacturer recommendations. While there are general guidelines available, it’s crucial to follow specific instructions for your spring system to ensure safe and effective operation. If you’re unsure or inexperienced, seek professional assistance to avoid injury or damage to your garage door. Proper tensioning of garage door springs is essential for maintaining smooth and reliable operation of the door.

Circle B Overhead Door

1818 Drillers Dr, Bryan, TX 77808, United States

1-979-324-6733

The Importance of Professional Garage Door Track Alignment – Superior Door

As a homeowner who relies on my garage door for convenient access to my property, I’ve come to appreciate the importance of maintaining its optimal functionality. One key aspect that significantly impacts the performance of the garage door is the alignment of its tracks. Over time, factors such as normal wear and tear, weather conditions, and even minor accidents can lead to track misalignment, resulting in a range of issues from noisy operation to complete malfunction. Through my own experiences and research, I’ve learned why professional garage door track alignment is crucial for ensuring smooth operation and prolonging the lifespan of this essential home feature.

In this article, I’ll delve into the importance of track alignment and highlight the benefits of entrusting this task to experienced professionals by following Garage Door Repair.

Understanding the Significance of Track Alignment

  1. Smooth Operation: Properly aligned tracks are essential for the smooth and efficient operation of a garage door. When the tracks are misaligned, the door may become uneven or jammed during opening or closing, leading to frustration and inconvenience for homeowners.
  2. Minimizing Wear and Tear: Misaligned tracks place unnecessary stress on various components of the garage door system, including rollers, hinges, and springs. Over time, this increased friction and strain can accelerate wear and tear, potentially resulting in costly repairs or premature replacement of parts.
  3. Preventing Damage to the Door: A garage door that operates with misaligned tracks is at risk of sustaining damage, both to the door itself and to surrounding structures. Misalignment can cause the door to scrape against the tracks or become stuck, leading to dents, scratches, and other forms of damage.
  4. Enhancing Safety: Safety is paramount when it comes to garage doors, especially considering their weight and the potential hazards they pose if not properly maintained. Misaligned tracks can compromise the safety of the door, increasing the risk of accidents or injuries during operation.
  5. Improving Energy Efficiency: A garage door that operates smoothly and seals properly contributes to improved energy efficiency in the home. Misaligned tracks may prevent the door from closing fully, allowing drafts, moisture, and pests to enter the garage, ultimately impacting the energy efficiency of the entire property.

Benefits of Professional Garage Door Track Alignment

While some homeowners may attempt DIY track alignment, there are compelling reasons to enlist the expertise of professionals for this task:

  1. Experience and Expertise: Professional garage door technicians have the knowledge, skills, and experience to assess track alignment issues accurately and determine the most effective solutions. They understand the complexities of garage door systems and can identify underlying issues that may contribute to misalignment.
  2. Precision and Accuracy: Achieving proper track alignment requires precise measurements and adjustments to ensure optimal performance. Professionals use specialized tools and techniques to align the tracks accurately, minimizing the risk of errors and ensuring long-lasting results.
  3. Comprehensive Inspection: In addition to addressing track alignment, professional technicians conduct a comprehensive inspection of the entire garage door system. They check for signs of wear, damage, or other issues that may affect performance and recommend necessary repairs or maintenance.
  4. Quality Assurance: When you hire a reputable garage door service provider, you can expect quality workmanship and reliable service. Professional technicians stand behind their work and strive to deliver results that meet or exceed industry standards, providing peace of mind for homeowners.
  5. Time and Cost Savings: While DIY track alignment may seem like a cost-effective option initially, it can be time-consuming and may lead to further complications if not done correctly. By investing in professional garage door track alignment, homeowners can save time and avoid the hassle of trial and error, ultimately saving money in the long run by preventing costly repairs or replacements.

Conclusion

Overall, according to Garage Door Repair, professional garage door track alignment plays a critical role in ensuring the smooth and reliable operation of garage doors. By addressing misalignment issues promptly and entrusting this task to experienced professionals, homeowners can minimize wear and tear, prevent damage to the door, enhance safety, and improve energy efficiency. The expertise, precision, and comprehensive service provided by professional technicians offer numerous benefits that contribute to the long-term performance and durability of garage door systems. Ultimately, investing in professional track alignment is a wise decision that yields tangible rewards in terms of convenience, safety, and peace of mind for homeowners.

Superior Door

8840 S 137th Cir #3, Omaha, NE 68138, United States

402-571-2999

How Do I Check My Car’s Fluid Levels – Circle S Auto Service


In this comprehensive guide, we’ll explore how to check your car’s fluid levels the various fluids you need to monitor and step-by-step instructions for conducting a Auto Repair Forth Worth TX

Introduction to Car Fluids:

Before we delve into the process of checking fluid levels, it’s essential to understand the critical fluids your car relies on for proper operation. These fluids include:

  1. Engine Oil: Lubricates the engine’s moving parts and helps dissipate heat.
  2. Coolant/Antifreeze: Regulates engine temperature and prevents overheating and freezing.
  3. Transmission Fluid: Lubricates and cools the transmission components, enabling smooth gear shifts.
  4. Brake Fluid: Transfers force from the brake pedal to the brake components, facilitating braking.
  5. Power Steering Fluid: Assists in steering by transmitting hydraulic pressure to the power steering system.
  6. Washer Fluid: Cleans the windshield and headlights for improved visibility while driving.

Step-by-Step Guide to Checking Fluid Levels:

1. Park on Level Ground:

Ensure your car is parked on a level surface and turned off before beginning the inspection. Engage the parking brake and let the engine cool down if it has been running.

2. Open the Hood:

Locate the hood release lever inside the car and pull it to unlock the hood. Then, lift the hood and secure it in place using the prop rod.

3. Locate Fluid Reservoirs:

Identify the fluid reservoirs under the hood, which are typically labeled with symbols or words indicating their contents. These reservoirs are usually translucent plastic containers with fill level markings.

4. Check Engine Oil:

Remove the engine oil dipstick, wipe it clean with a rag, and reinsert it fully. Remove the dipstick again and observe the oil level, ensuring it falls between the “min” and “max” marks. Additionally, inspect the oil’s color and consistency for signs of contamination or degradation.

5. Inspect Coolant/Antifreeze:

Locate the coolant reservoir, typically located near the radiator, and check the fluid level against the markings on the side of the reservoir. The coolant level should be between the minimum and maximum lines. Additionally, visually inspect the coolant for any signs of contamination or discoloration.

6. Check Transmission Fluid:

Locate the transmission fluid dipstick, which is usually labeled and located near the engine. Remove the dipstick, wipe it clean, and reinsert it fully. Remove the dipstick again and observe the fluid level, ensuring it falls within the designated range on the dipstick. Additionally, inspect the fluid’s color and odor for signs of contamination or degradation.

7. Inspect Brake Fluid:

Locate the brake fluid reservoir, typically located near the firewall on the driver’s side of the engine bay. Check the fluid level against the markings on the side of the reservoir, ensuring it is within the recommended range. Additionally, visually inspect the brake fluid for any signs of contamination or discoloration.

8. Check Power Steering Fluid:

Locate the power steering fluid reservoir, which is typically located near the power steering pump. Check the fluid level against the markings on the side of the reservoir, ensuring it is within the designated range. Additionally, visually inspect the power steering fluid for any signs of contamination or discoloration.

9. Verify Washer Fluid Level:

Locate the windshield washer fluid reservoir, usually located near the firewall on the driver’s side. Check the fluid level by visually inspecting the reservoir, ensuring it is filled to the top.

10. Reassemble and Close the Hood:

Once you have completed the fluid level checks, reinsert all dipsticks and securely tighten any caps or lids on the reservoirs. Lower the hood gently and ensure it latches securely.

Conclusion:

If you notice any significant changes in fluid levels or quality during your inspections, consult with a Auto Repair Forth Worth TX or technician for further evaluation and necessary repairs. Remember, proactive maintenance is key to keeping your car in top condition and maximizing its lifespan.

Circle S Auto Service

12195 N Saginaw Blvd #120, Fort Worth, TX 76179, United States

1-817-439-8020

How Do Concrete Crews Prepare A Worksite For Pouring Concrete – Denton Concrete Crew


 Concrete Crew Denton TX  follow a series of steps to prepare the worksite, taking into account factors such as site layout, ground conditions, formwork installation, and safety considerations.

Here’s a comprehensive guide on how concrete crews prepare a worksite for pouring concrete:

  1. Site Assessment and Planning:
    • Before starting any work, the concrete crew conducts a thorough assessment of the site to identify potential hazards, obstacles, and logistical challenges. They review construction plans, specifications, and drawings to understand the layout, dimensions, and requirements of the concrete pour.
    • The crew plans the sequence of work, including the location of access routes, staging areas for materials and equipment, and placement of formwork and reinforcement. They consider factors such as site access, terrain, drainage, and nearby structures to optimize workflow and ensure safe and efficient operations.
  2. Clearing and Grading:
    • The first step in preparing the worksite is to clear the area of any debris, vegetation, or obstacles that could interfere with the concrete pour. This may involve removing rocks, roots, trash, and other debris from the site.
    • The crew then grades the ground to create a level and uniform surface for the concrete pour. This may involve using grading equipment such as bulldozers, graders, or skid-steer loaders to adjust the elevation and slope of the site to meet project specifications.
  3. Layout and Marking:
    • Next, the crew lays out the dimensions and boundaries of the concrete pour using stakes, string lines, and marking paint. They mark the perimeter of the pour area, as well as any edges, corners, or reference points indicated in the construction plans.
    • The layout ensures that the concrete is poured to the correct dimensions and alignment, preventing errors or deviations that could compromise the integrity of the structure. The crew double-checks the layout for accuracy before proceeding to the next step.
  4. Installation of Formwork:
    • Formwork, also known as molds or shuttering, is used to contain and shape the concrete during pouring. The crew installs formwork along the perimeter of the pour area, following the layout and marking established earlier.
    • Formwork may be made of wood, metal, or plastic, depending on the size, shape, and complexity of the concrete structure. The crew assembles the formwork panels, ties them together securely, and braces them to withstand the pressure of the concrete.
    • Care is taken to ensure that the formwork is aligned, leveled, and properly supported to prevent leaks, bulges, or misalignment during the concrete pour. Expansion joints or control joints may be installed as needed to accommodate thermal expansion and contraction of the concrete.
  5. Reinforcement Installation:
    • In some cases, reinforcement such as rebar or wire mesh may be required to strengthen the concrete and prevent cracking. The crew installs the reinforcement according to the specifications and details provided in the construction plans.
    • Rebar is typically placed in a grid pattern within the formwork, with spacers or chairs used to maintain the proper spacing and elevation. Wire mesh may be laid on top of the base layer of concrete before pouring additional layers.
    • The crew ensures that the reinforcement is positioned correctly and securely tied or fastened in place to provide adequate support and structural integrity.
  6. Preparation of Access Routes and Equipment Placement:
    • The crew establishes access routes for concrete trucks, pumps, and other equipment to reach the pour area safely and efficiently. This may involve clearing paths, removing obstacles, and leveling the ground to provide a stable surface for vehicle traffic.
    • Concrete trucks are positioned strategically to minimize travel distances and facilitate continuous pouring without interruptions. Pump trucks or conveyors may be used to transport concrete to hard-to-reach areas or elevated surfaces.
    • Equipment such as mixers, vibrators, and finishing tools are set up near the pour area for easy access and use during the concrete placement and finishing process.
  7. Safety Precautions:
    • Throughout the worksite preparation process, the crew prioritizes safety by implementing appropriate safety measures and protocols. This includes providing personal protective equipment (PPE) such as hard hats, safety glasses, gloves, and steel-toed boots to all crew members.
    • Safety barriers, signage, and barricades are erected to delineate hazardous areas and restrict access to unauthorized personnel. Fall protection measures are implemented for work performed at heights, and traffic control measures are implemented to ensure the safety of workers and pedestrians in the vicinity of the worksite.
  8. Final Inspection and Readiness Check:
    • Before proceeding with the concrete pour, the crew conducts a final inspection of the worksite to ensure that all preparations have been completed satisfactorily. They verify that formwork is securely in place, reinforcement is correctly positioned, and access routes are clear for concrete delivery.
    • Any issues or concerns identified during the inspection are addressed and resolved promptly to minimize delays and disruptions. Once the crew is satisfied that the site is ready, they proceed with the concrete pour according to the established plan and schedule.

Proper worksite preparation sets the foundation for a successful  Concrete Crew Denton TX  project, leading to high-quality results and satisfied clients.

Denton Concrete Crew

1901 Lakeview Blvd, Denton, TX 76208, United States

1-940-461-7177

What Equipment Is Commonly Used By Concrete Crews For Concrete Placement And Finishing – Grapevine Concrete Crew


Concrete Crew Grapevine TX  rely on a variety of specialized equipment to efficiently and effectively carry out concrete placement and finishing tasks on construction sites. These tools and machines are essential for ensuring accuracy, productivity, and quality in the concrete construction process.

building construction worker pouring cement or concrete with pump tube

Here’s an overview of the equipment commonly used by concrete crews for concrete placement and finishing:

  1. Concrete Mixers:
    • Concrete mixers are used to blend cement, aggregates, water, and admixtures into a uniform concrete mixture.
    • Types of concrete mixers include drum mixers, transit mixers, and volumetric mixers, each offering different capacities and mixing methods.
  2. Concrete Pumps:
    • Concrete pumps are used to transport and distribute freshly mixed concrete to the desired location on the construction site.
    • They consist of a pump unit mounted on a truck or trailer, along with a flexible hose or boom for directing the concrete flow.
  3. Concrete Vibrators:
    • Concrete vibrators are used to consolidate freshly poured concrete, removing air bubbles and ensuring proper compaction.
    • They come in various types, including internal vibrators (needle vibrators), external vibrators, and surface vibrators, each suitable for different concrete placement scenarios.
  4. Power Trowels:
    • Power trowels are used for finishing concrete surfaces to achieve a smooth and level finish.
    • Walk-behind and ride-on power trowels feature rotating blades or pans that impart a polished appearance to the concrete surface.
  5. Bull Floats:
    • Bull floats are large, flat tools used to smooth and level the surface of freshly poured concrete.
    • They are typically made of aluminum or magnesium and are equipped with handles for easy maneuverability.
  6. Edgers and Groovers:
    • Edgers and groovers are hand tools used to shape and finish the edges and joints of concrete slabs.
    • Edgers create a rounded edge along the perimeter of the slab, while groovers form control joints or decorative patterns.
  7. Screeds:
    • Screeds are used to strike off and level freshly poured concrete to the desired elevation.
    • They can be manual screeds operated by hand or mechanized screeds powered by gasoline engines or electric motors.
  8. Concrete Buggies:
    • Concrete buggies, also known as mud buggies or power buggies, are used to transport and pour large quantities of concrete across the job site.
    • They feature a hopper for holding concrete and are equipped with tracks or wheels for maneuverability on rough terrain.
  9. Formwork and Shoring:
    • Formwork systems are used to contain and shape freshly poured concrete into the desired structure or configuration.
    • Shoring systems provide temporary support to formwork and reinforce concrete during placement and curing.
  10. Hand Tools:
    • Various hand tools are used by concrete crews for tasks such as mixing, spreading, consolidating, and finishing concrete.
    • These tools include shovels, rakes, buckets, wheelbarrows, tampers, and screed boards, among others.
  11. Safety Equipment:
    • Personal protective equipment (PPE) such as hard hats, safety glasses, gloves, hearing protection, and high-visibility clothing is essential for ensuring crew safety during concrete placement and finishing operations.
    • Fall protection equipment, including harnesses, lanyards, and anchor points, may also be required for working at heights or on elevated surfaces.
  12. Concrete Testing Equipment:
    • Equipment for testing concrete properties, such as slump cones, air meters, and compression testing machines, is used to verify concrete quality and performance according to project specifications.


Concrete Crew Grapevine TX  Regular maintenance, proper training, and adherence to safety protocols are essential for maximizing equipment performance and ensuring crew safety during concrete construction operations.

Grapevine Concrete Crew

1245 S Pine St, Grapevine, TX 76051, United States

1-817-859-6679

How Does A Concrete Crew Prepare A Worksite For Pouring Concrete – Concrete Crew Flower Mound


Concrete Crew Flower Mound TX  A well-prepared worksite ensures a stable foundation, optimal conditions for concrete placement, and successful completion of the project.

Here’s a comprehensive guide on how a concrete crew prepares a worksite for pouring concrete:

1. Site Assessment and Planning:

Before any work begins, the concrete crew conducts a thorough assessment of the construction site to evaluate the existing conditions and determine the necessary preparations. This involves:

  • Surveying the area to identify the location, dimensions, and elevation of the concrete structure to be poured.
  • Analyzing the soil composition and bearing capacity to ensure it can support the weight of the concrete and associated loads.
  • Assessing access points, logistics, and potential obstacles that may impact site operations.
  • Reviewing project specifications, drawings, and permits to confirm compliance with design requirements and regulatory guidelines.

2. Clearing and Excavation:

Once the site assessment is complete, the crew proceeds with clearing and excavation to prepare the ground for concrete placement. This involves:

  • Removing any vegetation, debris, or obstructions from the site to create a clean and level working area.
  • Excavating the soil to the required depth and dimensions specified in the construction plans.
  • Using heavy equipment such as excavators, bulldozers, or skid-steer loaders to perform excavation work efficiently and accurately.
  • Stockpiling excavated materials for disposal or reuse, depending on project requirements and environmental considerations.

3. Grading and Compaction:

After excavation, the crew grades and compacts the subgrade to ensure a stable and uniform base for the concrete slab. This includes:

  • Using grading tools such as laser levels, string lines, or grading rakes to establish the desired slope, elevation, and drainage patterns.
  • Compacting the subgrade using compactors or rollers to achieve the specified density and minimize settlement or soil movement.
  • Conducting moisture testing to assess the moisture content of the subgrade and ensure proper compaction and stability.

4. Formwork Installation:

With the subgrade prepared, the crew installs formwork or molds to define the shape and dimensions of the concrete structure. This involves:

  • Selecting and assembling formwork materials such as lumber, plywood, metal panels, or precast forms based on project requirements.
  • Placing formwork around the perimeter of the concrete slab and securing it in place using stakes, braces, or clamps.
  • Checking formwork alignment, levelness, and dimensions to ensure accuracy and consistency.
  • Installing additional reinforcement elements, such as stakes, kickers, or spreaders, to support the formwork and prevent distortion during concrete placement.

5. Reinforcement Placement:

Once the formwork is in place, the crew installs reinforcement materials to enhance the structural integrity and load-bearing capacity of the concrete. This includes:

  • Positioning rebar (reinforcing bar) or wire mesh within the formwork to provide tensile strength and prevent cracking.
  • Securing reinforcement elements using tie wire, chairs, or supports to maintain the desired spacing and alignment.
  • Overlapping and lapping reinforcement bars at intersections and joints to ensure continuity and structural stability.
  • Checking reinforcement placement against project specifications and design drawings to verify compliance with engineering requirements.

6. Utilities and Embedments:

Before pouring concrete, the crew ensures that any utilities, embedments, or penetrations required for the project are properly installed and integrated into the worksite. This may involve:

  • Embedding anchor bolts, dowels, or inserts into the concrete to facilitate connections with other structural elements or equipment.
  • Installing conduits, pipes, or sleeves for electrical, plumbing, or mechanical systems that will be embedded within the concrete slab.
  • Coordinating with utility providers and subcontractors to locate and mark underground utilities, such as gas lines, water mains, or sewer pipes, to avoid conflicts or damage during excavation and concrete placement.

7. Surface Preparation and Moisture Management:

Before pouring concrete, the crew prepares the surface and implements measures to manage moisture and prevent excessive drying or hydration. This includes:

  • Cleaning the formwork and subgrade to remove dust, debris, or contaminants that may affect concrete adhesion or finish.
  • Applying form release agents or curing compounds to the formwork surfaces to facilitate easy form removal and prevent concrete adhesion.
  • Moistening or pre-wetting the subgrade to control surface moisture and prevent rapid absorption of water from the concrete mix.
  • Installing moisture barriers or vapor retarders beneath the concrete slab to minimize moisture migration and mitigate the risk of moisture-related problems such as curling, cracking, or efflorescence.

8. Safety Precautions and Environmental Protection:

Throughout the worksite preparation process, the concrete crew prioritizes safety and environmental protection to minimize risks and ensure a safe and healthy work environment. This includes:

  • Conducting safety briefings and training sessions to educate crew members on potential hazards, safe work practices, and emergency procedures.
  • Providing personal protective equipment (PPE) such as hard hats, safety glasses, gloves, and steel-toed boots to mitigate the risk of injury.
  • Implementing erosion and sediment control measures such as silt fences, straw bales, or erosion control blankets to prevent soil erosion and protect nearby water bodies.
  • Complying with environmental regulations and best practices to minimize the impact of construction activities on air quality, water quality, and natural habitats.

9. Quality Control and Inspection:

Before proceeding with concrete placement, the crew conducts final checks and inspections to ensure that all preparations are complete and meet quality standards. This involves:

  • Verifying that formwork, reinforcement, utilities, and surface preparations are in accordance with project specifications and design drawings.
  • Conducting visual inspections and measurements to confirm formwork alignment, reinforcement placement, and subgrade elevation.
  • Addressing any discrepancies or deficiencies identified during the inspection process and implementing corrective actions as needed.

10. Coordination and Communication:

Throughout the worksite preparation process, the concrete crew emphasizes effective coordination and communication among team members, subcontractors, and project stakeholders. This includes:

  • Collaborating closely with other trades, such as carpenters, electricians, plumbers, and landscapers, to coordinate work activities and resolve conflicts.
  • Communicating updates, progress reports, and schedule changes to project managers, supervisors, and clients to ensure transparency and alignment with project objectives.
  • Anticipating potential challenges, delays, or issues that may arise during worksite preparation and proactively addressing them through proactive planning and problem-solving.

Concrete Crew Flower Mound TX  Through careful planning, attention to detail, and adherence to safety protocols, the crew ensures that the concrete placement process proceeds smoothly and efficiently

Concrete Crew Flower Mound

2001 Timber Creek Rd, Flower Mound, TX 75028, United States

1-972-846-9387

How To Replace The Garage Door Bottom Seal – Circle B Overhead Door


 Garage Door Repair Bryan TX Fortunately, replacing the bottom seal is a relatively straightforward process that can be completed with basic tools and materials.

Here’s a step-by-step guide on how to replace the garage door bottom seal:

1. Gather Necessary Materials and Tools:

Before you begin, gather the following materials and tools:

  • New garage door bottom seal (measure the width of your garage door to ensure you purchase the correct size)
  • Utility knife or scissors
  • Pliers or screwdriver
  • Tape measure
  • Soap and water (or mild detergent)
  • Rag or sponge
  • Safety gloves (optional)

2. Prepare the Work Area:

Park your vehicle outside the garage or move it to one side to create ample space for working. Ensure that the garage door is closed and the area around the bottom of the door is clear of obstructions.

3. Remove the Old Bottom Seal:

Start by removing the old bottom seal from the bottom of the garage door. Depending on the type of seal and how it’s attached, you may need to:

  • Cut the seal with a utility knife or scissors if it’s held in place with adhesive.
  • Unscrew the retainer or track holding the seal in place using pliers or a screwdriver.
  • Pull the seal out of the track or retainer, starting from one end and working your way along the bottom of the door.

4. Clean the Bottom of the Door:

Once the old seal is removed, clean the bottom of the garage door to remove any dirt, debris, or adhesive residue. Use soap and water (or a mild detergent) and a rag or sponge to scrub the surface thoroughly. Allow the area to dry completely before proceeding.

5. Measure and Cut the New Bottom Seal:

Measure the width of the bottom of your garage door to determine the length of the new bottom seal needed. Use a tape measure to get an accurate measurement. Transfer this measurement to the new bottom seal and mark it with a pencil or marker.

Using a utility knife or scissors, carefully cut the new bottom seal to the measured length. Double-check the length to ensure it matches the width of your garage door.

6. Install the New Bottom Seal:

With the new bottom seal cut to size, it’s time to install it on the bottom of the garage door. Depending on the type of seal and how it’s designed, you may need to:

  • Insert the seal into the track or retainer along the bottom of the door, starting from one end and working your way along.
  • Press the seal firmly into place to ensure a snug fit. If necessary, use a rubber mallet or hammer to tap the seal into the track or retainer.

7. Secure the New Bottom Seal:

Once the new bottom seal is installed, secure it in place to prevent it from coming loose or shifting. If the seal is held in place with a retainer or track, reattach or screw it back into position using pliers or a screwdriver.

8. Test the Garage Door:

After installing the new bottom seal, test the operation of the garage door to ensure it opens and closes smoothly without any obstructions. Open and close the door several times to verify that the seal remains in place and effectively seals the bottom of the door.

9. Make Adjustments if Necessary:

If the new bottom seal doesn’t fit properly or doesn’t provide an adequate seal, you may need to make adjustments. Check for any gaps or areas where the seal isn’t making contact with the ground. Trim the seal or adjust its position as needed to achieve a tight seal along the bottom of the door.

10. Maintain the Bottom Seal:

Regularly inspect and maintain the bottom seal of your garage door to ensure its effectiveness and longevity. Clean the seal periodically to remove dirt, debris, and buildup that may affect its performance. Replace the seal as needed if it becomes worn out, damaged, or ineffective at sealing the bottom of the door.

 Garage Door Repair Bryan TX With proper installation and maintenance, the new bottom seal will help keep your garage clean, dry, and secure for years to come.

Circle B Overhead Door

1818 Drillers Dr, Bryan, TX 77808, United States

1-979-324-6733

How Much Is It To Fix A Garage Door – Denzels Garage Doors


Garage Door Repair Las Vegas  the materials and components involved, the location of the garage door, and the labor rates of the service provider.

While it’s challenging to provide an exact cost without knowing the specific details of the repair job, I’ll outline the typical expenses associated with fixing common garage door issues and factors that can influence the overall cost.

1. Repair Services and Labor Costs:

The cost of labor is a significant factor in the total expense of fixing a garage door. Garage door repair technicians typically charge an hourly rate for their services, which can vary depending on their level of expertise, location, and the complexity of the repair job. Simple repairs such as adjusting the tracks or replacing a broken spring may require less time and labor compared to more extensive repairs like replacing the entire door panel or opener unit.

2. Type and Extent of Repairs:

The type and extent of repairs needed will also impact the overall cost. Minor repairs such as tightening loose bolts, lubricating moving parts, or replacing damaged rollers may be relatively inexpensive. However, more extensive repairs such as replacing broken springs, cables, or panels can be more costly due to the need for specialized parts and additional labor.

3. Replacement Parts and Materials:

The cost of replacement parts and materials required for the repair will also contribute to the total expense. Common replacement parts for garage doors include springs, cables, rollers, hinges, tracks, panels, and opener components. The price of these parts can vary depending on their quality, brand, and compatibility with your specific garage door model. Additionally, if custom or specialty parts are needed, they may come at a higher cost.

4. Emergency or After-Hours Service:

If you require emergency or after-hours garage door repair services, you may incur additional charges for expedited service or service outside of normal business hours. Emergency repairs are typically more expensive due to the urgency and inconvenience of the situation, so it’s essential to inquire about any additional fees or surcharges before scheduling service.

5. Geographic Location:

The cost of garage door repair services can vary depending on your geographic location and local market conditions. Service providers in urban areas or regions with higher costs of living may charge higher rates for labor and services compared to rural areas or regions with lower overhead expenses. It’s advisable to obtain multiple quotes from local service providers to compare prices and ensure you’re getting a fair estimate.

6. Maintenance and Preventive Services:

In addition to repair services, many garage door companies offer maintenance and preventive services to keep your door in optimal condition and prevent future issues. These services may include routine inspections, lubrication of moving parts, adjustment of tracks and springs, and testing of safety features. While preventive maintenance can help extend the lifespan of your garage door and prevent costly repairs, it may involve additional costs beyond basic repair services.

7. Warranty Coverage:

If your garage door is still under warranty, some or all of the repair costs may be covered by the manufacturer or installer, depending on the terms of the warranty. Be sure to review your warranty coverage and consult with the manufacturer or installer to determine if the repairs are eligible for reimbursement or coverage.

8. DIY vs. Professional Repairs:

While some minor garage door repairs can be tackled as do-it-yourself projects, more complex or safety-critical repairs should be left to professional technicians. Attempting to repair a garage door without the necessary skills, tools, or knowledge can lead to further damage, injury, or safety hazards. Professional repair services may involve higher upfront costs but can provide peace of mind and ensure the job is done correctly and safely.


Garage Door Repair Las Vegas  warranty coverage, and preventive maintenance options to make an informed decision and ensure the long-term functionality and safety of your garage door.

Denzels Garage Doors

1-619-496-9419

How To Open Liftmaster Garage Door Opener – Affordable Garage Door Repairs of Indianapolis, LLC

Opening a Garage Door Repair Indianapolis IN  involves a few different methods, depending on whether you’re inside or outside of the garage, and whether you have access to the remote control or the manual release mechanism.

Here’s a detailed guide on how to open a LiftMaster garage door opener:

  1. Using the Remote Control:
    • If you’re outside the garage, simply press the designated button on your LiftMaster remote control to activate the door opener. Most LiftMaster remote controls feature a large button with an icon resembling a garage door.
    • If you’re inside the garage, you can also use the wall-mounted control panel to operate the door opener. Press the appropriate button on the control panel to open the door.
  2. Using the Keypad:
    • If your LiftMaster garage door opener is equipped with a wireless keypad, you can enter the access code to open the door. Enter the code and press the “Enter” or “Open” button on the keypad to activate the door opener.
  3. Using the Manual Release Mechanism:
    • In the event of a power outage or malfunction, you can manually open the garage door using the manual release mechanism. This mechanism disengages the door opener from the door, allowing you to lift the door manually.
    • Locate the manual release cord and handle, which is usually red and hangs from the door opener’s trolley mechanism. It’s typically located near the center of the garage door tracks.
    • Pull down on the manual release cord to disengage the door opener. You may need to apply some force to release the mechanism.
    • Once the door opener is disengaged, you can manually lift the garage door by grasping the handle or the bottom edge of the door. Lift the door carefully and steadily until it’s fully open.
    • To re-engage the door opener, pull down on the manual release cord again until you hear a click, indicating that the mechanism is engaged. Test the door opener by pressing the remote control or wall-mounted control panel to ensure it’s functioning properly.
  4. Using the Emergency Key Release:
    • Some LiftMaster garage door openers are equipped with an emergency key release mechanism, which allows you to manually open the door using a key. This mechanism is useful in case the manual release cord is inaccessible or damaged.
    • Locate the emergency key release slot on the outside of the garage door opener unit. It’s usually located near the bottom of the unit and is marked with a key symbol.
    • Insert the key into the slot and turn it clockwise to disengage the door opener.
    • Once the door opener is disengaged, lift the garage door manually as described earlier.
    • To re-engage the door opener, turn the key counterclockwise in the slot until it stops. Remove the key and test the door opener’s operation.
  5. Using the Smartphone App (optional):
    • If your LiftMaster garage door opener is compatible with the MyQ smartphone app, you can use the app to open and close the door remotely. Simply open the app on your smartphone, select the appropriate garage door, and press the “Open” button to activate the door opener.

By following these steps, you can open your Garage Door Repair Indianapolis IN  using various methods, including remote control, keypad, manual release mechanism, emergency key release, or smartphone app. Familiarize yourself with these methods to ensure you can access your garage door opener efficiently in different situations, such as power outages or emergencies.

Affordable Garage Door Repairs of Indianapolis, LLC

1-317-372-5337

How To Program Car To Genie Garage Door Opener – EDM Garage Doors, LLC


Programming your car to a  Garage Door Repair Volo IL allows you to operate your garage door using the built-in remote system in your vehicle.

Here’s a comprehensive guide on how to program your car to a Genie garage door opener:

1. Prepare Your Vehicle:

  • Park your car inside the garage within range of the Genie garage door opener.

2. Identify the Learn Button on the Genie Opener:

  • Locate the motor unit of your Genie garage door opener. On the motor unit, you’ll find a “Learn” button. This button is usually located near the antenna wire hanging from the unit. The button may be colored red, yellow, green, or purple, depending on the model.

3. Clear Existing Codes (Optional):

  • If you’re reprogramming your opener or adding a new car remote, it’s recommended to clear existing codes first. Press and hold the “Learn” button on the opener unit until the indicator light turns off, typically for about 6-10 seconds.

4. Enter Programming Mode in Your Car:

  • Sit inside your car and turn the ignition switch to the “On” position. Do not start the engine.

5. Locate the Car’s Garage Door Opener Buttons:

  • Look for the built-in garage door opener buttons in your car. These buttons are usually located on the overhead console, sun visor, or rearview mirror, depending on the vehicle make and model.

6. Press and Hold the Opener Button:

  • Press and hold the button designated for programming the garage door opener. Hold the button until the indicator light on the Genie opener unit flashes, indicating that it’s ready to receive a signal from the car.

7. Press the Opener Button on Your Car:

  • While still holding the programming button in your car, press the button that you want to use to operate the garage door. Hold the button until the opener unit’s lights flash or you hear two clicks.

8. Release the Opener Button:

  • Release the button in your car. The Genie opener unit should confirm successful programming by flashing its lights or emitting a click sound.

9. Test the Remote:

  • Exit your car and test the programmed button by pressing it to operate the garage door. Ensure that the door opens and closes as expected.

10. Repeat if Necessary:

  • If you have multiple cars or additional buttons to program, repeat the above steps for each vehicle or button.

11. Finalize Programming (Optional):

  • Some models may require additional steps to finalize programming or adjust settings. Consult your Genie opener’s user manual for specific instructions.

12. Troubleshooting:

  • If you encounter any issues during programming, such as the opener not responding or the indicator light not illuminating, double-check the programming steps and ensure you’re within range of the opener unit.
  • If problems persist, refer to your Genie opener’s user manual or contact customer support for assistance.

Always refer to your opener’s Garage Door Repair Volo IL procedures and troubleshooting tips.

EDM Garage Doors, LLC

596 Richard Brown Blvd, Volo, IL 60073, United States

1-847-416-3036

How Can I Schedule A Mold Testing Appointment In Conroe – Mold Testing Houston – Post Oak


Scheduling a Mold Testing Services Houston TX involves several steps to ensure that you find a reputable and qualified mold testing company that meets your needs.

Here’s a comprehensive guide on how to schedule a mold testing appointment in Conroe:

  1. Research Local Mold Testing Companies: Start by researching mold testing companies in Conroe. Use online search engines, business directories, and review websites to compile a list of companies that offer mold testing services in the area. Pay attention to factors such as company reputation, experience, certifications, and customer reviews.
  2. Check Credentials and Certifications: Verify that the mold testing companies on your list have the necessary credentials and certifications to conduct mold testing in Texas. Look for certifications from reputable organizations such as the American Council for Accredited Certification (ACAC) or the National Organization of Remediators and Mold Inspectors (NORMI). These certifications demonstrate that the company meets industry standards for mold inspection and testing.
  3. Review Services Offered: Evaluate the services offered by each mold testing company to ensure they align with your needs. Some companies may specialize in residential or commercial mold testing, while others may offer additional services such as mold remediation, air quality testing, or moisture inspections. Choose a company that provides comprehensive mold testing services tailored to your specific requirements.
  4. Request Quotes and Estimates: Contact multiple mold testing companies in Conroe and request quotes or estimates for their services. Provide details about the size of your property, the extent of mold contamination (if known), and any specific concerns you have regarding mold growth. Compare the pricing, services included, and turnaround times provided by each company to make an informed decision.
  5. Inquire About Availability and Scheduling: Once you’ve narrowed down your options, contact the mold testing companies to inquire about their availability and scheduling process. Ask about lead times for appointments, availability of same-day or emergency services, and flexibility in scheduling appointments to accommodate your preferences. Choose a company that can accommodate your timeline and scheduling needs.
  6. Discuss Testing Methods and Protocols: During your initial contact with each mold testing company, discuss their testing methods and protocols in detail. Inquire about the types of tests they use (e.g., air sampling, surface sampling, bulk sampling), the equipment and tools employed, and the procedures followed during the testing process. Ensure that the company adheres to industry best practices and follows established protocols for mold testing.
  7. Arrange for a Site Visit or Consultation: If possible, arrange for a site visit or consultation with the mold testing company to discuss your mold concerns in person. This allows the company to assess the property, identify potential mold sources, and tailor their testing approach accordingly. During the consultation, ask any questions you have about the testing process, interpretation of results, and recommendations for mold remediation if necessary.
  8. Confirm Appointment Details: Once you’ve selected a mold testing company and agreed on the terms of service, confirm the appointment details with the company representative. Double-check the date, time, and location of the appointment, as well as any preparation instructions or requirements for accessing the property. Provide any additional information requested by the company to ensure a smooth and efficient testing process.
  9. Prepare for the Mold Testing Appointment: In the days leading up to the mold testing appointment, take steps to prepare your property for the testing process. This may include clearing clutter, removing obstacles blocking access to potential mold growth areas, and ensuring that all areas of the property are accessible to the testing technician. Follow any specific instructions provided by the mold testing company to facilitate accurate testing results.
  10. Follow Up After the Appointment: After the mold testing appointment, follow up with the mold testing company to inquire about the status of the results and any recommendations for next steps. Review the testing report carefully, and if mold is detected, discuss options for mold remediation or mitigation with the company or a qualified mold remediation specialist. Keep the testing report and any related documentation for future reference or insurance purposes.

By following these steps, you can schedule a mold testing appointment in Conroe with confidence, knowing that you’ve chosen a reputable and qualified mold testing company to assess your property for mold contamination.

Mold Testing Houston – Post Oak

777 S Post Oak Ln #1700, Houston, TX 77056, United States

1-832-409-2125

How Much Does Window Replacement Typically Cost – North Texas Home Exteriors


Additionally factors such as labor costs, permits, and any additional services or upgrades can impact the Windows Replacement North TX

Here’s a detailed breakdown of the typical costs associated with window replacement:

  1. Types of Windows:
    • The cost of window replacement largely depends on the type of windows being installed. Common types of windows include:
      • Single-hung or double-hung windows: These windows have two sashes that slide vertically within the frame. Single-hung windows typically cost less than double-hung windows.
      • Casement windows: These windows are hinged on one side and open outward like a door. They tend to be more expensive than single or double-hung windows.
      • Picture windows: These fixed windows do not open and are often larger in size, making them more expensive than operable windows.
      • Bay or bow windows: These windows protrude from the exterior wall of the home and create a bay or bow shape. They are typically more costly due to their size and complexity.
      • Specialty windows: Custom or specialty windows, such as arched or round windows, can also increase the cost of window replacement.
  2. Materials:
    • Window frames can be made from various materials, each with its own cost considerations:
      • Vinyl: Vinyl windows are cost-effective, low-maintenance, and energy-efficient. They are a popular choice for budget-conscious homeowners.
      • Wood: Wood windows offer a traditional look and can be painted or stained to match your home’s interior and exterior. They tend to be more expensive than vinyl but offer superior insulation.
      • Aluminum: Aluminum windows are durable and lightweight but may not provide the same level of insulation as vinyl or wood. They are typically mid-range in terms of cost.
      • Fiberglass: Fiberglass windows offer excellent durability and energy efficiency. They are often more expensive than vinyl but may be comparable to wood in terms of cost.
  3. Window Size and Quantity:
    • The size and quantity of windows being replaced will also affect the overall cost of the project. Larger windows and a greater number of windows will require more materials and labor, resulting in higher costs.
    • Additionally, custom or oversized windows may incur additional expenses due to special ordering or installation requirements.
  4. Installation:
    • The cost of installation can vary depending on the complexity of the project, the condition of the existing window openings, and any additional services required, such as trim work or weatherproofing.
    • Labor costs may be calculated on a per-hour basis or as a flat fee, depending on the contractor and the scope of the project.
  5. Additional Services and Upgrades:
    • There may be additional services or upgrades that add to the total cost of window replacement, including:
      • Window trim or casing installation
      • Window screens or storm windows
      • Window tinting or UV protection
      • Energy-efficient upgrades such as low-E coatings or argon gas fills
      • Removal and disposal of old windows
      • Permits and inspections required by local building codes
  6. Location:
    • The cost of window replacement can also vary depending on the location of your home and local market conditions. Labor and material costs may be higher in urban areas or regions with higher living expenses.
  7. Warranty and Maintenance:
    • Some window manufacturers offer warranties on their products, which may impact the overall cost of window replacement. Additionally, consider the long-term maintenance requirements of different window materials and factor in any associated costs.

To provide a rough estimate, the cost of window replacement typically ranges from $300 to $1,500 per window, including materials and labor. However, this is a broad estimate, and actual costs may vary significantly depending on the factors mentioned above.

For example, replacing ten standard-sized vinyl windows in a mid-sized home could cost between $3,000 and $15,000, while replacing ten custom-sized wood windows in a larger home could cost between $5,000 and $25,000.

Windows Replacement North TX and services offered to make an informed decision and ensure that you get the best value for your investment.

North Texas Home Exteriors

1-817-201-6800