How Much Does A Single Insulated Garage Door Cost – Tarrant County Door & Gate

Garage Door Repair North Richland Hills TX offers homeowners several benefits, including improved energy efficiency, enhanced durability, and better noise reduction compared to non-insulated doors.

Whether you’re replacing an old garage door or installing a new one, understanding the factors that influence the cost of a single insulated garage door is essential for making an informed decision. In this guide, we’ll explore the various considerations that affect the cost of single insulated garage doors and provide insights into pricing to help you choose the right option for your home.

Factors Affecting the Cost

Several factors influence the cost of a single insulated garage door, including:

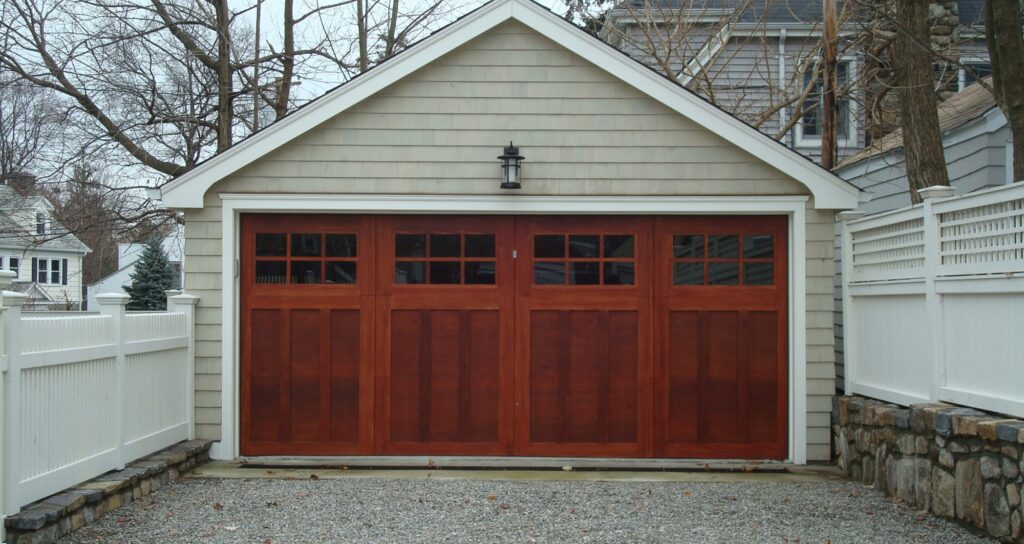
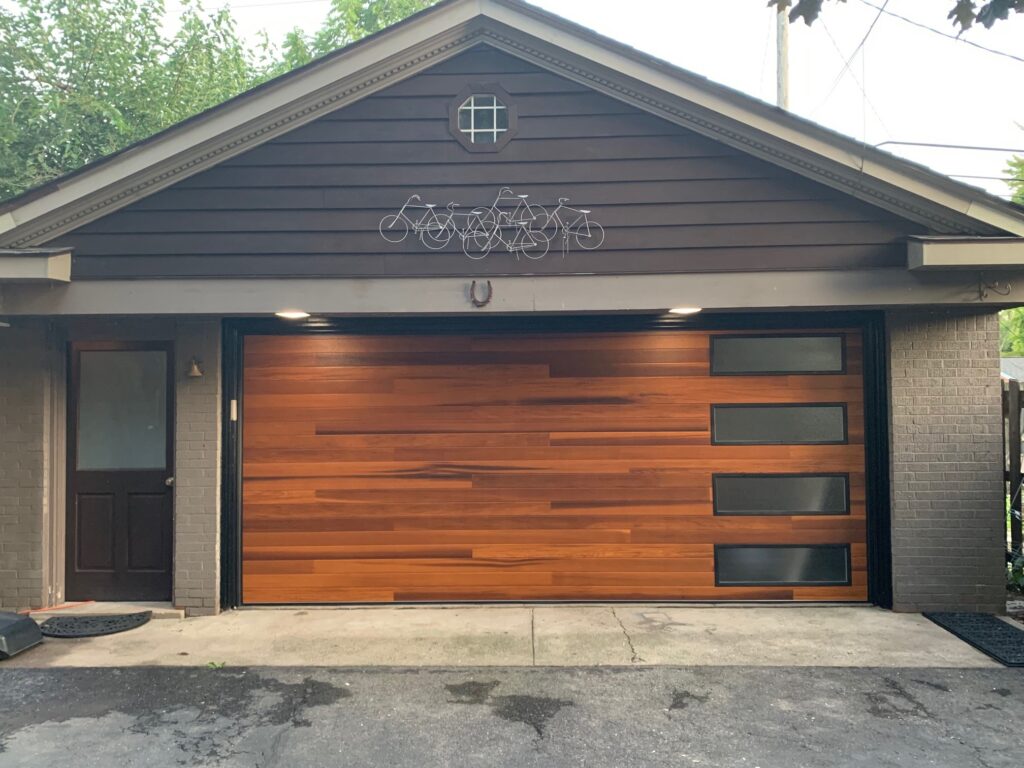
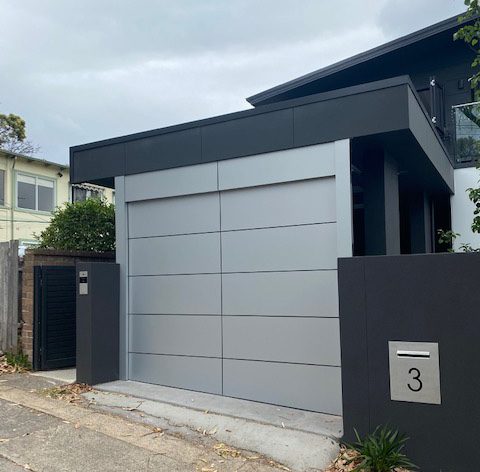
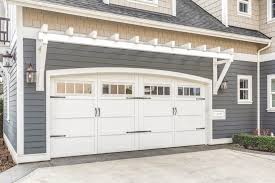
  1. Material: Single insulated garage doors are available in different materials, including steel, aluminum, wood, and composite materials. The material you choose will impact the cost of the door, with steel doors generally being the most affordable option and wood or composite doors being more expensive.
  2. Insulation Type and Thickness: Insulated garage doors come with different types and thicknesses of insulation, such as polyurethane or polystyrene foam. Thicker insulation generally offers better thermal performance but may come at a higher cost.
  3. Design and Style: The design and style of the garage door can also affect its cost. Custom designs, decorative elements, and specialty finishes may increase the price of the door compared to standard designs.
  4. Size and Configuration: The size and configuration of the garage door opening will influence the cost of the door. Standard-sized doors are typically more affordable than custom-sized doors, and additional features such as windows or decorative hardware may add to the cost.
  5. Brand and Quality: Garage door prices can vary depending on the brand and quality of the product. Well-known brands with a reputation for reliability and durability may command higher prices compared to lesser-known brands.
  6. Additional Features and Accessories: Single insulated garage doors can be equipped with various features and accessories, such as windows, decorative hardware, insulation upgrades, and smart technology integration. The more features and accessories you add, the higher the cost of the door.

Cost Range of Single Insulated Garage Doors

The cost of a single insulated garage door varies depending on the aforementioned factors and can range from $700 to $3000 or more. Here’s a breakdown of the cost range based on different considerations:

  1. Steel Garage Doors:
    • Basic Steel Door with Standard Insulation: $700 to $1500
    • Premium Steel Door with High-Grade Insulation: $1200 to $2500
  2. Aluminum Garage Doors:
    • Aluminum Doors with Foam Insulation: $800 to $1800
    • Insulated Aluminum Doors with Enhanced Thermal Performance: $1500 to $3000
  3. Wood Garage Doors:
    • Basic Wood Door with Insulation: $1000 to $2500
    • Custom Wood Door with Premium Insulation and Design Features: $2000 to $5000 or more
  4. Composite Garage Doors:
    • Composite Doors with Insulation: $900 to $2000
    • High-End Composite Doors with Advanced Insulation and Design Options: $1800 to $3500

Additional Costs and Considerations

In addition to the cost of the garage door itself, there may be additional costs and considerations to factor in:

  1. Professional Installation: Professional installation is recommended for garage doors to ensure proper fitting, operation, and warranty coverage. Installation costs vary depending on factors such as labor rates, the complexity of the installation, and any additional services required.
  2. Hardware and Accessories: Consider the cost of hardware and accessories such as tracks, springs, hinges, rollers, and weather seals when budgeting for a new garage door. These components are essential for the proper functioning and longevity of the door.
  3. Warranty and Support: Choose a garage door manufacturer that offers a comprehensive warranty and responsive customer support. A longer warranty period and reliable customer service can provide peace of mind and protection against defects or malfunctions.

Conclusion:

In conclusion, the cost of a single insulated garage door varies depending on factors such as material, insulation type and thickness, design and style, size and configuration, brand and quality, and additional features and accessories. By carefully considering these factors and working with reputable manufacturers and installers, homeowners can choose a garage door that meets their needs and budget while enhancing the energy efficiency, durability, and curb appeal of their home.

Tarrant County Door & Gate

6408 Marlette Ct, North Richland Hills, TX 76182

+91-817-456-2958

How Much To Install Automatic Garage Door Opener – Tarrant County Door & Gate

Garage Door Repair North Richland Hills TX can bring added convenience, security, and peace of mind to your home. If you’re considering this upgrade, you may be wondering about the associated costs.

In this comprehensive guide, we’ll explore various factors that influence the cost of installing an automatic garage door opener and provide valuable insights to help you budget effectively.

Understanding Automatic Garage Door Openers

Before delving into costs, let’s briefly review what automatic garage door openers entail:

An automatic garage door opener is a motorized device that opens and closes your garage door with the touch of a button. These openers come in various types, including chain-drive, belt-drive, screw-drive, and direct-drive, each offering different levels of noise, speed, and durability.

Factors Affecting Installation Costs

Several factors influence the cost of installing an automatic garage door opener:

  • Opener Type: Chain-drive openers are typically the most affordable but tend to be noisy. Belt-drive openers are quieter but may cost more upfront. Screw-drive and direct-drive openers offer smooth and quiet operation but may come at a higher price point.
  • Opener Features: Advanced features such as Wi-Fi connectivity, battery backup, and smart home integration can add to the overall cost.
  • Garage Door Compatibility: Some garage door openers are compatible with specific types or brands of garage doors, which may affect compatibility and installation costs.
  • Labor Rates: Installation costs vary depending on the contractor’s rates, location, and level of expertise.

Average Cost of Automatic Garage Door Opener Installation

The cost of installing an automatic garage door opener can vary widely depending on the factors mentioned above. On average, homeowners can expect to pay:

  • Basic Installation: For a standard single automatic garage door opener with basic features and no additional customization, the cost typically ranges from $200 to $500.
  • Advanced Installation: For a high-end automatic garage door opener with premium features such as Wi-Fi connectivity, battery backup, and smart home integration, the cost can range from $500 to $1,000 or more.

DIY vs. Professional Installation

While some homeowners may consider a DIY installation to save money, it’s essential to weigh the pros and cons:

  • DIY Installation: DIY installation can save on labor costs, but it requires technical skills, specialized tools, and knowledge of electrical wiring and safety regulations. Improper installation can compromise security and functionality.
  • Professional Installation: Hiring a professional ensures proper installation, warranty coverage, and peace of mind. While it adds to the overall cost, professional installation reduces the risk of issues down the line.

Tips for Cost-Saving

To minimize the cost of automatic garage door opener installation, consider the following tips:

  • Choose a Standard Model: Opt for a standard automatic garage door opener with basic features to keep costs down.
  • Reuse Existing Hardware: If your existing garage door opener hardware is in good condition, you may be able to save on installation costs by reusing it with the new opener.
  • Shop Around: Obtain quotes from multiple contractors to compare prices and services offered, ensuring you get the best value for your money.

Conclusion:

Garage Door Repair North Richland Hills TX can enhance convenience, security, and functionality while adding value to your home. By understanding the factors influencing installation costs and following the tips outlined in this guide, you can ensure a smooth and cost-effective installation process.

Tarrant County Door & Gate

6408 Marlette Ct, Fort Worth, TX 76182, United States

1-817-456-2958

Evaluating Garage Door Damage: A Professional’s Guide – NRH’s Gates & Garage Doors

As a homeowner, I’ve always believed in taking a proactive approach to home maintenance. This philosophy led me to become familiar with various aspects of my house, including my garage door. However, when I noticed signs of damage to my garage door, I quickly realized that evaluating the extent of the problem required a professional’s expertise.

By following Garage Door Repair North Richland Hills TX, I’ll share my journey into understanding how to assess garage door damage effectively, guided by the knowledge of professionals.

Recognizing the Telltale Signs

It all began with subtle hints that something was amiss with my garage door. At first, it was an unusual creaking sound that accompanied its movements. Soon after, I observed visible dents on the door panels, and the operation of the door became less smooth. These signs were impossible to ignore, and it was evident that the time had come to assess the extent of the damage and determine the best course of action.

The DIY Inspection

My initial instinct was to conduct a thorough inspection myself. Armed with a checklist I found online, I embarked on an evaluation of my garage door. I examined the door panels, springs, tracks, and hinges, trying to identify any visible damage or wear and tear.

While my DIY inspection provided some insight, it was clear that I lacked the expertise to determine the full scope of the damage accurately. This realization was the turning point that led me to seek professional guidance.

The Professional’s Approach

With my concerns about the garage door’s condition mounting, I contacted a local garage door repair company. They dispatched a technician to assess the situation. What I learned from this expert was eye-opening and invaluable.

Here are the key insights I gained from the professional’s approach:

1. Systematic Inspection:

The technician began the evaluation by conducting a systematic inspection of the entire garage door system. This included the door panels, hinges, springs, tracks, rollers, cables, and the opener.

2. Focus on Safety:

One of the technician’s first priorities was ensuring the safety of the garage door. He emphasized that garage doors can be dangerous if not properly maintained. He carefully inspected the springs, cables, and other components to ensure that they were in good condition and functioning safely.

3. Identifying Hidden Damage:

One of the most significant advantages of a professional’s evaluation is the ability to identify hidden damage. While visible dents and wear are easy to spot, issues within the mechanisms of the garage door may not be apparent to the untrained eye. The technician used specialized tools and techniques to assess the integrity of the door.

4. Component Interdependence:

The professional explained the interdependence of various components in a garage door system. For instance, damage to a single spring or a misalignment in the tracks could affect the entire door’s operation. Understanding these interconnections was vital for a comprehensive evaluation.

Common Types of Garage Door Damage

The technician also shared insights into the most common types of garage door damage that homeowners may encounter:

1. Dented or Damaged Panels: These can result from accidental impacts, such as hitting the door with a vehicle or from natural wear and tear.

2. Spring Issues: Garage door springs are critical for counterbalancing the weight of the door. If they become damaged or worn, it can affect the door’s ability to open and close smoothly.

3. Track Misalignment: Misaligned tracks can cause the door to operate unevenly or become stuck.

4. Roller and Hinge Problems: Damaged or worn-out rollers and hinges can result in a noisy and inefficient garage door operation.

5. Cable Damage: Cables are essential for lifting and lowering the door. Damage to the cables can lead to the door becoming unbalanced.

6. Opener Troubles: The garage door opener can experience electrical issues, limit switch problems, or malfunctions that affect the door’s operation.

The Repair and Maintenance Plan

After a comprehensive evaluation, the technician provided a detailed report of the garage door’s condition. He identified the specific areas of damage and wear, and he recommended a repair and maintenance plan. This plan included immediate repairs to address critical issues, as well as a schedule for ongoing maintenance.

Preventive Measures

The professional also emphasized the importance of preventive measures to keep the garage door in good condition:

Regular Lubrication: Proper lubrication of moving parts, such as rollers, hinges, and springs, is crucial to reduce friction and wear.

Periodic Inspections: Conduct regular visual inspections to identify any signs of damage or wear.

Safety Checks: Test the garage door’s safety features, such as the auto-reverse mechanism, to ensure they function correctly.

Professional Maintenance: Schedule annual or bi-annual professional maintenance to keep the garage door in optimal condition.

Conclusion

My journey into evaluating garage door damage led me to appreciate the expertise of professionals in the field. While DIY inspections can be valuable for routine maintenance, a professional’s evaluation is indispensable when it comes to identifying hidden damage and assessing the overall condition of the garage door system.

Overall, according to Garage Door Repair North Richland Hills TX, understanding the interdependence of various components and recognizing the common types of garage door damage can help homeowners be proactive in maintaining their garage doors. Moreover, a comprehensive repair and maintenance plan, tailored to the specific needs of the garage door, is essential for ensuring its long-term functionality and safety. This experience has taught me the significance of regular professional evaluations and preventive measures to keep my garage door in optimal condition, and it’s a lesson I’ll carry with me in my ongoing journey as a responsible homeowner.

NRH’s Gates & Garage Doors

7048 Ridge Crest Dr, North Richland Hills, TX 76182, United States

817-533-4913

How To Install Garage Door Threshold – NRH’s Gates & Garage Doors

Installing a Garage Door Repair North Richland Hills TX is a relatively simple DIY project that can help improve the insulation and weatherproofing of your garage.

A garage door threshold is a seal that goes along the bottom of your garage door to keep out rain, snow, leaves, and pests. Here’s a step-by-step guide on how to install a garage door threshold:

Tools and Materials You’ll Need:

  1. Garage door threshold kit (typically includes the threshold strip and adhesive)
  2. Measuring tape
  3. Utility knife or scissors
  4. A marker or pencil
  5. Cleaning supplies (soap and water)
  6. Rag or paper towels
  7. A hacksaw or circular saw (if you need to trim the threshold)
  8. A caulking gun (optional)
  9. Silicone caulk (optional)

: Prepare the Area

Before you begin, make sure your garage floor is clean and free from debris. Sweep or vacuum the area to remove any dust or dirt. If there are any existing seals or adhesives along the bottom of the garage door, remove them carefully.

: Measure and Cut the Threshold

Measure the width of your garage door opening. Most threshold kits come in standard sizes, but if your opening is larger, you may need to trim the threshold to fit. If trimming is necessary, use a hacksaw or circular saw to cut the threshold to the appropriate length.

: Position the Threshold

Position the threshold strip along the inside of the garage door, making sure it is centered and aligned with the door’s bottom edge. You may want to have a helper hold one end while you align the other.

: Mark the Placement

Using a marker or pencil, mark the position of the threshold strip on the garage floor. This will help you ensure it stays in the correct position as you work.

: Apply Adhesive

Most garage door threshold kits come with adhesive backing on the threshold strip. Starting at one end, peel back a portion of the adhesive backing and press the threshold strip firmly onto the garage floor, aligning it with your markings. Continue peeling the backing and pressing down as you move along the entire length of the threshold strip.

: Press Down Firmly

Once the entire threshold strip is in place, use your hands or a roller to press it down firmly, ensuring good adhesion to the garage floor.

: Check for Air Bubbles

Inspect the threshold strip for any air bubbles or gaps between the strip and the floor. If you find any, press them out to ensure a tight seal.

: Trim Excess

If there is any excess threshold strip sticking out beyond the edges of the garage door, use a utility knife or scissors to trim it flush with the door frame.

: Allow Adhesive to Set

Follow the manufacturer’s instructions for the adhesive’s curing time. This usually takes a few hours or more. Make sure the garage door remains closed during this time to allow for proper bonding.

: Caulk the Edges

To further weatherproof your garage, you can apply a bead of silicone caulk along the edges of the threshold strip where it meets the garage floor and door frame. This will create an extra barrier against moisture and pests.

: Test the Seal

Once the adhesive has fully set, open and close your garage door to test the seal. It should create a tight barrier along the bottom edge of the door.

Congratulations! You’ve successfully installed a Garage Door Repair North Richland Hills TX, which will help keep your garage clean, dry, and insulated. This relatively straightforward DIY project can have a significant impact on your garage’s overall functionality and comfort.

NRH’s Gates & Garage Doors

7048 Ridge Crest Dr, North Richland Hills, TX 76182, United States

1-817-533-4913

How To Deactivate A Garage Door Opener – Tarrant County Door & Gate

A Garage Door Repair North Richland Hills TX opener provides convenience and security, but there are instances when you might need to deactivate it. Whether you’re moving out, upgrading your system, experiencing issues, or simply want to disable it temporarily, learning how to deactivate a garage door opener is crucial.

This comprehensive guide will walk you through the steps involved in deactivating various types of garage door openers, ensuring a safe and successful process. Before proceeding, always consult your owner’s manual and follow safety guidelines to prevent accidents or damage.

I. Understanding Different Garage Door Opener Types:

Before delving into the deactivation process, it’s essential to understand the different types of garage door openers available:

  1. Chain-Drive Openers: Utilizing a metal chain to raise and lower the door, these are common and relatively easy to deactivate.
  2. Belt-Drive Openers: Similar to chain-drive, but with a reinforced rubber belt for quieter operation.
  3. Screw-Drive Openers: Employ a threaded steel rod to move the trolley and open or close the door.
  4. Jackshaft Openers: Mounted on the wall beside the garage door and operate through a rotating shaft.

II. Preparing for Deactivation:

  1. Gather Necessary Tools: Depending on your garage door opener type, you might need a ladder, screwdriver, pliers, wire nuts, and electrical tape.
  2. Disconnect Power: To ensure safety, unplug the garage door opener from its power source or trip the circuit breaker that supplies electricity to it.
  3. Locate Emergency Release Cord: Most garage door openers have an emergency release cord, usually hanging from the trolley. This cord disconnects the opener from the door, allowing manual operation.

III. Deactivation Steps:

  1. Deactivating Chain-Drive and Belt-Drive Openers:a. Open the Garage Door: Manually lift the garage door using the emergency release cord until it reaches the fully open position.b. Secure the Door: To prevent accidents, brace the door with a sturdy object, such as a wooden block, ensuring it remains open.c. Disconnect the Opener: Locate the quick-release mechanism, usually a cord or lever attached to the trolley. Pull down or push it to disengage the opener from the door.d. Test the Deactivation: Attempt to operate the garage door using the wall control or remote. If the opener is successfully deactivated, the door should not move.
  2. Deactivating Screw-Drive Openers:a. Open the Door: Manually lift the garage door using the emergency release cord, fully opening it.b. Locate the Disconnect Screw: It is typically found on the side of the opener near the motor head. Turn the screw counterclockwise to disengage the trolley from the screw drive.c. Test the Deactivation: Try operating the garage door using the wall control or remote. If the opener is deactivated, the door should not respond to commands.
  3. Deactivating Jackshaft Openers:a. Locate the Power Cord: Unplug the power cord from the electrical outlet or switch off the circuit breaker supplying power to the opener.b. Disconnect the Opener: Depending on the model, you may need to unscrew the opener from the wall bracket or follow specific instructions in the owner’s manual.c. Verify Deactivation: Attempt to operate the garage door manually. If the opener is successfully deactivated, the door should move freely.

IV. Safety and Maintenance:

  1. Safety Precautions: Always exercise caution when working with garage door openers. If unsure, consult a professional technician for assistance.
  2. Reversal Mechanism Test: After reactivating the garage door opener, perform a reversal mechanism test to ensure it operates correctly and reverses when meeting an obstruction.
  3. Regular Maintenance: Even if deactivated, perform regular maintenance on your garage door to keep it in optimal condition.

Conclusion:

Deactivating a Garage Door Repair North Richland Hills TX opener is a manageable task when done correctly. Follow the instructions outlined in this guide and prioritize safety throughout the process. If you encounter challenges or uncertainties, consult your owner’s manual or seek professional assistance. By deactivating your garage door opener properly, you’ll ensure smooth functioning or address any issues efficiently.

Tarrant County Door & Gate

6408 Marlette Ct, North Richland Hills, TX 76182, Estados Unidos

817-456-2958

How to Adjust Garage Door Height-North Richland hills Best Garage & Overhead Doors

Adjusting the height of a Garage Door Repair North Richland Hills TX is an important task to ensure proper functionality and fit. Whether you need to increase or decrease the height, the process involves adjusting the tracks, springs, and opener settings.

Follow the steps below to adjust the height of your garage door:

  1. Gather the necessary tools: Before you begin, gather the tools required for the job. These may include a ladder, wrenches, pliers, locking pliers, socket set, and a tape measure.
  2. Safety first: Make sure to disconnect the power to the garage door opener to prevent any accidents or injuries during the adjustment process. Also, wear protective gloves and safety glasses.
  3. Measure and determine the required height: Use a tape measure to measure the height of the garage door opening. Decide how much you need to adjust the height and whether you want to increase or decrease it.
  4. Adjusting the tracks: The tracks guide the garage door as it opens and closes. To adjust the door’s height, loosen the screws or bolts holding the track brackets to the wall. Carefully move the track up or down to the desired position. Use a level to ensure that the track is straight and then tighten the screws or bolts securely.
  5. Adjusting the springs: The springs on the garage door help counterbalance its weight. If you need to increase the height, you may need to add tension to the springs. For decreasing the height, you’ll need to release tension. Locate the torsion spring located above the garage door. Be extremely cautious when working with springs, as they are under high tension and can cause injury. Consult a professional if you’re unsure or uncomfortable with this step.
  6. Adjusting the opener settings: Most garage door openers have settings that control the height at which the door opens and closes. Refer to your opener’s manual to locate the adjustment settings. Adjust them according to the manufacturer’s instructions to achieve the desired door height. This may involve adjusting limit switches or programming the opener.
  7. Testing and fine-tuning: After making the adjustments, reconnect the power to the garage door opener. Test the door by opening and closing it several times to ensure it operates smoothly and at the desired height. If necessary, make further adjustments to the tracks, springs, or opener settings until you achieve the desired result.
  8. Regular maintenance: To maintain the proper operation of your garage door, perform regular maintenance tasks such as lubricating the tracks and springs, inspecting the cables and rollers, and checking for any signs of wear or damage. This will help prevent issues and ensure the longevity of your garage door system.

Remember, adjusting the height of a Garage Door Repair North Richland Hills TX can be a complex task, and it’s always a good idea to consult a professional if you’re unsure or uncomfortable with any aspect of the process. They have the expertise and tools to handle the job safely and effectively.

North Richland hills Best Garage & Overhead Doors

North Richland Hills, TX 76182

817-533-4913

How to Replace Garage Door Seal – Tarrant County Door & Gate

Here’s a step-by-step guide from Garage Door Repair Services on how I personally replace a garage door seal:

  1. First, I gather all the necessary tools and materials. I make sure to have a new garage door seal, a utility knife or scissors, a measuring tape, a ladder, a flathead screwdriver, and safety goggles.
  2. I start by measuring the existing garage door seal using a measuring tape. This helps me determine the length of the new seal I need to purchase.
  3. Next, I visit a local home improvement store or search online to find a replacement garage door seal that matches the type and size of my existing seal. I ensure it’s the correct length based on the measurement I took earlier.
  4. With the tools and materials ready, I prepare the garage door by closing it completely and switching off the power to the garage door opener. This is an important safety precaution to avoid any accidental activation of the door while I’m working on it.
  5. Using a flathead screwdriver, I carefully remove the fasteners or release the retaining clips that hold the existing seal in place. Starting from one end, I gently pull the old seal away from the bottom of the door, being cautious not to damage the door or the seal track.
  6. Once the old seal is removed, I inspect the seal track for any debris or dirt. If necessary, I use a clean cloth or a brush to remove any accumulated dirt, leaves, or other debris from the track. This ensures a smooth installation of the new seal.
  7. I unroll the new garage door seal and place it along the bottom edge of the door. Using a utility knife or scissors, I trim the seal to the appropriate length based on the measurement I took earlier. It’s important to cut the seal straight and even for a proper fit.
  8. Starting from one end, I insert the trimmed edge of the new seal into the seal track at the bottom of the door. I apply firm pressure to push the seal into the track, ensuring a snug fit. I work my way along the bottom edge of the door, carefully inserting the seal into the track until it reaches the other end.
  9. To secure the new seal in place, I use the provided fasteners or retaining clips. I ensure that the seal is aligned properly and there are no gaps or overlaps. If needed, I use a ladder to reach the higher sections of the door.
  10. Finally, I test the seal by closing the garage door and observing it closely. I check for any gaps or areas where the seal may not be properly aligned. To further test its effectiveness, I open and close the door a few times to ensure the seal provides a tight and effective barrier against drafts, pests, and debris.

By following these steps from Garage Door Repair Services, I can successfully replace a garage door seal, improving insulation and providing better protection for my garage. It’s important to prioritize safety throughout the process and refer to the manufacturer’s instructions for specific guidance on replacing your garage door seal.

Please note that the specific steps may vary depending on the type and brand of your garage door seal. Always consult the manufacturer’s instructions for detailed guidance on replacing your specific garage door seal.

Tarrant County Door & Gate

6408 Marlette Court,North Richland Hills, TX

817-456-2958