Enhance Security and Style with Expert Garage Door Repair and Installation Services

In the realm of home improvement, a well-maintained and stylish garage door serves as both a functional asset and an aesthetic focal point. Whether you’re looking to repair a malfunctioning door or upgrade to a modern, stylish model, our professional garage door repair and installation services are tailored to meet your needs.

Section 1: Importance of Garage Doors

Garage doors play a crucial role in the overall functionality and security of your home. A properly functioning door not only safeguards your vehicles and belongings but also adds to the curb appeal of your property. Our comprehensive services address a wide range of issues, ensuring that your garage door remains a reliable and stylish element of your home.

Section 2: Garage Door Repair Services

a) Swift Diagnosis: Our team of experienced technicians begins with a thorough inspection to identify the root cause of any issues your garage door may be experiencing. From faulty springs to malfunctioning openers, we diagnose and troubleshoot with precision.

b) Efficient Repairs: With a commitment to timely and efficient service, our skilled technicians use cutting-edge tools and high-quality replacement parts to ensure your garage door is back to optimal performance quickly. We prioritize your convenience without compromising on the quality of repairs.

c) Preventive Maintenance: Beyond repairs, our services extend to preventive maintenance to identify potential issues before they escalate. Regular maintenance not only enhances the longevity of your garage door but also minimizes the chances of unexpected breakdowns.

Section 3: Garage Door Installation Services

a) Expert Consultation: Choosing the right garage door for your home involves various considerations, including style, material, and functionality. Our expert consultants work closely with you to understand your preferences and guide you through the selection process.

b) Professional Installation: A flawless installation is essential for the optimal performance of your garage door. Our certified technicians ensure precision installation, utilizing industry best practices to guarantee smooth operation and longevity.

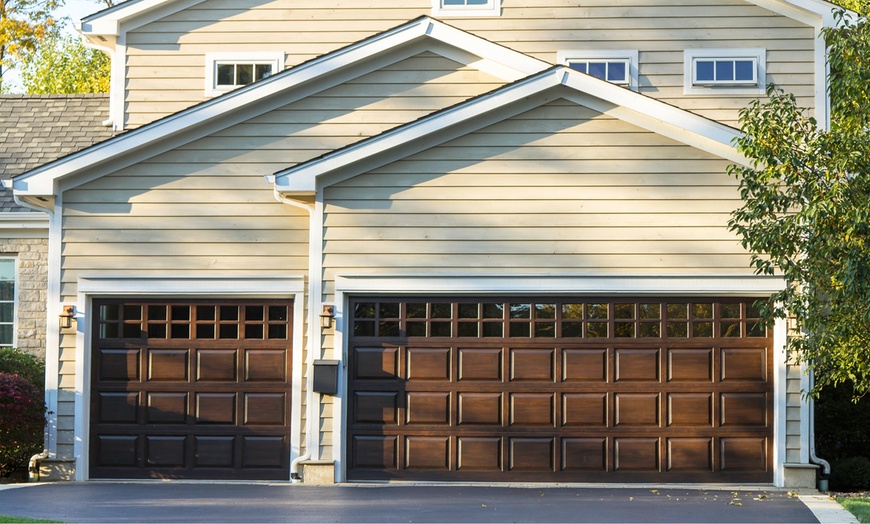
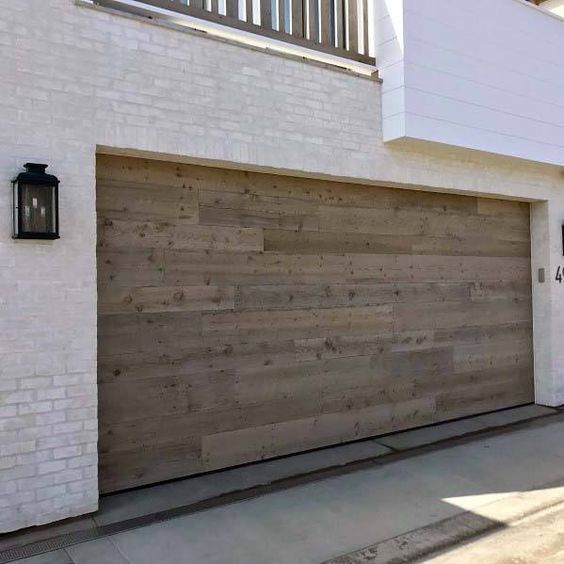
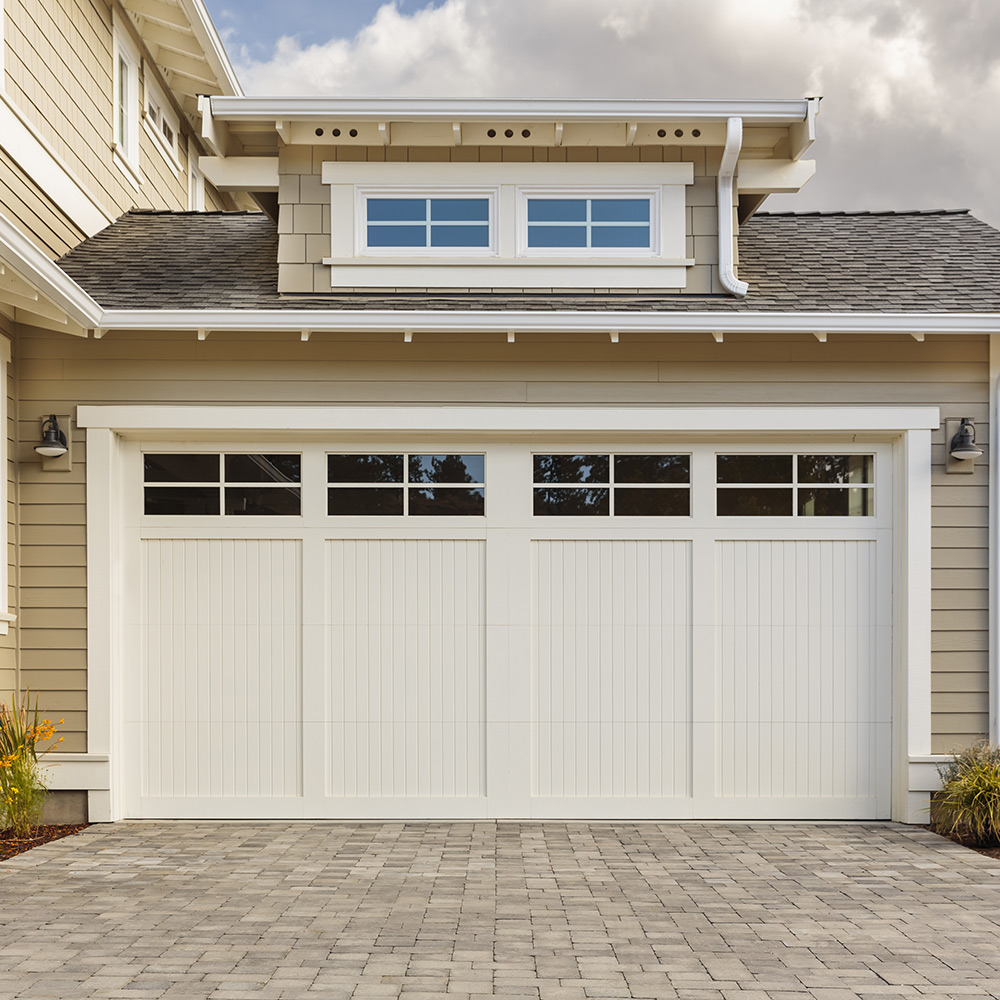
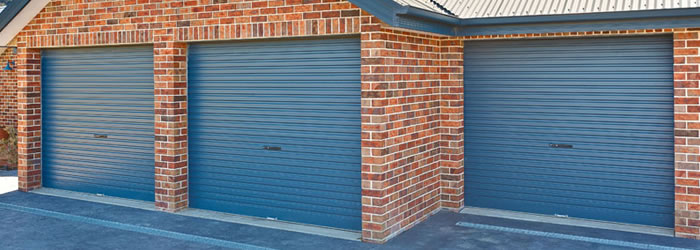
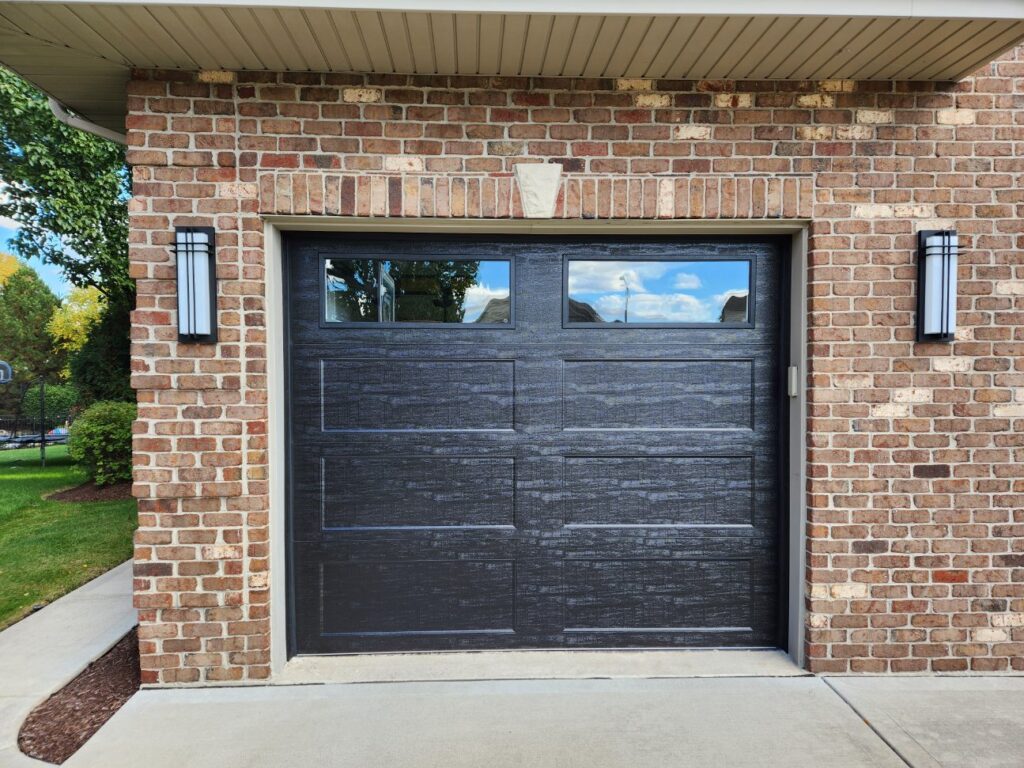
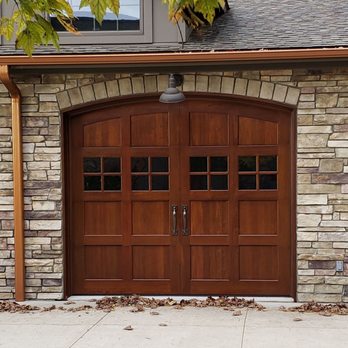
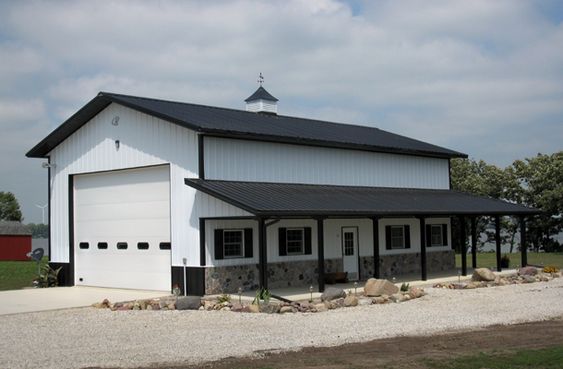
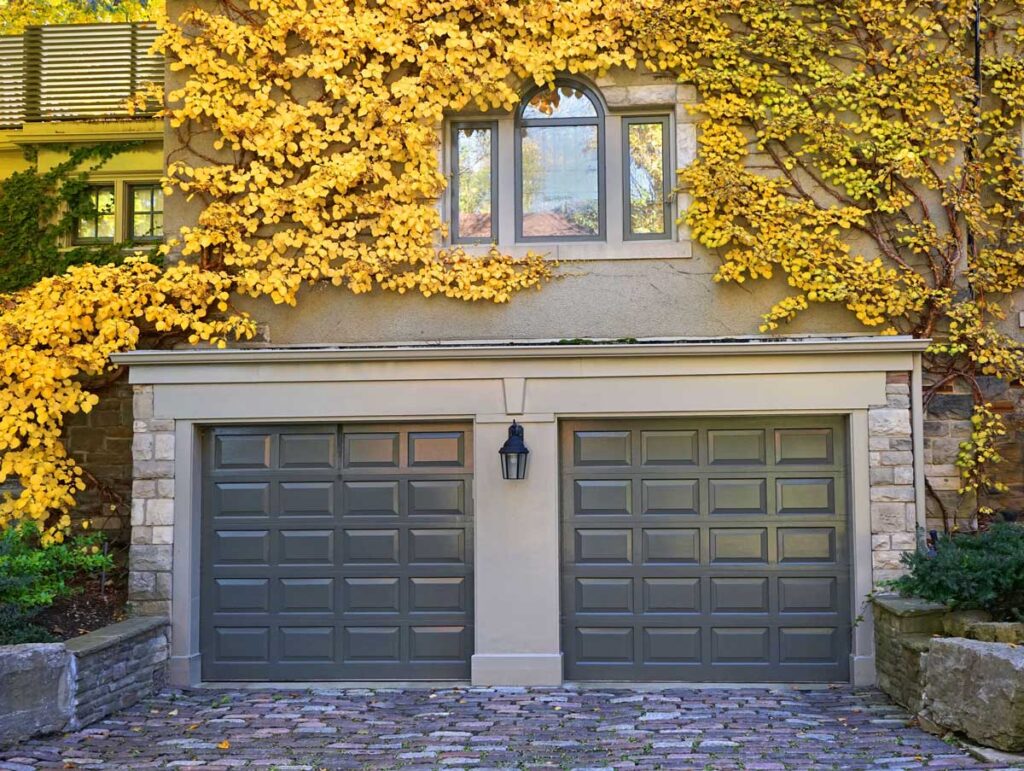
c) Customization Options: Elevate the aesthetics of your home with our diverse range of garage door styles and finishes. From traditional to contemporary designs, we offer customization options to match your unique taste and complement the architecture of your home.

Section 4: Benefits of Our Services

a) Enhanced Security: Our repair and installation services prioritize the security of your home, providing peace of mind through robust and reliable garage door solutions.

b) Curb Appeal: Upgrade the exterior of your home with a visually appealing garage door. Our selection of styles and finishes allows you to make a statement that enhances your property’s overall curb appeal.

c) Increased Property Value: A well-maintained and stylish garage door contributes to the overall value of your home, making it an excellent investment for both current and future homeowners.

Conclusion:

Investing in professional garage door repair and installation services not only ensures the security and functionality of your garage but also adds an element of style to your home. Trust our team of experts to deliver prompt, reliable, and personalized solutions that enhance the overall appeal and value of your property. Contact us today to schedule a consultation and take the first step toward a secure and stylish garage door experience.

Denzel Garage Door Repair
2380 Camino Vida Roble, Carlsbad, CA 92011, United States
+17609708179

How Big Is A Single Car Darage Door – Denzel Garage Door Repair

Garage Door Repair Carlsbad CA, often overlooked in the grand scheme of a home, play a crucial role in both functionality and aesthetics.

In this comprehensive guide, we’ll delve into the dimensions of single car garage doors, exploring factors that influence size, materials, installation processes, and the latest technological advancements.

Standard Sizes of Single Car Garage Doors

Understanding the typical dimensions is the first step in selecting the right garage door for your needs. Single car garage doors typically range from 8 to 10 feet in width and 7 to 8 feet in height. However, these are not strict standards, as variations exist based on architectural designs and the size of the vehicles intended to be housed.

Factors Affecting Garage Door Size

Architectural considerations, such as the style of the home and available space, can impact the size of the garage door. Additionally, the dimensions of the vehicles that will be stored in the garage play a significant role in determining the appropriate size.

Popular Materials for Garage Doors

The choice of materials for garage doors can affect both aesthetics and size. Wood, steel, and aluminum are common options, each with its own set of characteristics that influence the overall dimensions of the door.

The Role of Insulation

Insulation is a crucial factor in garage door size, especially for homeowners concerned about energy efficiency. The choice of insulation material and thickness can impact the overall size of the door and contribute to temperature regulation inside the garage.

Customization Options

For those with specific size constraints or unique preferences, customization is key. Tailoring garage doors to fit particular architectural styles or accommodating oversized vehicles allows homeowners to achieve both functionality and individuality.

Installation Process

Installing a single car garage door involves a series of steps, from measuring the space to selecting the appropriate door and ensuring proper alignment. While some homeowners may opt for a DIY approach, professional installation ensures accuracy and safety.

Cost Factors

The cost of a garage door is influenced by its size, material, and customization options. Understanding the breakdown of expenses helps homeowners make informed decisions aligned with their budget and long-term financial goals.

Maintenance Tips for Single Car Garage Doors

Preserving the longevity of a garage door involves simple maintenance tasks that homeowners can undertake. Regular inspections, lubrication, and addressing minor issues promptly contribute to the door’s durability.

Technological Advancements in Garage Door Systems

In the era of smart homes, garage doors have not been left behind. We explore the latest technological features, including remote control access, security measures, and integration with home automation systems.

Garage Door Trends

Aesthetic considerations are increasingly important in garage door selection. From contemporary designs to classic styles, we uncover the latest trends shaping the appearance of garage doors in modern homes.

Safety Measures

Garage door safety is paramount. We discuss the importance of features such as sensors, auto-reverse mechanisms, and adherence to common safety standards to protect both property and residents.

Common Misconceptions About Garage Door Sizes

Addressing prevalent myths, we debunk common misconceptions about garage door sizes. Accurate information empowers homeowners to make decisions that align with their needs and preferences.

Environmental Impact

For environmentally conscious homeowners, we explore sustainable options for garage doors. From eco-friendly materials to energy-efficient designs, there are choices that contribute to a greener living space.

Conclusion:

In conclusion, the size of a single car Garage Door Repair Carlsbad CA is a multifaceted decision influenced by factors ranging from architectural considerations to technological advancements. By understanding the dimensions, materials, and customization options, homeowners can make informed choices that enhance both functionality and aesthetics.

Denzel Garage Door Repair

2380 Camino Vida Roble, Carlsbad, CA 92011, United States

1-760-970-8179

How to Level a Garage Door? – Denzel Garage Door Repair

As a homeowner who takes pride in maintaining the functionality and aesthetics of my property, I’ve encountered various challenges over the years. One of the key aspects that demanded my attention was ensuring that my garage door operated smoothly and maintained a level stance.

By following Garage Door Repair, I’ll share my personal journey and insights on how to level a garage door, transforming it from a potential source of frustration into a seamless and well-balanced entry point.

Understanding the Importance of Garage Door Leveling

Before delving into the practical steps of leveling a garage door, it’s essential to grasp why this task is crucial for the overall performance and longevity of the door.

1. Smooth Operation:

A level garage door ensures smooth and effortless operation. An imbalanced door can strain the opener system and cause unnecessary wear and tear on various components.

2. Reduced Noise:

A level door minimizes friction and reduces noise during operation. Unusual sounds such as scraping or grinding may indicate an imbalance that needs attention.

3. Enhanced Safety:

A level garage door contributes to a safer environment. An imbalanced door poses a potential safety hazard as it may not function properly during opening or closing, increasing the risk of accidents.

4. Prolonged Lifespan:

Maintaining a level position distributes the weight of the door evenly. This balanced distribution of weight can extend the lifespan of the door and its components.

Signs Your Garage Door Needs Leveling:

Recognizing the signs that your garage door may be out of balance is the first step in addressing the issue. Look out for these indicators:

1. Uneven Movement:

If your garage door appears to sag on one side or moves unevenly during operation, it’s a clear sign that leveling is needed.

2. Difficulty in Opening or Closing:

An imbalanced door may become difficult to open or close. If you find yourself exerting extra force or if the door feels stuck, leveling may be the solution.

3. Unusual Noises:

Strange noises, such as creaking, popping, or grinding, can indicate an imbalance. These sounds may be a result of excessive strain on the door components.

4. Gaps or Spaces:

Inspect the gaps between the door and the frame. Uneven gaps or spaces on one side suggest an imbalance that needs correction.

Preparing for the Leveling Process: Safety First

Before attempting to level your garage door, it’s crucial to prioritize safety. Here’s how I prepare for the task:

1. Gather the Necessary Tools:

Ensure you have the required tools, including a level, winding bars, a socket set, and safety glasses.

2. Disconnect the Garage Door Opener:

For safety reasons, disconnect the garage door opener from the power source to prevent accidental activation during the leveling process.

3. Secure the Door:

Use locking pliers or a C-clamp to secure the door in the closed position. This ensures stability and prevents accidental movement during the leveling process.

4. Use Caution Labels:

Place caution labels on the garage door to alert others to the ongoing maintenance and the potential hazards involved.

Leveling a Torsion Spring System: A Step-by-Step Guide

If your garage door operates on a torsion spring system, follow these steps to level it:

1. Locate the Torsion Springs:

Identify the torsion springs mounted above the garage door. There is usually one or two depending on the size and weight of the door.

2. Use a Level:

Place a level horizontally on the bottom section of the door. This will help you determine which side is higher or lower.

3. Adjust the Torsion Springs:

To level the door, use winding bars to adjust the tension on the torsion springs. If the left side is higher, increase the tension on the left spring. If the right side is higher, adjust the tension on the right spring.

4. Balance the Springs:

Make small adjustments and test the door’s movement after each one. The goal is to achieve a balanced position where the door is level both visually and according to the level.

5. Test the Door:

Reconnect the garage door opener and manually test the door’s movement. It should open and close smoothly without any imbalance.

Leveling an Extension Spring System: A Step-by-Step Guide

If your garage door operates on an extension spring system, follow these steps to level it:

1. Identify the Extension Springs:

Locate the extension springs on both sides of the garage door. They run parallel to the tracks.

2. Use a Level:

Place a level horizontally on the bottom section of the door. Determine which side is higher or lower.

3. Adjust the Cable:

To level the door, move the S-hook to a higher or lower hole on the track hanger on the side with the least tension. This adjusts the tension in the cable.

4. Test the Door:

Manually close the garage door and observe its movement. If further adjustment is needed, repeat the process until the door moves smoothly.

Common Mistakes to Avoid:

In my experience, certain common mistakes can hinder the garage door leveling process. Here’s what to avoid:

1. Overlooking Safety Precautions:

Ignoring safety precautions can lead to accidents. Always disconnect the garage door opener, secure the door, and use caution labels to alert others.

2. Making Drastic Adjustments:

Making large adjustments to the springs can lead to overcompensation and imbalance. Make small, incremental adjustments and test the door’s movement after each one.

3. Neglecting Regular Maintenance:

Once you’ve leveled the door, regular maintenance is key to preventing future imbalances. Neglecting routine checks can result in recurring issues.

4. Not Seeking Professional Help:

If you’re unsure about the leveling process or if your garage door continues to exhibit issues, seeking professional help is advisable. Garage door technicians have the expertise to address complex problems safely.

Conclusion: A Balanced and Harmonious Entrance

Leveling a garage door may seem like a technical task, but with the right knowledge and precautions, it becomes an integral part of responsible homeownership. Regularly checking and adjusting the door’s level ensures that it operates smoothly, reduces wear and tear, and contributes to a safer and more efficient home.

As a homeowner, according to Garage Door Repair, the satisfaction of achieving a level and harmonious garage door extends beyond the practical benefits. It reflects a commitment to maintaining the integrity and functionality of your property. By mastering the art of garage door leveling, you not only enhance the daily convenience of your home but also contribute to its long-term well-being—one balanced door at a time.

Denzel Garage Door Repair

2380 Camino Vida Roble, Carlsbad, CA 92011, United States

760-970-8179

How To Program Overhead Garage Door Remote Control – Carlsbad Garage Door & Gate Repairs

Programming an Garage Door Repair Carlsbad CA is a relatively simple process that allows you to wirelessly operate your garage door opener.

The steps may vary slightly based on the brand and model of your garage door opener, but the general procedure is similar. Here’s a comprehensive guide to help you through the programming process:

: Gather Information Before you begin, gather essential information about your garage door opener, including the brand and model. Locate the “learn” or “smart” button on the garage door opener unit.

: Read the Manuals Refer to the manuals provided with both the garage door opener and the remote control. These manuals contain specific instructions and information that will be crucial during the programming process.

: Install Batteries in the Remote Control If the batteries are not already installed in the remote control, open the battery compartment and insert the recommended batteries. Ensure that you follow the polarity indicated in the battery compartment.

: Identify the “Learn” Button on the Opener Unit Locate the “learn” or “smart” button on the garage door opener unit. This button is usually on the back or side of the motor unit. Pressing this button puts the opener into programming mode.

: Clear Existing Programming (if needed) If there are existing remote codes programmed into the garage door opener, it’s advisable to clear them. Press and hold the “learn” button on the opener until the indicator light blinks, indicating that the memory has been cleared.

: Program the Remote Control Consult the remote control manual to find out how to put the remote into programming mode. This often involves pressing a specific combination of buttons on the remote. Once in programming mode, the remote’s indicator light may flash.

: Press the “Learn” Button on the Opener Unit Within 30 seconds of putting the remote into programming mode, go to the garage door opener unit and press the “learn” button. The indicator light on the opener should flash, indicating that it is ready to receive the new remote code.

: Press a Button on the Remote Control Press any button on the remote control that you want to program to the garage door opener. The opener unit should acknowledge the signal by flashing its indicator light or emitting a sound.

: Test the Remote Control Test the remote by pressing the programmed button. The garage door should respond by moving up or down. If it doesn’t, repeat steps 6-8.

: Program Additional Remotes (if applicable) If you have additional remote controls, repeat steps 6-9 for each additional remote you want to program.

: Final Testing and Troubleshooting Perform a final test of all programmed remotes to ensure they operate the garage door correctly. If any issues arise, consult the troubleshooting section of the garage door opener or remote control manual.

Conclusion:

By following these detailed steps, you should be able to successfully program your Garage Door Repair Carlsbad CA. Remember to consult the specific manuals for your garage door opener and remote control, as instructions may vary. This comprehensive guide aims to assist you in seamlessly integrating your remote control with your garage door opener, providing convenient and efficient access to your garage.

Carlsbad Garage Door & Gate Repairs

760-350-3536

How To Connect Chamberlain Garage Door To Car – Denzel Garage Door of Carlsbad

Connecting a Chamberlain Garage Door Repair Carlsbad CA to your car can be a convenient way to operate your garage door without the need for a separate remote control.

Chamberlain offers several different models of garage door openers, so the specific instructions may vary slightly depending on your model. However, I can provide you with a general step-by-step guide that should help you connect most Chamberlain garage door openers to your car.

: Gather Your Equipment

Before you begin, make sure you have the following equipment ready:

  • Chamberlain garage door opener with MyQ technology
  • Compatible car with built-in HomeLink or Car2U system (check your car’s manual to confirm compatibility)
  • Garage door remote control (for programming purposes)
  • Stepladder (if needed)

: Locate the Learn Button

On your Chamberlain garage door opener, you’ll need to find the “Learn” or “Learn Code” button. This button is typically located on the back panel or near the light bulb socket. Consult your garage door opener’s manual if you’re having trouble locating it.

: Clear Previous Programming (if necessary)

If you have previously programmed your garage door opener with other remotes or devices, you may need to clear the existing codes before proceeding. To do this, press and hold the “Learn” button on your garage door opener until the LED light next to the button turns off.

: Program Your Car’s System

Now, it’s time to program your car’s built-in HomeLink or Car2U system to communicate with your Chamberlain garage door opener:

For HomeLink (most common):

  1. Sit in your car with the ignition on (but the engine off).
  2. Press and hold the HomeLink button you want to use for your garage door opener (usually located on your car’s visor or overhead console).

If you don’t see a HomeLink button, you may need to access it through your car’s infotainment system. Consult your car’s manual for specific instructions.

  1. While holding the HomeLink button, simultaneously press the “Learn” button on your Chamberlain garage door opener. You may need assistance from another person for this step.
  2. Hold both buttons until the HomeLink indicator light starts flashing rapidly.
  3. Release both buttons.
  4. Press the HomeLink button again to test if the garage door opens or closes.

For Car2U (less common):

  1. Sit in your car with the ignition on (but the engine off).
  2. Press and release the “Learn” button on your Chamberlain garage door opener.
  3. Within 2 minutes, press and release the Car2U button you want to use.
  4. Press the Car2U button again to test if the garage door opens or closes.

: Test the Connection

After programming, test the connection to ensure it’s working correctly. Park your car outside the garage and press the HomeLink or Car2U button you programmed. Your garage door should open or close. If it doesn’t work, repeat the programming steps.

: Final Adjustments

If the door doesn’t open or close as expected, you may need to make some final adjustments:

  • Check the alignment of the HomeLink or Car2U buttons with the garage door opener.
  • Ensure that you’re within range of the garage door opener when testing the connection.
  • Confirm that the Chamberlain garage door opener is functioning properly.

If you encounter any issues, consult your Chamberlain garage door opener’s manual or contact Chamberlain’s customer support for further assistance.

In conclusion, connecting your Chamberlain Garage Door Repair Carlsbad CA to your car is a convenient feature that can make your daily routine more convenient. Just follow these steps carefully, and you should be able to enjoy the benefits of remote-controlled garage access from your car.

Denzel Garage Door of Carlsbad

300 Carlsbad Village Dr 108a 205, Carlsbad, CA 92008, United States

1-760-378-7470

How Much Is A Single Garage Door – Carlsbad Garage Door & Gate Repairs

A single Garage Door Repair Carlsbad CA typically consists of several components and can vary in price depending on factors such as size, material, design, and installation costs.

While I can’t provide an exact price without specific details, I can give you a general idea of what factors can influence the cost of a single garage door in about.


Factors Affecting the Cost of a Single Garage Door

Garage doors are an essential part of your home’s security and aesthetics. They come in various styles, materials, and sizes, and the cost of a single garage door can vary significantly based on a range of factors. In this comprehensive guide, we’ll explore these factors to help you understand what to consider when budgeting for a garage door replacement or installation.

1. Garage Door Material

The material of your garage door plays a significant role in its cost. The most common materials for garage doors include:

  • Steel: Steel doors are durable and low-maintenance. They come in various thicknesses, with thicker doors typically costing more. Expect to pay more for insulated steel doors, which provide better energy efficiency.
  • Wood: Wooden garage doors offer a classic and elegant look. They are often custom-made, which can drive up the cost. The type of wood used, such as cedar or redwood, can also affect the price.
  • Aluminum: Aluminum garage doors are lightweight and resistant to rust. They are less expensive than wood or steel but may not be as durable.
  • Fiberglass: Fiberglass doors are lightweight, low-maintenance, and can mimic the appearance of wood. They tend to be moderately priced.

2. Garage Door Style

Garage doors come in various styles to complement your home’s architecture. Some common styles include:

  • Traditional: These doors often feature raised panels and are a classic choice for many homes.
  • Carriage House: Carriage house doors mimic the look of old-fashioned carriage house doors. They add a rustic charm to your home.
  • Modern: Modern garage doors have clean lines and a minimalist design, making them a popular choice for contemporary homes.
  • Custom: If you have a specific design in mind, you can opt for custom-made garage doors. Customization comes at a premium cost.

3. Garage Door Size

The size of your garage door affects the overall cost. Single garage doors are typically 8 to 10 feet wide and 7 to 8 feet high, while double garage doors are 16 to 18 feet wide and 7 to 8 feet high. Custom sizes may be more expensive due to special manufacturing requirements.

4. Insulation

If you live in an area with extreme temperatures, consider an insulated garage door. Insulation helps regulate the temperature inside your garage, making it more comfortable and energy-efficient. Insulated doors are generally more expensive than non-insulated ones.

5. Hardware and Accessories

The hardware and accessories you choose for your garage door can also impact the cost. This includes handles, hinges, decorative hardware, and windows. Decorative elements and high-quality hardware may add to the price.

6. Installation

The cost of installation can vary depending on factors such as location, labor rates, and whether you’re replacing an existing garage door or installing a new one. It’s essential to hire a professional installer to ensure proper installation and avoid additional costs down the road.

7. Opener and Remote Control

If your garage door doesn’t already have an opener, you’ll need to factor in the cost of one. Opener prices can vary based on features and power. Remote controls and keyless entry systems are additional expenses to consider.

8. Warranty and Maintenance

Consider the warranty offered by the manufacturer and any maintenance costs associated with your chosen garage door material. Some materials require more upkeep than others, which can affect long-term costs.

9. Local Building Codes and Regulations

Local building codes and regulations may dictate specific requirements for garage doors, such as wind resistance or safety features. Compliance with these codes may influence the cost.

10. Additional Features

Some garage doors come with advanced features like Wi-Fi connectivity, smartphone control, and battery backups. These features can increase the price but may provide added convenience and security.

11. Brand and Quality

The brand and quality of the garage door also impact pricing. Reputable brands with a history of reliability tend to cost more than lesser-known options.

12. DIY vs. Professional Installation

While some homeowners may choose to install their garage doors to save money, it’s often recommended to hire professionals. DIY installation can be challenging and may void warranties if done incorrectly.

13. Geographic Location

The cost of materials and labor can vary based on your geographic location. Areas with a higher cost of living generally have higher installation costs.

14. Aesthetic Customization

If you want a unique or custom design for your garage door, you’ll need to budget for additional design and manufacturing expenses.

In conclusion, the cost of a single Garage Door Repair Carlsbad CA can vary widely based on the factors mentioned above. To get an accurate estimate, it’s essential to consult with local garage door professionals who can provide quotes tailored to your specific needs and preferences. Keep in mind that investing in a high-quality garage door can enhance your home’s curb appeal, energy efficiency, and overall security. Therefore, it’s often worth considering the long-term benefits when making your decision.

Denzel Garage Door of Carlsbad

300 Carlsbad Village Dr 108a 205, Carlsbad, CA 92008, United States

1-760-378-7470

Resolving Garage Door Cable Snaps and How to Prevent Them – Carlsbad Garage & Overhead Doors

The loud, jarring sound of a garage door cable snap echoed through my garage, instantly sending waves of concern through me. As a homeowner who values safety and functionality, the sudden realization that my garage door’s cables had snapped was not just an inconvenience; it was a clear indication that something needed immediate attention. Determined to address this issue promptly and prevent such incidents in the future, I embarked on a journey of understanding the causes, finding solutions, and implementing preventive measures. Through careful research, hands-on experience, and professional guidance, I learned the importance of dealing with cable snaps and taking proactive steps to maintain a secure and smoothly operating garage door.

I’m excited to share my journey and provide a step-by-step guide to resolving garage door cable snaps and safeguarding against their recurrence based from Garage Door Near Me.

Step 1: The Startling Revelation

My journey began with a sharp, unexpected noise—the sound of a garage door cable snapping. The sudden drop of the door on one side and its crooked appearance made it clear that a cable snap was the cause of the disruption.

Step 2: Prioritizing Safety

My first instinct was to ensure my safety. I quickly disconnected the automatic opener and engaged the manual release to prevent any inadvertent movements while I assessed the situation.

Step 3: Creating a Clear Space

Clearing the space around the garage door was crucial to create a safe and accessible environment for tackling the issue.

Step 4: The Visual Inspection

A close inspection of the cables revealed signs of fraying and wear—clear indicators that they were vulnerable to snapping. This assessment informed me that immediate action was necessary.

Step 5: Replacing the Snapped Cables

Replacing the snapped cables was a task that required expertise due to the potential hazards involved. Seeking professional assistance ensured the job was done safely and effectively.

Step 6: Digging into the Causes

Understanding the underlying reasons for cable snaps was essential to prevent their recurrence. Some common causes I learned about were worn-out cables, lack of maintenance, and incorrect installation.

Preventive Measures:

Taking preventive measures to safeguard against future cable snaps became my mission. Here are the strategies I adopted:

1. Regular Maintenance:

I established a regular maintenance routine that involved lubricating the cables, inspecting for wear, and identifying potential issues early on.

2. Professional Inspection:

I realized the value of professional expertise and engaged garage door technicians for regular inspections. Their trained eye could identify potential cable issues before they escalated.

3. Quality Cables:

I prioritized the use of high-quality, durable cables that were suited for my garage door’s weight and size. Investing in quality materials significantly reduced the risk of cable snaps.

4. Balancing Act:

Maintaining proper door balance emerged as a crucial step. I understood that an imbalanced door places uneven stress on the cables, making them more susceptible to snapping.

5. Professional Installation:

For cable replacement and installation, I sought out the skills of professional technicians. Their experience ensured that the installation was done correctly, reducing the risk of weak points that could lead to cable snaps.

6. Safety Measures:

I discovered the importance of safety features, such as safety cables that run through the springs. These cables act as a safeguard in case of cable snaps, preventing extensive damage or injury.

When to Seek Professional Help:

While my DIY efforts were focused on maintenance, I also recognized the instances where professional intervention was essential:

  • Cable Replacement: Replacing snapped cables requires specialized knowledge and equipment. Professional assistance is recommended to ensure safe and effective replacement.
  • Complex Issues: If cable snaps become a recurring problem or if there are underlying factors contributing to the snaps, consulting a professional technician can provide a comprehensive solution.

Overall, as stated from Garage Door Near Me, my journey in resolving a snapped garage door cable taught me the significance of proactive maintenance and safety practices. By following the steps above and prioritizing safety, I was able to address the immediate issue and take preventive measures to minimize future cable snaps. Regular upkeep, professional inspections, and adherence to safety protocols can greatly reduce the risk of cable snap incidents. With a well-maintained and secure garage door, I’ve reclaimed the peace of mind that comes with a smoothly operating and safe home environment.

Carlsbad Garage & Overhead Doors

300 Carlsbad Village Dr 108a 205, Carlsbad, CA 92008, United States

760-350-3536

How To Identify Garage Door Manufacturer – Carlsbad Garage & Overhead Doors

Identifying the manufacturer of a Garage Door Repair Carlsbad CA can be a helpful task for various reasons, such as getting replacement parts, troubleshooting issues, or contacting customer support. While it may seem challenging at first, with a systematic approach and attention to details, you can often determine the manufacturer of your garage door.

Here’s a comprehensive guide on how to do just that:

  1. Check for Manufacturer Label or Sticker: Start by examining the interior of your garage door panels, particularly near the bottom edge or sides. Many manufacturers affix labels or stickers that contain essential information about the door, including the brand name, model number, and manufacturing date. These labels are usually located on the interior side of the door and might be attached to the back of the panel.
  2. Inspect the Door Handle or Hinge: Look for any markings, engravings, or logos on the door handle or hinges. Some manufacturers emboss their brand name or logo onto these parts, making it easier to identify the company.
  3. Examine the Remote Control: If you have a remote control for your garage door opener, check for any branding or labels on it. Some remote controls will have the manufacturer’s name or logo, providing a clue to the garage door’s maker.
  4. Search Online for Identifying Features: If you find any numbers or codes on the garage door or its components, try searching for them on the internet. Sometimes, you can find forums or websites where users have discussed similar numbers and identified the manufacturer.
  5. Contact the Builder or Previous Owner: If you recently moved into a house with an existing garage door, try reaching out to the builder or the previous owner. They might have information about the door’s installation or provide you with details about the manufacturer.
  6. Look for Installation Manuals or Documents: If you have kept any documents related to the installation or purchase of the garage door, check them for manufacturer information. Manuals or receipts might contain the brand name or even the contact information of the company.
  7. Visit the Manufacturer’s Website: Browse through the websites of well-known garage door manufacturers. Many companies provide an online gallery or database of their products, which could help you identify your door based on its design or features.
  8. Seek Help from a Professional: If you are still unable to identify the manufacturer, consider contacting a local garage door professional or technician. They have extensive experience with different garage door brands and might be able to recognize the door’s make just by looking at it.
  9. Check the Garage Door Opener: Sometimes, the garage door opener itself might have identifying information. Open the opener’s cover and see if you can find any labels, stickers, or engravings indicating the manufacturer.
  10. Inspect the Track and Rollers: Some manufacturers design their track and rollers with specific patterns or unique features. Comparing these components to known manufacturer designs might help you narrow down the possibilities.
  11. Compare with Known Models: If you have access to resources such as manufacturer catalogs or online databases of garage door models, try to compare the design and features of your door with those listed. It could give you a hint about the manufacturer.
  12. Utilize Social Media and Forums: Post pictures and descriptions of your garage door on social media platforms or garage door enthusiast forums. Enthusiasts and experts might be able to recognize the door or provide valuable insights.
  13. Inspect the Springs: Some garage door spring manufacturers stamp their name or code onto the springs. Be cautious when dealing with the springs, as they are under high tension and can be dangerous if mishandled.

Remember that identifying the manufacturer may not always be straightforward, especially if the door is custom-made or from an obscure brand. However, with patience and perseverance, you stand a good chance of discovering the information you need. Knowing the manufacturer of your Garage Door Repair Carlsbad CA can save you time and effort when seeking assistance or replacement parts, ensuring your garage door continues to function smoothly and safely.

Carlsbad Garage & Overhead Doors

300 Carlsbad Village Dr 108a 205, Carlsbad, CA 92008, United States

760-350-3536

How to Open Multi Code Garage Door Opener? – Carlsbad Garage & Overhead Doors

When I need to open my Multi-Code garage door opener, I follow these steps from Garage Door Repair Carlsbad CA:

  1. I make sure I have the Multi-Code remote control in my hand. It’s a small handheld device with buttons specifically designed for operating the garage door.
  2. I quickly identify the button responsible for opening the garage door on the remote control. It is usually labeled with an upward-facing arrow or an icon representing an open door. This button is my key to opening the garage door.
  3. To ensure proper communication between the remote and the opener, I stand within the specified range. The range may vary depending on the model of my Multi-Code opener, but it typically extends a few yards from the garage door.
  4. I aim the remote control directly at the garage door opener unit. It’s important to have a clear line of sight between the remote and the opener without any obstructions.
  5. With everything set, I press and hold the button on the remote control responsible for opening the garage door. I apply firm pressure and keep the button pressed until I see the door start to move.
  6. As I maintain pressure on the “Open” button, I observe the movement of the garage door. I pay close attention to any unusual sounds or jerky motions that might indicate a problem. If I notice anything out of the ordinary, I release the button immediately and investigate the issue.
  7. I patiently wait for the garage door to fully open. It will continue moving until it reaches its fully open position. During this time, I ensure that no one is in the way and that there are no objects obstructing the door’s path.
  8. To close the garage door, I locate the button on the remote control responsible for closing the door. It is typically labeled with a downward-facing arrow or an icon representing a closed door. I aim the remote at the opener unit and press the “Close” button to initiate the closing process.
  9. In case of a power outage or malfunction, I am aware of the emergency release cord hanging from the opener. If necessary, I can use this cord to manually disengage the door from the opener, allowing me to open or close it by hand. I remember that using the emergency release cord disables the automatic opening and closing functions until I re-engage it.
  10. To maintain the smooth and reliable operation of my Multi-Code garage door opener, I regularly perform maintenance tasks. These include lubricating the moving parts, inspecting cables and springs for wear, and cleaning the tracks. I consult the manufacturer’s instructions for specific maintenance guidelines.

By following these steps from Garage Door Repair Carlsbad CA and paying attention to the details, I can effectively open and close my Multi-Code garage door. If I encounter any difficulties or have concerns about the operation of my garage door opener, I know it’s best to consult the user manual or seek professional assistance from a qualified technician.

Carlsbad Garage & Overhead Doors

300 Carlsbad Village Dr 108a 205, Carlsbad, CA 92008, United States

760-350-3536

How to Build Sliding Garage Doors – Carlsbad Garage & Overhead Doors

Building sliding garage doors can be a challenging but rewarding DIY project. Sliding garage doors are a great option if you have limited space in your garage or if you want to create a unique look for your home. In this guide from Garage Door Repair Carlsbad CA, we’ll go over the steps involved in building sliding garage doors.

Materials and Tools Needed:

  • Wood boards
  • Plywood
  • Sliding door hardware kit
  • Saw
  • Drill
  • Screws
  • Wood glue
  • Sandpaper
  • Paint or stain

Step 1: Measure and Plan The first step in building sliding garage doors is to measure the opening of your garage door. Measure the width and height of the opening to determine the size of the doors you’ll need to build. Plan the design and style of your doors and purchase the materials accordingly.

Step 2: Build the Frame Cut the wood boards to the appropriate size for the doors and build a frame using wood glue and screws. Make sure the frame is sturdy and square. Use plywood to cover the frame and attach it to the frame with screws. Sand the doors to create a smooth surface.

Step 3: Install the Sliding Door Hardware Purchase a sliding door hardware kit and install the tracks and rollers on the top and bottom of the doors. Make sure the rollers move smoothly along the tracks. You can also add handles or locks to the doors if desired.

Step 4: Hang the Doors With the help of a friend, lift the doors and hang them on the tracks. Make sure the doors are level and adjust the rollers as necessary. Test the doors to ensure they slide smoothly and easily.

Step 5: Finishing Touches Once the doors are hung and working properly, sand any rough edges or surfaces and apply paint or stain to match the look of your home. You can also add weather stripping or insulation to the doors to improve energy efficiency and prevent drafts.

Overall, as stated in Garage Door Repair Carlsbad CA, building sliding garage doors requires some carpentry skills and attention to detail, but with the right tools and materials, it’s definitely doable as a DIY project. Remember to measure and plan carefully, use high-quality materials, and take your time during each step of the process. With some patience and effort, you can create a beautiful and functional set of sliding garage doors for your home.

Carlsbad Garage & Overhead Doors

300 Carlsbad Village Dr 108a 205, Carlsbad, CA 92008, United States

760-350-3536