Troubleshooting Garage Door Opener Remote Syncing Issues – First Responder Garage Doors

As a homeowner who relies on the convenience and security provided by my garage door opener, encountering syncing issues with the remote control can be frustrating and disruptive. The ability to remotely open and close the garage door is a modern convenience that we often take for granted until something goes wrong. When the garage door opener remote fails to sync with the opener unit, it can leave us feeling perplexed and inconvenienced.

In this article, I’ll delve into the common causes of garage door opener remote syncing issues, troubleshooting steps to resolve them, and tips for preventing future problems by following Garage Door Repair.

Understanding Garage Door Opener Remote Syncing

Before we delve into troubleshooting, let’s first understand what we mean by “remote syncing.” Remote syncing refers to the process of pairing the garage door opener remote control with the opener unit. This synchronization allows the remote control to communicate effectively with the opener, sending signals to activate the door’s opening and closing mechanisms.

Common Causes of Garage Door Opener Remote Syncing Issues

Several factors can contribute to garage door opener remote syncing issues. Understanding these common causes can help pinpoint the root of the problem:

  1. Interference: Radio frequency interference from nearby electronic devices or appliances can disrupt the communication between the remote control and the opener unit, preventing successful syncing.
  2. Battery Issues: A weak or depleted battery in the garage door opener remote can hinder its ability to transmit signals effectively, leading to syncing problems.
  3. Misalignment: Misalignment of the garage door opener’s antenna or the remote control’s internal components can impede signal transmission and reception, affecting syncing.
  4. Programming Errors: Incorrect programming or settings on the garage door opener or remote control can prevent successful syncing between the two devices.
  5. Opener Unit Malfunction: Faulty or malfunctioning components within the garage door opener unit, such as the receiver or control board, can disrupt syncing with the remote control.

Troubleshooting Garage Door Opener Remote Syncing Issues

Now that we understand the common causes of syncing problems let’s explore some troubleshooting steps to resolve them:

  1. Check Battery: Start by checking the battery level in the garage door opener remote. Replace the battery with a fresh one if necessary, ensuring it is properly seated in the remote.
  2. Test Remote: Press the buttons on the remote control to verify if it emits a signal (you may use a smartphone camera to detect infrared light from the remote). If the remote appears to be functioning correctly, move on to the next step.
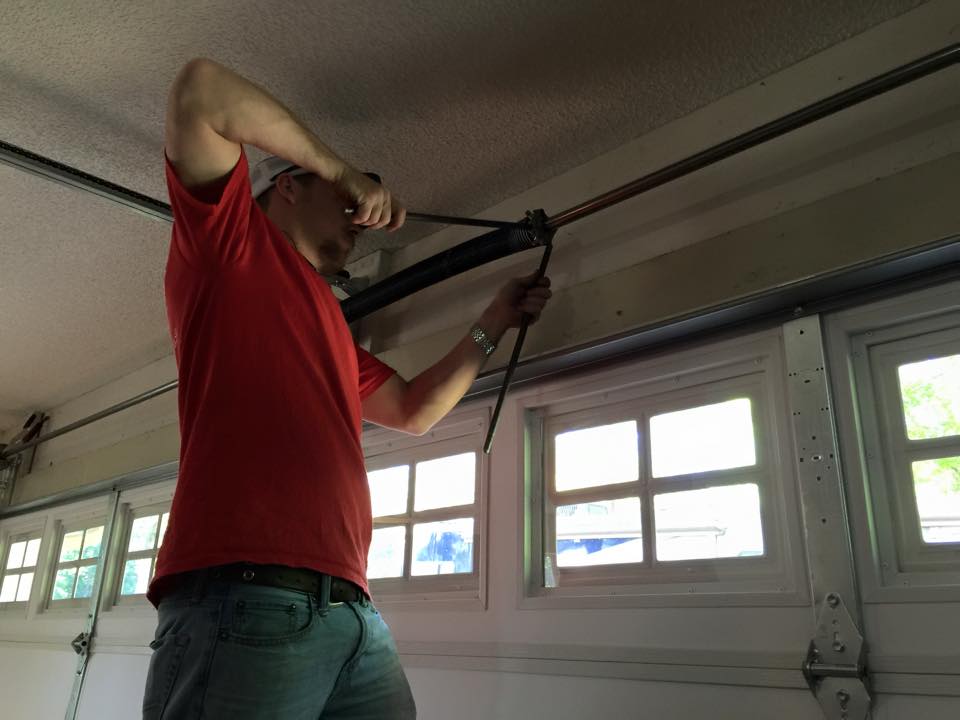
  3. Reset Opener Unit: Locate the “learn” or “program” button on the garage door opener unit. Press and hold this button until the indicator light flashes, indicating that the unit is ready to sync with a new remote control.
  4. Sync Remote: With the opener unit in programming mode, press and release the desired button on the remote control. Wait for the indicator light on the opener unit to confirm successful syncing. Repeat this process for each button on the remote control, if applicable.
  5. Check for Interference: Remove or relocate any electronic devices or appliances that may be causing radio frequency interference with the garage door opener system. Additionally, ensure that there are no metal obstructions blocking the signal between the remote control and the opener unit.
  6. Realign Antenna: If the opener unit has an external antenna, ensure that it is properly aligned and oriented vertically for optimal signal reception. Adjust the antenna if necessary to improve syncing performance.
  7. Reprogram Remote: If the syncing issue persists, try reprogramming the garage door opener remote control according to the manufacturer’s instructions. This may involve resetting the remote or clearing existing programming codes before attempting to sync it with the opener unit again.
  8. Check Opener Settings: Review the settings and programming options on the garage door opener unit to ensure that they are configured correctly. Make any necessary adjustments to the settings related to remote control syncing or signal reception.

Preventing Future Syncing Issues

Once you’ve successfully resolved the syncing issue, consider implementing the following tips to prevent future problems:

  1. Regular Maintenance: Perform routine maintenance on your garage door opener system, including cleaning the opener unit’s internal components and inspecting for signs of wear or damage.
  2. Replace Batteries: Regularly check and replace the batteries in your garage door opener remote control to ensure reliable performance.
  3. Minimize Interference: Identify and minimize sources of radio frequency interference in your garage or home environment to prevent disruptions to the opener system.
  4. Follow Manufacturer Guidelines: Adhere to the manufacturer’s instructions and guidelines for programming and syncing your garage door opener remote control to ensure compatibility and optimal performance.

Conclusion

Overall, as per Garage Door Repair, encountering syncing issues with your garage door opener remote control can be frustrating, but with the right troubleshooting steps, most problems can be resolved quickly and easily. By understanding the common causes of syncing issues, performing systematic troubleshooting, and implementing preventive measures, you can ensure smooth and reliable operation of your garage door opener system for years to come. If you encounter persistent syncing problems despite your best efforts, consider seeking assistance from a professional garage door technician to diagnose and address any underlying issues with the opener unit.

First Responder Garage Doors

180 State St Suite 225, Southlake, TX 76092, United States

817-991-5551

How To Open Lift Master Garage Door Remote – First Responder Garage Doors


Garage Door Repair Southlake TX Here’s a step-by-step guide on how to open a Lift Master garage door using a remote:

1. Determine Compatibility: Before attempting to open your LiftMaster garage door with a remote, ensure that the remote is compatible with your specific LiftMaster garage door opener model. LiftMaster offers a range of remotes, so check the compatibility with your opener by consulting the user manual or contacting LiftMaster customer support.

2. Prepare the Remote: If your remote requires batteries, ensure they are installed correctly and that the remote is functioning properly. Replace the batteries if necessary to ensure reliable operation.

3. Locate the Remote Button: Most LiftMaster remotes have a large button with the LiftMaster logo or a dedicated “Open” button. Identify this button on your remote as you’ll use it to open the garage door.

4. Stand Within Range: To ensure the remote signal reaches the garage door opener, stand within the recommended range specified by LiftMaster. Typically, this range is within a certain distance from the garage door opener motor unit.

5. Aim the Remote: Point the remote towards the garage door opener motor unit. Ensure there are no obstructions between the remote and the opener that could block the signal.

6. Press the Button: Firmly press the button on the remote to send the signal to the garage door opener. Hold the button down until you see or hear the garage door start to open.

7. Observe the Door: Watch or listen as the garage door begins to open in response to the signal from the remote. Ensure that the door moves smoothly and without any unusual noises or hesitations.

8. Wait for Opening: Depending on the speed of your garage door opener, it may take a few moments for the door to fully open. Be patient and wait until the door reaches the fully open position before proceeding.

9. Troubleshooting (If Necessary): If the garage door does not respond to the remote signal, troubleshoot potential issues. Check the batteries in the remote, ensure it’s programmed correctly, and verify that there are no obstructions blocking the signal between the remote and the opener.

10. Close the Door (Optional): If you only wanted to open the garage door partially or for a specific purpose, you can press the remote button again to stop the door at your desired position. Alternatively, you can use the wall-mounted control panel or another remote to close the door when you’re ready.

11. Maintain Your Remote: Regularly check and maintain your LiftMaster remote to ensure optimal performance. Replace batteries as needed, keep the remote clean, and store it in a safe place when not in use.

Garage Door Repair Southlake TX If you encounter persistent issues with your remote or garage door opener, consult the user manual or contact LiftMaster customer support for assistance.

First Responder Garage Doors

180 State St Suite 225, Southlake, TX 76092, United States

1-817-991-5551

How To Add Remote To Chamberlain Garage Door Opener – Southlake Garage Door & Gate Repairs

Adding a remote control to your Chamberlain Southlake Garage Door Repair is a straightforward process that involves a series of steps to ensure proper synchronization between the remote and the opener.

Follow this comprehensive guide for a detailed walkthrough, complete with explanations to help you successfully program your remote.

: Gather Necessary Materials

Before you begin the programming process, gather the required materials. You’ll need your Chamberlain garage door opener, a compatible remote control, a stepladder (if necessary), and access to the garage door opener’s motor unit.

: Identify the Learn Button

Locate the “Learn” or “Learn Code” button on the motor unit of your Chamberlain garage door opener. Typically, this button is colored and situated near the antenna wire. Identifying this button is crucial as it serves as the interface for programming new remotes.

: Clear Existing Codes (if needed)

If you’re adding a new remote or replacing an existing one, it’s advisable to clear out any pre-existing codes. Press and hold the “Learn” button until the indicator light on the motor unit blinks or turns off. This action signifies that the opener has successfully cleared its memory of previous remote codes.

: Position Yourself

For effective programming, position yourself in a way that allows easy access to both the “Learn” button on the motor unit and the remote control. If required, use a stepladder to reach the motor unit comfortably.

: Press the Learn Button

Press the “Learn” button on the motor unit and release it. The indicator light on the motor unit should illuminate and stay lit, indicating that the garage door opener is now in programming mode and ready to receive signals from the new remote.

: Program the Remote Control

Hold down the button on the remote control that you wish to program. Continue holding it until the indicator light on the motor unit flashes or blinks, typically within 30 seconds. This signifies that the remote control has been successfully programmed and is now synchronized with the garage door opener.

: Test the Remote Control

Verify the programming by testing the remote control. Press the programmed button, and the garage door should respond accordingly. If the door moves as expected, the programming was successful.

: Repeat for Additional Remotes (if needed)

If you have multiple remotes to program, repeat steps 5-7 for each additional remote control. This ensures that all your remotes are synchronized with the garage door opener.

: Finalize Programming

Once all remotes are programmed, press the “Learn” button on the motor unit again to exit programming mode. The indicator light should turn off, indicating that the garage door opener has completed the programming process.

: Verify Operation

Perform a final check by testing all programmed remote controls to ensure they are functioning correctly. If any issues arise, revisit the programming steps to ensure accuracy.

By diligently following these step-by-step instructions, you should be able to successfully add a remote control to your Chamberlain Southlake Garage Door Repair, enhancing the convenience and accessibility of your garage door system. Remember to consult your specific garage door opener model’s manual for any model-specific instructions or troubleshooting tips.

Southlake Garage Door & Gate Repairs

817-587-0445

How To Open A Broken Garage Door – Southlake Garage Door & Gate Repairs

Opening a broken Southlake Garage Door Repair requires a systematic approach to ensure safety and successful resolution of the issue. In this comprehensive guide, we’ll explore step-by-step instructions for handling various common problems that may prevent your garage door from functioning properly.

**1. Assess the Situation: The first step is to assess the nature of the problem. Is it a broken spring, a malfunctioning opener, or some other issue? Understanding the root cause will guide your approach to opening the door.

**2. Disconnect the Opener: If your garage door has an automatic opener, start by disconnecting it from the power source. This is a crucial safety step to prevent the opener from attempting to operate the door while you are troubleshooting.

**3. Release the Emergency Cord: Most garage doors are equipped with an emergency release cord. Locate this cord, typically hanging from the opener track, and pull it. This disengages the door from the opener, allowing you to manually open and close it.

**4. Secure the Door: Before attempting any manual operation, use vice grips or locking pliers to secure the door in the fully open position. This precautionary measure ensures the door won’t unexpectedly fall during your inspection and repairs.

**5. Identify and Replace Broken Springs: Broken springs are a common issue. Identify whether you have torsion or extension springs and exercise extreme caution when dealing with them, as they are under tension. Follow the manufacturer’s guidelines for spring replacement or consider seeking professional assistance.

**6. Check the Tracks: Inspect the tracks for misalignment or damage. If the tracks are bent, use a rubber mallet to gently straighten them. Ensure that the rollers move smoothly along the tracks without any obstructions.

**7. Lubricate Moving Parts: Apply a specialized garage door lubricant to the rollers, hinges, and springs. This minimizes friction and ensures smooth operation. Avoid using oil-based lubricants, as they can attract dirt and debris.

**8. Inspect the Cables: Examine the cables for signs of fraying or damage. If there are issues with the cables, it’s advisable to consult a professional for repairs or replacements. Cables are critical for the safe operation of the door.

**9. Manually Test the Door: Attempt to manually open and close the door to ensure it operates smoothly. If you encounter resistance or hear unusual noises, further investigation is necessary.

**10. Examine the Opener: If the problem lies with the opener, inspect it for visible damage or loose connections. Refer to the opener’s manual for troubleshooting tips or contact the manufacturer for guidance.

**11. Seek Professional Help if Needed: If you’re unable to identify or fix the issue, don’t hesitate to seek the assistance of a professional garage door technician. Attempting complex repairs without the necessary expertise can lead to further damage or injury.

**12. Implement Preventive Maintenance: Once the door is operational, consider establishing a regular maintenance routine. This includes lubricating moving parts, checking for wear and tear, and addressing any issues promptly to prevent future breakdowns.

In conclusion, opening a broken Southlake Garage Door Repair involves a careful and methodical approach. Prioritize safety, follow these steps, and seek professional help when needed. Regular maintenance can also extend the lifespan of your garage door and prevent unexpected issues.

Southlake Garage Door & Gate Repairs

817-587-0445

How To Replace Springs On Garage Door – Southlake Garage Door & Gate Repairs

Garage Door Repair Southlake TX are essential components that help in the smooth operation of your garage door. Over time, these springs may wear out or break, requiring replacement.

Replacing garage door springs is a task that requires careful attention to safety and the right tools. In this comprehensive guide, we will walk you through the process of replacing garage door springs, step by step.

1. Safety First

Before you begin any work on your garage door, it’s crucial to prioritize safety. Garage door springs are under high tension and can be dangerous if mishandled. Follow these safety precautions:

  • Disconnect the power: Unplug the garage door opener or turn off the breaker to ensure the door cannot be accidentally activated.
  • Gather safety gear: Wear safety glasses, gloves, and a hardhat to protect yourself from any potential hazards.
  • Use the right tools: Ensure you have the necessary tools for the job, including winding bars, a ladder, vise grips, and wrenches.

2. Identify the Type of Springs

There are two common types of garage door springs: torsion springs and extension springs. Identify which type you have, as they require different replacement methods.

  • Torsion springs are located above the door and wind up when the door is closed. They are wound with a set number of turns based on the weight of the door.
  • Extension springs run parallel to the door’s horizontal tracks and stretch when the door is closed. They often have safety cables to prevent injury if they break.

3. Release Tension

For both torsion and extension springs, it’s crucial to release the tension before attempting to replace them.

  • Torsion springs: Insert winding bars into the winding cone, one on each side, and slowly release the tension by turning the bars until the spring is fully unwound.
  • Extension springs: Open the garage door fully and clamp locking pliers onto the track just below the bottom roller to prevent the door from moving.

4. Remove the Old Springs

  • Torsion springs: Use a socket wrench to remove the set screws from the winding cone. Slide the spring off the bar.
  • Extension springs: Disconnect the safety cables from the brackets and then disconnect the spring from the pulley system.

5. Install New Springs

  • Torsion springs: Slide the new spring onto the bar and secure it with set screws. Wind the spring according to the manufacturer’s instructions, considering the door’s weight.
  • Extension springs: Install the new springs by attaching them to the pulley system and brackets. Reconnect the safety cables.

6. Reattach Cables and Check Balance

Ensure that cables are properly reattached for extension springs. For torsion springs, reattach the cables and check the balance of the door. It should open and close smoothly.

7. Test the Door

Reconnect the power to the garage door opener and test the door’s operation. Make adjustments as necessary to ensure it opens and closes smoothly.

8. Regular Maintenance

To extend the lifespan of your garage door springs, perform regular maintenance. Lubricate the springs and other moving parts every few months and inspect for signs of wear or damage.

Conclusion:

Replacing Garage Door Repair Southlake TX is a task that requires caution, the right tools, and a good understanding of the type of springs your door uses. By following these steps and prioritizing safety, you can successfully replace your garage door springs and ensure the continued smooth operation of your garage door. If you’re uncomfortable with any aspect of this process, consider consulting a professional garage door technician to do the job safely and efficiently.

Southlake Garage Door & Gate Repairs

817-587-0445

How Dangerous Are Garage Door Springs – Southlake Garage Door & Gate Repairs

Southlake Garage Door & Gate Repairs springs can be extremely dangerous if not handled properly. These springs are under high tension and play a critical role in lifting and balancing the weight of the garage door. Due to the significant force they exert, mishandling or attempting to repair them without proper knowledge and equipment can lead to serious injuries or even death. Understanding the potential dangers associated with garage door springs is crucial for your safety.

Here’s a comprehensive guide to the dangers of garage door springs and how to approach them:

1. High Tension and Force:

Garage door springs, whether torsion springs or extension springs, are tightly wound and store a considerable amount of energy. When the door is in the closed position, the springs are under maximum tension. Attempting to adjust, repair, or replace them without the necessary expertise and tools can cause the springs to suddenly release their stored energy, resulting in severe injuries or property damage.

2. Risks Associated with Garage Door Springs:

2.1. Spring Breakage:
Garage door springs have a limited lifespan and will eventually break due to the stress of constant use. A broken spring can snap with great force, potentially causing the garage door to slam shut unexpectedly.

2.2. Sudden Release of Tension:
When working with torsion springs, releasing the tension improperly can lead to the spring uncoiling rapidly and causing serious injuries to anyone nearby.

2.3. Falling Door:
If a garage door spring breaks while the door is open, the door can come crashing down, posing a risk to people, pets, and objects in its path.

2.4. Pinching and Crushing Hazards:
During spring replacement or adjustment, there’s a risk of fingers, hands, or other body parts getting caught between the moving parts of the door and the springs, resulting in pinching, crushing, or even amputation injuries.

2.5. Flying Debris:
The force of a spring breaking or suddenly releasing can cause fragments of the spring to become dangerous projectiles, potentially injuring anyone in their trajectory.

3. How to Approach Garage Door Springs Safely:

3.1. Leave Repairs to Professionals:
Due to the high risks involved, it’s strongly recommended to leave garage door spring repairs, replacements, and adjustments to trained and experienced professionals. DIY attempts to work with garage door springs can lead to catastrophic accidents.

3.2. Avoid Tampering:
Do not attempt to adjust, repair, or replace garage door springs on your own. Even seemingly simple tasks like adjusting tension can have dangerous consequences if done improperly.

3.3. Regular Maintenance:
Schedule regular maintenance checks with a professional technician who can inspect the condition of your garage door springs and other components. Early detection of worn or damaged springs can prevent accidents.

3.4. Beware of DIY Tutorials:
Online tutorials or videos on DIY garage door spring repairs can be misleading and dangerous. Professionals are trained to handle springs safely and have the necessary tools to minimize risks.

3.5. Safety Precautions for Professionals:
If you hire a professional technician for spring repairs, ensure they take safety precautions, such as wearing protective gear, securing the door, and using the appropriate tools.

3.6. Use the Emergency Release Cord Wisely:
If the door is stuck or malfunctioning, you can use the emergency release cord to disconnect the opener and open the door manually. However, doing so while the door’s springs are under tension can cause the door to crash down unexpectedly.

4. Conclusion:

In summary, Southlake Garage Door & Gate Repairs springs are inherently dangerous due to the high tension and force they carry. Mishandling or attempting DIY repairs without proper knowledge and equipment can result in severe injuries or worse. It’s crucial to prioritize your safety and the safety of others by leaving garage door spring repairs and replacements to trained professionals. Regular maintenance checks and professional assistance are essential for maintaining a safe and smoothly operating garage door system.

Southlake Garage Door & Gate Repairs

2106 E State Hwy 114 #105, Southlake, TX 76092, United States

1-817-587-0445

Do Garage Door Opener Keypads Have Batteries-Southlake Automatic Gates LLC

Garage Door Repair Southlake TX opener keypads are widely used devices that provide convenient access to garages without the need for a physical key or remote control. These keypads are typically mounted outside the garage and allow users to enter a unique PIN code to open or close the garage door. One common question that arises regarding these keypads is whether they require batteries to function.

The answer is yes, most garage door opener keypads do require batteries to operate. These batteries serve as a power source for the keypad’s electronic circuitry and allow it to function independently of the main garage door opener system. The type and number of batteries required can vary depending on the specific model and manufacturer.

The purpose of the batteries in the keypad is to supply power to the buttons and the circuitry responsible for transmitting the PIN code to the garage door opener. When a user enters the correct PIN code, the keypad sends a wireless signal to the garage door opener unit, instructing it to open or close the door. Without functioning batteries, the keypad would be unable to send these signals and would not be able to control the garage door.

The battery life of garage door opener keypads can vary depending on factors such as usage frequency, environmental conditions, and the quality of the batteries used. On average, the batteries in these keypads can last anywhere from one to three years before needing to be replaced. Some keypads may feature low-battery indicators, which provide a visual or audible warning when the batteries are running low and need to be changed.

Replacing the batteries in a garage door opener keypad is usually a straightforward process. Most keypads have a battery compartment located on the back or underside, which can be accessed by removing a cover or sliding open a panel. Inside the compartment, there are slots or holders for the batteries. It is important to use the correct type and size of batteries as specified by the manufacturer to ensure proper operation.

Common battery types used in garage door opener keypads include alkaline, lithium, or coin cell batteries. The specific battery type required is typically indicated in the keypad’s user manual or on the keypad itself. It is recommended to replace all the batteries at once rather than mixing old and new batteries to ensure optimal performance.

Regularly checking and replacing the batteries in a garage door opener keypad is essential to avoid any inconvenience or potential security risks. It is a good practice to keep spare batteries on hand so that they can be replaced promptly when needed. Additionally, it is worth noting that some advanced garage door opener systems may offer keypad models that are powered by a direct electrical connection, eliminating the need for batteries altogether.

In conclusion, Garage Door Repair Southlake TX opener keypads are convenient devices that allow users to open or close their garage doors by entering a unique PIN code. Most keypads require batteries to function, providing power to the keypad’s buttons and circuitry. The battery life can vary, but it is generally recommended to replace them every one to three years. It is important to use the correct type and size of batteries specified by the manufacturer for optimal performance. Regularly checking and replacing the batteries will ensure that the keypad operates smoothly and reliably, providing secure access to your garage.

Southlake Automatic Gates LLC

100 N Carroll Ave, Southlake, TX 76092, United States

1-817-631-4158

How To Reset Your Garage Door Remote-Southlake Best Garage & Overhead Doors

Resetting a Garage Door Repair Southlake TX remote is a relatively simple process that can be done in a few steps. The exact method may vary depending on the make and model of your garage door opener and remote, so it’s always a good idea to consult the manufacturer’s instructions specific to your system.

However, I can provide you with a general guide on how to reset a garage door remote that should work for most setups.

Before proceeding with the reset process, make sure you have the following items ready:

  1. The garage door remote that you want to reset.
  2. A ladder (if necessary) to access the garage door opener unit.
  3. A small tool, such as a paperclip or a toothpick, to press the reset button.

Now, let’s begin the process of resetting your garage door remote:

Step 1: Locate the garage door opener unit First, you need to find the main garage door opener unit. It is usually installed on the ceiling near the center of the garage. If you’re unsure, refer to your garage door opener’s user manual or manufacturer’s instructions for assistance.

Step 2: Identify the “Learn” or “Program” button On the garage door opener unit, look for a button labeled “Learn” or “Program.” This button is typically located near the antenna wire or the control panel. It may be color-coded or have other identifying markers.

Step 3: Clear existing codes To reset your garage door remote, you’ll need to clear any existing codes stored in the opener unit. Press and hold down the “Learn” or “Program” button until you see a light or indicator on the unit turn on. The length of time you need to hold the button varies, but it’s usually around 6-10 seconds. Once the light or indicator is on, release the button.

Step 4: Prepare the remote for programming Next, you’ll need to prepare the garage door remote for programming. Look for a reset button or a small hole on the remote itself. If there’s a reset button, press and hold it for a few seconds until you see a light or indicator flash. If there’s a small hole, use a tool like a paperclip or toothpick to press and hold the reset button inside the hole. Again, wait for the light or indicator to flash before releasing the button.

Step 5: Program the remote With the garage door opener unit and remote prepared, it’s time to program the remote. Approach the garage door opener unit with the remote in hand. Press the desired button on the remote that you want to assign to the garage door. Hold the button down and then press and release the “Learn” or “Program” button on the opener unit. The indicator light on the opener unit should flash or turn on, indicating that the programming was successful. Release the button on the remote.

Step 6: Test the remote To ensure that the garage door remote has been successfully reset, test it by pressing the programmed button. The garage door should respond by opening or closing. If it doesn’t, repeat the programming steps, ensuring that you follow the instructions carefully.

Step 7: Repeat for additional remotes If you have multiple garage door remotes that you want to reset, repeat the process outlined above for each remote. Remember to program each remote with a unique button to avoid conflicts.

That’s it! You have now reset your Garage Door Repair Southlake TX remote. It should be ready to use and operate your garage door opener once again. Remember to consult your specific garage door opener’s user manual for any model-specific instructions or variations in the reset process.

Southlake Best Garage & Overhead Doors

Southlake, TX 76092

817-385-7628

How to Change Code on Garage Door Keypad – Dragon Garage Door & Gates

Changing the code on a Garage Door Repair Southlake TX keypad is a relatively simple process that can be accomplished in just a few steps.

In this guide, I’ll provide a step-by-step process for changing the code on a Garage Door Repair Southlake TX keypad.

Step 1: Locate the “Learn” Button

The first step in changing the code on a garage door keypad is to locate the “Learn” button on your garage door opener. This button is typically located on the back of the opener, near the antenna wire. It may also be located on the side or front of the opener.

Step 2: Clear the Existing Code

Once you have located the “Learn” button, press and hold it down for approximately 10 seconds until the indicator light on the opener turns off. This will clear the existing code from the opener’s memory.

Step 3: Enter the New Code on the Keypad

Next, enter the new code that you would like to use on the keypad. Be sure to choose a code that is easy for you to remember but difficult for others to guess. Typically, garage door keypads allow for four to six-digit codes.

Step 4: Press the “Learn” Button on the Opener

After entering the new code on the keypad, press the “Learn” button on the garage door opener. The indicator light on the opener will flash to indicate that it is ready to learn a new code.

Step 5: Enter the New Code on the Keypad Again

Once the indicator light on the opener is flashing, enter the new code on the keypad a second time. This will confirm that the new code has been successfully programmed into the opener’s memory.

Step 6: Test the New Code

To ensure that the new code is working properly, test it by pressing the numbers on the keypad and checking that the garage door opens and closes as expected.

Step 7: Repeat the Process for Additional Keypads

If you have multiple garage door keypads, you will need to repeat the above process for each keypad to ensure that all keypads are updated with the new code.

Step 8: Secure the Keypad

Once you have successfully programmed the new code into the garage door opener, be sure to secure the keypad to prevent unauthorized access. This can be done by simply removing the batteries from the keypad or by locking the keypad cover with a key.

In conclusion, changing the code on a garage door keypad is a simple process that can be accomplished in just a few steps. By following the above steps, you can update the code on your garage door keypad to keep your home and belongings safe and secure.

Dragon Garage Door & Gates

351 Central Ave #7, Southlake, TX 76092, United States

1-817-587-0445