How To Make My Garage Door Look Like Wood – DFW Garage Door Experts


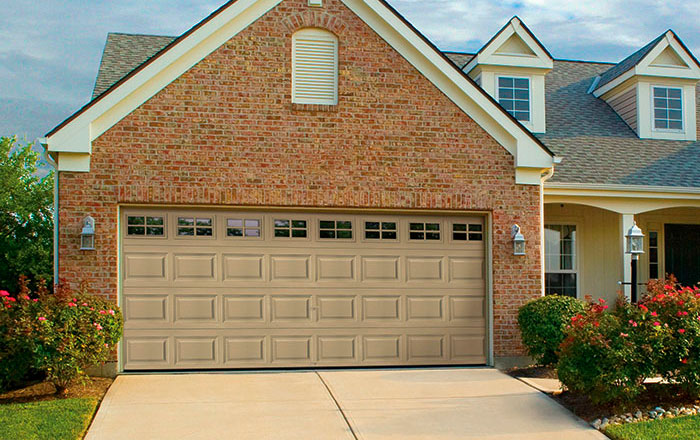
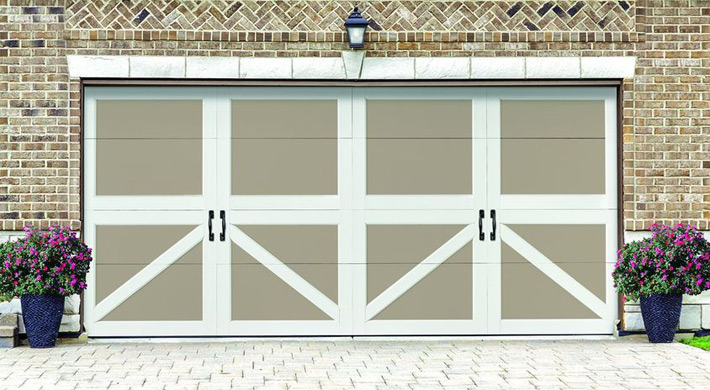
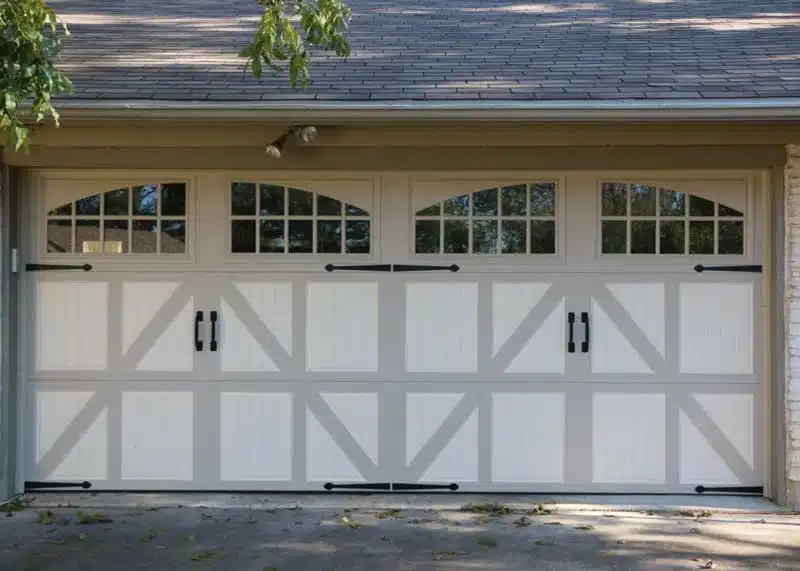
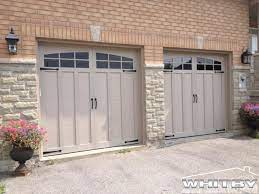
Transforming your Garage Door Repair Bedford TX to look like wood can add warmth, character, and curb appeal to your home’s exterior. Whether you have a metal or vinyl garage door, you can achieve the look of real wood through various painting and staining techniques. In this comprehensive guide, I’ll walk you through the step-by-step process of making your garage door look like wood, from preparation to finishing touches.

Step 1: Gather Necessary Tools and Materials

  1. Sandpaper: Use medium-grit sandpaper (around 120-150 grit) to roughen the surface of the garage door.
  2. Tack Cloth: Use a tack cloth to remove dust and debris from the surface after sanding.
  3. Primer: Choose a high-quality primer suitable for the material of your garage door (metal or vinyl).
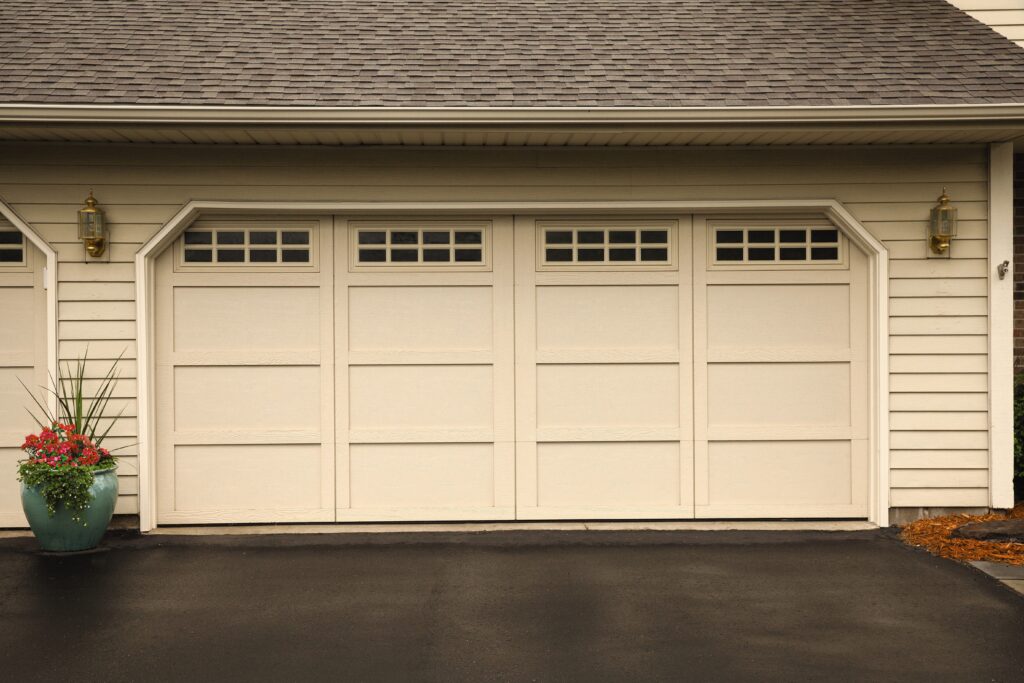
  4. Paint: Select paint colors that resemble the natural tones of wood, such as brown, tan, or beige.
  5. Wood Grain Tool: Purchase a wood grain tool or comb to create realistic wood grain patterns.
  6. Stain: Choose a wood stain in a color that complements the base paint color for added depth and dimension.
  7. Clear Sealer: Finish with a clear sealer or topcoat to protect the painted surface and enhance the wood-like appearance.

Step 2: Prepare the Garage Door Surface

  1. Clean the Surface: Thoroughly clean the garage door surface using a mild detergent and water to remove dirt, grease, and grime.
  2. Sand the Surface: Lightly sand the surface of the garage door with medium-grit sandpaper to create a rough texture that will help the primer and paint adhere better.
  3. Wipe Down with Tack Cloth: Use a tack cloth to remove any dust and debris left from sanding, ensuring a clean surface for painting.

Step 3: Prime the Garage Door

  1. Apply Primer: Apply a coat of primer to the entire surface of the garage door using a paintbrush or roller. Follow the manufacturer’s instructions for drying time and recoat intervals.
  2. Allow to Dry: Allow the primer to dry completely before proceeding to the next step. This may take several hours, depending on the type of primer used and environmental conditions.

Step 4: Paint the Base Coat

  1. Select Base Paint Color: Choose a base paint color that resembles the background color of the wood you want to imitate, such as light brown or tan.
  2. Apply Base Coat: Use a paintbrush or roller to apply an even coat of base paint to the entire surface of the garage door. Allow the paint to dry completely between coats, following the manufacturer’s recommendations.

Step 5: Create Wood Grain Pattern

  1. Mix Darker Paint: Mix a darker shade of paint using the base color and a darker tint to create contrast and depth.
  2. Apply Darker Paint: Use a wood grain tool or comb to apply the darker paint in long, sweeping motions, following the natural grain patterns of wood. Experiment with different angles and pressure to create a realistic wood grain effect.
  3. Blend and Feather: Blend and feather the darker paint into the base coat using a dry brush or rag to soften harsh lines and create a more natural appearance.

Step 6: Apply Wood Stain (Optional)

  1. Choose Stain Color: Select a wood stain in a color that complements the base paint color and enhances the wood-like appearance.
  2. Apply Stain: Use a clean brush or rag to apply the wood stain in a thin, even layer over the painted surface. Wipe off any excess stain with a clean rag.
  3. Allow to Dry: Allow the stain to dry completely according to the manufacturer’s instructions before proceeding to the next step.

Step 7: Seal and Protect

  1. Select Clear Sealer: Choose a clear sealer or topcoat designed for exterior use to protect the painted surface and enhance durability.
  2. Apply Sealer: Apply a thin, even coat of clear sealer over the entire surface of the garage door using a paintbrush or roller. Allow the sealer to dry completely between coats, following the manufacturer’s recommendations.
  3. Repeat as Needed: Apply additional coats of sealer as needed to achieve the desired level of protection and durability.

Step 8: Finish and Maintain

  1. Reattach Hardware: Once the paint, stain, and sealer are dry, reattach any hardware, such as handles, hinges, and decorative accents, to the garage door.
  2. Regular Maintenance: To maintain the wood-like appearance of your garage door, periodically clean the surface with a mild detergent and water and touch up any areas that may become worn or damaged over time.

Step 9: Enjoy Your Wood-Look Garage Door

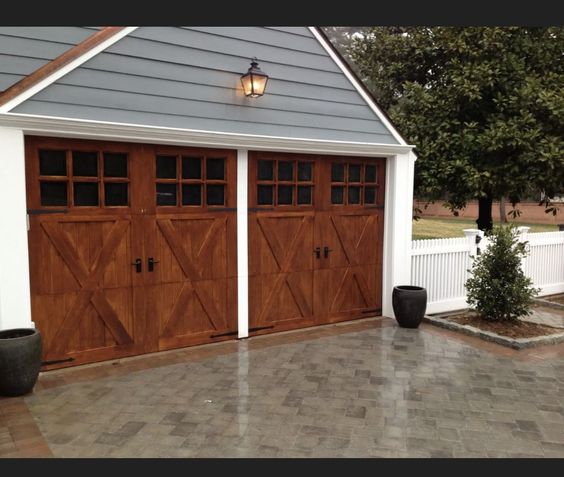
  1. Admire Your Work: Step back and admire the transformation of your garage door into a realistic wood-like finish that enhances the curb appeal of your home.
  2. Share Your Success: Share your DIY project with friends, family, and neighbors to inspire others to create their own wood-look garage doors.

Conclusion:

Whether you have a metal or vinyl Garage Door Repair Bedford TX with the right techniques and attention to detail, you can create a stunning wood-look finish that will impress for years to come.

DFW Garage Door Experts

2165 Loma Alta Dr, Bedford, TX 76021, United States

https://maps.app.goo.gl/CJiQmxsf3p2hxXfYA

How To Reset Travel On Chamberlain Garage Door Opener – Bedford Gates & Garage Doors

Resetting the travel limits on your Chamberlain Bedford Garage Door Repair is a crucial task to ensure the proper functioning of the door.

This process involves adjusting the travel limits, which dictate how far the garage door opens and closes. Whether you’re installing a new garage door or troubleshooting an existing one, the following comprehensive guide will walk you through the steps in detail.

1. Locate the Travel Limit Adjustment Controls:

  • The travel limit adjustment controls are typically located on the motor unit of the garage door opener. Look for two screws labeled “Up” or “Open” and “Down” or “Close.”

2. Understand the Current Settings:

  • Before making any changes, it’s essential to understand the current positions of the travel limit adjustment screws. This information will serve as a reference point and can be helpful if you need to revert to the original settings.

3. Prepare the Environment:

  • Close the garage door to ensure a safe working environment. This prevents the door from moving unexpectedly during the adjustment process.

4. Access the Adjustment Screws:

  • Use a stable step ladder to reach the motor unit comfortably. Ensure that you have a clear line of sight to the travel limit adjustment screws.

5. Close the Garage Door:

  • For safety reasons, close the garage door before initiating any adjustments. This prevents any accidents or injuries during the process.

6. Adjust the Down/Close Limit:

  • Turn the “Down” or “Close” travel limit adjustment screw clockwise to decrease the travel distance of the door in the closing direction. Make small adjustments and observe the door’s movement.

7. Test the Adjustment:

  • Press the remote control or wall button to open the garage door. Observe whether it opens fully and stops at the desired closed position. If adjustments are needed, repeat step 6 until the desired position is achieved.

8. Adjust the Up/Open Limit:

  • Turn the “Up” or “Open” travel limit adjustment screw clockwise to decrease the travel distance in the opening direction. Make incremental adjustments and test the door’s movement.

9. Test Both Directions:

  • Open and close the garage door multiple times to ensure that it stops at the correct positions in both the open and closed directions. This iterative testing helps fine-tune the travel limits.

10. Fine-Tune if Necessary: – If the door doesn’t stop at the desired positions, continue making small adjustments to the travel limit screws until the correct settings are achieved. Patience and precision are key during this step.

11. Secure the Adjustment Screws: – Once you are satisfied with the travel limits, ensure that the adjustment screws are tightened securely. This prevents any unintended changes in the settings.

12. Verify Safety Features: – After adjusting the travel limits, verify that the safety features, such as the photoelectric sensors, are functioning correctly. These sensors are crucial for preventing the door from closing if an obstruction is detected.

13. Document the Settings: – Optionally, document the final settings for future reference. This documentation can be useful if you need to reset the travel limits again or if someone else needs to make adjustments.

14. Perform a Full System Test: – Open and close the garage door several times, testing its functionality thoroughly. Ensure that it stops at the correct positions, and all safety features are operational.

15. Troubleshoot if Necessary: – If issues persist or if the door doesn’t operate as expected, consult the Chamberlain garage door opener manual for troubleshooting tips. It’s important to address any issues promptly to maintain the safety and functionality of the garage door.

By following these detailed steps, you can confidently reset the travel limits on your Chamberlain Bedford Garage Door Repair. Remember to prioritize safety throughout the process and consult the manufacturer’s manual for specific guidance on your model.

Bedford Gates & Garage Doors

817-886-3064

How Wide Is A Single Car Garage Door – Bedford Gates & Garage Doors


I might not need a thousand words, but I can certainly provide you with the information you’re looking for. A standard single-carĀ Garage Door Repair Bedford TX in the United States is typically 9 feet wide.

This width is designed to accommodate most vehicles comfortably, allowing enough space for the car to enter and exit without much difficulty. However, garage doors can come in various widths, and some may be as narrow as 8 feet or as wide as 10 feet, depending on the specific needs and preferences of the homeowner.

The standard height for a garage door is 7 feet, but again, variations exist. Taller vehicles, such as trucks or vans, may require a higher clearance, and accordingly, garage doors with heights of 8 or 9 feet are also common.

It’s worth noting that these dimensions are standard in the U.S., and measurements may differ in other countries. Additionally, custom garage doors can be designed to meet specific requirements, so homeowners have the flexibility to choose dimensions that best suit their needs.

In terms of construction, garage doors are typically made of various materials, including steel, wood, aluminum, or fiberglass. The choice of material depends on factors such as durability, maintenance preferences, and aesthetic considerations.

To ensure proper functioning, garage doors are equipped with a system of springs, cables, and rollers. The operation of the door can be manual or automated, with many homeowners opting for the convenience of a garage door opener that allows them to open and close the door with the press of a button.

In recent years, technological advancements have introduced smart garage door openers, allowing homeowners to control and monitor their garage doors remotely through smartphone apps. This adds an extra layer of security and convenience, as individuals can check the status of their garage door and even open or close it from anywhere with an internet connection.

Proper maintenance of a garage door is essential to ensure its longevity and smooth operation. Regular inspection of springs, cables, and rollers, as well as lubrication of moving parts, can help prevent malfunctions and extend the life of the garage door.

In conclusion, the width of a single-carĀ Garage Door Repair Bedford TX is typically 9 feet in the United States, but variations exist based on individual preferences and needs. The height is commonly 7 feet, with adjustments made for taller vehicles. Garage doors are available in different materials and can be operated manually or with the convenience of automated systems, including smart technologies for remote control and monitoring. Regular maintenance is key to ensuring the optimal performance and longevity of a garage door.

Garage Door Repair in Bedford, TX

817-886-3064

How To Remote Control Garage Door – Bedford Gates & Garage Doors

Controlling your Garage Door Repair Bedford TX can add a lot of convenience to your life.

There are various methods to achieve this, and I’ll break down a few popular ones for you.

1. Smart Garage Door Opener:

One of the most straightforward ways to remote control your garage door is by installing a smart garage door opener. These devices can be connected to your home Wi-Fi network, allowing you to control the garage door using a smartphone app. Installation typically involves replacing your existing garage door opener with the smart version, which comes with detailed instructions.

Once installed, you can open or close the garage door from anywhere with an internet connection. Some smart garage door openers also offer additional features, such as scheduling door closures, receiving notifications when the door is opened or closed, and integrating with other smart home devices.

2. Garage Door Remote Control Apps:

If you already have a compatible garage door opener, you might not need to replace the entire system. Instead, you can check if there’s a dedicated app for your garage door opener. Many manufacturers provide smartphone apps that allow you to control your garage door remotely. Simply download the app, follow the setup instructions, and you’ll have the ability to open and close your garage door using your phone.

3. Smart Home Integration:

If you have a smart home hub, like Amazon Alexa, Google Home, or Apple HomeKit, you can integrate your garage door opener with these platforms. This often involves connecting your existing garage door opener to your smart home hub and configuring the settings through the respective app. Once integrated, you can use voice commands to control your garage door or automate actions based on other smart home devices.

4. Remote Control Kits:

For those who want a more hands-on approach, there are remote control kits available that can be added to existing garage door openers. These kits typically include a remote control device and a receiver that connects to your garage door opener. Installation may require some technical know-how, so make sure to follow the provided instructions carefully.

5. Security Considerations:

When implementing remote control for your garage door, it’s crucial to prioritize security. Ensure that any devices or apps you use are from reputable manufacturers and have strong security features. Use secure passwords and enable two-factor authentication when available. Regularly update firmware or software to patch any vulnerabilities that may be discovered over time.

In conclusion, remote controlling your Garage Door Repair Bedford TX can be achieved through various methods, from installing a smart garage door opener to using dedicated apps or integrating with a smart home hub. Whichever method you choose, prioritize security to protect your home and belongings.

Bedford Gates & Garage Doors

817-886-3064

Professional Garage Door Panel Repair Techniques – Bedford Gates & Garage Doors

As a homeowner, I’ve always taken pride in maintaining my property. However, when I discovered that my garage door had unsightly and damaged panels, I quickly realized that certain repair tasks were best left to the professionals.

In Garage Door Repair, I’ll share my experience on the fascinating world of professional garage door panel repair techniques, shedding light on the complexities and expertise required to restore the aesthetics and functionality of these vital home features.

1. Understanding the Importance of Garage Door Panels

Before diving into the intricate world of panel repair techniques, it’s essential to appreciate the significance of garage door panels. They are not merely aesthetic components; they play a crucial role in the overall functionality and security of the garage door. Damaged panels can compromise the door’s insulation, structural integrity, and even its ability to open and close smoothly.

My Experience: The moment I noticed the dents and dings on my garage door panels, I realized that addressing the issue was not just about appearances; it was about preserving the functionality of this essential part of my home.

2. Assessing the Damage

One of the first steps in professional garage door panel repair is a thorough assessment of the damage. Experienced technicians inspect each panel meticulously, identifying the extent of the damage, whether it’s dents, cracks, or warping. This assessment guides them in determining the most suitable repair technique.

Expert Tip: A professional will also assess the overall condition of the garage door to ensure that there are no underlying issues contributing to the panel damage, such as misalignment or malfunctioning hardware.

My Experience: Watching the technician examine my garage door panels with precision and expertise was impressive. Their trained eye caught details I had missed.

3. Dent Removal Techniques

Dents are one of the most common issues that homeowners face with garage door panels. Professional technicians have an array of techniques at their disposal to address this problem, including:

  • Dent Removal Tools: Specialized tools, such as suction cups and dent pullers, are used to gently pull or push the dented area back into its original shape.
  • Heat Application: For certain types of dents, controlled heat is applied to the affected area, allowing the panel material to regain its original form.
  • Filler and Sanding: In cases where the dent is too severe to be fully removed, a filler material can be applied to smooth out the surface, followed by meticulous sanding and finishing.

Expert Tip: The choice of dent removal technique depends on the type and severity of the dent, as well as the material of the garage door panel.

My Experience: Witnessing the technician use these techniques to eliminate dents from my garage door panels was like witnessing artistry in action. The results were astonishing.

4. Crack Repair

Cracks in garage door panels are more complex issues that require careful attention. Professional repair techniques for cracks typically involve:

  • Welding: For metal panels, skilled technicians use welding techniques to repair cracks, ensuring a strong and seamless bond.
  • Epoxy Resin: For non-metal panels, epoxy resin is applied to fill and seal cracks, providing stability and preventing further damage.

Expert Tip: Proper preparation of the cracked area is crucial for successful repairs. Technicians clean and prepare the surface meticulously before applying the chosen repair method.

My Experience: Observing the technician meticulously repair the cracks in my garage door panels instilled a sense of confidence that the door would be as good as new.

5. Warping Correction

Warping of garage door panels can occur due to various factors, including temperature fluctuations and exposure to the elements. Correcting panel warping involves techniques such as:

  • Panel Reinforcement: Technicians often reinforce warped panels with additional bracing or support to restore their shape and stability.
  • Heat Application: Controlled heat is used to soften and reshape the warped area, bringing it back to its original configuration.

Expert Tip: Warping correction requires a delicate balance of heat application and structural reinforcement to ensure the panel is both straightened and strengthened.

My Experience: The precision with which the technician addressed the warping in my garage door panels left me in awe. They used a combination of techniques to ensure the panels were not only straightened but also reinforced for durability.

6. Painting and Finishing

After the repairs are complete, professional technicians pay close attention to the finishing touches. This includes matching the paint or finish of the repaired panel to the rest of the garage door. A seamless finish not only restores the appearance but also protects the repaired area from future damage.

Expert Tip: It’s essential to use high-quality paints and finishes that are specifically designed for outdoor use to ensure longevity.

My Experience: Seeing the repaired panels seamlessly blend in with the rest of the door was the final touch that made the repair work feel like a work of art.

7. Quality Assurance and Testing

Before concluding the repair process, professional technicians conduct rigorous quality assurance checks. This involves thorough testing of the garage door to ensure that the repaired panels integrate seamlessly with the overall system. Technicians also test the door’s balance, alignment, and safety features.

Expert Tip: A well-balanced and aligned garage door not only operates smoothly but also prolongs the life of the panels and the entire door system.

My Experience: Witnessing the meticulous testing process was a testament to the commitment of the technician to ensure that the repair work was of the highest quality.

8. Preventive Measures and Maintenance Recommendations

Professional technicians often provide valuable advice on preventive measures and maintenance to homeowners. This includes guidance on how to protect garage door panels from future damage, such as regular cleaning, applying protective coatings, and addressing issues promptly.

Expert Tip: Homeowners can extend the life of their garage door panels by following a regular maintenance routine and promptly addressing any minor issues before they escalate.

My Experience: I appreciated the technician’s recommendations for maintaining my garage door panels, which gave me confidence in their long-term durability.

Overall, as stated in Garage Door Repair, experiencing the process of professional garage door panel repair was both enlightening and reassuring. It reinforced my belief that certain repair tasks are best entrusted to skilled technicians who possess the knowledge, techniques, and tools to restore not only the aesthetics but also the functionality of garage door panels. The meticulous attention to detail, the use of specialized repair methods, and the commitment to quality assurance were all evident throughout the repair process. For homeowners facing the challenge of damaged garage door panels, seeking professional expertise is a wise investment in the longevity and performance of this essential home feature.

Bedford Gates & Garage Doors

2201 Harwood Rd, Bedford, TX 76021, United States

817-886-3064

How Many HP Garage Door Opener – Bedford Gates & Garage Doors

A standard Garage Door Repair Bedford TX typically does not have a specific horsepower (HP) rating expressed in whole numbers like a car engine or other machinery.

Instead, garage door openers are classified by their lifting capacity, which is usually measured in pounds (lbs) or kilograms (kg). The lifting capacity determines how heavy a garage door the opener can effectively lift and lower.

Common lifting capacity ratings for residential garage door openers include:

  1. 1/3 HP (Horsepower): This rating is suitable for lightweight single-car garage doors made of aluminum or similar materials.
  2. 1/2 HP (Horsepower): This rating is more common and can handle standard single-car and some double-car garage doors made of various materials, including steel.
  3. 3/4 HP (Horsepower): These openers are suitable for heavy double-car garage doors, especially those made of solid wood or insulated steel.
  4. 1 HP (Horsepower) or higher: These openers are designed for extremely heavy and oversized garage doors, such as those in commercial settings.

So, there isn’t a direct correlation between a specific HP rating and the number of words in your question. However, I’ve provided you with information about the most common HP ratings for Garage Door Repair Bedford TX to help you understand their capabilities. If you have a specific garage door and its weight, you can choose an opener with an appropriate lifting capacity to ensure it operates effectively and safely.

Bedford Gates & Garage Doors

2201 Harwood Rd, Bedford, TX 76021, United States

1-817-886-3064

How To Disable Sensors On Chamberlain Garage Door Opener – Bedford Gates & Garage Doors

Disabling the safety sensors on a Chamberlain Bedford Gates & Garage Doors opener is not recommended, as these sensors are a crucial safety feature that prevents the door from closing if an object or person is detected in the door’s path. Tampering with or disabling these sensors can pose a significant risk of injury or damage. Instead of disabling the sensors, it’s better to address any issues with them to ensure proper and safe operation. If you’re experiencing problems with your garage door sensors, consider troubleshooting and fixing the issue rather than disabling them.

Here’s a guide on troubleshooting and fixing common sensor problems:

Materials You’ll Need:

  • Ladder
  • Cleaning cloth
  • Screwdriver
  • Level
  • Safety goggles and gloves

Step-by-Step Guide:

1. Check for Obstructions:

  • Make sure there are no obstructions, debris, or objects blocking the sensors’ line of sight. If something is in the way, the door won’t close.

2. Clean the Sensors:

  • Dust, dirt, or cobwebs on the sensors can disrupt their function. Use a clean cloth to gently wipe the sensors’ lenses to ensure they’re clean and free from any debris.

3. Verify Alignment:

  • The sensors need to be properly aligned for them to work correctly. Use a level to ensure that both sensors are perfectly aligned with each other. Adjust them if needed.

4. Check the Wiring:

  • Inspect the wires connecting the sensors to the garage door opener. Ensure they are securely connected and not damaged. Repair or replace any damaged wires.

5. Test the Sensors:

  • Activate the garage door opener to close the door. While the door is closing, wave an object (not your hand) between the sensors to break the beam. The door should stop and reverse direction immediately.

6. Adjust Sensor Height:

  • If the door doesn’t reverse when an object breaks the beam, adjust the sensor’s height. Raise or lower the sensors slightly and retest until the door reverses as it should.

7. Check the Indicator Lights:

  • Most Chamberlain garage door openers have indicator lights on the sensors. If the lights are off or blinking, it indicates a problem. Consult the user manual to interpret the indicator light codes.

8. Inspect the Wiring:

  • Check the wiring connections between the sensors and the garage door opener. Ensure they’re properly connected and not damaged. Replace any damaged wires.

9. Reset the Sensors:

  • Some Chamberlain garage door openers allow you to reset the sensors by unplugging the opener and then plugging it back in after a few minutes. Consult your user manual for specific instructions.

10. Test the Door:

  • After troubleshooting and addressing any issues, test the garage door to ensure that the sensors are working correctly. The door should stop and reverse when an object breaks the sensor beam.

11. Seek Professional Help (if needed):

  • If you’ve tried troubleshooting and the sensors still aren’t functioning correctly, or if you’re not comfortable performing the troubleshooting steps, consider seeking help from a professional garage door technician.

Conclusion:

Instead of disabling the safety sensors on your Chamberlain Bedford Gates & Garage Doors opener, focus on troubleshooting and fixing any issues with the sensors. These sensors play a vital role in preventing accidents and ensuring safe operation. By following the steps outlined above and addressing any sensor-related problems, you can maintain the safety and functionality of your garage door opener system.

Bedford Gates & Garage Doors

2201 Harwood Rd, Bedford, TX 76021, United States

1-817-886-3064

Can Sunlight Interfere With Garage Door Sensors-Bedford Best Garage & Overhead Doors

Garage Door Repair Bedford TX sensors are essential safety devices designed to prevent accidents and damage by detecting obstacles in the path of a closing garage door.

However, various factors can potentially interfere with their proper functioning, including sunlight. This article aims to explore the effects of sunlight on garage door sensors and investigate potential interference issues that may arise.

  1. Understanding Garage Door Sensors: Garage door sensors typically consist of two components: a transmitter and a receiver. These sensors are positioned on either side of the garage door, typically near the floor. The transmitter emits an invisible beam of light to the receiver, creating a continuous circuit. When an object interrupts this beam, such as a person, pet, or vehicle, the sensor detects the obstruction and signals the garage door opener to stop or reverse its operation.
  2. Sunlight and Its Characteristics: Sunlight is a primary source of light and heat on Earth. It comprises various wavelengths, including ultraviolet (UV), visible light, and infrared (IR) radiation. While sunlight is essential for our daily lives, its presence and characteristics can potentially pose challenges for garage door sensors.
  3. Impact of Direct Sunlight on Sensors: a) Direct sunlight exposure: Garage door sensors can be adversely affected by direct sunlight. Intense sunlight may cause the receiver to receive a continuous beam, rendering it unable to detect obstructions accurately. As a result, the garage door may fail to stop or reverse when an object is in its path, increasing the risk of accidents or property damage.

b) Sensor alignment: Sunlight can also affect sensor alignment. If sunlight enters the garage through windows or other openings and directly shines on the sensors, it may disrupt the beam’s path. Misalignment can prevent the sensors from detecting obstructions effectively, compromising the safety features of the garage door system.

  1. Reflections and Shadows: a) Reflections: Sunlight reflecting off various surfaces can create false signals and interfere with the functioning of garage door sensors. For example, shiny or reflective objects, such as metal surfaces or vehicles with highly polished finishes, can reflect sunlight and confuse the sensors, leading to incorrect readings.

b) Shadows: The presence of strong sunlight can create shadows that might be mistaken for objects by the sensors. As a result, the garage door may unnecessarily halt or reverse its operation, causing inconvenience and potential wear on the door system.

  1. Strategies to Minimize Sunlight Interference: To mitigate sunlight interference with garage door sensors, several strategies can be implemented:

a) Shielding sensors: Install shields or covers around the sensors to minimize direct sunlight exposure. These shields can be designed to block sunlight while still allowing the sensors to function optimally.

b) Adjusting sensor alignment: Regularly check and adjust the alignment of the sensors to ensure they are not affected by sunlight or other environmental factors. Proper alignment is crucial for accurate detection and reliable garage door operation.

c) Using sun filters: Sun filters can be installed on windows or other openings in the garage to reduce the intensity of sunlight entering the space. This measure can indirectly minimize sunlight interference with garage door sensors.

d) Enhancing sensor technology: Manufacturers are continuously improving sensor technology to enhance their resistance to sunlight interference. Upgrading to newer models that feature advanced sensors may offer increased reliability and reduced susceptibility to sunlight-related issues.

Conclusion:

While sunlight can potentially interfere with Garage Door Repair Bedford TX sensors, proper awareness and appropriate measures can mitigate these issues. Homeowners should ensure regular maintenance, align the sensors correctly, and employ strategies like shielding and sun filters to minimize the impact of sunlight. By understanding the challenges associated with sunlight interference, individuals can promote the safe and efficient operation of their garage door systems.

Bedford Best Garage & Overhead Doors

2200 Airport Fwy Suite 555, Bedford, TX 76022

817-373-5968

Where Can I Buy Garage Door Window Inserts – Bedford Overhead & Garage Door

Garage door window inserts are a great way to add natural light and style to your garage. There are many different options available when it comes to buying garage door window inserts, including online retailers, local home improvement stores, and specialty garage door suppliers.

There are many different options available when it comes to buying garage door window inserts as stated in Garage Door Repair Bedford TX.

Online Retailers

One of the easiest ways to buy garage door window inserts is to shop online. There are many different online retailers that sell garage door window inserts, including Amazon, Home Depot, Lowe’s, and Wayfair. Shopping online allows you to compare prices and styles from different retailers without leaving your home. Additionally, many online retailers offer free shipping or the option to pick up your purchase at a local store.

When shopping online for garage door window inserts, it’s important to make sure that you are purchasing the correct size and style for your garage door. Most online retailers will provide detailed measurements and product descriptions to help you make an informed decision. Be sure to read customer reviews and ratings before making a purchase to ensure that the product is high quality and meets your needs.

Local Home Improvement Stores

Another option for buying garage door window inserts is to visit your local home improvement store, such as Home Depot or Lowe’s. These stores typically have a selection of garage door window inserts in stock, and you can see and touch the product before making a purchase. Additionally, if you are unsure about the size or style of the garage door window inserts you need, a sales associate at the store can help you find the right product for your needs.

When shopping at a local home improvement store, it’s important to compare prices and styles between different stores to ensure that you are getting the best deal. Some stores may offer discounts or promotions on garage door window inserts, so be sure to ask about any current specials.

Specialty Garage Door Suppliers

If you are looking for a more specialized selection of garage door window inserts, you may want to consider shopping at a specialty garage door supplier. These suppliers specialize in garage doors and accessories and often have a larger selection of products to choose from.

To find a specialty garage door supplier in your area, you can do a quick search online or ask for recommendations from friends or family members who have purchased garage door window inserts in the past. When shopping at a specialty supplier, be sure to ask about any warranties or guarantees on the product and compare prices with other retailers to ensure that you are getting a fair price.

Conclusion

In conclusion, according to Garage Door Repair Bedford TX, there are many different options available when it comes to buying garage door window inserts, including online retailers, local home improvement stores, and specialty garage door suppliers. When shopping for garage door window inserts, it’s important to consider the size and style of the product, compare prices between different retailers, and read customer reviews and ratings to ensure that you are getting a high-quality product that meets your needs. With the right garage door window inserts, you can add natural light and style to your garage and improve the overall appearance of your home.

Bedford Overhead & Garage Door

2200 Airport Fwy Suite 555, Bedford, TX 76022

817-373-5968