Why Does My Garage Door Keep Opening – Colleyville Gates & Garage Doors

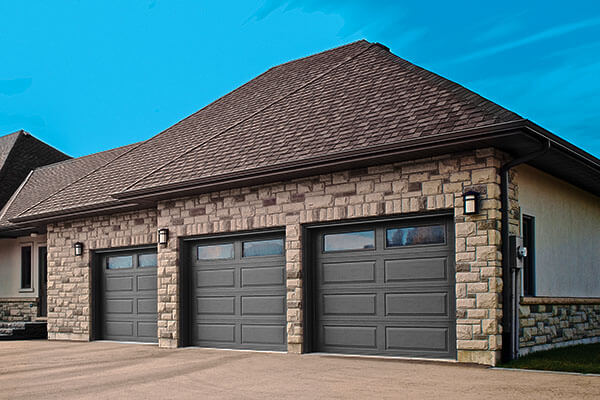
 Garage Door Repair Colleyville TX can be a bit like mysterious creatures sometimes, behaving in ways that leave us scratching our heads.

There are several possible reasons why your garage door might be opening on its own, and while I may not hit exactly, let’s explore some common culprits.

Remote Interference: Sometimes, the signals from your garage door remote can be intercepted or disrupted by other devices operating on similar frequencies. It could be a neighbor’s remote, a nearby radio transmitter, or even some electronic devices within your own home.

Faulty Remote: If the remote control itself is malfunctioning, it might be sending signals to the door without you pressing any buttons. Check for any visible damage to the remote or try using a spare one if you have it.

Wiring Issues: Faulty wiring in the garage door opener system can lead to erratic behavior. Inspect the wiring for any signs of wear or damage, and make sure all connections are secure.

Faulty Sensors: Modern garage doors are equipped with sensors that detect obstructions in the door’s path. If these sensors are misaligned or malfunctioning, they might be sending signals that prompt the door to open unexpectedly.

Programming Glitches: The programming of your garage door opener system might have glitches or errors. Check the user manual for your opener and reprogram it according to the instructions.

Power Surges: Power surges can affect the functioning of electronic devices, including garage door openers. Consider installing a surge protector to shield your opener from sudden voltage spikes.

Neighbors with Similar Systems: If your neighbors have garage door openers with similar frequencies, there’s a chance that their signals could be inadvertently triggering your door. Changing your opener’s frequency or code might help in such cases.

Ghost in the Machine (Rare, but Possible): Extremely rare instances of electromagnetic interference or faulty components within the garage door opener itself could cause unexplained openings. In such cases, consulting a professional might be the best course of action.

Weather Conditions: Drastic weather changes can sometimes affect the sensitivity of garage door sensors. Extreme temperatures or humidity might lead to false signals.

Human Error: This might sound simple, but it’s worth checking if someone in your household or a neighbor accidentally pressed the remote button. Also, ensure that your remote isn’t stuck in a position where it’s constantly transmitting signals.

In conclusion, troubleshooting the issue might require a bit of detective work. Start with the simpler possibilities like checking for remote interference or faulty remotes, and gradually move on to more complex issues if the problem persists  Garage Door Repair Colleyville TX. If all else fails, seeking professional help can save you time and frustration.

Colleyville Gates & Garage Doors

6508 Colleyville Blvd Colleyville, TX, 76034

817-755-6231

How To Remove An Appliance Garage Door – Colleyville Gates & Garage Doors

Removing an appliance Garage Door Repair Colleyville TX may sound like a daunting task, but with the right tools and approach, you can tackle it successfully.

Here’s a comprehensive guide with detailed steps to ensure a smooth removal process.

: Gather Your Tools and Safety Gear

Before you begin, make sure you have the necessary tools and safety equipment. You’ll likely need a screwdriver, power drill, pliers, and a wrench. Additionally, wear safety glasses and gloves to protect yourself during the process.

: Empty the Appliance Garage

Remove all items stored in the appliance garage to ensure a clear and safe working space. This includes any small appliances, utensils, or other items that may be stored inside.

: Locate and Disconnect Power

If your appliance garage has a power source for built-in appliances like blenders or coffee makers, locate the power supply and turn it off. This may involve unplugging the garage or switching off the circuit breaker connected to it.

: Identify Attachment Points

Examine the appliance garage to identify where it is attached to the surrounding cabinets or countertop. Most appliance garages are secured with screws or brackets.

: Remove the Trim or Molding

In some cases, there may be trim or molding covering the attachment points. Use a screwdriver or pry tool to carefully remove any trim that may be concealing screws.

: Unscrew Attachment Points

Using the appropriate screwdriver or power drill, begin unscrewing the attachment points. Start with the screws securing the appliance garage to the cabinet or countertop. Keep track of the screws as you remove them.

: Disconnect any Plumbing or Wiring

If your appliance garage is connected to plumbing or has electrical wiring, carefully disconnect these connections. Turn off the water supply if there are plumbing connections and, if needed, consult a professional to safely disconnect any electrical wiring.

: Detach the Door

Once all attachment points are unscrewed and any connections are detached, carefully lift and remove the appliance garage door. If the door is hinged, you may need to lift it upward to release it from the hinges.

: Remove Remaining Hardware

Inspect the area where the appliance garage was attached and remove any remaining hardware, such as brackets or screws. Use pliers or a wrench if necessary.

: Patch and Repair

If there are holes or damage left behind from the removal, patch and repair the area using wood filler or an appropriate material. Sand the patched area to ensure a smooth surface.

: Clean and Organize

Before declaring the job complete, take the opportunity to clean the surrounding area thoroughly. Organize the space according to your preferences or repurpose it for other storage needs.

By following these detailed steps, you should be able to successfully remove an appliance Garage Door Repair Colleyville TX with confidence and precision. Always prioritize safety and consult professionals if you encounter any challenges or if the removal involves electrical or plumbing connections.

Colleyville Gates & Garage Doors

817-755-6231

How Often Should You Lubricate Your Garage Door? – Colleyville Gates & Garage Doors

As a homeowner, I’ve come to appreciate the importance of regular maintenance to keep my house running smoothly. One often-overlooked aspect of home maintenance is the garage door. It’s a vital component of our homes, providing convenience and security. However, it requires proper care and attention to ensure it functions correctly. One crucial maintenance task is lubricating the garage door.

In this article, I’ll share my experiences and provide guidance on how often you should lubricate your garage door to keep it in top shape as stated in Garage Door Repair.

The Unsung Hero: Your Garage Door

Before diving into the specifics of garage door lubrication, it’s essential to understand the role of your garage door. It’s not just a barrier between your car and the elements; it’s a complex system of moving parts that require regular care. A typical garage door system consists of the following components:

  1. Rollers: These are the wheels attached to the sides of the door panels. They move within the tracks to facilitate smooth door operation.
  2. Tracks: The tracks guide the rollers as the door moves up and down. They need to be aligned correctly for the door to function smoothly.
  3. Springs: Garage doors often have either extension springs or torsion springs that assist in lifting the door’s weight. These springs are under significant tension and require careful maintenance.
  4. Hinges: Hinges connect the door panels and allow them to pivot as the door opens and closes. They are crucial for maintaining the door’s structure.
  5. Opener System: The garage door opener consists of a motor, drive system, and controls. It automates the process of opening and closing the door.

All these components need to work in harmony for your garage door to function correctly. Lubrication plays a key role in ensuring their smooth operation and longevity.

Why Lubrication Matters

Lubrication is essential for a garage door because it serves several crucial purposes:

  1. Reduced Friction: Lubrication minimizes friction between moving parts. Reduced friction means less wear and tear on the components, leading to a longer lifespan for your garage door system.
  2. Quieter Operation: A well-lubricated garage door operates quietly. If you notice squeaking or grinding noises when you open or close your garage door, it’s a sign that lubrication is needed.
  3. Prevent Rust and Corrosion: Lubricants act as a protective barrier, preventing rust and corrosion on metal components. This is especially important in regions with humid or rainy climates.
  4. Improved Efficiency: Proper lubrication ensures that your garage door opener system works efficiently. An efficiently operating opener consumes less energy, potentially saving you money on electricity bills.

How Often Should You Lubricate Your Garage Door?

The frequency of garage door lubrication depends on various factors, including climate, usage, and the type of lubricant used. Here’s a general guideline to help you determine how often you should lubricate your garage door components:

1. Twice a Year:

For most homeowners in moderate climates, lubricating your garage door twice a year is sufficient. Plan to lubricate it once in the spring and again in the fall. These seasons are ideal because they help prepare your garage door for temperature changes and potential weather challenges.

2. Quarterly:

If you live in a region with extreme weather conditions, such as hot summers or harsh winters, consider lubricating your garage door every quarter. Extreme temperatures can affect lubricant performance, so more frequent maintenance can help protect your door.

3. Monthly:

If your garage door sees heavy use, such as multiple openings and closings daily, it may benefit from monthly lubrication. This is especially true for commercial garage doors or households with several drivers coming and going.

4. On an As-Needed Basis:

Pay attention to your garage door’s performance. If you notice any unusual noises, resistance when opening or closing, or signs of wear on components, it’s time for lubrication, even if it’s not on your regular schedule.

Steps to Properly Lubricate Your Garage Door

Now that you know how often to lubricate your garage door, let’s discuss the steps to do it correctly:

1. Gather Supplies:

  • A can of garage door lubricant (avoid using WD-40, as it’s not a long-lasting lubricant)
  • A ladder or step stool
  • Safety gloves and protective eyewear

2. Safety First:

Before starting, unplug or disconnect the power to your garage door opener to prevent any accidental activation during the lubrication process.

3. Clean the Tracks:

Start by cleaning the tracks with a damp cloth or sponge. Remove any dirt, dust, or debris that may have accumulated. Clean tracks ensure smoother operation.

4. Lubricate the Rollers:

Apply a small amount of garage door lubricant to each roller. You can do this by lifting the door and working on one roller at a time. Roll the door up and down a few times to evenly distribute the lubricant.

5. Lubricate the Hinges:

Apply lubricant to the hinges connecting the door panels. Focus on the pivot points where the hinges bend as the door moves. Move the door up and down to distribute the lubricant.

6. Lubricate the Springs:

If you have torsion springs above the door, use caution when lubricating them, as they are under tension. Apply lubricant sparingly to the coils of the springs. Extension springs, if present, can also be lightly lubricated.

7. Lubricate the Tracks:

Apply lubricant to the inside of the vertical tracks on either side of the door. Make sure to coat the entire length of the track.

8. Lubricate the Opener Rail:

If your garage door opener uses a rail system, apply lubricant to the rail. This will help the trolley move smoothly along the rail.

9. Test the Door:

After lubricating all the necessary components, operate the garage door manually a few times to ensure that the lubricant is evenly distributed. Pay attention to any improvement in its operation and reduced noise.

10. Reconnect the Opener:

Finally, reconnect the power to your garage door opener, and test it with the remote control or wall-mounted control panel to ensure that it’s functioning smoothly.

Choosing the Right Lubricant

Selecting the right lubricant is crucial for effective garage door maintenance. Here are some tips on choosing the appropriate lubricant:

  • Use a silicone-based garage door lubricant specifically designed for garage door components. These lubricants are formulated to withstand temperature extremes and provide long-lasting protection.
  • Avoid using WD-40 or other general-purpose lubricants, as they may not provide adequate protection and can attract dust and debris.
  • Check the manufacturer’s recommendations for lubricant types and brands, as some garage door companies may have specific guidelines.

Conclusion: A Simple Maintenance Task with Big Benefits

Based from Garage Door Repair, lubricating your garage door may seem like a minor task, but it can have a significant impact on the performance and lifespan of your garage door system. By following a regular lubrication schedule and taking the time to do it correctly, you can.

Colleyville Gates & Garage Doors

6508 Colleyville Blvd, Colleyville, TX 76034, United States

817-755-6231

How Hard is it to Install a Garage Door Opener – Colleyville Gates & Garage Doors

Installing a Garage Door Repair Colleyville TX opener may seem like a daunting task, but it’s a manageable DIY project for most homeowners with basic tools and some mechanical aptitude. The difficulty level can vary depending on your experience, the type of garage door opener you choose, and the existing setup of your garage.

1. Assess Your Skills and Tools

Before diving into any DIY project, it’s crucial to assess your own skills and experience. Installing a garage door opener involves electrical wiring, mechanical assembly, and adjustments, so you should have some basic knowledge in these areas. If you’re comfortable with tasks like drilling, wiring, and following instructions, you’re off to a good start.

You’ll also need a set of tools, which typically includes a power drill, screwdrivers, pliers, a wrench, a level, and a tape measure. Having these tools ready will make the installation process smoother.

2. Choose the Right Opener

The complexity of the installation largely depends on the type of garage door opener you select. There are three main types to consider:

  • Chain Drive: These are the most common and affordable garage door openers. They use a chain to move the door and tend to be noisier than other options.
  • Belt Drive: Belt drive openers are quieter and smoother than chain drives. They use a rubber belt to operate the door and are an excellent choice if your garage is adjacent to living spaces.
  • Screw Drive: These openers have fewer moving parts and are known for their reliability. They are relatively easy to install.

Opting for a belt drive or screw drive opener can make the installation process less complex due to their simplicity and reduced noise.

3. Read the Manual

Once you’ve chosen the right garage door opener for your needs, read the manufacturer’s installation manual carefully. The manual will provide step-by-step instructions tailored to your specific model, including a list of required tools and safety precautions.

4. Clear the Garage and Prepare the Door

Before you start the installation, ensure your garage is cleared of any obstructions, and you have enough space to work. Disconnect the power to the garage door opener (if one is already installed) and remove any existing hardware. Inspect the garage door itself to ensure it’s in good working condition. If it’s damaged or in need of repair, it’s best to address those issues before proceeding.

5. Mount the Power Unit

The first step in installing the opener is mounting the power unit to the ceiling of your garage. You’ll need to secure it to sturdy joists or rafters using the provided brackets and hardware. This step requires careful measurement and the use of a level to ensure the unit is installed perfectly horizontal.

6. Install the Trolley and Rail Assembly

Next, assemble and install the trolley and rail components. These are responsible for moving the garage door. Depending on the opener type, you’ll either use a chain, belt, or screw mechanism to connect the trolley to the garage door.

This step can be a bit challenging as it involves precise alignment, but following the instructions in the manual will guide you through the process. It’s important to ensure the rail assembly is straight and securely attached to the power unit.

7. Connect the Wiring

Garage door openers require electrical wiring to operate. You’ll need to connect the power wires from the opener to a nearby electrical outlet. If you’re not comfortable with electrical work, it’s advisable to consult a professional to handle this part, as improper wiring can be hazardous.

Additionally, you may need to connect safety sensors, which are typically mounted on each side of the garage door near the floor. These sensors ensure the door stops and reverses if something is in its path, enhancing safety.

8. Program the Remote Control

Most garage door openers come with remote controls for easy operation. Programming these remotes involves following the instructions in the manual, which may vary depending on the model. You’ll typically need to set a unique code for security reasons.

9. Perform Safety Checks and Adjustments

Safety should be a top priority when installing a garage door opener. Before completing the installation, conduct safety checks to ensure everything is in working order. This includes testing the auto-reverse feature by placing an object in the path of the closing door to see if it reverses direction. Adjustments may be necessary to fine-tune this feature.

Additionally, you should check the door’s balance and adjust the tension on the springs if needed. A properly balanced door is crucial for the opener to function efficiently and safely.

10. Test and Troubleshoot

After completing the installation, it’s essential to test the garage door opener thoroughly. Operate it using the remote control and ensure it opens and closes smoothly without any unusual noises or jerking movements. Pay attention to the safety features and ensure they work as intended.

If you encounter any issues or the door doesn’t operate correctly, consult the troubleshooting section of the manual or seek professional assistance. It’s crucial to address any problems promptly to maintain the safety and functionality of your garage door opener.

Conclusion:

In conclusion, installing a Garage Door Repair Colleyville TX opener can range from a moderately challenging DIY project to a straightforward task, depending on your experience, the type of opener chosen, and the existing garage setup. While it might seem daunting at first, following the manufacturer’s instructions, having the right tools, and taking the time to do the job carefully can make the process manageable for many homeowners.

Colleyville Gates & Garage Doors

6508 Colleyville Blvd, Colleyville, TX 76034, United States

1-817-755-6231

How To Keep Garage Door From Slamming – Colleyville Gates & Garage Doors

Preventing a Garage Door Repair Colleyville TX from slamming requires addressing various factors that contribute to the forceful closing of the door. A slamming garage door not only creates noise but can also lead to premature wear and tear on the door components.

Here’s a comprehensive guide on how to keep a garage door from slamming:

Step 1: Check Spring Tension

  1. Balance and Spring Tension: The garage door springs play a crucial role in controlling its movement. If the springs are imbalanced or have incorrect tension, the door can close rapidly. Consult the manufacturer’s guidelines or seek professional assistance to ensure proper spring tension.

Step 2: Install a Door Closer

  1. Install a Hydraulic Closer: A hydraulic door closer is designed to control the speed and force of the door’s closing motion. Attach the closer to the top panel of the garage door and adjust it to slow down the closing speed. Follow the manufacturer’s instructions for proper installation and adjustment.

Step 3: Adjust the Garage Door Opener Settings

  1. Adjust the Force Setting: Modern garage door openers have force adjustment settings that control how much force is exerted when closing the door. If this setting is too high, the door might slam shut. Consult the owner’s manual for your opener model to find the force adjustment settings and lower them if necessary.

Step 4: Lubricate Moving Parts

  1. Lubricate Hinges and Rollers: Regularly lubricate the hinges, rollers, and other moving parts of the garage door. Proper lubrication reduces friction and ensures smooth operation, which can prevent abrupt closing.

Step 5: Check for Obstructions

  1. Clear the Door Path: Ensure that there are no obstructions or debris in the path of the garage door. Objects in the way can interfere with the door’s movement and cause it to close with excessive force.

Step 6: Replace Worn or Damaged Components

  1. Inspect Components: Regularly inspect the garage door’s components, such as hinges, rollers, tracks, and cables. If you notice any signs of wear, damage, or misalignment, replace or repair these components promptly.

Step 7: Install a Dampening Device

  1. Install a Dampening Device: Some companies offer dampening devices specifically designed to slow down the closing speed of a garage door. These devices can be installed on the inside of the garage door and provide a controlled closing motion.

Step 8: Educate Family Members

  1. Teach Proper Usage: Educate everyone in your household about the importance of gently closing the garage door. Emphasize that forcefully slamming the door can lead to damage and unnecessary wear.

Step 9: Maintain Regularly

  1. Perform Routine Maintenance: Regular maintenance is essential for preventing garage door issues, including slamming. Perform routine checks, lubrication, and adjustments to keep the door operating smoothly.

Step 10: Seek Professional Help

  1. Consult a Professional: If you’re unsure about adjusting spring tension, installing a closer, or making adjustments to the garage door opener settings, it’s best to consult a professional garage door technician. They can provide expert guidance and ensure that adjustments are made safely and effectively.

By following these steps and addressing the contributing factors, you can prevent your Garage Door Repair Colleyville TX from slamming and maintain its proper functionality. Regular maintenance, adjustments, and proper usage habits will contribute to a longer-lasting and quieter garage door.

Colleyville Gates & Garage Doors

6508 Colleyville Blvd, Colleyville, TX 76034, United States

1-817-755-6231

How Much Does it Cost to Replace a Garage Door-Colleyville Garage Door and Gates

Replacing a Garage Door Repair Colleyville TX can be a significant investment for homeowners. The cost of replacement can vary depending on several factors, including the size of the door, the type of material used, the level of insulation, and the installation costs.

In this article, we will discuss these factors and provide a comprehensive guide to help you estimate the cost of replacing your garage door.

Factors that Affect the Cost of Replacing a Garage Door:

  1. Size of the Door: The size of your garage door will have a significant impact on the cost of replacement. Generally, the larger the door, the more expensive it will be to replace. Garage doors are typically available in standard sizes, including 8×7 feet, 9×7 feet, and 10×7 feet. If you have a non-standard size garage door, you may need to order a custom door, which will be more expensive.
  2. Material: The material used to make the garage door will also affect the cost of replacement. The most common materials used for garage doors include wood, steel, aluminum, and fiberglass. Wood doors are generally the most expensive, while steel and aluminum doors are less expensive. Fiberglass doors are the least expensive, but they are not as durable as other materials.
  3. Insulation: Insulated garage doors are becoming increasingly popular among homeowners because they can help reduce energy costs and provide better temperature control in the garage. The level of insulation you choose will also affect the cost of replacement. Generally, the more insulation a door has, the more expensive it will be.
  4. Installation Costs: The cost of installation will depend on the complexity of the installation process and the contractor you hire. Some contractors may charge more for installation if they need to remove and dispose of the old garage door, while others may charge a flat rate for installation.

Estimating the Cost of Replacing a Garage Door:

To estimate the cost of replacing a garage door, you should consider the following factors:

  1. Size of the Door: As mentioned earlier, the size of the door will have a significant impact on the cost of replacement. Standard garage doors typically range from $600 to $2,500, depending on the material and level of insulation. Custom doors can cost significantly more.
  2. Material: The cost of the material will also vary depending on the type of material you choose. Wood doors can cost between $1,200 and $4,000, while steel doors can cost between $600 and $1,500. Aluminum doors typically cost between $700 and $2,000, while fiberglass doors can cost between $300 and $1,500.
  3. Insulation: The cost of insulation will depend on the type and level of insulation you choose. Single-layer doors are typically the least expensive, while triple-layer doors are the most expensive. You can expect to pay anywhere from $100 to $1,000 more for an insulated door.
  4. Installation Costs: The cost of installation will vary depending on the complexity of the installation process and the contractor you hire. You should expect to pay anywhere from $200 to $500 for installation, depending on the contractor you choose.

In summary, the cost of replacing a Garage Door Repair Colleyville TX can range from $600 to $4,000 or more, depending on the size, material, level of insulation, and installation costs. To get an accurate estimate of the cost of replacing your garage door, you should contact a professional contractor in your area. They can provide you with a detailed estimate based on the specific needs of your garage. Remember that replacing your garage door can add value to your home, improve curb appeal, and provide better security for your belongings.

Colleyville Garage Door and Gates

Colleyville Doors and Gates
102 Williamsburg Ct Suit 1C
Colleyville, TX 76034

817-904-4816

How Lubricate Garage Door – Colleyville Door and Gates

Maintaining a Garage Door Repair Colleyville TX can be an important aspect of ensuring its longevity and smooth operation. One of the key maintenance tasks is lubricating the various moving parts of the door, such as the hinges, rollers, and tracks.

In this article, we will go through a step-by-step guide on how to lubricate a garage door, with detailed explanations of each step.

Step 1: Gather the necessary materials

Before you begin, make sure you have all the necessary materials. This includes a can of silicone-based lubricant (preferably one designed specifically for garage doors), a clean rag or towel, and a ladder.

Step 2: Clean the door and tracks

Before applying any lubricant, it is important to clean the door and tracks thoroughly. This can be done using a mild detergent and warm water, or a specialized garage door cleaner. Use the rag or towel to wipe down the door and tracks, removing any dirt, debris, or residue.

Step 3: Inspect the door and tracks

While cleaning the door and tracks, take the opportunity to inspect them for any signs of wear and tear or damage. Look for any cracks or gaps in the tracks, loose or missing bolts, or bent or broken rollers. If you notice any issues, you may need to repair or replace these parts before lubricating the door.

Step 4: Lubricate the hinges

Start by lubricating the hinges that attach the door to the track. Apply a small amount of lubricant to each hinge, making sure to get the lubricant inside the hinge where the pin rotates. Use the rag or towel to wipe away any excess lubricant.

Step 5: Lubricate the rollers

Next, lubricate the rollers that run along the tracks. Apply lubricant to each roller, again making sure to get the lubricant inside the roller where it spins on the shaft. Roll the door up and down a few times to distribute the lubricant evenly.

Step 6: Lubricate the tracks

Now it’s time to lubricate the tracks themselves. Apply a small amount of lubricant to the inside of each track, where the rollers move. Be careful not to apply too much lubricant, as this can attract dirt and debris and cause the door to become clogged.

Step 7: Lubricate the springs

If your garage door has springs, you can also lubricate them to ensure smooth operation. Apply a small amount of lubricant to each spring, making sure to get the lubricant on all sides of the spring. Be careful not to apply too much lubricant, as this can cause the spring to slip and lose tension.

Step 8: Test the door

Once you have lubricated all the moving parts, test the door to make sure it is working smoothly. Open and close the door a few times to ensure that it is moving freely and without any creaking or squeaking. If you notice any issues, such as the door sticking or making unusual noises, you may need to reapply lubricant or inspect the door for any additional issues.

Step 9: Schedule regular maintenance

Regular maintenance can help extend the life of your garage door and keep it operating smoothly. In addition to lubricating the moving parts, you should also schedule regular inspections and maintenance checks, especially if you notice any issues with the door or tracks. A professional garage door technician can provide routine maintenance services, such as adjusting the tension on the springs or replacing worn-out parts.

In conclusion, lubricating a Garage Door Repair Colleyville TX is an important maintenance task that can help extend the life of your door and keep it operating smoothly. By following the steps outlined in this article, you can ensure that your garage door remains in good working condition for years to come.

Colleyville Door and Gates

817-904-4816