How Do I Fix The Cable On My Garage Door – Lantana Gates & Garage Doors

Garage Door Repair Lantana TX work in conjunction with the springs to facilitate the smooth opening and closing of your garage door.

These cables bear the weight of the door and ensure it moves evenly, preventing imbalances and potential accidents.

1. Cable Off the Drum

A common problem is the cable slipping off the drum. This can occur due to wear and tear, improper installation, or sudden tension changes.

2. Frayed Cables

Frayed cables are a result of extended usage and exposure to the elements. They weaken over time, compromising the door’s stability.

3. Snapped Cables

Cables can snap due to excessive tension or corrosion. A snapped cable can lead to the door becoming unbalanced and, in some cases, crashing down.

Tools You’ll Need

Before attempting to fix your garage door cable, gather the necessary tools: locking pliers, a winding bar, a wrench, safety glasses, and a ladder.

Step-by-Step Guide to Fixing Garage Door Cables
1. Ensure Safety First

Before you begin any repairs, disconnect the garage door opener, and ensure the door is in the closed position. This prevents accidental opening during the repair process.

2. Release Tension

Using a winding bar, release tension from the garage door springs. This is crucial for safely working on the cables.

3. Secure the Door

Use locking pliers to secure the door in place. This prevents it from accidentally falling while you work on the cables.

4. Remove the Old Cable

Carefully detach the damaged or snapped cable from the garage door. If it’s off the drum, guide it back into place.

5. Inspect the Drum and Pulley System

Check the drum and pulley system for any damage or misalignment. Address any issues before installing the new cable.

6. Install the New Cable

Thread the new cable through the pulley system and secure it to the drum. Ensure it’s properly aligned to prevent future issues.

7. Adjust the Cable Tension

Gradually wind the springs to restore tension to the cable. Be cautious and follow the manufacturer’s recommendations for proper tension levels.

8. Test the Door

After completing the repairs, test the door’s functionality by opening and closing it to ensure smooth operation.

When to Seek Professional Help

While some cable repairs are DIY-friendly, complex issues may require professional assistance. If you’re unsure or uncomfortable with the repair process, it’s safer to consult a garage door technician.

Tips for Preventing Future Cable Issues
  • Schedule regular inspections to catch cable wear early.
  • Keep the cables lubricated to reduce friction and prevent fraying.
  • Avoid DIY cable repairs if you’re not confident in your abilities.
Conclusion:

Fixing your Garage Door Repair Lantana TX is a manageable task with the right knowledge and tools. By understanding common cable issues and following our step-by-step guide, you can ensure your garage door operates smoothly and safely. Remember, safety should always be your top priority.

Lantana Gates & Garage Doors

1180 Central Way, Lantana, TX 76226, United States

1-940-400-3038

How To Get A Replacement Garage Door Remote – Lantana Gates & Garage Doors

When you find yourself in the unfortunate situation of needing a replacement Garage Door Repair Lantana TX, the process might initially seem daunting.

However, fear not—getting a new remote is usually a straightforward task. Here’s a comprehensive guide to help you navigate the process effectively.

1. Identify Your Garage Door Opener Model: The first step is crucial—locate the model number of your garage door opener. Typically, you can find this on a label attached to the motor unit. This information is vital for ensuring you purchase a remote that is compatible with your specific opener.

2. Check the Frequency: Garage door remotes operate on different frequencies, commonly 315 MHz or 390 MHz. It’s imperative to determine the frequency of your existing remote, as this information will guide you in selecting a replacement.

3. Visit the Manufacturer’s Website: Most garage door opener manufacturers have an online presence with a support or parts section. Visit the official website and look for information on replacement remotes. Enter your opener’s model number to find compatible accessories.

4. Contact Customer Support: If the online information is insufficient, consider reaching out to the manufacturer’s customer support. A quick call can save you time and effort. Provide them with your opener’s model number, and they can guide you through the process of selecting the right remote.

5. Local Garage Door Dealer: Visit a local garage door dealer or a home improvement store. These establishments often have knowledgeable staff who can assist you in finding the right replacement remote. Bring your opener’s model number for reference.

6. Universal Remotes: Consider a universal garage door remote. These remotes are designed to work with a variety of opener models. They often come with programming instructions that allow you to sync them with your specific opener.

7. Online Retailers: Explore online retailers such as Amazon, eBay, or specialized garage door remote websites. Use your opener’s model number and frequency as search parameters to find a replacement remote. Pay attention to customer reviews to ensure the remote’s reliability.

8. Read Reviews: Before finalizing a purchase, take the time to read customer reviews. Real-world experiences can provide insights into the reliability and compatibility of the remote you are considering.

9. Programming the Remote: Once you have the replacement remote, follow the programming instructions provided in the manual. This typically involves a specific sequence of button presses on both the remote and the garage door opener. Be patient and follow the steps carefully.

10. Keep the Manual: Save the manual and any programming instructions that come with the new remote. These documents can be valuable for future reference, especially if you need to reprogram the remote or troubleshoot any issues.

11. Professional Installation: If you find programming the remote challenging or encounter difficulties, consider hiring a professional garage door technician. They have the expertise to ensure the remote is correctly configured with your opener.

12. Dispose of the Old Remote Securely: If your old remote is lost or stolen, take precautions. Erase its codes from the opener’s memory to prevent unauthorized access. Refer to your opener’s manual for instructions on how to perform this security measure.

By following these steps, you can navigate the process of getting a replacement Garage Door Repair Lantana TX with confidence. Remember to be diligent in selecting the right remote for your opener model and frequency, and enjoy the convenience of a smoothly operating garage door.

Lantana Gates & Garage Doors

1180 Central Way, Lantana, TX 76226, United States

1-940-400-3038

How To Install Single Garage Door – Coppell Gates & Garage Doors


Installing a single Garage Door Repair Lantana TX is a complex task that requires careful planning, precise measurements, and attention to detail.

It’s important to follow manufacturer instructions and safety guidelines throughout the process. This guide will outline the general steps for installing a single garage door. Please note that specific instructions may vary depending on the type and brand of the door you’re installing, so be sure to consult the manufacturer’s instructions that come with your garage door.

Materials and Tools Needed:

Before you start, gather all the necessary materials and tools:

Materials:

  1. Single garage door kit with tracks and hardware
  2. Garage door opener (optional)
  3. Nails or screws
  4. Weatherstripping
  5. Concrete anchors (if attaching to a masonry wall)
  6. Lubricant for hinges and rollers
  7. Insulation (optional)

Tools:

  1. Tape measure
  2. Level
  3. Hammer
  4. Screwdriver
  5. Electric drill
  6. Wrenches
  7. Saw (for trimming tracks if needed)
  8. Safety glasses
  9. Ladder
  10. Helper (recommended for certain steps)

: Prepare the Opening

Measure the garage door opening width and height accurately. Follow the manufacturer’s guidelines for proper measurements.

Ensure the opening is square. Use a level to check for plumb and a square to check for squareness. Adjust as needed.

: Assemble the Tracks

Follow the manufacturer’s instructions to assemble the vertical and horizontal tracks. Cut them to the required length if necessary.

Install the vertical tracks on both sides of the opening. Ensure they are plumb and secure them to the wall with anchors or sturdy brackets.

: Install the Springs and Hardware

Install the torsion or extension springs as per the manufacturer’s instructions. Be cautious, as these can be dangerous if mishandled.

Attach the hinges and rollers to the door sections, following the manufacturer’s guidelines.

: Hang the Door

With the help of a friend or a garage door installation assistant, carefully lift the garage door into place, resting it on the tracks.

Make sure the door is level and that there is a small gap at the bottom for clearance. Adjust the tracks if needed.

: Install the Garage Door Opener (Optional)

If you’re installing an opener, follow the manufacturer’s instructions to mount the motor unit to the ceiling and attach the opener’s arm to the door.

Connect the opener to a power source and program the remote control.

: Secure the Door

Attach the horizontal and curved tracks to the vertical tracks securely.

Install any additional hardware, such as cables and safety brackets, as specified in the manufacturer’s instructions.

: Test the Door

Manually raise and lower the garage door a few times to ensure it moves smoothly.

Test the garage door opener, if installed, to make sure it operates correctly.

: Add Weatherstripping

Install weatherstripping along the sides and bottom of the door to seal gaps and keep out drafts.

: Insulate the Door (Optional)

If you want to insulate your garage, consider adding insulation panels to the door. Follow the manufacturer’s instructions for this step.

: Final Adjustments

Make any final adjustments to the tracks, springs, and opener if necessary to ensure the door operates smoothly and safely.

: Safety Checks

Ensure all safety features, such as photoelectric sensors and auto-reverse mechanisms, are functioning correctly.

: Maintenance

Periodically lubricate the hinges, rollers, and springs to keep the door operating smoothly.

Regularly inspect the door for signs of wear and tear, and replace any damaged parts promptly.

This guide provides a general overview of the installation process for a Garage Door Repair Lantana TX. Always follow the manufacturer’s specific instructions for your door and opener. If you are unsure about any step or if you encounter difficulties during installation, it is advisable to consult a professional garage door installer for assistance to ensure a safe and secure installation.

Coppell Gates & Garage Doors

440 Shadowcrest Ln, Coppell, TX 75019, United States

1-972-449-7776

Factors to Consider When Selecting a Garage Door Material – Lantana Gates & Garage Doors

Choosing the right garage door material is a significant decision for any homeowner. As someone who recently went through the process of selecting a garage door material, I understand the importance of considering various factors to ensure that the choice aligns with your needs, preferences, and budget.

In reference to Garage Door Repair, I’ll share my insights into the factors to consider when selecting a garage door material, helping you make an informed decision that enhances the functionality, aesthetics, and security of your home.

The Role of Your Garage Door

Before we dive into the specific factors to consider, it’s essential to understand the role your garage door plays in your daily life and the overall functionality of your home:

1. Security: A garage door is a critical barrier that protects your home and belongings. It should provide a high level of security to deter potential intruders.

2. Curb Appeal: The garage door is one of the most visible parts of your home’s exterior. It significantly contributes to your home’s curb appeal and overall aesthetics.

3. Energy Efficiency: An insulated garage door can help regulate the temperature in your garage, which can impact the energy efficiency of your home, especially if the garage is attached.

4. Durability: Garage doors are subjected to various weather conditions, including rain, snow, and extreme temperatures. The material you choose should be durable and able to withstand these challenges.

5. Maintenance: Some materials require more maintenance than others. Consider your willingness and ability to perform regular maintenance when choosing a material.

Factors to Consider When Selecting a Garage Door Material

Now, let’s explore the key factors to consider when choosing a garage door material:

1. Budget: Your budget is a significant factor in your decision-making process. Garage door materials vary in price, so it’s essential to choose one that aligns with your financial constraints. Keep in mind that while some materials may have a higher upfront cost, they can save you money in the long run due to lower maintenance requirements.

2. Durability: Consider how well the material stands up to wear and tear, weather, and potential damage. Some materials are more durable than others and are better suited for areas with harsh weather conditions or high usage.

3. Maintenance Requirements: Different materials have varying maintenance needs. Wood, for example, may require regular staining or painting, while aluminum or steel doors are typically low-maintenance. Assess your willingness and ability to perform the necessary maintenance tasks.

4. Insulation: If energy efficiency is a priority, choose a garage door material that offers adequate insulation. Insulated doors help regulate the temperature in your garage and can lead to energy savings in your home.

5. Aesthetics: Consider the visual appeal of the material and how well it complements your home’s style and architecture. Some materials, like wood, offer a classic and natural look, while others, like steel, provide a modern and sleek appearance.

6. Security Features: Evaluate the security features of the material. A secure garage door is essential for protecting your home and belongings. Look for materials that offer strong locks and panels resistant to forced entry.

7. Weight: The weight of the garage door material can impact the operation of your door. Make sure your garage door opener and tracks can support the weight of the chosen material.

8. Climate: Consider your local climate when selecting a garage door material. Materials that are resistant to moisture, rust, and corrosion are ideal for regions with high humidity or frequent rainfall.

9. Noise Level: Some materials, like wood, can be quieter when operated than others. If noise is a concern, choose a material that offers quieter operation.

10. Longevity: Investigate the expected lifespan of the garage door material. High-quality materials tend to last longer and provide a better return on investment.

11. Environmental Impact: If environmental considerations are important to you, look for materials that are sustainable and eco-friendly. Some materials, such as steel, can be recycled.

Common Garage Door Materials

Let’s explore some common garage door materials and their characteristics:

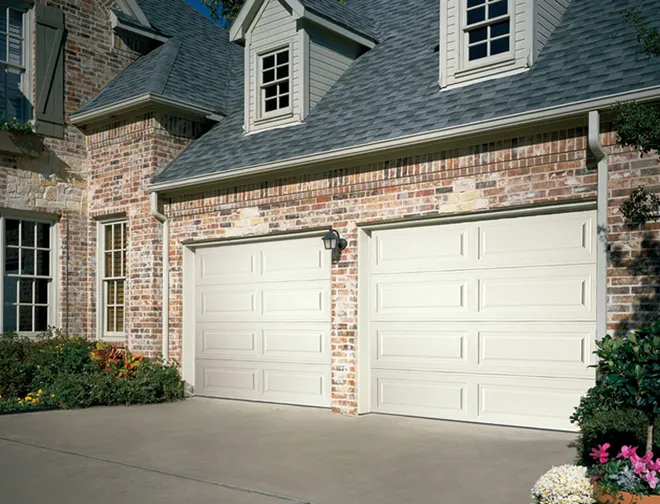
1. Steel: Steel garage doors are popular due to their durability, security, and low maintenance. They are available in various styles and can be insulated for energy efficiency. Steel doors are a cost-effective option with a long lifespan.

2. Wood: Wooden garage doors offer a classic and natural appearance that can enhance the curb appeal of your home. They can be customized to match your home’s architecture. However, wood doors typically require more maintenance, including staining or painting, to protect against moisture and pests.

3. Aluminum: Aluminum garage doors are lightweight, resistant to rust, and low-maintenance. They come in a variety of styles and can be a good choice for contemporary homes. However, they may not provide as much insulation as other materials.

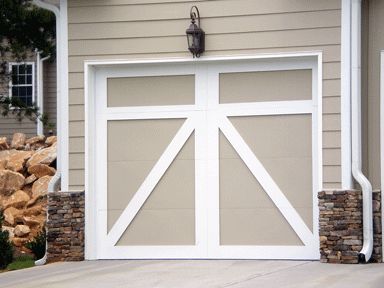
4. Vinyl: Vinyl garage doors are durable, resistant to dents, and require minimal maintenance. They are available in various designs and can be insulated for energy efficiency. Vinyl doors are a great choice for homeowners seeking a low-maintenance option.

5. Fiberglass: Fiberglass garage doors are lightweight, resistant to dents, and can mimic the appearance of wood. They are a good choice for coastal areas as they are resistant to saltwater corrosion. Fiberglass doors are relatively low-maintenance.

6. Composite: Composite garage doors combine the benefits of multiple materials, often featuring a wood-like appearance with the durability of steel or fiberglass. They are low-maintenance and provide good insulation.

Making Your Decision

Selecting the right garage door material requires careful consideration of your priorities, budget, and local climate. Here are some steps to help you make an informed decision:

1. Prioritize Your Needs: Determine what aspects are most important to you, whether it’s security, aesthetics, energy efficiency, or low maintenance.

2. Set a Budget: Define your budget for the garage door project, including installation costs.

3. Research Options: Explore the characteristics and benefits of various garage door materials.

4. Consult Professionals: Seek advice from garage door specialists or installers who can provide insights based on your specific needs and preferences.

5. Request Quotes: Obtain quotes from multiple dealers and installers to compare pricing for different materials and styles.

6. Consider Long-Term Value: Think about the long-term value and potential savings that come with choosing a durable and energy-efficient material.

7. Assess Maintenance Commitment: Be honest about your willingness to perform regular maintenance, and choose a material that aligns with your maintenance capabilities.

In conclusion, according to Garage Door Repair, selecting the right garage door material involves careful consideration of various factors. By understanding your priorities and budget, researching material options, and consulting professionals, you can make a well-informed decision that enhances the functionality, aesthetics, and security of your home. Whether you prioritize durability, energy efficiency, or aesthetics, there’s a garage door material that can meet your needs and provide lasting value for your home.

Lantana Gates & Garage Doors

1180 Central Way, Lantana, TX 76226, United States

940-400-3038v

How To Paint Metal Garage Doors – Lantana Gates & Garage Doors

Metal Garage Door Repair Lantana TX are a popular choice due to their durability and low maintenance requirements. However, over time, they can lose their luster and may require a fresh coat of paint to enhance their appearance and protect them from the elements.

Painting your metal garage doors can be a rewarding DIY project that not only adds curb appeal to your home but also prolongs the life of your doors. In this comprehensive guide, we will walk you through the step-by-step process of painting metal garage doors.

Materials You Will Need

Before you begin painting your metal garage doors, gather the necessary materials and tools:

  1. Safety equipment: Safety goggles, gloves, and a dust mask.
  2. Drop cloths or plastic sheets to protect the surrounding area.
  3. A ladder or scaffolding, if needed, to reach higher sections of the door.
  4. Paint scraper or wire brush for removing loose paint and rust.
  5. Sandpaper (80-120 grit) for smoothing rough surfaces.
  6. A bucket of soapy water and a sponge or rag for cleaning the doors.
  7. Rust-inhibiting primer suitable for metal surfaces.
  8. High-quality exterior metal paint in your preferred color.
  9. Paint rollers, brushes, and paint trays.
  10. Painter’s tape for masking off areas you don’t want to paint.
  11. Stir sticks and paint can opener.

: Prepare the Area

Start by preparing the area around the garage doors:

  1. Move any vehicles or objects away from the doors to create a clear workspace.
  2. Lay down drop cloths or plastic sheets to protect the ground from paint splatter.
  3. Remove any outdoor decor, such as house numbers or door handles, that may be in the way.

: Safety First

Put on your safety gear, including goggles, gloves, and a dust mask, to protect yourself from potential hazards during the painting process.

: Clean the Surface

Cleaning the garage door is crucial to ensure proper adhesion of the paint. Follow these steps:

  1. Mix warm, soapy water in a bucket.
  2. Use a sponge or rag to thoroughly clean the surface of the door, removing dirt, dust, and grime.
  3. Rinse the door with clean water and allow it to dry completely before proceeding.

: Remove Loose Paint and Rust

Inspect the garage door for loose paint and rust spots. To remove them:

  1. Use a paint scraper or wire brush to gently scrape away any loose paint or rust.
  2. Sand the affected areas with 80-120 grit sandpaper until they are smooth and even.
  3. Wipe away the dust with a clean, dry cloth.

: Mask and Protect

Apply painter’s tape to mask off any areas you don’t want to paint, such as windows or decorative elements around the door.

: Prime the Surface

Priming is essential for metal surfaces to ensure proper paint adhesion and prevent rust. Follow these steps:

  1. Stir the rust-inhibiting primer thoroughly.
  2. Use a paintbrush or roller to apply a thin, even coat of primer to the entire garage door.
  3. Allow the primer to dry according to the manufacturer’s instructions.

: Paint the Garage Door

Now it’s time to apply the paint:

  1. Stir the exterior metal paint well to ensure an even consistency.
  2. Pour some paint into a paint tray.
  3. Use a paint roller or brush to apply an even coat of paint to the garage door.
  4. Start at the top and work your way down, using long, smooth strokes to minimize brush marks.
  5. Be careful not to apply the paint too thickly, as it may drip or sag.

: Allow to Dry

Let the first coat of paint dry completely, usually for at least 24 hours. Check the paint can for specific drying times.

: Apply Additional Coats

Apply a second coat of paint following the same process as the first coat. Depending on the color and coverage, you may need to apply a third coat as well. Allow each coat to dry thoroughly.

: Remove Masking and Clean Up

Once the final coat is dry, carefully remove the painter’s tape and any masking. Clean your brushes and rollers with appropriate cleaning agents, following the instructions on the paint cans.

Conclusion:

Painting your metal Garage Door Repair Lantana TX can rejuvenate the look of your home while providing necessary protection against the elements. By following these steps and using high-quality materials, you can achieve a professional-looking finish that will last for years. Remember to take your time, and with patience and care, your metal garage doors will look as good as new.

Lantana Gates & Garage Doors

1180 Central Way, Lantana, TX 76226, United States

1-940-400-3038

How To Relatch Garage Door Opener – Lantana Gates & Garage Doors

Relatching a Garage Door Repair Lantana TX opener involves reconnecting the garage door to the opener’s carriage or trolley after it has been manually disengaged, typically for purposes like manual operation during a power outage or maintenance.

Here’s a step-by-step guide on how to relatch a garage door opener:

Step 1: Identify the Emergency Release Cord
Locate the emergency release cord on the garage door opener. This cord is usually red and hangs from the trolley or carriage of the opener. It’s used to disengage the door from the opener, allowing for manual operation.

Step 2: Close the Garage Door
If the garage door is open, gently close it fully. This will ensure that the trolley or carriage is positioned in the correct location for relatching.

Step 3: Pull the Emergency Release Cord
Pull the emergency release cord down and away from the garage door opener motor. This will disengage the trolley or carriage from the opener’s drive mechanism. The door should now be in manual mode, and you should be able to open and close it manually.

Step 4: Move the Door to the Closed Position (if needed)
If the garage door is not already in the closed position, carefully move it down to the fully closed position using your hands. This is important for relatching the door to the opener.

Step 5: Relatch the Door to the Opener
To relatch the garage door to the opener’s trolley or carriage, follow these steps:

  1. With the garage door fully closed, gently push the door upward a few inches. This will engage the trolley or carriage with the attachment point on the door’s top section.
  2. While holding the door in this slightly raised position, release the emergency release cord. The trolley or carriage should now be reconnected to the door.

Step 6: Test the Door Operation
Test the garage door opener to make sure the door is properly relatched and functioning. Press the wall control button or remote control to open and close the door. The opener should operate as expected, moving the door smoothly.

Step 7: Re-Engage the Garage Door Opener (if applicable)
If you’re done with any manual tasks or maintenance that required the door to be disengaged, you can re-engage the opener by pulling the emergency release cord back toward the opener motor. This will lock the trolley or carriage back into place with the drive mechanism.

Step 8: Perform Safety Tests
After relatching the garage door opener, it’s a good practice to perform some safety tests to ensure the door is functioning safely and correctly. Test the auto-reverse feature by placing a block of wood on the ground under the door’s path. When the door contacts the wood, it should automatically reverse.

Step 9: Lubricate Moving Parts
As part of regular garage door maintenance, consider lubricating the moving parts of the garage door system, including rollers, hinges, and springs. This can help ensure smooth and quiet operation.

Step 10: Regular Maintenance
Regularly inspect and maintain your garage door and opener to prevent issues and ensure proper functionality. Lubricate moving parts, tighten bolts and screws, and address any signs of wear or damage promptly.

Relatching a Garage Door Repair Lantana TX opener is a simple process that requires careful attention to safety and proper procedure. If you encounter any difficulties or if you’re unsure about any step, consult your garage door opener’s manual or consider seeking professional assistance from a garage door technician. Your safety and the proper functioning of your garage door are of utmost importance.

Lantana Gates & Garage Doors

1180 Central Way, Lantana, TX 76226, United States

1-940-400-3038

The Top Garage Door Trends for Modern Homes – Lantana Gates & Garage Doors

As a homeowner who values the perfect blend of functionality and style, I’ve been on an exciting journey tracking the transformation of garage door designs over the years. In the world of modern homes, garage doors have evolved from mere functional necessities to becoming integral components of a home’s overall aesthetic. In this article, I’m thrilled to share my discoveries regarding the top garage door trends that have been making waves in the design realm.

According to Garage Door Repair, these trends not only elevate the curb appeal of contemporary homes but also capture the essence of innovation, technology, and timeless elegance that resonates with me.

  1. Sleek and Minimalistic Designs: My Aesthetic Choice

The allure of clean lines and simplicity speaks to my design preferences. I’m drawn to sleek, minimalistic garage doors that feature smooth surfaces, subtle textures, and hardware that seamlessly blends with the door’s overall design. These doors effortlessly harmonize with my home’s architecture, creating a sophisticated and uncluttered appearance.

  1. Embracing Contemporary Materials

The innovative use of materials has breathed new life into garage door design. I’m particularly captivated by the incorporation of glass, aluminum, and composite materials that are redefining the conventional norms. Glass panels, in particular, infuse a sense of transparency and modernity, allowing natural light to grace the interiors and making a bold statement from the outside.

  1. Bold Colors and Unconventional Finishes: A Burst of Personality

The era of neutral garage door shades is behind us. Bold colors and unconventional finishes have captured my attention, adding a distinct personality and character to the exterior of my home. I find myself drawn to deep blacks, rich blues, and even vibrant reds, as these colors inject a vibrant energy into the overall design.

  1. Seamless Smart Technology Integration: A New Dimension of Convenience

The smart home revolution has expanded to include garage doors. The ability to control my garage doors remotely through smartphone apps has added a layer of convenience and security. This innovation lets me open and close my garage doors from anywhere, aligning perfectly with my modern lifestyle.

  1. Expressing Individuality Through Customization

The trend of customization has taken garage doors to a new level. I’m intrigued by the option to personalize my garage door’s design, whether it’s through geometric patterns, monograms, or even commissioned artwork. Customization empowers me to transform my garage door into a canvas for self-expression.

  1. Innovative Opening Mechanisms: Space-Saving Solutions

In cases where space is at a premium, I’m drawn to bi-fold and vertical opening garage doors. These ingenious designs fold either vertically or horizontally, offering practical solutions without compromising on style or functionality.

  1. Playing with Mixed Materials and Textures

The fusion of mixed materials and textures is a trend that resonates with my design sensibilities. I’m captivated by the interplay of wood, glass, and metal, which adds depth and visual intrigue to the design, making it a tactile experience as well.

  1. Hidden Hardware and Mechanisms: A Streamlined Aesthetic

For a clean and streamlined aesthetic, hidden hardware and mechanisms have captured my interest. This design approach eliminates visual clutter and directs the focus toward the door’s elegant design.

  1. Prioritizing Energy Efficiency

The growing emphasis on sustainability has led me to consider energy-efficient garage doors. Insulated doors contribute to temperature regulation, reduced energy consumption, and overall energy efficiency—an essential factor in modern living.

  1. Blending Tradition and Modernity with Transitional Designs

Transitional garage door designs bridge the gap between classic and contemporary styles—a blend of the best of both worlds. These designs seamlessly incorporate modern elements while paying homage to timeless aesthetics.

  1. Strategic Window Placement and Designs

Windows play a pivotal role in garage door design. I appreciate strategically placed windows that infuse visual interest and break up the expanse of the door. Frosted or tinted glass maintains my privacy while allowing the warmth of natural light to permeate.

  1. Vertical Grooves and Patterns: Adding Dimension

Vertical grooves and patterns have captured my imagination as well. These design elements add a layer of depth and texture to the garage door, transforming it into a captivating focal point that complements my home’s exterior.

  1. Embracing Rustic and Industrial Inspirations

I’m intrigued by the infusion of rustic and industrial aesthetics into garage door designs. The allure of doors with reclaimed wood, distressed finishes, and industrial hardware appeals to my appreciation for unique character.

  1. Embracing Minimalistic Hardware

The allure of minimalism extends to garage door hardware. I gravitate toward minimalistic handles, hinges, and other hardware elements that contribute to a cohesive and understated look, aligning with my overall modern aesthetic.

Overall, as stated from Garage Door Repair, my journey through the landscape of garage door design has been a fascinating one. From sleek minimalism to personalized customization, and from the integration of smart technology to the exploration of mixed materials, these trends celebrate the synergy between function and aesthetics. By embracing these top garage door trends, I’ve elevated my home’s curb appeal while staying true to my contemporary sensibilities. The incorporation of bold colors, the fusion of materials, and the commitment to energy efficiency—all of these trends showcase the seamless integration of design and practicality. My modern garage doors have become not just functional elements but also stunning statements of elegance that blend seamlessly with the architecture of my home.

Lantana Gates & Garage Doors

1180 Central Way, Lantana, TX 76226, United States

940-400-3038

How to Adjust Travel Limits on Chamberlain Garage Door-Lantana Garage & Overhead Doors

Adjusting the travel limits on a Chamberlain Garage Door Repair Lantana TX is a relatively simple process that can be done by following a few steps. The travel limits control how far the garage door opens and closes, ensuring it stops at the desired positions. Before adjusting the travel limits, it is essential to make sure the garage door is properly balanced and functioning correctly.

Here’s a step-by-step guide to adjusting the travel limits on a Chamberlain garage door:

  1. Prepare the Tools: Gather the necessary tools before you begin. You will need a ladder, a flathead screwdriver or a similar tool for adjusting the limit screws, and possibly a stepladder, depending on the height of your garage ceiling.
  2. Locate the Adjustment Screws: Identify the limit adjustment screws on the garage door opener unit. These screws are usually located on the back or sides of the opener near the motor head. There are typically two screws labeled “Up” and “Down” or “Open” and “Close.”
  3. Open the Garage Door Completely: Ensure that the garage door is fully open. Use a ladder if necessary to reach the opener unit. Make sure the ladder is secure and stable before climbing it.
  4. Adjust the Upward Travel Limit: Locate the “Up” or “Open” limit adjustment screw. Turn it clockwise to decrease the opening distance or counterclockwise to increase it. Adjust the screw in small increments, no more than a quarter turn at a time.Start by turning the screw counterclockwise to increase the opening distance if the door doesn’t open fully. If the door opens too far, turn the screw clockwise to decrease the opening distance.
  5. Close the Garage Door Completely: Once you have adjusted the upward travel limit, close the garage door fully using the wall-mounted control button or remote opener. Make sure the door closes smoothly and securely.
  6. Adjust the Downward Travel Limit: With the door closed, locate the “Down” or “Close” limit adjustment screw on the opener unit. Similar to the previous step, turn the screw clockwise to decrease the closing distance or counterclockwise to increase it.If the door does not close fully, turn the screw counterclockwise to increase the closing distance. If the door closes too far or hits the floor forcefully, turn the screw clockwise to decrease the closing distance.
  7. Test the Adjustments: Open the garage door using the wall-mounted control button or remote opener. The door should open to the desired height, as adjusted in step 4. Next, close the door using the same controls and ensure it closes fully without any issues.
  8. Fine-Tuning: If necessary, make further adjustments to fine-tune the travel limits. Repeat steps 4 to 7 as needed until the door opens and closes to the desired positions smoothly and accurately.
  9. Safety Precautions: Throughout the adjustment process, be cautious and attentive to avoid any accidents or injuries. Keep hands and fingers away from moving parts, and never stand directly under the garage door while it is in motion.

It’s important to note that the above instructions are general guidelines for adjusting the travel limits on a Chamberlain Garage Door Repair Lantana TX opener. However, specific models may have slightly different procedures, so it’s always recommended to consult the owner’s manual provided by Chamberlain for your particular model. The manual will provide detailed instructions and any model-specific considerations to ensure proper adjustment of the travel limits.

Lantana Garage & Overhead Doors

3501 FM 407 #15, Lantana, TX 76226

940-400-3038