How Do I Clean Windows Without Streaks? – Squeaky Clean Windows

Window Cleaning Service Southlake TX can transform the appearance of any space, adding brightness and clarity to your surroundings.

However, achieving streak-free windows can be a challenge for many. In this comprehensive guide, we’ll explore effective techniques and tips to help you clean your windows without streaks, ensuring a sparkling finish every time.

Understanding the Problem

What Causes Streaks on Windows?

Streaks on windows often result from residual dirt, improper cleaning methods, or the use of unsuitable cleaning products. When cleaning solution is not properly removed, or when windows are wiped with a dirty cloth, streaks can form, diminishing the overall cleanliness and aesthetic appeal of the glass.

Common Mistakes in Window Cleaning

  1. Using Paper Towels: While convenient, paper towels can leave behind lint and fibers, leading to streaks on your windows.
  2. Overusing Cleaning Solution: Excessive use of cleaning solution can leave residue behind, which can result in streaks once it dries.
  3. Cleaning in Direct Sunlight: Cleaning windows in direct sunlight can cause the cleaning solution to dry too quickly, increasing the likelihood of streaks forming.

Essential Tools and Supplies

Before we begin, gather the following tools and supplies:

  1. Microfiber cloth or squeegee
  2. Distilled white vinegar or commercial window cleaning solution
  3. Spray bottle
  4. Bucket
  5. Water

Step-by-Step Cleaning Process

1. Prepare the Cleaning Solution

Mix equal parts distilled white vinegar and water in a spray bottle. Alternatively, use a commercial window cleaning solution diluted according to the manufacturer’s instructions.

2. Remove Dust and Debris

Before applying the cleaning solution, use a dry microfiber cloth to gently remove any dust, dirt, or debris from the surface of the window.

3. Apply the Cleaning Solution

Spray the cleaning solution onto the window, ensuring thorough coverage. Avoid oversaturating the window to prevent streaks.

4. Wipe Away the Solution

Using a clean microfiber cloth or squeegee, wipe away the cleaning solution in a vertical or horizontal motion. Start from the top of the window and work your way down to prevent drips.

5. Buff to Shine

Once the solution has been wiped away, use a dry microfiber cloth to buff the window, removing any remaining streaks and enhancing its shine.

Additional Tips for Streak-Free Windows

  1. Choose the Right Time: Clean your windows on a cloudy day or when the sun is not directly shining on them to prevent the cleaning solution from drying too quickly.
  2. Work in Sections: Divide large windows into smaller sections to ensure thorough cleaning and prevent the solution from drying before you can wipe it away.
  3. Use a Squeegee: For larger windows, a squeegee can be a more efficient tool for removing cleaning solution and preventing streaks.

Conclusion:

With the right tools, techniques, and attention to detail, achieving streak-free windows is entirely feasible. By avoiding common cleaning mistakes, selecting suitable cleaning products, and following a systematic approach, you can enjoy clear, sparkling windows that enhance the overall appeal of your space.

Squeaky Clean Windows

2140 E Southlake Blvd L629, Southlake, TX 76092, United States

1-817-938-7654

Removing Hard Water Stains? – Squeaky Clean Windows

Window Cleaning Service Southlake TX are a common nuisance in many households, leaving unsightly marks on surfaces such as glass, tile, and metal fixtures.

In this article, we’ll explore the causes of hard water stains and provide effective tips and techniques for removing them using both natural remedies and commercial products.

Understanding Hard Water Stains

Hard water stains are caused by mineral deposits, primarily calcium and magnesium, that are left behind when water evaporates. These minerals can accumulate on surfaces over time, forming stubborn stains that can be challenging to remove. Common areas affected by hard water stains include:

  • Glass shower doors
  • Bathroom and kitchen faucets
  • Tile and grout
  • Stainless steel sinks and appliances

Natural Remedies for Removing Hard Water Stains

  1. Vinegar and Water Solution: White vinegar is a natural acid that can dissolve mineral deposits and effectively remove hard water stains. Mix equal parts vinegar and water in a spray bottle, spray the solution onto the stained surface, and let it sit for a few minutes before wiping clean with a cloth or sponge.
  2. Baking Soda Paste: Baking soda is a mild abrasive that can help scrub away stubborn hard water stains. Mix baking soda with a small amount of water to form a paste, apply the paste to the stained area, and scrub gently with a sponge or brush until the stains are removed.
  3. Lemon Juice: The acidic properties of lemon juice can also help dissolve hard water stains. Squeeze fresh lemon juice onto the stained surface, let it sit for a few minutes, and then scrub with a sponge or brush before rinsing thoroughly with water.

Commercial Products for Removing Hard Water Stains

  1. Acidic Cleaners: Many commercial cleaners contain acidic ingredients such as hydrochloric acid or phosphoric acid, which can effectively dissolve mineral deposits and hard water stains. Be sure to follow the manufacturer’s instructions carefully and use these products in well-ventilated areas.
  2. Lime Scale Removers: Lime scale removers are specifically formulated to target calcium and magnesium deposits commonly found in hard water stains. These products often contain strong acids or chelating agents that break down mineral deposits for easy removal.

Techniques for Removing Stubborn Hard Water Stains

  1. Scrubbing with Abrasive Materials: For stubborn hard water stains that won’t budge with liquid cleaners alone, try scrubbing the affected area with an abrasive material such as a nylon scrub pad or steel wool. Be cautious not to scratch or damage delicate surfaces.
  2. Using a Pumice Stone: A pumice stone can be an effective tool for removing hard water stains from surfaces such as toilets and ceramic tile. Wet the pumice stone and gently rub it over the stained area until the stains are lifted. Be sure to test the stone on a small, inconspicuous area first to ensure it won’t scratch the surface.

Preventative Measures to Avoid Hard Water Stains

  1. Installing a Water Softener: A water softener can help prevent the formation of hard water stains by removing minerals from the water before it enters your home’s plumbing system. This can prolong the life of your appliances and fixtures and reduce the need for frequent cleaning.
  2. Regular Cleaning Routine: Incorporating regular cleaning into your household routine can help prevent hard water stains from building up in the first place. Wipe down surfaces with a squeegee or towel after each use, and clean with vinegar or other acidic cleaners on a weekly or bi-weekly basis to keep stains at bay.

Conclusion:

Window Cleaning Service Southlake TX can be a frustrating problem to deal with, but with the right techniques and products, they can be effectively removed from surfaces throughout your home. Whether you opt for natural remedies like vinegar and baking soda or commercial cleaners designed specifically for hard water stains, regular maintenance and preventative measures can help keep your home looking clean and pristine.

Squeaky Clean Windows

2140 E Southlake Blvd L629, Southlake, TX 76092, United States

1-817-938-7654

What Is The Best Microfiber Cloth For Window Cleaning – DFW Window Cleaning Colleyville

Selecting the right microfiber cloth for Window Cleaning Service Colleyville TX is crucial to achieving streak-free and crystal-clear results. With a plethora of options available, it can be challenging to identify the best microfiber cloth for your specific window cleaning needs.

In this comprehensive guide, we’ll explore the key factors to consider and recommend some top choices to help you achieve optimal results in your window cleaning routine.

1. Microfiber Cloth Characteristics: Microfiber cloths are made of tiny fibers that are significantly finer than human hair. These fibers have unique properties that make them highly effective for cleaning purposes. When choosing a microfiber cloth for window cleaning, consider the following characteristics:

  • Fiber Quality: Look for high-quality microfiber cloths with fine, densely woven fibers. The quality of the fibers determines the cloth’s ability to trap and lift dirt, dust, and streak-inducing particles.
  • Density: Higher density microfiber cloths tend to be more effective because they have more fibers per square inch, providing greater cleaning power.
  • Absorbency: A good window cleaning microfiber cloth should have high absorbency to quickly absorb cleaning solutions and water, leaving the windows dry and streak-free.
  • Lint-Free: Opt for lint-free microfiber cloths to avoid leaving lint or fibers behind on the windows. Lint can compromise the clarity of the glass and create additional cleaning challenges.

2. Types of Microfiber Cloths: Microfiber cloths come in various types, each designed for specific purposes. When selecting a microfiber cloth for window cleaning, consider the following types:

  • Glass Cleaning Cloths: Some microfiber cloths are specifically designed for glass surfaces, making them ideal for window cleaning. These cloths often have a smoother texture to glide over the glass effortlessly.
  • Dual-Purpose Cloths: Many high-quality microfiber cloths are versatile and can be used for both general cleaning and window cleaning. These cloths are designed to be effective on various surfaces, including glass.
  • Waffle Weave Cloths: Waffle weave microfiber cloths have a textured pattern that enhances their cleaning capabilities. They are effective for scrubbing away dirt and grime from windows without leaving streaks.

3. Recommended Microfiber Cloths for Window Cleaning:

  • 1. Zwipes Microfiber Cleaning Cloths:
    • Features: Zwipes Microfiber Cleaning Cloths are highly absorbent and lint-free, making them suitable for streak-free window cleaning. They are versatile and can be used for various cleaning tasks.
    • Material: 80% polyester, 20% polyamide.
    • Density: 110,000 fibers per square inch.
  • 2. AmazonBasics Microfiber Cleaning Cloth:
    • Features: AmazonBasics Microfiber Cleaning Cloths are budget-friendly and effective for window cleaning. They are suitable for multiple surfaces and are machine washable for reuse.
    • Material: 90% polyester, 10% nylon.
    • Density: Not specified.
  • 3. MagicFiber Microfiber Cleaning Cloths:
    • Features: MagicFiber Microfiber Cleaning Cloths are designed for electronics but are also excellent for delicate window surfaces. They are soft, lint-free, and highly effective.
    • Material: 80% polyester, 20% polyamide.
    • Density: Not specified.
  • 4. E-Cloth Window Cleaning Pack:
    • Features: The E-Cloth Window Cleaning Pack includes specialized cloths for cleaning windows and polishing. The cloths are designed to remove dirt, grease, and over 99% of bacteria.
    • Material: 80% polyester, 20% polyamide.
    • Density: Not specified.
  • 5. Kirkland Signature Ultra High Pile Premium Microfiber Towels:
    • Features: Kirkland Signature Microfiber Towels have a high pile and are suitable for various cleaning tasks, including windows. They are soft, absorbent, and durable.
    • Material: Not specified.
    • Density: Not specified.

4. Tips for Using Microfiber Cloths for Window Cleaning:

  • Dampen the Cloth: Lightly dampen the microfiber cloth with a suitable window cleaning solution or water. Excess moisture can lead to streaks, so avoid oversaturation.
  • Use a Separate Cloth for Drying: After cleaning the window with a damp microfiber cloth, use a dry microfiber cloth to ensure a streak-free and polished finish.
  • Fold, Don’t Wad: Fold the microfiber cloth into quarters or use it in a folded manner. This provides multiple cleaning surfaces and ensures that you’re using a clean section as you work across the window.
  • Wash Regularly: Keep your microfiber cloths clean by washing them regularly. Use a mild detergent, and avoid fabric softeners as they can reduce the cloth’s effectiveness.
  • Inspect for Damage: Regularly inspect your microfiber cloths for signs of damage, such as fraying or excessive wear. Damaged cloths may not clean as effectively and could scratch glass surfaces.
  • Avoid Harsh Chemicals: While microfiber is generally resistant to many chemicals, it’s best to avoid harsh chemicals, especially ammonia-based cleaners, which can compromise the integrity of the microfiber and potentially damage window tint.

Conclusion:

Choosing the best microfiber cloth for Window Cleaning Service Colleyville TX involves considering the characteristics of the cloth, its intended purpose, and your specific cleaning needs. High-quality microfiber cloths with fine fibers, high density, and lint-free properties are ideal for achieving streak-free and clear windows. Whether opting for specialized glass cleaning cloths or versatile dual-purpose cloths, selecting the right microfiber cloth will contribute to the success of your window cleaning routine.

DFW Window Cleaning Colleyville

1808 Maplewood Trail, Colleyville, TX 76034, United States

1-817-813-8010

What Is The Best Way To Clean Windows With Wooden Frames – Plano Window Cleaning & Glass Repair

Plano Window Cleaning Service exude warmth and charm, adding character to any space. However, cleaning them requires a delicate touch to ensure their longevity and beauty.

In this guide, we’ll explore the best way to clean windows with wooden frames, combining effective cleaning methods with a focus on preserving the integrity of the wood.

Understanding Wooden Window Frames

Wooden window frames, while aesthetically pleasing, are susceptible to damage from moisture and harsh cleaning chemicals. Understanding the unique characteristics of wood is crucial when determining the best cleaning approach.

Types of Wood

Different types of wood require varied care. Hardwoods like oak or mahogany may be more resilient, while softer woods like pine demand gentler cleaning.

Sealing and Finishing

The presence of seals or finishes on the wood affects its reaction to cleaning agents. Sealed wood may be less prone to water damage but could be sensitive to certain chemicals.

Gather Your Cleaning Supplies

Before diving into the cleaning process, assemble the necessary supplies to ensure a smooth and effective experience.

Gentle Wood Cleaner

Opt for a wood-specific cleaner or create a mild solution using a mixture of water and vinegar or dish soap. Avoid harsh chemicals that could damage the wood.

Soft Microfiber Cloths

Soft, lint-free microfiber cloths are ideal for wiping and drying wooden surfaces without scratching or leaving fibers behind.

Soft Bristle Brush

For hard-to-reach areas and intricate details on the frames, a soft bristle brush will help dislodge dust and debris gently.

Distilled Water

If using water in your cleaning solution, opt for distilled water to prevent any mineral deposits on the wood.

Dusting and Preparing the Window Area

Gentle Dusting

Start by dusting the wooden frames using a dry, soft cloth or a soft brush. This removes loose dirt and prevents scratching during the cleaning process.

Protecting the Glass

Cover the glass with a cloth or a layer of newspaper to shield it from cleaning solutions. This ensures that any splatters won’t affect the clarity of the glass.

Applying the Cleaning Solution

Testing in a Small Area

Before applying the cleaner to the entire frame, test it in a small, inconspicuous area to ensure compatibility with the wood and finishes.

Wiping with Care

Dampen a microfiber cloth with the cleaning solution and gently wipe the wooden frame. Follow the natural grain of the wood to prevent streaks and ensure even cleaning.

Addressing Stubborn Stains

For stubborn stains, use a soft brush dipped in the cleaning solution. Avoid excessive scrubbing, as this could damage the wood.

Drying and Polishing

Thorough Drying

After cleaning, use a dry microfiber cloth to thoroughly dry the wooden frame. Lingering moisture can lead to water damage or mold growth.

Optional Polishing

Consider applying a wood polish or wax after cleaning to enhance the luster of the wood. Ensure the product is suitable for your specific type of wood.

Regular Maintenance Tips

Consistent Dusting

Regularly dust the wooden frames to prevent the accumulation of dirt and grime. This simple step can significantly extend the life of your windows.

Annual Inspection

Perform an annual inspection of the frames, checking for any signs of wear, damage, or the need for resealing.

Conclusion:

In conclusion, Plano Window Cleaning Service with wooden frames requires a thoughtful and gentle approach. By understanding the characteristics of the wood, choosing the right cleaning supplies, and following a systematic cleaning process, you can ensure that your windows remain both clean and beautiful.

Plano Window Cleaning & Glass Repair

1201 Legacy Dr #2114, Plano, TX 75023, United States

1-972-544-1373

How Do I Clean Windows Without A Squeegee – NRH Window Cleaning & Glass Repair

Windows, the portals to the outside world from the comfort of our homes, often bear the brunt of nature’s elements. Keeping them pristine can be a challenge, especially when you find yourself Window Cleaning Service North Richland Hills TX.

Fret not, for we’re about to embark on a journey of window-cleaning wizardry without the traditional tool. In this guide, we’ll explore innovative techniques, household items, and a sprinkle of DIY magic to leave your windows sparkling like never before.

The Magic Elixir:

1. The Vinegar-Water Alchemy

White vinegar, a kitchen staple, transforms into a potent window-cleaning elixir when mixed with water. Achieving the perfect ratio is crucial, so let’s delve into the science of streak-free brilliance. Mix one part vinegar with two parts water for a concoction that dissolves dirt and grime, leaving your windows gleaming without the need for a squeegee.

2. Lemon Zest for Windows’ Best

Step into the world of citrus freshness with a homemade lemon solution. Lemons, with their natural degreasing properties, can be your secret weapon against stubborn stains. Extract the juice of a lemon, mix it with water, and witness the magic unfold as your windows regain their luster.

3. Baking Soda Brilliance

For windows burdened with heavy-duty grime, baking soda comes to the rescue. Create a baking soda paste by mixing it with water, apply it to the affected areas, and let it sit for a few minutes. This gentle abrasive will scrub away the toughest stains, proving that you don’t need a squeegee for a spotless finish.

Tools of the Trade:

4. Microfiber Marvel

Enter the realm of microfiber cloths, where softness meets efficiency. These gentle yet effective cloths trap dirt without leaving scratches, ensuring a streak-free finish. Ditch the squeegee, grab a microfiber cloth, and watch as your windows transform under its tender touch.

5. Newspaper: Not Just for Reading

Surprisingly, newspapers can be your allies in achieving spotless windows. The ink’s composition, when combined with a vinegar solution, creates a powerful cleaning agent. Wipe your windows with a crumpled newspaper for a streak-free polish that rivals squeegee results.

6. Rubber Gloves: More Than Just Hand Protection

Unleash the versatility of rubber gloves in your window-cleaning arsenal. Simply dampen the gloves, run your fingers along the window surface, and witness how static electricity attracts and lifts away dust. No squeegee needed—just the transformative power of rubber gloves.

Expert Tips for Challenging Situations

7. Banishing Hard Water Stains

Hard water stains can be persistent, but fear not. A mixture of vinegar and lemon juice, applied with a soft cloth, can break down these mineral deposits. Bid farewell to hard water stains, proving that even without a squeegee, your windows can shine.

8. Dust Be Gone: Prevention and Cure

Dusty windows can dull the sheen of your home. To minimize dust buildup, regularly dust window sills and frames. For a more extended dust-free period, consider applying a thin layer of furniture wax. Your windows will stay cleaner for longer, no squeegee required.

9. Pet Prints: A Furry Dilemma Solved

Pet owners, rejoice! Tackling paw prints on windows doesn’t require a squeegee. Mix warm water with a drop of dish soap, dampen a microfiber cloth, and gently wipe away those adorable but pesky prints. Enjoy a clear view without compromising on cuddle time.

Embracing Technology:

10. Robotic Window Cleaners: The Future Beckons

Step into the future with robotic window cleaners. These autonomous devices are designed to navigate and clean your windows effortlessly. While an initial investment, their efficiency and hands-free operation make them a worthy substitute for the traditional squeegee.

11. High-Tech Solutions for Modern Living

Explore the world of high-tech window cleaning solutions. Smart sprays and innovative tools are revolutionizing the way we approach window cleaning. Embrace the convenience of technology and bid farewell to the limitations of a squeegee.

Conclusion:

In conclusion, achieving sparkling Window Cleaning Service North Richland Hills TX is not only feasible but also an exciting exploration of household items, DIY solutions, and cutting-edge technology. Embrace the alternatives, experiment with different methods, and witness the transformation of your windows into crystal-clear showcases.

NRH Window Cleaning & Glass Repair

7510 Davis Blvd # B, North Richland Hills, TX 76182, United States

1-817-601-6082

What Is The Best Time Of Day To Clean Windows – Southlake Window Cleaning & Glass Repair

Understanding Window Cleaning Service Southlake TX involves a combination of scientific insights and practical considerations.

Clean windows not only allow more natural light into your home but also contribute to a sense of cleanliness and well-being. Let’s delve into the details and discover the optimal times for achieving spotless, streak-free windows.

The Science Behind Window Cleaning

Before we dive into the ideal cleaning times, let’s explore the science behind the accumulation of dirt and pollutants on windows. Sunlight, while essential for our well-being, can reveal streaks and smudges that are invisible in lower light conditions. Dust and pollutants in the air can also cling to windows, affecting their clarity.

Morning Magic: Benefits of Cleaning Windows in the AM

Cleaning your windows in the morning has its own set of advantages. The soft morning sunlight helps in identifying streaks and imperfections that might be missed during other times of the day. Additionally, starting your day with a clear view outside can boost your productivity and set a positive tone.

Afternoon Allure: Why Window Cleaning is Ideal Midday

The midday sun provides optimal conditions for drying windows quickly and effectively. Cleaning your windows during this time ensures that streaks are less likely to form, and the enhanced natural lighting can showcase the cleanliness of your windows.

Golden Hour Gleam: Cleaning Windows in the Evening

The golden hour, with its warm and soft light, is an excellent time for window cleaning. As the sun sets, it illuminates any remaining streaks, allowing you to address them before the day concludes. Cleaning your windows in the evening also provides a sense of accomplishment and relaxation after a day’s work.

Nighttime Notions: Cleaning Windows at Night

While cleaning windows at night may seem unconventional, it can be practical in certain situations. Adequate indoor lighting allows you to spot streaks, and preparing your windows for the next day’s sunlight can be a satisfying routine.

Weather Matters: Choosing the Right Conditions

Regardless of the time of day, it’s crucial to consider weather conditions. Avoid extreme temperatures, as they can impact the effectiveness of cleaning solutions. Rain can also affect the cleanliness of windows, so it’s advisable to choose dry days for optimal results.

Cleaning Supplies: Must-Haves for Sparkling Windows

To achieve sparkling windows, it’s essential to use the right cleaning supplies. Consider eco-friendly options and DIY cleaning solutions to minimize environmental impact. This section will provide a detailed list of must-have supplies for effective window cleaning.

Common Mistakes to Avoid in Window Cleaning

Even with the best intentions, window cleaning mistakes can happen. This section will highlight common errors to avoid, such as overlooking corners and edges, and using abrasive materials that can damage your windows over time.

Tips for Apartment Dwellers: Window Cleaning Simplified

Living in an apartment comes with its own set of challenges, especially when it comes to cleaning windows. This section will offer practical tips for maximizing natural light in limited space and ensuring safety for those residing in high-rise buildings.

The Psychology of Clean Windows: Impact on Mood

Research has shown a clear link between cleanliness and mental well-being. Clean windows contribute to a positive indoor environment, enhancing mood and reducing stress. This section will explore the psychological benefits of maintaining clean windows.

Windows and Curb Appeal: First Impressions Matter

Whether you’re a homeowner or looking to sell your property, the cleanliness of windows significantly contributes to curb appeal. This section will discuss how clean windows can boost property value and play a crucial role in real estate.

Eco-Friendly Practices: Cleaning Windows Without Harming the Environment

As environmental awareness grows, it’s essential to adopt eco-friendly practices in all aspects of life, including window cleaning. This section will provide tips on choosing sustainable cleaning products and proper disposal methods to minimize environmental impact.

DIY vs. Professional Window Cleaning:

Deciding between a DIY approach and hiring a professional for window cleaning depends on various factors. This section will weigh the pros and cons of both options, helping readers make an informed decision based on their specific needs and preferences.

Conclusion:

In conclusion, Window Cleaning Service Southlake TX depends on various factors, including sunlight, weather conditions, and personal preferences. Whether you prefer the morning magic, afternoon allure, golden hour gleam, or even nighttime notions, regular window maintenance is key to a clean and inviting living space.

Southlake Window Cleaning & Glass Repair

1052 Summerplace Ln, Southlake, TX 76092, United States

1-817-839-4773

Interior vs. Exterior Window Cleaning: Which Comes First? – DFW Window Cleaning Coppell

As a homeowner who takes pride in maintaining a clean and welcoming living space, I’ve often found myself pondering the age-old question: should I start with interior window cleaning or tackle the exterior first? It’s a question that may seem trivial, but it can make a significant difference in your window cleaning routine.

In this article, I’ll share my insights and experiences to help you decide whether to start with interior or exterior window cleaning and the reasons behind your choice by following Window Cleaning Coppell TX.

The Battle of Prioritization

Before delving into the nuances of interior vs. exterior window cleaning, let’s acknowledge that both are essential. Clean windows inside and out contribute to the overall cleanliness and appearance of your home, allowing natural light to flood your living spaces and providing unobstructed views of the outdoors.

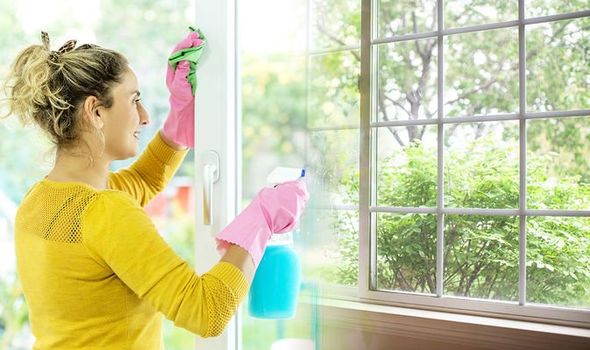
The Interior Perspective

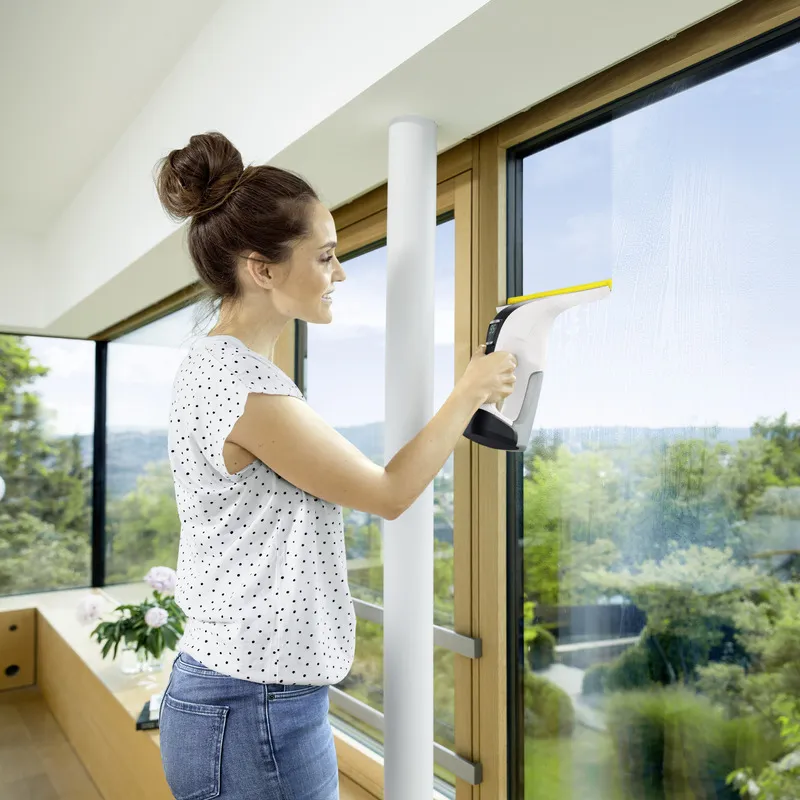
Interior window cleaning is often the more straightforward and less intimidating of the two tasks. You’re working within the comfort of your home, where you have easy access to supplies, light, and a controlled environment.

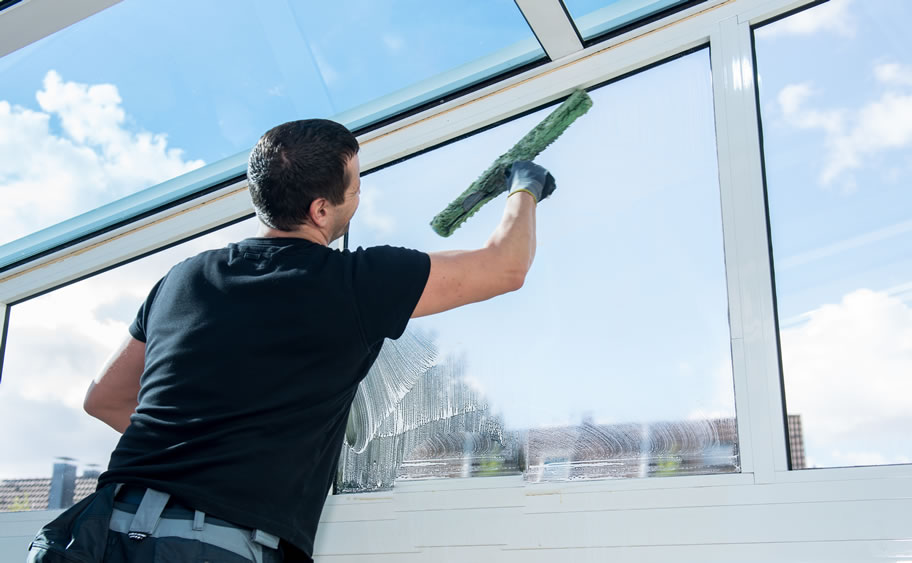
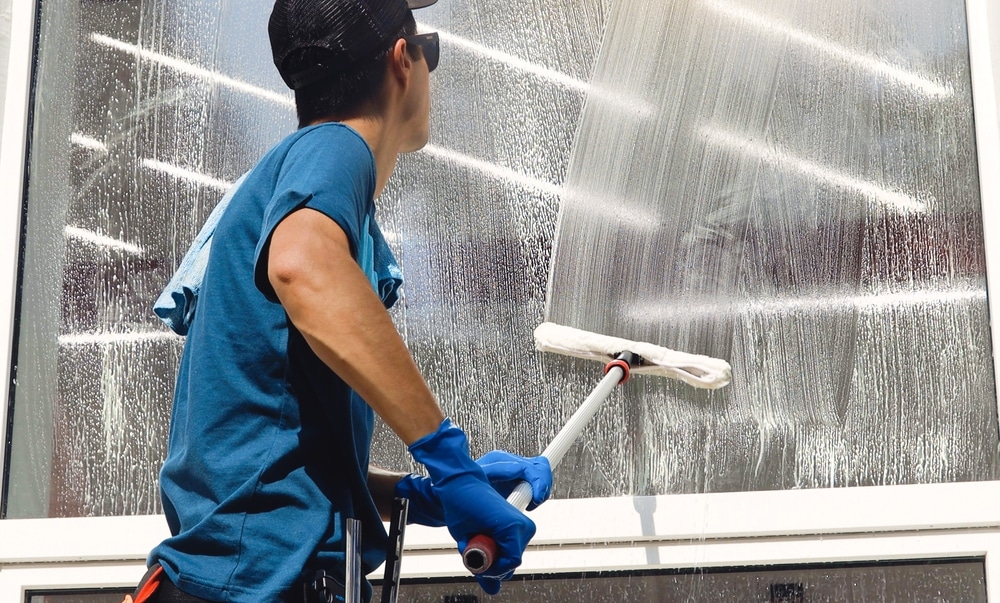
The Exterior Challenge

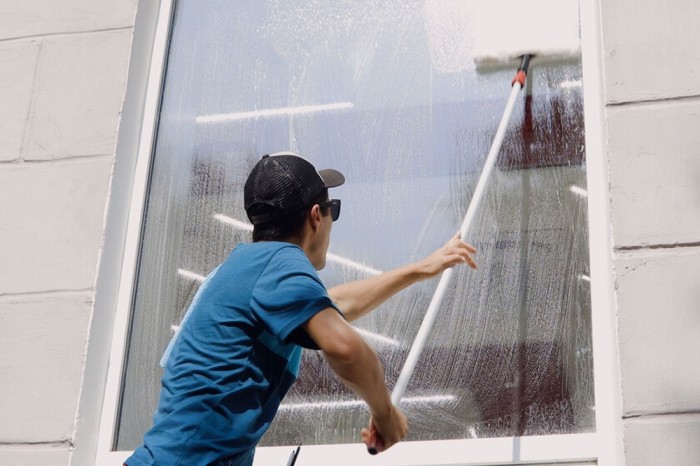
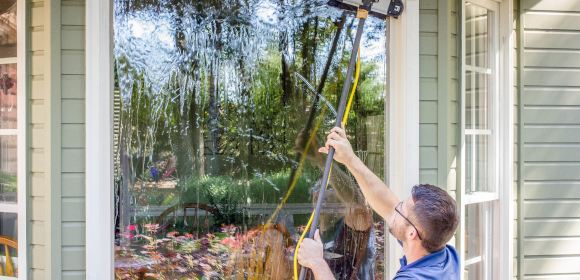
Exterior window cleaning, on the other hand, can be a bit more daunting. It involves outdoor conditions, the need for equipment like ladders or extension poles, and, sometimes, a dose of bravery for those hard-to-reach windows.

The Case for Starting with the Interior

Starting with interior window cleaning has several advantages:

1. Immediate Gratification

Cleaning the interior windows allows you to see instant results. The satisfaction of having crystal-clear windows in your living spaces is both motivating and rewarding.

2. Convenience

You’re already indoors, where all your cleaning supplies and equipment are readily available. There’s no need to carry buckets of water or cleaning solutions outdoors.

3. Comfort and Safety

Interior window cleaning takes place in a controlled environment, reducing the risk of accidents or exposure to outdoor elements like heat, cold, or inclement weather.

4. Accessibility

Cleaning the interior windows doesn’t require special equipment like ladders or extension poles, making it accessible to most homeowners.

The Argument for Starting with the Exterior

While beginning with interior window cleaning has its merits, there are compelling reasons to consider starting with the exterior:

1. Dirt Prevention

Cleaning the exterior first helps prevent dirt, pollen, and environmental debris from transferring to the interior windows during the cleaning process.

2. Top-Down Approach

Starting with the exterior allows for a logical top-down cleaning sequence. Any drips or streaks from exterior cleaning can be easily addressed when you move indoors.

3. Safety Considerations

Exterior window cleaning often involves more hazardous situations, such as working at heights. Starting with the exterior when you have more energy and focus can enhance safety.

4. Time Efficiency

Completing the exterior cleaning first ensures that your outdoor window surfaces are pristine, providing a pleasant view while you tackle the interior.

Finding the Right Sequence for You

The choice between starting with interior or exterior window cleaning ultimately depends on your preferences, experience, and circumstances. Here’s a step-by-step guide to help you decide:

Step 1: Assess Your Comfort Level

Consider your comfort level with outdoor cleaning and the equipment required. If you’re confident and have the necessary tools, starting with the exterior may be a good choice.

Step 2: Weather Considerations

Check the weather forecast. If you anticipate unfavorable conditions, such as rain or extreme temperatures, it might be wiser to start with interior window cleaning.

Step 3: Equipment Availability

Assess whether you have all the equipment and supplies needed for exterior window cleaning. If not, make sure to acquire or rent the necessary tools.

Step 4: Time Management

Consider your available time and energy. If you have a limited window of time for cleaning, it may be more efficient to start with the side that requires more effort or attention.

Step 5: The “Dirty Test”

Conduct a quick “dirty test” by examining your windows. If the exterior appears significantly dirtier than the interior, you may want to begin with exterior cleaning.

My Preferred Approach

In my own experience, I’ve found that my cleaning routine often begins with exterior window cleaning. Here’s why:

1. Preventing Dirt Transfer

By starting outside, I avoid transferring dirt or streaks from the exterior to the interior during the cleaning process. This ensures that my freshly cleaned indoor windows remain spotless.

2. Safety First

I prioritize safety when working outdoors. Cleaning exterior windows can sometimes involve heights or tricky angles, so I prefer to tackle these challenges when I’m fresh and alert.

3. A Top-Down Flow

I find it satisfying to follow a logical top-down cleaning sequence. Beginning with the highest exterior windows and working my way down allows for efficient use of time and resources.

4. Immediate Satisfaction

Once the exterior windows are clean, I can enjoy a clear view of the outdoors while working on the interior. This provides immediate gratification and motivation to complete the cleaning process.

Tips for Efficient Window Cleaning

Regardless of whether you choose to start with interior or exterior window cleaning, here are some tips to make the process efficient and effective:

1. Gather Supplies

Before you begin, gather all the necessary cleaning supplies, including microfiber cloths, squeegees, a bucket, a cleaning solution, and any extension poles or ladders you may need.

2. Dust First

Remove loose dust and debris from window frames and sills using a soft brush or duster. This prevents dirt from being transferred to the glass during cleaning.

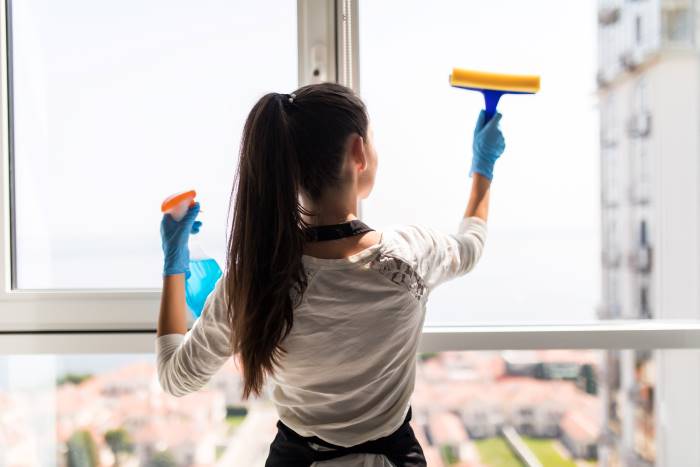
3. Use the Right Cleaning Solution

Choose an appropriate cleaning solution for your windows. Homemade solutions like vinegar and water or commercial glass cleaners work well.

4. Work in Sections

Divide large windows into smaller sections to ensure thorough cleaning. This approach prevents the cleaning solution from drying before you have a chance to wipe it off.

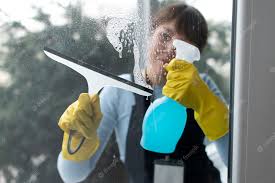
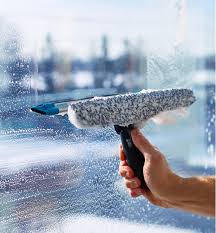
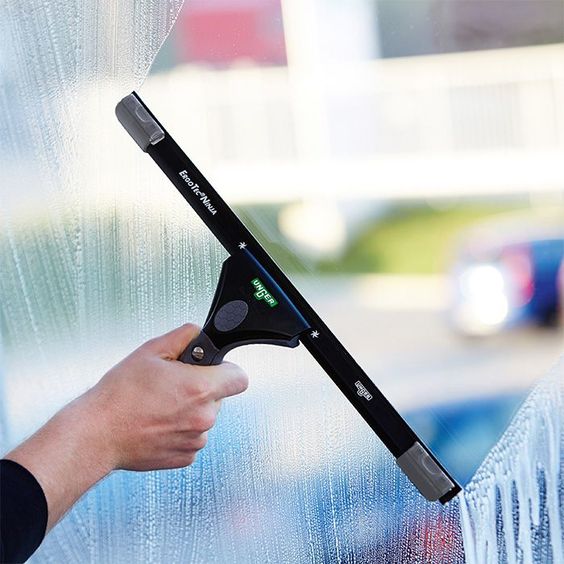
5. Squeegee Technique

For streak-free results, use a squeegee to remove the cleaning solution from the glass. Start at the top and pull the squeegee down in a straight line, wiping the blade after each pass.

6. Dry and Polish

Finish by drying the glass with a clean, dry microfiber cloth or paper towels. This step helps eliminate any remaining streaks and leaves your windows sparkling.

Overall, as stated in Window Cleaning Service Coppell TX, the choice of whether to start with interior or exterior window cleaning ultimately comes down to your individual preferences and circumstances. There is no one-size-fits-all answer, and the key is to find a sequence that works best for you and allows you to achieve pristine, clear windows.

Whether you begin inside or outside, the satisfaction of looking through crystal-clear windows, free from streaks and smudges, is well worth the effort. So, as you embark on your next window cleaning adventure, consider your priorities, assess your resources, and choose the sequence that aligns with your preferences and goals. In the end, it’s all about creating a bright and inviting living space that you can take pride in.

DFW Window Cleaning Coppell

842 Dalmalley Ln, Coppell, TX 75019, United States

469-809-1532

Cleaning Windows in Coastal Areas: Salt and Sea Spray – DFW Window Cleaning Mckinney

The sound of crashing waves, the scent of salty sea air, and the panoramic views of the ocean make coastal living a dream come true. However, with the perks of living near the coast come unique challenges, especially when it comes to home maintenance. One such challenge is the relentless assault of salt and sea spray on your windows. Having spent years living in a coastal paradise, I’ve learned the ins and outs of cleaning windows in salt-infused coastal areas.

In this article, I’ll share my experiences and insights on keeping your windows crystal clear, even in the face of sea spray and salt-laden air based from McKinney Window Cleaning.

Coastal Living: A Unique Window Cleaning Challenge

Living by the coast has its undeniable allure, but it also comes with its share of maintenance tasks, including the upkeep of your home’s windows. Coastal regions are characterized by a high concentration of salt in the air, courtesy of the nearby ocean. This salt, along with sea spray, can wreak havoc on your windows, leaving them streaked, hazy, and corroded if not properly maintained.

1. Understanding the Impact of Salt and Sea Spray

Salt in the air can combine with moisture and settle on your windows, forming a stubborn, crusty residue. Meanwhile, sea spray, driven by ocean breezes and storms, carries microscopic salt particles that settle onto your windows’ glass and frames. Over time, this combination of salt and sea spray can lead to:

  • Corrosion: The salt’s corrosive properties can damage window frames and sills, particularly if they’re made of metal.
  • Streaks and Haze: Salt residue on the glass can create streaks and a hazy appearance that obstructs your view.
  • Reduced Transparency: The buildup of salt and sea spray can reduce the transparency of your windows, diminishing the amount of natural light that enters your home.

My Journey to Salt-Free Windows

Living in a coastal area, I quickly realized that keeping my windows clean required a bit more effort and attention than it did in landlocked regions. Here are the steps I’ve honed over the years for effectively cleaning windows in salt-infused coastal areas:

1. Gather Your Cleaning Arsenal

Before you embark on the task of cleaning coastal windows, ensure you have the right tools and supplies at your disposal:

  • Rubber Gloves: Protect your hands from cleaning solutions and salt residue.
  • Bucket: A bucket with a wide mouth is useful for mixing cleaning solutions and dipping your cleaning tools.
  • Squeegee: Invest in a high-quality squeegee with a rubber blade for streak-free results.
  • Soft Bristle Brush: A soft-bristle brush is essential for scrubbing window frames and sills.
  • Microfiber Cloths or Towels: Microfiber cloths are excellent for cleaning glass, as they are gentle and highly absorbent.
  • Cleaning Solution: Choose a mild and non-abrasive window cleaning solution. Avoid harsh chemicals that can damage glass or frames.
  • Vinegar: White vinegar can be an effective natural cleaner for removing salt residue.

2. Preparing for Cleaning

Before you begin cleaning your coastal windows, it’s essential to take a few preparatory steps:

  • Dust Removal: Use a soft brush or a duster to remove any loose dirt, dust, or cobwebs from the window frames and sills.
  • Protective Measures: Cover any nearby plants, outdoor furniture, or surfaces that may be affected by the cleaning solution.

3. The Window Cleaning Process

Here’s a step-by-step guide to cleaning coastal windows effectively:

Step 1: Wet the Glass

Begin by wetting the glass with your chosen cleaning solution. A mixture of water and vinegar works well for removing salt residue.

Step 2: Scrub Gently

Use a soft bristle brush to gently scrub the glass and frames. Pay close attention to areas with noticeable salt buildup or corrosion.

Step 3: Squeegee It Clean

Next, use your squeegee to remove the cleaning solution from the glass. Start at the top and pull the squeegee downward in a straight line, wiping the blade clean after each pass. Repeat this process, slightly overlapping each stroke, until the entire window is clean.

Step 4: Wipe the Edges and Sills

After squeegeeing, use a clean, dry microfiber cloth or towel to wipe down the window edges, frames, and sills. This step is crucial for removing any remaining moisture or cleaning solution and preventing further salt buildup.

Step 5: Inspect and Touch-Up

Closely inspect the glass for any remaining streaks, salt residue, or spots. If you notice any, use a clean, dry cloth to touch up the area with a few gentle strokes until it’s perfectly clear.

4. Post-Cleaning Care

After you’ve completed the window cleaning process, there are a few additional steps to consider:

  • Rinse with Fresh Water: If you used vinegar or a commercial cleaning solution, it’s a good idea to rinse the windows with fresh water to ensure that all traces of the cleaning solution are removed.
  • Regular Maintenance: Living in a coastal area means that salt and sea spray will continually affect your windows. Consider implementing a regular maintenance routine to keep your windows looking their best.

The Rewards of Salt-Free Windows

In summary, as per McKinney Window Cleaning and as I look through my newly cleaned coastal windows, I’m reminded of the effort and care that goes into maintaining them. The view of the ocean, once obstructed by salt residue and streaks, is now pristine and captivating. Cleaning coastal windows is not just a chore; it’s a way to reconnect with the beauty of the sea and bring the outdoors into your home.

Cleaning windows in salt-infused coastal areas may require a bit more diligence, but the rewards are undeniable. The clarity of the glass allows you to fully appreciate the stunning coastal landscape while also ensuring that your windows and frames remain in good condition for years to come.

So, the next time you gaze out at the mesmerizing waves and the beauty of coastal living, take a moment to appreciate the clear, salt-free windows that allow you to enjoy this spectacular view every day.

DFW Window Cleaning Mckinney

10701 Smithville Pl, McKinney, TX 75071, United States

972-433-5793

Eco-Friendly Window Cleaning Practices – DFW Window Cleaning Colleyville

As a homeowner who is deeply committed to reducing my environmental footprint, I’ve embarked on a journey to adopt eco-friendly practices in every aspect of my life, including window cleaning. Clean and clear windows not only enhance the beauty of my home but also connect me with the outside world. However, I’ve discovered that achieving sparkling windows doesn’t have to come at the cost of harming the environment.

In this article, I’ll share my experiences and insights into eco-friendly window cleaning practices, allowing you to enjoy pristine windows while contributing to a greener planet based from Colleyville Window Cleaning.

The Importance of Eco-Friendly Window Cleaning

Before diving into the eco-friendly practices, it’s crucial to understand why they matter:

  1. Environmental Impact: Traditional window cleaning methods often involve the use of chemical-laden cleaning solutions that can harm aquatic ecosystems and contribute to pollution when washed down drains.
  2. Health and Well-being: Harsh chemicals in cleaning products can be harmful to your health when inhaled or absorbed through the skin. Eco-friendly alternatives are safer for you and your family.
  3. Sustainability: Embracing eco-friendly practices aligns with the principles of sustainability, which are essential for the long-term well-being of our planet.

Eco-Friendly Window Cleaning Practices: My Journey

  1. Homemade Cleaning Solutions: One of the most accessible and effective ways to adopt eco-friendly window cleaning practices is to make your cleaning solutions. Here’s a simple recipe I’ve found effective:
    • Mix equal parts water and white vinegar in a spray bottle.
    • Add a few drops of biodegradable dish soap.
    • Shake gently to combine.
    This homemade solution is not only cost-effective but also gentle on the environment, as it reduces the need for chemical-laden commercial cleaners.
  2. Reusable Cleaning Tools: Opt for reusable cleaning tools and materials, such as microfiber cloths, sponges, and scrubbers. Microfiber cloths, in particular, are highly effective at cleaning windows without the need for disposable paper towels.
  3. Minimal Water Usage: Eco-friendly window cleaning involves minimizing water waste. To achieve this, I use a bucket with just enough water to wet my cleaning cloth or sponge, reducing the amount of excess water that would otherwise be used in a hose or bucket.
  4. Rainwater Harvesting: Harvesting rainwater is a sustainable way to obtain water for window cleaning. I collect rainwater in barrels and use it for various household tasks, including window cleaning. Rainwater is naturally soft and free of the chlorine or minerals found in tap water, making it an eco-friendly choice.
  5. Biodegradable Squeegees and Scrubbers: When replacing my window cleaning tools, I opt for squeegees and scrubbers made from biodegradable materials. These tools break down naturally over time, reducing their environmental impact.
  6. Minimalistic Approach: Instead of overusing cleaning products, I take a minimalistic approach by using just enough solution to get the job done. This reduces chemical runoff and the amount of waste generated.
  7. Proper Disposal: When disposing of old cleaning products or containers, I follow proper disposal guidelines. This ensures that any potentially hazardous materials are handled and disposed of responsibly.
  8. Avoiding Harmful Ingredients: I read product labels carefully and avoid cleaning solutions that contain harmful ingredients such as ammonia, chlorine, and phosphates. These substances can harm aquatic life when they enter waterways.
  9. Vinegar and Baking Soda for Stubborn Stains: For particularly stubborn stains or mineral deposits on my windows, I turn to the power of vinegar and baking soda. A paste of baking soda and water can be used to gently scrub away stains, while vinegar can dissolve mineral deposits.
  10. Indoor Air Quality: I prioritize indoor air quality by ensuring proper ventilation while cleaning. Opening windows and doors allows fresh air to circulate, reducing exposure to indoor pollutants.

Benefits of Eco-Friendly Window Cleaning

My commitment to eco-friendly window cleaning practices has yielded several benefits, not only for the environment but also for my home and well-being:

  1. Reduced Environmental Impact: By avoiding harmful chemicals and minimizing water waste, I’m actively reducing my contribution to environmental pollution.
  2. Healthier Living Environment: Eco-friendly practices create a healthier indoor living environment, as there are no harsh chemical fumes or residues left behind.
  3. Cost Savings: Homemade cleaning solutions and reusable cleaning tools are cost-effective alternatives to commercial products, resulting in long-term savings.
  4. Sustainable Living: Adopting eco-friendly practices aligns with a sustainable lifestyle, promoting the responsible use of resources and a reduced ecological footprint.
  5. Aesthetic Appeal: Eco-friendly cleaning methods are just as effective at achieving sparkling windows as traditional methods. I enjoy the same beautiful, streak-free results without compromising on appearance.

Challenges and Solutions

While eco-friendly window cleaning practices offer numerous benefits, I’ve also encountered a few challenges along the way:

  1. Streaks and Residues: Achieving streak-free windows with homemade solutions can be challenging. To address this, I ensure that I thoroughly rinse and squeegee the windows after cleaning to remove any residue.
  2. Stubborn Stains: Some stains may require extra effort to remove using eco-friendly methods. A bit of patience and persistence, along with the right tools and techniques, can usually overcome this challenge.
  3. Transition Period: Transitioning from traditional cleaning products to eco-friendly alternatives may take some time and adjustment. However, the long-term benefits outweigh any initial inconvenience.

Conclusion: A Clearer, Greener Future

My journey towards eco-friendly window cleaning practices has not only resulted in sparkling, clear windows but also contributed to a cleaner, greener future. By making simple changes in my approach to window cleaning, I’ve reduced my environmental impact, improved indoor air quality, and embraced a sustainable way of life.

Overall, as per Colleyville Window Cleaning and I encourage you to embark on your own eco-friendly window cleaning journey, exploring homemade solutions, reusable tools, and mindful practices. Together, we can enjoy the beauty of pristine windows while preserving the natural beauty of our planet for generations to come.

DFW Window Cleaning Colleyville

1808 Maplewood Trail, Colleyville, TX 76034, United States

817-813-8010

Tips for Maintaining Window Cleanliness Between Professional Services – Plano Window Cleaning & Glass Repair

I take great pride in the crystal-clear windows that grace my living space, offering unobstructed views and a sense of openness. While I appreciate the expertise of professional window cleaners, I’ve learned that there’s much I can do to maintain the sparkling cleanliness of my windows between their visits. Through trial and error, I’ve discovered practical strategies that have helped me extend the time between professional cleaning sessions while keeping my windows looking their best.

In this article, I’m excited to share my personal insights on caring for windows in between those scheduled appointments as stated from Window Cleaning Plano TX.

1. The Magic of Regular Dusting and Wiping

I’ve found that incorporating a regular dusting and wiping routine makes a significant difference. Using a soft cloth or microfiber duster, I gently remove dust from windowsills, frames, and glass surfaces. It’s a small effort that prevents dirt from building up and detracting from the pristine appearance of my windows.

2. Respect for Glass Surfaces

I’ve made it a household rule to avoid touching the glass surfaces with hands or fingers. The natural oils and residues on our skin can attract dirt and leave behind smudges. By encouraging family members and guests to enjoy the view without direct contact, I’ve noticed a reduction in the need for frequent cleaning.

3. Pets and Their Adventures

Pets can add joy to our homes, but their excitement at the window can sometimes lead to paw prints and nose marks. I’ve taken the time to train my furry companions to admire the view without touching the glass. Creating a cozy space slightly away from the windows for them to enjoy has kept my windows looking cleaner for longer.

4. Managing Indoor Humidity

Condensation on windows can create unsightly water spots and streaks. I’ve learned that managing indoor humidity levels is key to preventing excess condensation. I use exhaust fans in areas prone to moisture, like bathrooms and kitchens, and I’ve considered using a dehumidifier when needed.

5. Swift Action on Spills

Accidents happen, and spills on windows can lead to stains and residues if left unattended. I’ve made a habit of addressing spills promptly with a soft cloth and a gentle cleaning solution. This quick clean-up prevents stains from setting and eliminates the need for more extensive cleaning later on.

6. Thoughtful Use of Cleaning Solutions

When I decide to use DIY cleaning solutions between professional visits, I opt for gentle and eco-friendly options. I’ve found that vinegar-based solutions or commercially available eco-friendly cleaners work effectively. I steer clear of ammonia-based products to protect window tinting and delicate glass.

7. The Marvel of Microfiber for Touch-Ups

I keep a microfiber cloth within reach for those quick touch-up moments. Microfiber is gentle on glass surfaces and adept at capturing dust and light dirt. A brief wipe-down maintains the brilliance and transparency of my windows between deeper cleaning sessions.

8. Rotation of Window Dressings

Regularly changing and washing curtains, blinds, and drapes prevents them from accumulating dust and transferring it onto the windows. This rotation not only maintains window cleanliness but also freshens up the overall aesthetics.

9. Love for Exterior Surfaces

While professionals handle the exterior, I contribute by keeping the surrounding areas clean. Regular sweeping of windowsills and frames prevents dirt from finding its way onto the glass. This simple upkeep ensures that my windows stay cleaner for longer.

10. The Weekly Window-Care Ritual

I’ve established a weekly routine specifically dedicated to window care. Every week, I take a little time to lightly dust frames, wipe down any visible spots, and ensure that my windows remain free from smudges. This consistent effort adds up to sustained window clarity.

Conclusion: Nurturing Window Brilliance

According to Window Cleaning Plano TX, maintaining window cleanliness between professional services has become a gratifying practice for me. By incorporating these straightforward strategies into my routine, I extend the time between thorough cleaning sessions and relish the unmatched clarity of my windows. Each glimpse through a spotless pane reminds me of the effort I’ve invested in nurturing the beauty of my living space. It’s a journey that has allowed me to savor the transformative power of clean windows, enhancing both my surroundings and my personal well-being.

Plano Window Cleaning & Glass Repair

1201 Legacy Dr #2114, Plano, TX 75023, United States

972-544-1373

How to Choose the Right Professional Window Cleaning Company – NRH Window Cleaning & Glass Repair

As someone who takes immense pride in the appearance and maintenance of my home, I understand the significance of clear and sparkling windows. To achieve that level of clarity, I’ve come to appreciate the expertise of professional window cleaning companies. However, finding the right company amidst the plethora of options available can be a daunting task. I embarked on a journey to find the perfect professional window cleaning company that aligns with my standards and preferences.

By following experts from North Richland Hills Window Cleaning, I’ll share my personal insights on how to choose the ideal company that will leave your windows immaculate and your satisfaction guaranteed.

1. Clarifying My Needs

Before I began my search, I took a moment to outline my exact needs. Determining the number of windows, the type of property (residential or commercial), and any additional services like screen cleaning or gutter maintenance helped me narrow down the choices. By having a clear idea of what I required, I was able to focus my search on companies that specialize in those specific services.

2. Tapping into Recommendations

My quest for the perfect window cleaning company started with recommendations. I reached out to friends, family, and colleagues who had utilized window cleaning services in the past. Their firsthand experiences and insights were invaluable in pointing me toward companies with a strong reputation.

3. Evaluating Credentials and Reviews

Once I had a list of potential companies, I delved into their credentials. I made sure to choose companies that were licensed and insured, providing peace of mind in case of accidents or damages during the cleaning process. Reading online reviews and testimonials further validated the companies’ reliability and quality of service.

4. The Power of Experience

Experience was a crucial factor in my decision-making process. I preferred companies with a proven track record and several years in the industry. Experience often translates to a deep understanding of effective cleaning techniques and the ability to handle various challenges with expertise.

5. Professionalism and Communication Matters

Professionalism was a non-negotiable criterion for me. I valued companies that were prompt and responsive in their communication, providing clear information about their services. The level of professionalism a company displays in their interactions often reflects the quality of service you can expect.

6. Ensuring Safety Protocols

Safety was paramount, especially for windows situated at greater heights. I inquired about the safety protocols and equipment companies used, including harnesses, ladders, and scaffolding. Opting for a company that prioritized safety demonstrated their commitment to both their employees and their clients.

7. Aligning with Eco-Friendly Values

Environmental consciousness was essential to me, so I sought out companies that embraced eco-friendly practices. I asked about the cleaning solutions they used and whether they employed techniques that minimized water consumption and chemical usage. Supporting a company that aligns with my values felt like the right choice.

8. Balancing Pricing and Quality

While cost was a consideration, I reminded myself that quality should never be compromised for a lower price. I obtained quotes from different companies and compared their pricing. However, I approached exceptionally low prices with caution, as they could indicate subpar service. A balance between affordability and quality was my goal.

9. Talking to Previous Customers

Before making my final decision, I requested references from the window cleaning companies. Speaking directly to previous customers provided me with insights into their overall satisfaction with the company’s services. It was an opportunity to ask questions and gather unbiased opinions about the company’s performance.

10. Solidifying the Agreement

Upon selecting a company that aligned with my preferences, I made sure to obtain a written agreement that detailed all aspects of the service. This agreement covered the scope of work, pricing, payment terms, and any guarantees provided. Having everything in writing ensured that both parties were on the same page.

Conclusion: Clarity Achieved

Based from North Richland Hills Window Cleaning, choosing the right professional window cleaning company is an investment in the appearance and maintenance of your property. By clarifying your needs, seeking recommendations, evaluating credentials and reviews, considering experience, professionalism, safety, and eco-friendliness, and obtaining references and a written agreement, you can make an informed decision. The right company will not only leave your windows spotless but also provide a seamless and satisfying experience from start to finish. After navigating through these steps, I can confidently say that my search for the perfect window cleaning company was worth the effort.

NRH Window Cleaning & Glass Repair

7510 Davis Blvd # B, North Richland Hills, TX 76182, United States

817-601-6082

How Often Should You Clean Your Windows? Expert Advice – Southlake Window Cleaning & Glass Repair

As a homeowner who takes pride in maintaining a clean and welcoming living space, the question of how often to clean my windows has always intrigued me. Clean windows not only enhance the aesthetic appeal of my home but also allow me to fully enjoy the beauty of the outdoors from within. To shed light on this common dilemma, I’ve delved into expert advice and combined it with my personal experiences to create a window cleaning routine that aligns with the unique characteristics of my home environment.

In this guide, I’ll share my insights and journey towards finding the ideal frequency for window cleaning as stated from Window Cleaning Service Southlake TX.

Recognizing the Significance of Regular Window Cleaning

Clear and clean windows contribute immensely to the overall atmosphere and charm of a home. Here’s why I’ve come to value regular window cleaning:

  1. Elevated Aesthetics: Clean windows elevate the curb appeal of my property and create a positive impression for both visitors and passersby.
  2. Unhindered Views: Crystal-clear windows enable me to savor the beauty of nature without any visual obstructions.
  3. Amplified Natural Light: Clean windows allow more sunlight to penetrate my living spaces, creating a brighter and more inviting ambiance indoors.
  4. Longevity of Windows: By preventing the buildup of dirt and corrosive elements, regular cleaning ensures the longevity of my windows.
  5. Healthier Living Environment: Cleaner windows mean reduced dust and allergen accumulation, leading to a healthier indoor atmosphere.

Factors Influencing My Window Cleaning Frequency

Setting the right window cleaning frequency for my home involves considering a variety of factors:

  1. Location:
    • Urban Living: I reside in an urban area where pollution levels are relatively higher, warranting more frequent cleaning to combat the effects of urban grime.
  2. Weather Conditions:
    • Rainy Seasons: Rain often leaves unsightly streaks and water spots on windows, prompting more frequent cleaning to maintain clarity.
    • Dry and Dusty Periods: During dry and dusty periods, I notice a buildup of debris on my windows, necessitating extra attention.
  3. Proximity to Nature:
    • Living in a neighborhood surrounded by trees and plants means regular encounters with pollen, sap, and falling leaves that cling to windows.
  4. Personal Preferences:
    • My preference for pristine windows aligns with the desire to clean them more frequently, ensuring they always look their best.

Expert Guidance on Window Cleaning Frequency

By combining expert recommendations with my personal experiences, I’ve established a window cleaning routine that suits my home:

  1. Urban Residences:
    • Monthly Cleaning: Living in an urban area, monthly cleaning helps combat the effects of pollution and maintains the overall appearance of my windows.
  2. Seasonal Considerations:
    • Spring and Fall Deep Cleans: Regardless of where I live, spring and fall are perfect times for thorough window cleaning to remove winter residue and summer grime.
  3. Adapting to Conditions:
    • I keep a close eye on weather forecasts and adjust my cleaning routine during periods of heavy rain or dusty winds.
  4. Personalized Approach:
    • I’ve tailored my window cleaning routine to align with my personal preference for cleanliness, adjusting the frequency as needed.

Crafting My Window Cleaning Routine

  1. Regular Check-ins:
    • I’ve incorporated a habit of regularly inspecting my windows to detect signs of dirt, water spots, or residue that indicate the need for cleaning.
  2. Flexible Strategy:
    • My routine remains flexible, allowing me to adapt to changing circumstances and address unexpected cleaning needs promptly.
  3. Professional Touch:
    • For a comprehensive clean and expert advice, I engage professional window cleaning services on occasion.

Conclusion: A Clear View on Window Cleaning Frequency

Based from Window Cleaning Service Southlake TX, the frequency of window cleaning is a balance between maintaining unobstructed views and accommodating the practicalities of your living environment. By combining expert insights with personal preferences, I’ve arrived at a window cleaning routine that perfectly suits my home. The result is an environment that exudes cleanliness and charm, both indoors and outdoors. With a clear view through sparkling windows, I can confidently enjoy the beauty of nature and bask in the comfort of my well-maintained living space.

Southlake Window Cleaning & Glass Repair

1052 Summerplace Ln, Southlake, TX 76092, United States

817-839-4773