Garage Door Opener Buying Guide – Hi-Country Dock & Door LLC

As a homeowner who recently went through the process of selecting a new garage door opener, I understand firsthand how overwhelming it can be to sift through the myriad options available on the market. With various brands, models, and features to consider, finding the right garage door opener can feel like a daunting task. However, armed with the right knowledge and guidance, the process becomes much more manageable.

I’ll share valuable insights and tips from Garage Door Repair Roundup MT to help you navigate the garage door opener buying process with confidence.

Assess Your Needs

Before diving into the world of garage door openers, take some time to assess your specific needs and requirements. Consider factors such as the size and weight of your garage door, the level of noise tolerance, desired features, and budget constraints. Understanding your priorities will help narrow down your options and streamline the decision-making process.

Types of Garage Door Openers

There are three primary types of garage door openers to choose from: chain-drive, belt-drive, and screw-drive. Each type offers its own set of advantages and considerations:

  • Chain-Drive Openers: Known for their durability and affordability, chain-drive openers use a metal chain to lift and lower the garage door. While they tend to be the loudest option, they are well-suited for heavy garage doors and offer reliable performance.
  • Belt-Drive Openers: Belt-drive openers operate similarly to chain-drive models but use a reinforced rubber belt instead of a metal chain. This results in quieter operation, making them ideal for attached garages or homeowners seeking minimal noise disruption.
  • Screw-Drive Openers: Screw-drive openers utilize a threaded steel rod to move the garage door along the track. They offer smooth and efficient operation with fewer moving parts, making them a low-maintenance option. However, they may produce more noise than belt-drive openers.

Consider Additional Features

In addition to the basic operation of opening and closing your garage door, modern garage door openers come with a variety of additional features and functionalities to enhance convenience, security, and efficiency. Some key features to consider include:

  • Remote Control: Most garage door openers come with remote controls for easy operation from inside your vehicle. Look for models with multi-function remotes that offer additional controls, such as turning on lights or opening multiple garage doors.
  • Keyless Entry Pad: A keyless entry pad allows you to enter a code to open the garage door without the need for a remote control or key. This can be useful for family members or guests who may not have access to a remote.
  • Smart Home Integration: Many garage door openers now offer compatibility with smart home systems, allowing you to control your garage door remotely from your smartphone or tablet. Look for models that support popular platforms like Google Assistant or Amazon Alexa for seamless integration.
  • Battery Backup: In the event of a power outage, a garage door opener with a battery backup ensures that you can still operate your garage door manually. This provides added peace of mind and convenience during emergencies.
  • Safety Features: Look for garage door openers equipped with safety features such as auto-reverse sensors, which detect obstructions in the door’s path and automatically reverse its direction to prevent accidents or damage.

Set a Realistic Budget

As with any home improvement purchase, it’s essential to establish a realistic budget for your garage door opener. Prices can vary significantly depending on the type of opener, brand, and features included. While it may be tempting to opt for the cheapest option available, investing in a high-quality garage door opener from a reputable manufacturer can save you money in the long run by reducing maintenance costs and ensuring reliable performance.

Research and Compare Brands

Before making a final decision, take the time to research and compare different garage door opener brands and models. Look for reviews and testimonials from other homeowners to gauge the reliability, durability, and overall satisfaction with the product. Pay attention to factors such as warranty coverage, customer support, and availability of replacement parts, as these can impact your long-term satisfaction with the opener.

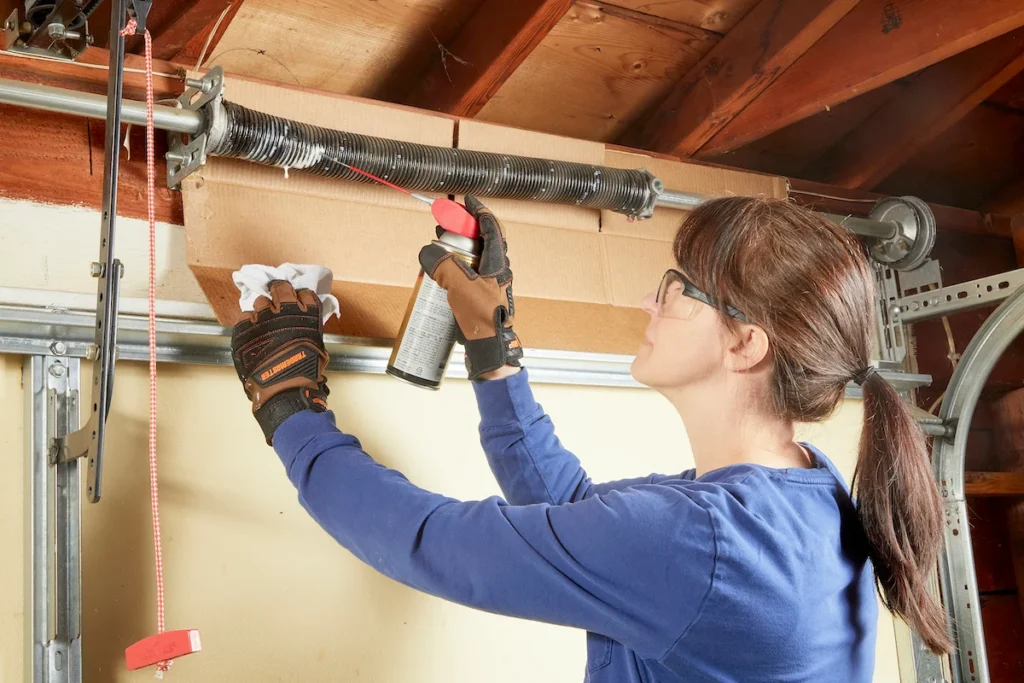
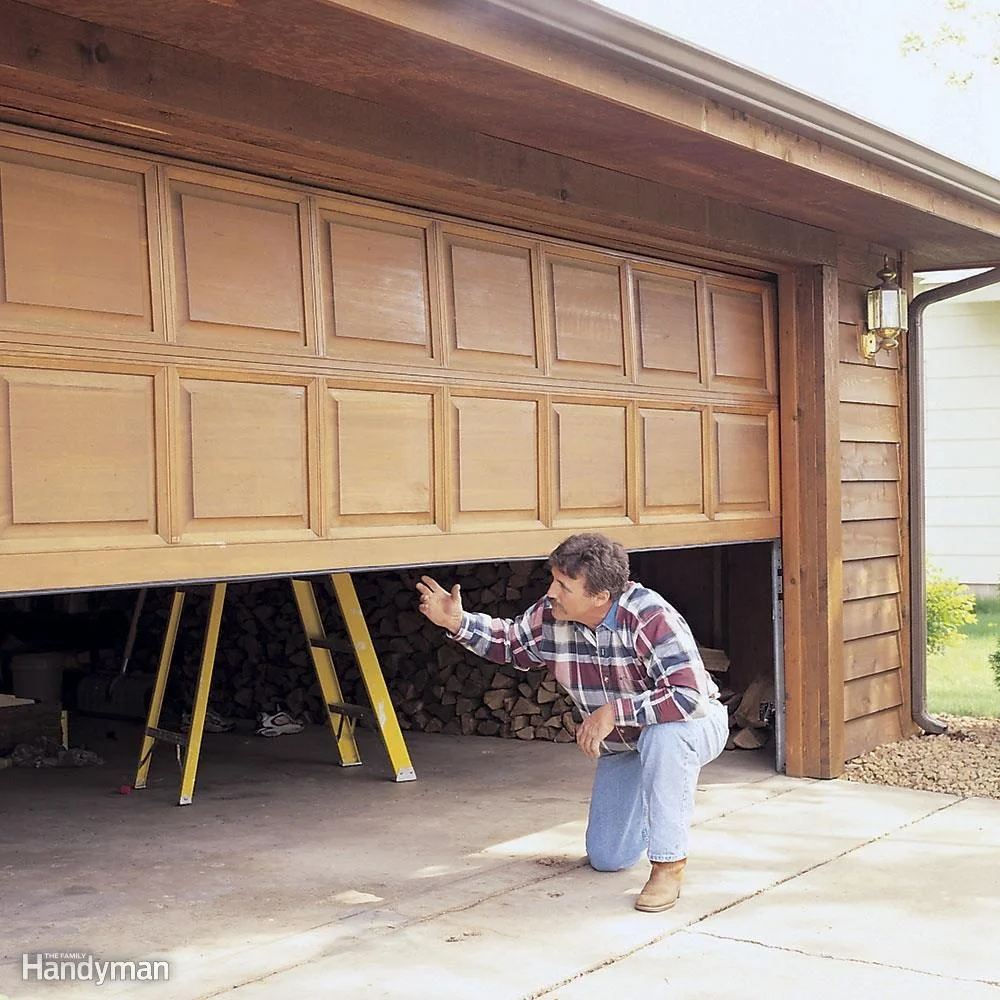
Installation and Maintenance

Finally, consider the installation process and ongoing maintenance requirements of the garage door opener. While some homeowners may feel comfortable installing the opener themselves, others may prefer to hire a professional for peace of mind. Additionally, be sure to follow the manufacturer’s guidelines for regular maintenance, such as lubricating moving parts, inspecting safety sensors, and testing the auto-reverse feature.

Conclusion: Finding the Perfect Garage Door Opener

In conclusion, based from Garage Door Repair Roundup MT, selecting the right garage door opener is a decision that should be approached thoughtfully and carefully. By assessing your needs, considering different types and features, setting a realistic budget, and conducting thorough research, you can confidently choose a garage door opener that meets your requirements and enhances the functionality and security of your home. Whether you opt for a chain-drive, belt-drive, or screw-drive opener, investing in a high-quality product from a reputable manufacturer will provide you with years of reliable performance and peace of mind.

Hi-Country Dock & Door LLC

104 Cottonwood Rd, Roundup, MT 59072, United States

406-320-0518

How Much To Replace Garage Door And Opener – Wallen Garage Door Repair and Installation

Garage Door Repair Newport News VA can significantly improve the appearance, functionality, and security of your home while enhancing its curb appeal and resale value.

However, it’s essential to understand the factors that influence the cost of replacement and to choose the right products and services for your needs and budget. In this guide, we’ll explore everything you need to know about the cost of replacing a garage door and opener, including factors affecting the cost, types of doors and openers available, and tips for selecting the right replacement.

Factors Affecting the Cost

Several factors can influence the cost of replacing a garage door and opener, including:

  1. Type and Size of the Door: Garage doors come in various materials, styles, and sizes, ranging from single-car to double-car configurations. The type and size of the door you choose will affect the cost of replacement.
  2. Material of the Door: Garage doors are typically made from materials such as steel, wood, aluminum, or vinyl. Each material has its advantages and disadvantages, and the cost of replacement will vary accordingly.
  3. Insulation: Insulated garage doors offer improved energy efficiency and temperature control, but they may come at a higher cost compared to non-insulated doors.
  4. Type of Opener: Garage door openers come in several types, including chain-drive, belt-drive, screw-drive, and direct-drive models. The type of opener you choose will affect the cost of replacement.
  5. Features and Accessories: Additional features such as remote controls, keypads, smartphone connectivity, battery backup, and security systems can add to the overall cost of replacing a garage door and opener.

Cost Range of Replacing Garage Door and Opener

The cost of replacing a garage door and opener can vary depending on factors such as the type of door and opener, materials used, size of the door, and additional features. Here’s a breakdown of the cost range based on different scenarios:

  1. Single-Car Garage Door Replacement:
    • Basic Non-Insulated Door: $500 to $1,500
    • Insulated Door with Windows: $1,000 to $2,500
    • Premium Custom Wood Door: $2,000 to $5,000
  2. Double-Car Garage Door Replacement:
    • Basic Non-Insulated Door: $800 to $2,000
    • Insulated Door with Windows: $1,500 to $3,500
    • Premium Custom Wood Door: $3,000 to $7,000
  3. Garage Door Opener Replacement:
    • Chain-Drive Opener: $150 to $300
    • Belt-Drive Opener: $200 to $400
    • Screw-Drive Opener: $250 to $500
    • Direct-Drive Opener: $300 to $600

Additional Costs and Considerations

In addition to the cost of the garage door and opener themselves, you’ll also need to consider the following factors:

  1. Labor Costs: Professional installation typically costs between $500 and $1,000 for a new garage door and opener, depending on the complexity of the job and the technician’s experience.
  2. Removal and Disposal: If you’re replacing an existing garage door and opener, you may need to pay extra for removal and disposal of the old equipment.
  3. Additional Accessories: Depending on your preferences and needs, you may want to invest in additional accessories such as remote controls, keypads, smartphone connectivity, battery backup, and security systems, which can add to the overall cost.
  4. Warranties and Guarantees: Be sure to inquire about warranties or guarantees on the garage door and opener, as well as the installation, to ensure that you’re protected in case of any issues or defects.

DIY vs. Professional Installation

While some homeowners may attempt to install a new garage door and opener themselves to save money, this is not recommended unless you have experience and expertise in garage door installation. Garage door systems are complex and require precise installation to ensure proper functioning and safety. Hiring a professional garage door technician ensures that the replacement is done correctly and safely, reducing the risk of accidents or injuries and ensuring the longevity of your garage door system.

Conclusion:

In conclusion, the cost of replacing a garage door and opener depends on factors such as the type and size of the door, materials used, type of opener, additional features, labor costs, and warranties. By understanding these factors and working with a reputable garage door technician, you can ensure that your garage door and opener are replaced correctly and safely, enhancing the functionality, security, and curb appeal of your home.

Wallen Garage Door Repair and Installation

732 Bluecrab Rd Ste D, Newport News, VA 23606, United States

1-757-972-7860

How Much Does A Single Insulated Garage Door Cost – Tarrant County Door & Gate

Garage Door Repair North Richland Hills TX offers homeowners several benefits, including improved energy efficiency, enhanced durability, and better noise reduction compared to non-insulated doors.

Whether you’re replacing an old garage door or installing a new one, understanding the factors that influence the cost of a single insulated garage door is essential for making an informed decision. In this guide, we’ll explore the various considerations that affect the cost of single insulated garage doors and provide insights into pricing to help you choose the right option for your home.

Factors Affecting the Cost

Several factors influence the cost of a single insulated garage door, including:

  1. Material: Single insulated garage doors are available in different materials, including steel, aluminum, wood, and composite materials. The material you choose will impact the cost of the door, with steel doors generally being the most affordable option and wood or composite doors being more expensive.
  2. Insulation Type and Thickness: Insulated garage doors come with different types and thicknesses of insulation, such as polyurethane or polystyrene foam. Thicker insulation generally offers better thermal performance but may come at a higher cost.
  3. Design and Style: The design and style of the garage door can also affect its cost. Custom designs, decorative elements, and specialty finishes may increase the price of the door compared to standard designs.
  4. Size and Configuration: The size and configuration of the garage door opening will influence the cost of the door. Standard-sized doors are typically more affordable than custom-sized doors, and additional features such as windows or decorative hardware may add to the cost.
  5. Brand and Quality: Garage door prices can vary depending on the brand and quality of the product. Well-known brands with a reputation for reliability and durability may command higher prices compared to lesser-known brands.
  6. Additional Features and Accessories: Single insulated garage doors can be equipped with various features and accessories, such as windows, decorative hardware, insulation upgrades, and smart technology integration. The more features and accessories you add, the higher the cost of the door.

Cost Range of Single Insulated Garage Doors

The cost of a single insulated garage door varies depending on the aforementioned factors and can range from $700 to $3000 or more. Here’s a breakdown of the cost range based on different considerations:

  1. Steel Garage Doors:
    • Basic Steel Door with Standard Insulation: $700 to $1500
    • Premium Steel Door with High-Grade Insulation: $1200 to $2500
  2. Aluminum Garage Doors:
    • Aluminum Doors with Foam Insulation: $800 to $1800
    • Insulated Aluminum Doors with Enhanced Thermal Performance: $1500 to $3000
  3. Wood Garage Doors:
    • Basic Wood Door with Insulation: $1000 to $2500
    • Custom Wood Door with Premium Insulation and Design Features: $2000 to $5000 or more
  4. Composite Garage Doors:
    • Composite Doors with Insulation: $900 to $2000
    • High-End Composite Doors with Advanced Insulation and Design Options: $1800 to $3500

Additional Costs and Considerations

In addition to the cost of the garage door itself, there may be additional costs and considerations to factor in:

  1. Professional Installation: Professional installation is recommended for garage doors to ensure proper fitting, operation, and warranty coverage. Installation costs vary depending on factors such as labor rates, the complexity of the installation, and any additional services required.
  2. Hardware and Accessories: Consider the cost of hardware and accessories such as tracks, springs, hinges, rollers, and weather seals when budgeting for a new garage door. These components are essential for the proper functioning and longevity of the door.
  3. Warranty and Support: Choose a garage door manufacturer that offers a comprehensive warranty and responsive customer support. A longer warranty period and reliable customer service can provide peace of mind and protection against defects or malfunctions.

Conclusion:

In conclusion, the cost of a single insulated garage door varies depending on factors such as material, insulation type and thickness, design and style, size and configuration, brand and quality, and additional features and accessories. By carefully considering these factors and working with reputable manufacturers and installers, homeowners can choose a garage door that meets their needs and budget while enhancing the energy efficiency, durability, and curb appeal of their home.

Tarrant County Door & Gate

6408 Marlette Ct, North Richland Hills, TX 76182

+91-817-456-2958

How To Program Universal Garage Door Opener – Ohio Garage Door Repair

Garage Door Repair Solon OH provide a convenient solution for operating multiple garage doors from a single remote control transmitter. Whether you’ve purchased a new universal opener or need to reprogram an existing one, the process of programming it to work with your garage door is relatively straightforward.

In this comprehensive guide, we’ll walk you through the step-by-step process of programming a universal garage door opener, ensuring that you can operate your garage doors with ease and convenience.

1. Choose a Compatible Universal Garage Door Opener

Before you begin the programming process, it’s essential to choose a universal garage door opener that is compatible with your existing garage door system. Universal openers typically work with most major garage door brands and models, but it’s essential to verify compatibility to ensure seamless operation. Check the packaging or product specifications to confirm that the opener is compatible with your garage door system.

2. Prepare the Remote Control Transmitter

If you’re programming a new universal garage door opener, the first step is to prepare the remote control transmitter. Remove the battery cover from the transmitter and insert the required batteries according to the manufacturer’s instructions. Ensure that the batteries are installed correctly, with the positive and negative terminals aligned properly.

3. Locate the “Learn” or “Program” Button

Next, locate the “learn” or “program” button on your existing garage door opener unit. This button is typically located on the back panel or side of the opener motor housing. It may be labeled with the word “learn” or have a small LED indicator light next to it. Refer to the user manual for your specific garage door opener model if you’re unsure where to find the “learn” button.

4. Enter Programming Mode

Once you’ve located the “learn” button, press and release it to enter programming mode. The LED indicator light on the opener unit should begin flashing, indicating that it is ready to accept new programming from the remote control transmitter. You’ll typically have 30 seconds to complete the programming process before the opener exits programming mode.

5. Program the Remote Control Transmitter

With the opener in programming mode, it’s time to program the remote control transmitter to work with your garage door. Follow these steps:

  • Press and hold the button on the remote control transmitter that you want to program.
  • While holding the button, press and release the “learn” button on the opener unit.
  • Release the button on the remote control transmitter. The LED indicator light on the opener unit should flash to indicate that the programming was successful.

6. Test the Remote Control Transmitter

After programming the remote control transmitter, it’s essential to test it to ensure that it operates the garage door correctly. Stand within range of the garage door opener unit and press the button on the remote control transmitter. Verify that the garage door opens and closes smoothly in response to the transmitter signal.

7. Repeat for Additional Doors

If you have multiple garage doors, you can repeat the programming process to program the universal opener to work with each door. Simply follow the same steps outlined above for each additional door, using a separate button on the remote control transmitter for each one.

8. Secure the Remote Control Transmitter

Once you’ve programmed the remote control transmitter to work with your garage door(s), it’s essential to secure the transmitter to prevent unauthorized access. Keep it in a secure location, such as a keychain or inside your vehicle, and avoid leaving it in plain sight where it could be easily accessed by intruders.

9. Keep the User Manual Handy

Lastly, it’s a good idea to keep the user manual for your universal garage door opener on hand for reference. The manual contains valuable information about programming, troubleshooting, and maintenance, and can help you resolve any issues that may arise during the setup process.

10. Seek Professional Assistance if Needed

If you encounter difficulties or have concerns about programming your universal garage door opener, don’t hesitate to seek professional assistance. Contact a reputable garage door technician or the manufacturer of your opener for guidance on programming and troubleshooting.

By following these steps and exercising proper caution, you can successfully program a universal garage door opener to work with your existing garage door system, providing convenient and reliable operation for years to come.

Ohio Garage Door Repair

7201 Longview Dr, Solon, OH 44139

1-440-773-2246

How To Program Clicker Garage Door Opener – El Paso Garage Door Repair

Garage Door Repair El Paso TX allows you to control your garage door with ease and convenience. Whether you’ve purchased a new Clicker remote or need to reprogram an existing one, the process is straightforward and can be completed in just a few simple steps.

In this guide, we’ll walk you through the step-by-step process of programming a Clicker garage door opener, ensuring that you can operate your garage door smoothly and efficiently.

1. Gather Necessary Tools and Materials

Before you begin programming your Clicker garage door opener, gather all the necessary tools and materials:

  • Clicker garage door opener remote
  • Step ladder (if needed)
  • Access to the garage door opener unit

2. Locate the Learn Button on the Garage Door Opener

To program your Clicker garage door opener, you’ll need to locate the learn button on the garage door opener unit itself. The learn button is typically located near the antenna wire on the motor housing or on the back of the opener unit.

3. Clear Existing Programming (If Needed)

If you’re reprogramming an existing Clicker remote or adding a new remote to your garage door opener, it’s important to clear any existing programming first. Press and hold the learn button on the garage door opener until the indicator light on the unit turns off, indicating that the existing programming has been cleared.

4. Press the Learn Button

Once you’ve cleared any existing programming, press the learn button on the garage door opener unit. The indicator light on the unit will illuminate, indicating that the opener is in programming mode and ready to receive signals from the remote.

5. Program the Clicker Remote

With the garage door opener in programming mode, press and release the button on the Clicker remote that you wish to program. You’ll typically hear a beep or see the indicator light on the remote flash, indicating that the programming was successful.

6. Test the Clicker Remote

After programming the Clicker remote, test it to ensure that it works properly. Stand within range of the garage door opener and press the button on the remote to open or close the garage door. The door should respond to the signal from the remote, indicating that the programming was successful.

7. Repeat the Process (If Programming Multiple Remotes)

If you have multiple Clicker remotes that you wish to program to the garage door opener, repeat the programming process for each remote individually. Press the learn button on the opener unit and program each remote following steps 5 and 6 until all remotes have been successfully programmed.

8. Mount the Clicker Remote (Optional)

Once you’ve programmed the Clicker remote(s), you may choose to mount them in a convenient location within your vehicle or near the entry door to your home. Use adhesive strips or mounting hardware to secure the remote(s) in place, ensuring easy access and convenience.

9. Perform Regular Maintenance

To ensure continued reliability and performance of your Clicker garage door opener, perform regular maintenance and inspections. Check the batteries in the remote(s) regularly and replace them as needed to prevent signal loss or weak transmission. Additionally, clean the contacts on the remote(s) and the learn button on the opener unit to maintain optimal connectivity.

10. Seek Professional Assistance if Needed

If you encounter difficulties programming your Clicker garage door opener or are unsure of the correct procedure to follow, don’t hesitate to seek professional assistance. Contact a reputable garage door technician to inspect the opener unit and provide guidance on programming the remote(s) safely and effectively.

By following these steps and using the appropriate methods, you can program a Clicker garage door opener with ease and convenience. Whether you’re adding a new remote or reprogramming an existing one, knowing how to program your Clicker remote ensures smooth and efficient operation of your garage door.

El Paso Garage Door Repair

11394 James Watt Dr #603, El Paso, TX 79936, United States

1-915-201-3339

How Can I Change The Code On My Garage Door – Atlas Door Company

Garage Door Repair Joshua TX or remote control is a crucial step in maintaining the security of your home and ensuring that unauthorized individuals cannot access your garage.

In this comprehensive guide, we’ll walk you through the process of changing the code on your garage door opener, providing step-by-step instructions and valuable security tips to safeguard your property effectively.

Understanding Garage Door Opener Security

Garage door openers typically feature a keypad or remote control that allows homeowners to open and close the garage door conveniently. These devices utilize a unique access code or signal to communicate with the garage door opener, ensuring that only authorized individuals can operate the door. Changing the access code periodically is essential to prevent unauthorized access and maintain the security of your garage and home.

Step-by-Step Guide to Changing the Code

Follow these step-by-step instructions to change the code on your garage door opener keypad or remote control:

1. Locate the Programming Button:

Identify the programming button on your garage door opener, which is typically located on the motor unit or on the wall control panel inside the garage.

2. Enter Programming Mode:

Press and release the programming button to enter programming mode. The indicator light on the motor unit or wall control panel will typically begin flashing, indicating that the opener is ready to accept a new code.

3. Select a New Code:

Choose a new access code for your garage door opener keypad or remote control. Ensure that the code is easy to remember but difficult for others to guess. Avoid using common combinations such as birthdates or sequential numbers.

4. Program the New Code:

Enter the new access code on the keypad or remote control, following the manufacturer’s instructions for your specific model. The indicator light on the motor unit or wall control panel will confirm successful programming by flashing or turning solid.

5. Test the New Code:

Test the new access code to ensure that it activates the garage door opener properly. Enter the code on the keypad or press the button on the remote control to open and close the garage door. Verify that the door operates smoothly and that the new code functions as intended.

6. Reset Additional Devices:

If you have multiple keypads or remote controls linked to your garage door opener, repeat the programming process for each device to ensure that they all use the new access code.

Security Tips for Changing the Code

To maximize the security of your garage door opener and prevent unauthorized access, consider the following tips:

1. Choose a Strong Access Code:

Select a new access code that is unique and difficult to guess. Avoid using easily recognizable or sequential combinations, and opt for a mix of numbers and letters for added security.

2. Change the Code Regularly:

Change the access code on your garage door opener periodically to minimize the risk of unauthorized access. Consider changing the code every few months or whenever you suspect a security breach.

3. Keep the Code Confidential:

Avoid sharing your access code with unauthorized individuals, and remind family members or trusted individuals to keep the code confidential. Restrict access to the code to minimize the risk of it falling into the wrong hands.

4. Disable Remote Access:

If you have a remote control for your garage door opener, consider disabling remote access when not in use. Some garage door openers allow you to lock out remote access temporarily to prevent unauthorized operation.

5. Monitor Access Activity:

Consider installing a garage door opener system that allows you to monitor access activity remotely. Some modern systems offer smartphone connectivity and real-time notifications, allowing you to track when the garage door is opened and closed.

Conclusion:

Changing the code on your garage door opener is a simple yet essential security measure that helps safeguard your property and prevent unauthorized access. By following the step-by-step instructions provided in this guide and implementing security tips to enhance protection, you can ensure that your garage and home remain secure against potential intruders. Regularly changing the access code and maintaining vigilance regarding access activity are key components of an effective garage door security strategy.

Atlas Door Company

6817 Sundance Cir W, Joshua, TX 76058, United States

1-817-295-3660

How To Fix Liftmaster Garage Door Opener Remote – Veterans Garage Door

A Garage Door Repair Sarasota FL is a convenient device that allows you to open and close your garage door with the touch of a button. However, like any electronic device, it can encounter issues from time to time.

Whether your LiftMaster remote is not working at all or experiencing intermittent problems, there are several troubleshooting steps you can take to fix it yourself. In this guide, we’ll walk through common issues with LiftMaster garage door opener remotes and how to troubleshoot and resolve them.

Check the Batteries

The most common reason for a malfunctioning garage door opener remote is dead or weak batteries. Before attempting any other troubleshooting steps, replace the batteries in your LiftMaster remote with fresh ones. Make sure to use high-quality alkaline batteries to ensure optimal performance.

Reprogram the Remote

If replacing the batteries doesn’t solve the problem, try reprogramming the remote to sync it with your garage door opener. Follow these steps to reprogram your LiftMaster garage door opener remote:

  1. Locate the “Learn” button on your garage door opener motor unit.
  2. Press and release the “Learn” button. The indicator light on the motor unit will turn on.
  3. Within 30 seconds, press and hold the button on your remote that you want to program. Hold the button until the indicator light on the motor unit flashes, indicating that the remote has been successfully programmed.

Check for Interference

Sometimes, radio frequency interference can disrupt the signal between your LiftMaster remote and the garage door opener. Common sources of interference include nearby electronics, wireless routers, and metal objects. To troubleshoot interference issues, try the following:

  • Move any electronic devices away from the garage door opener motor unit.
  • Reposition the antenna on the motor unit to improve signal reception.
  • Ensure that there are no metal objects blocking the signal between the remote and the motor unit.

Reset the Garage Door Opener

If reprogramming the remote and checking for interference doesn’t solve the problem, try resetting the garage door opener. Follow these steps to reset your LiftMaster garage door opener:

  1. Locate the power cord or the circuit breaker that supplies power to the garage door opener.
  2. Unplug the power cord or turn off the circuit breaker to cut off power to the opener.
  3. Wait at least 30 seconds, then plug the power cord back in or turn the circuit breaker back on to restore power to the opener.

Inspect the Remote and Motor Unit

If none of the above troubleshooting steps resolve the issue, visually inspect both the remote and the garage door opener motor unit for any signs of damage or malfunction. Look for loose wires, damaged buttons, or visible wear and tear. If you notice any physical damage, it may be necessary to replace either the remote or the motor unit.

Contact LiftMaster Support

If you’ve tried all of the above troubleshooting steps and your LiftMaster garage door opener remote still isn’t working, it’s time to contact LiftMaster customer support for further assistance. They can provide additional troubleshooting guidance or help you schedule a service appointment if necessary.

Conclusion:

A malfunctioning LiftMaster garage door opener remote can be frustrating, but with the right troubleshooting steps, you can often resolve the issue yourself. By checking the batteries, reprogramming the remote, troubleshooting interference, resetting the garage door opener, and inspecting for damage, you can identify and fix common problems with your LiftMaster remote. If all else fails, don’t hesitate to reach out to LiftMaster support for professional assistance.

Veterans Garage Door

6497 Parkland Dr F, Sarasota, FL 34243, United States

1-941-699-6198

How To Install Craftsman Belt Drive Garage Door Opener – Wallen Garage Door Repair and Installation

Garage Door Repair Hampton Roads VA are designed to provide smooth and quiet operation, making them ideal for homes with living spaces above or adjacent to the garage.

Unlike chain drive openers, which can be noisy, belt drive openers use a rubber belt to lift and lower the garage door. This makes them a popular choice for homeowners looking for convenience without the noise.

Understanding the Components

Before you begin the installation process, it’s essential to understand the components of the Craftsman belt drive garage door opener:

Motor

The motor is the heart of the garage door opener, providing the power to lift and lower the door. Craftsman motors are known for their durability and reliability, ensuring years of trouble-free operation.

Belt Drive

The belt drive connects the motor to the garage door, allowing for smooth and quiet operation. Craftsman belt drives are made of high-quality materials to ensure longevity and minimal maintenance.

Rail System

The rail system guides the garage door as it opens and closes. Craftsman rail systems are adjustable to fit doors of various sizes, making them suitable for a wide range of applications.

Tools Required for Installation

Before you begin the installation process, gather the following tools:

  • Power drill
  • Screwdriver set
  • Adjustable wrench
  • Hammer
  • Tape measure
  • Level
  • Step ladder

Having these tools on hand will make the installation process smoother and more efficient.

Pre-Installation Preparation

Before you start installing the Craftsman belt drive garage door opener, take the following pre-installation steps:

Safety Measures

Safety should always be your top priority when working with garage door openers. Make sure to read the manufacturer’s instructions carefully and follow all safety precautions. Wear protective gear, such as gloves and safety glasses, to prevent accidents.

Clearing Space

Clear the area around the garage door opener to provide ample space for installation. Remove any obstacles or debris that may interfere with the installation process.

Step-by-Step Installation Process

Now that you’ve completed the pre-installation preparation, it’s time to install the Craftsman belt drive garage door opener. Follow these steps:

Assembling the Rail System

Start by assembling the rail system according to the manufacturer’s instructions. Use the provided hardware to secure the rail segments together and attach them to the garage ceiling.

Mounting the Motor

Next, mount the motor to the ceiling of the garage using the provided mounting brackets. Make sure the motor is securely attached and level to ensure smooth operation.

Attaching the Belt Drive

Once the motor is in place, attach the belt drive to the motor and feed it through the rail system. Make sure the belt is properly tensioned and aligned to prevent slippage.

Wiring and Connection

After the motor and belt drive are installed, it’s time to wire the garage door opener. Follow the manufacturer’s instructions carefully to connect the motor to the power source and any additional accessories, such as remote controls or keypads.

Testing and Adjustment

Once the installation is complete, test the garage door opener to ensure it’s functioning properly. Use the remote control or keypad to open and close the garage door several times, checking for any unusual noises or malfunctions. Make any necessary adjustments to the settings or alignment to ensure smooth operation.

Troubleshooting Common Issues

If you encounter any problems during the installation process, refer to the troubleshooting section of the manufacturer’s instructions. Common issues include misaligned rails, loose hardware, or electrical problems. Follow the provided troubleshooting steps to resolve the issue and ensure proper operation.

Maintenance Tips for Longevity

To keep your Craftsman belt drive garage door opener running smoothly, follow these maintenance tips:

  • Regularly inspect the hardware for signs of wear or damage and replace as needed.
  • Keep the rail system clean and lubricated to prevent friction and ensure smooth operation.
  • Test the safety features, such as the auto-reverse mechanism, regularly to ensure they’re functioning properly.
  • Schedule professional maintenance at least once a year to keep your garage door opener in optimal condition.

Conclusion:

Installing a Craftsman belt drive garage door opener is a straightforward process that can be completed in a few hours with the right tools and preparation. By following the steps outlined in this guide, you can enjoy the convenience and security of a reliable garage door opener for years to come.

Wallen Garage Door Repair and Installation

732 Bluecrab Rd Ste D, Newport News, VA 23606, United States

1-757-256-4543

How To Install A Wall Mount Garage Door Opener – Superior Door

Garage Door Repair Omaha NE is a great way to maximize space and convenience in your garage. Wall mount openers are designed to save overhead space, making them ideal for garages with limited ceiling clearance.

In this step-by-step guide, we’ll walk you through the process of installing a wall mount garage door opener to ensure smooth operation of your garage door.

Tools and Materials Needed

Before you begin the installation process, gather the following tools and materials:

  1. Wall mount garage door opener kit
  2. Power drill
  3. Screwdriver set
  4. Measuring tape
  5. Level
  6. Step ladder
  7. Safety goggles
  8. Pencil
  9. Mounting hardware (included with the opener)
  10. Remote control or keypad (if not included)

Step-by-Step Installation Process

1. Preparation

Before you start the installation, read the manufacturer’s instructions carefully to familiarize yourself with the process and ensure you have all the necessary tools and materials. Clear the area around your garage door and make sure the power to the garage door opener is turned off.

2. Determine Mounting Location

Choose a suitable location on the wall near your garage door for mounting the opener. The location should be at least 7 feet above the ground and free from any obstructions. Use a measuring tape and level to mark the position for the opener.

3. Install Mounting Bracket

Use the mounting bracket provided with the opener to attach it securely to the wall. Use a power drill and screws to mount the bracket according to the manufacturer’s instructions. Make sure the bracket is level and securely anchored to the wall.

4. Attach Opener to Bracket

Once the mounting bracket is in place, attach the opener to the bracket using the provided hardware. Follow the manufacturer’s instructions to ensure the opener is securely mounted to the bracket.

5. Connect to Power Source

Next, connect the opener to a power source according to the manufacturer’s instructions. This may involve wiring the opener directly to a power outlet or hardwiring it to your home’s electrical system. If you’re not comfortable working with electrical wiring, consider hiring a professional electrician to assist with this step.

6. Program Remote Control or Keypad

If your wall mount opener comes with a remote control or keypad, follow the instructions to program it to operate the opener. This typically involves pressing a series of buttons or entering a code to sync the remote or keypad with the opener.

7. Test Operation

Once the opener is installed and connected to power, test its operation to ensure it opens and closes the garage door smoothly. Use the remote control or keypad to operate the opener from inside your garage, and also test it from outside to make sure it works from a distance.

8. Adjust Settings

Adjust the settings on the opener as needed to customize its operation to your preferences. This may include adjusting the speed of the door, setting the travel limits, and configuring any safety features.

9. Install Safety Sensors

If your wall mount opener is equipped with safety sensors, install them according to the manufacturer’s instructions. Safety sensors are designed to detect obstructions in the path of the garage door and prevent it from closing if something is in the way.

10. Secure Wiring and Test Again

Once everything is installed and tested, secure any wiring and cables to prevent them from getting tangled or damaged. Test the opener again to make sure everything is working correctly before using it regularly.

Conclusion:

Installing a wall mount garage door opener is a relatively straightforward process that can be completed with basic tools and some patience. By following the manufacturer’s instructions and taking your time to ensure everything is installed correctly, you can enjoy the convenience and space-saving benefits of a wall mount opener in your garage.

Superior Door

8840 S 137th Cir #3, Omaha, NE 68138, United States

1-402-571-2999

Can You Program Multiple Garage Door Openers – Garage Door Wizard

Garage Door Repair Cypress TX offers convenience and flexibility, allowing different users or vehicles to access the garage with their own remote controls.

Whether you have multiple garage doors on the same property or want to grant access to family members, guests, or tenants, programming multiple openers is a straightforward process. Let’s explore in more detail how to program multiple garage door openers:

1. Check Compatibility: Before programming multiple garage door openers, ensure that all openers and remote controls are compatible with each other and with the garage door(s) you intend to operate. Most modern garage door openers support programming multiple remotes, but it’s essential to verify compatibility to avoid compatibility issues.

2. Access Programming Mode: To program multiple garage door openers, you’ll need to access programming mode on each opener individually. The method for accessing programming mode may vary depending on the make and model of the opener. Typically, you’ll need to locate the “learn” button on the opener’s motor unit and press it to initiate programming mode.

3. Follow Programming Instructions: Once you’ve accessed programming mode on each opener, follow the manufacturer’s instructions for programming the remote controls. This typically involves pressing a specific sequence of buttons on the remote control or the opener itself to synchronize the remote with the opener.

4. Test Each Opener: After programming each opener, test its functionality by using the programmed remote control to open and close the garage door(s). Ensure that each opener operates the door(s) smoothly and reliably without any issues.

5. Repeat the Programming Process: If you have additional garage door openers that you want to program, repeat the programming process for each opener individually. Access programming mode on each opener and follow the same steps outlined above to synchronize each remote with the opener.

6. Consider Programming Keyless Entry Keypads: In addition to remote controls, many garage door openers support keyless entry keypads, which allow users to enter a code to open the garage door(s). If desired, you can also program keyless entry keypads for multiple users, providing an additional method for accessing the garage.

7. Secure Programming Mode: Once you’ve programmed all desired garage door openers, secure programming mode on each opener to prevent unauthorized access or accidental reprogramming. This typically involves pressing the “learn” button again or following specific instructions provided by the manufacturer.

8. Troubleshooting: If you encounter any issues or difficulties during the programming process, refer to the manufacturer’s instructions for troubleshooting tips and guidance. Common issues may include signal interference, low battery power, or improper button sequences.

9. Conclusion:

In conclusion, programming multiple garage door openers is a straightforward process that provides convenience and flexibility for users. By following the manufacturer’s instructions and ensuring compatibility between the openers and remote controls, you can successfully program multiple openers to control the same garage door(s). Enjoy the convenience of having multiple remotes for accessing your garage door(s) from different vehicles or locations.

Garage Door Wizard

17302 House & Hahl Rd Suit 208, Cypress, TX 77433, United States

1-832-373-7681

Can You Lock A Garage Door From The Inside – Affordable Garage Door Repairs of Kokomo

Garage Door Repair Kokomo IN is a common practice to enhance security and prevent unauthorized access to your home. While most garage doors are equipped with locking mechanisms, not all of them are designed to be locked from the inside.

However, there are several methods and devices you can use to secure your garage door from the inside. Let’s explore these options in detail:

1. Manual Locks or Latches: Many garage doors are equipped with manual locks or latches that can be engaged from the inside to secure the door. These locks typically operate by sliding a bolt or bar into a corresponding slot on the garage door track or frame. To lock the door, simply engage the lock mechanism using the provided key or handle.

2. Slide Bolt Locks: Slide bolt locks are another type of manual locking mechanism commonly used to secure garage doors from the inside. These locks consist of a bolt or bar that slides horizontally across the door track to prevent it from being opened. Slide bolt locks are usually installed near the bottom of the door and can be engaged or disengaged manually as needed.

3. Padlocks and Hasps: Padlocks and hasps can be used to secure garage doors from the inside by attaching them to the door track or frame. Hasps are metal loops or hooks that are mounted onto the door, while padlocks are inserted through the hasp to secure the door in place. This method provides an additional layer of security and can be used in conjunction with other locking mechanisms.

4. C-Clamp Locks: C-clamp locks are simple yet effective devices that can be used to prevent the garage door from being opened from the outside. These locks consist of a metal clamp that is placed over the track of the garage door and tightened securely using a wrench or similar tool. C-clamp locks are easy to install and provide a strong barrier against forced entry.

5. Automatic Garage Door Locks: Some modern garage door openers come equipped with automatic locking features that engage when the door is closed. These locks are typically activated by the garage door opener itself and provide an additional layer of security by preventing the door from being manually opened from the outside. Automatic garage door locks are ideal for homeowners who want added peace of mind and convenience.

6. Door Reinforcement Kits: Door reinforcement kits are designed to strengthen the garage door and prevent forced entry by reinforcing weak points such as hinges, locks, and panels. These kits typically include heavy-duty metal plates, bars, and bolts that can be installed on the interior side of the garage door to provide enhanced security. Door reinforcement kits are a proactive measure that can deter burglars and protect your home from intruders.

7. Security Bars or Braces: Security bars or braces can be installed on the interior side of the garage door to provide additional reinforcement and prevent the door from being forced open. These devices are typically adjustable and can be customized to fit the size and configuration of your garage door. Security bars or braces are an effective deterrent against break-ins and can provide added peace of mind.

Conclusion:
Garage Door Repair Kokomo IN is an important security measure that helps protect your home and belongings from unauthorized access. Whether using manual locks, slide bolt locks, padlocks and hasps, C-clamp locks, automatic garage door locks, door reinforcement kits, or security bars, there are several options available to secure your garage door from the inside. By choosing the most appropriate locking mechanism for your needs and taking proactive steps to enhance security, you can effectively prevent break-ins and keep your home safe and secure.

Affordable Garage Door Repairs of Kokomo

1206 Peace Pipe Dr, Kokomo, IN 46902, United States

1-765-441-4637

How To Activate Liftmaster Garage Door Opener – Martin Garage Door

Activating a  Garage Door Repair Parker CO  is a straightforward process that allows you to effortlessly open and close your garage door.

LiftMaster offers a range of garage door openers equipped with various activation methods, including remote controls, wall-mounted buttons, keypads, smartphone apps, and vehicle Homelink systems. Understanding how to activate your LiftMaster garage door opener ensures convenient access to your garage while prioritizing security and safety. Let’s explore each activation method in detail to help you activate your LiftMaster garage door opener effectively:

1. Remote Control Activation: Remote controls are the most common and convenient method of activating a LiftMaster garage door opener. They allow you to operate the door from a distance, typically within a range of 20 to 30 feet. To activate the opener using a remote control, simply press the designated button on the remote. This action sends a signal to the opener’s receiver, prompting the door to open or close. LiftMaster garage door openers come with one or more remote controls, enabling multiple users to access the garage. Some advanced remotes feature programmable buttons for controlling multiple doors or activating additional features like lights or security locks.

2. Wall-Mounted Button Activation: Wall-mounted buttons provide a convenient way to activate the LiftMaster garage door opener from within the garage itself. To activate the opener using a wall-mounted button, simply press the button located on the wall near the garage door. This action sends a signal to the opener’s receiver, initiating the door’s movement. Wall-mounted buttons often include additional controls such as the ability to turn on lights or lock the door, depending on the model of the opener.

3. Keypad Activation: Keypads offer a secure and keyless method of activating a LiftMaster garage door opener, eliminating the need for a remote control or physical key. To activate the opener using a keypad, enter the predetermined code using the keypad’s buttons. This sends a signal to the opener’s receiver, allowing the door to be opened or closed. LiftMaster keypads are typically installed outside the garage door and may feature programmable codes for enhanced security and flexibility.

4. Smartphone App Activation: LiftMaster offers smartphone apps that provide a modern and versatile way to activate a garage door opener using your mobile device. To activate the opener using the LiftMaster smartphone app, open the app on your device and select the option to open or close the garage door. This action sends a signal to the opener’s receiver, triggering the door’s movement. LiftMaster smartphone apps often offer additional features such as real-time monitoring of the garage door status, scheduling of automatic openings or closings, and integration with other smart home devices.

5. Vehicle Homelink Activation: Some vehicles come equipped with a built-in feature called Homelink, which allows you to program the vehicle’s buttons to activate a LiftMaster garage door opener. To activate the opener using Homelink, program the vehicle’s buttons to communicate with the LiftMaster garage door opener. This typically involves pressing and holding the desired button until the vehicle’s lights flash. Once programmed, press the programmed button inside the vehicle to send a signal to the opener’s receiver, opening or closing the garage door.

6. Manual Activation: In the event of a power outage or malfunction, LiftMaster garage door openers are equipped with a manual release mechanism that allows manual operation of the door. To manually activate the door, locate the manual release mechanism on the opener’s motor unit or track. Pulling this mechanism disengages the opener from the door, allowing you to lift or lower the door manually. Exercise caution when manually operating the garage door, as it may be heavier than expected and pose a safety risk if not handled properly.

Conclusion: Activating a  Garage Door Repair Parker CO  is a straightforward process that ensures convenient access to your garage while prioritizing security and safety. Whether using a remote control, wall-mounted button, keypad, smartphone app, vehicle Homelink system, or manual release mechanism, understanding how to activate your LiftMaster garage door opener enables smooth and reliable operation in various situations. By familiarizing yourself with the different activation methods and their respective procedures, you can enjoy the convenience and peace of mind that comes with effortless garage door access. Additionally, regular maintenance and testing of your LiftMaster garage door opener’s activation systems help ensure optimal performance and reliability for years to come.

Martin Garage Door

10411 S Parker Rd, Parker, CO 80134

1-303-663-1310

How Much To Install Automatic Garage Door Opener – Tarrant County Door & Gate

Garage Door Repair North Richland Hills TX can bring added convenience, security, and peace of mind to your home. If you’re considering this upgrade, you may be wondering about the associated costs.

In this comprehensive guide, we’ll explore various factors that influence the cost of installing an automatic garage door opener and provide valuable insights to help you budget effectively.

Understanding Automatic Garage Door Openers

Before delving into costs, let’s briefly review what automatic garage door openers entail:

An automatic garage door opener is a motorized device that opens and closes your garage door with the touch of a button. These openers come in various types, including chain-drive, belt-drive, screw-drive, and direct-drive, each offering different levels of noise, speed, and durability.

Factors Affecting Installation Costs

Several factors influence the cost of installing an automatic garage door opener:

  • Opener Type: Chain-drive openers are typically the most affordable but tend to be noisy. Belt-drive openers are quieter but may cost more upfront. Screw-drive and direct-drive openers offer smooth and quiet operation but may come at a higher price point.
  • Opener Features: Advanced features such as Wi-Fi connectivity, battery backup, and smart home integration can add to the overall cost.
  • Garage Door Compatibility: Some garage door openers are compatible with specific types or brands of garage doors, which may affect compatibility and installation costs.
  • Labor Rates: Installation costs vary depending on the contractor’s rates, location, and level of expertise.

Average Cost of Automatic Garage Door Opener Installation

The cost of installing an automatic garage door opener can vary widely depending on the factors mentioned above. On average, homeowners can expect to pay:

  • Basic Installation: For a standard single automatic garage door opener with basic features and no additional customization, the cost typically ranges from $200 to $500.
  • Advanced Installation: For a high-end automatic garage door opener with premium features such as Wi-Fi connectivity, battery backup, and smart home integration, the cost can range from $500 to $1,000 or more.

DIY vs. Professional Installation

While some homeowners may consider a DIY installation to save money, it’s essential to weigh the pros and cons:

  • DIY Installation: DIY installation can save on labor costs, but it requires technical skills, specialized tools, and knowledge of electrical wiring and safety regulations. Improper installation can compromise security and functionality.
  • Professional Installation: Hiring a professional ensures proper installation, warranty coverage, and peace of mind. While it adds to the overall cost, professional installation reduces the risk of issues down the line.

Tips for Cost-Saving

To minimize the cost of automatic garage door opener installation, consider the following tips:

  • Choose a Standard Model: Opt for a standard automatic garage door opener with basic features to keep costs down.
  • Reuse Existing Hardware: If your existing garage door opener hardware is in good condition, you may be able to save on installation costs by reusing it with the new opener.
  • Shop Around: Obtain quotes from multiple contractors to compare prices and services offered, ensuring you get the best value for your money.

Conclusion:

Garage Door Repair North Richland Hills TX can enhance convenience, security, and functionality while adding value to your home. By understanding the factors influencing installation costs and following the tips outlined in this guide, you can ensure a smooth and cost-effective installation process.

Tarrant County Door & Gate

6408 Marlette Ct, Fort Worth, TX 76182, United States

1-817-456-2958

How Much To Convert Manual Garage Door To Automatic – Team Taylor Doors

Converting a Garage Door Repair Lees Summit MO one can significantly enhance convenience and security. Manual garage doors require physical effort to open and close, whereas automatic garage doors operate with the press of a button, offering seamless functionality.

However, homeowners often wonder about the cost implications of such a conversion. In this guide, we’ll explore the factors influencing the cost of converting a manual garage door to an automatic one and provide valuable insights to help you make informed decisions.

Understanding Manual and Automatic Garage Doors

Before diving into costs, it’s essential to understand the differences between manual and automatic garage doors:

Manual Garage Doors

Manual garage doors operate through manual lifting and lowering mechanisms, typically using handles or pull ropes. They require physical effort from the user to open and close.

Automatic Garage Doors

Automatic garage doors are equipped with motors and remote control systems that allow for effortless operation. They can be operated remotely via a wall-mounted switch or a handheld remote.

Factors Affecting Conversion Costs

Several factors influence the cost of converting a manual garage door to an automatic one, including:

  • Type of Garage Door: The type and material of the existing garage door can impact the complexity and cost of the conversion.
  • Type of Automation System: There are different types of automation systems available, including chain-drive, belt-drive, and screw-drive systems, each varying in price.
  • Additional Features: Additional features such as keyless entry pads, motion sensors, and smartphone connectivity can increase the overall cost of the conversion.
  • Labor Costs: Hiring professionals for installation incurs labor costs, which vary depending on the complexity of the project and the contractor’s rates.

Average Cost of Conversion

The cost of converting a manual garage door to an automatic one can vary depending on various factors. On average, homeowners can expect to pay:

  • Automation Kit: The cost of a basic automation kit typically ranges from $200 to $500, depending on the brand and features included.
  • Installation: Professional installation costs can range from $300 to $800, depending on the complexity of the project and labor rates in your area.
  • Additional Features: Adding extra features such as keyless entry pads or smartphone connectivity can increase the total cost by $100 to $300 or more.

DIY vs. Professional Installation

While some homeowners may consider DIY installation to save money, it’s essential to weigh the pros and cons carefully:

  • Pros of DIY Installation: Lower upfront costs, flexibility in scheduling.
  • Cons of DIY Installation: Risk of improper installation leading to malfunctions or safety hazards, lack of warranty protection.

Tips for Hiring a Professional

If you opt for professional installation, consider the following tips to ensure a smooth and successful conversion:

  • Research Reputable Contractors: Look for licensed and insured garage door installation companies with positive reviews and ratings.
  • Obtain Multiple Quotes: Obtain quotes from multiple contractors to compare prices and services offered.
  • Inquire About Warranties: Ask about warranties on both the automation kit and installation labor to ensure peace of mind.

Cost-Saving Tips

To minimize the cost of converting a manual garage door to an automatic one, consider the following tips:

  • Choose a Basic Automation Kit: Opt for a basic automation kit without unnecessary features to keep costs down.
  • Shop Around for Installation Quotes: Compare quotes from different contractors to find the most competitive pricing.
  • Consider DIY for Simple Installations: If you’re handy with tools and have experience with home improvement projects, consider tackling the installation yourself to save on labor costs.

Conclusion:

Converting a Garage Door Repair Lees Summit MO one can enhance convenience and security while adding value to your home. By understanding the factors that influence the cost of conversion and following the tips outlined in this guide, you can make informed decisions and enjoy the benefits of an automatic garage door system.

Team Taylor Doors

210 SW Market St Suite 144, Lee’s Summit, MO 64063, United States

1-816-408-6999

Can Smart Garage Door Openers Be Hacked – BH Garage Doors and Gates


Smart  Garage Door Repair Rockwall TX like any other internet-connected device, can potentially be vulnerable to hacking if proper security measures are not in place.

Here’s an in-depth exploration of the risks and precautions associated with smart garage door opener security:

1. Vulnerabilities in Internet Connectivity:

  • Smart garage door openers connect to the internet via Wi-Fi or other wireless protocols, allowing users to control them remotely through smartphone apps or web interfaces. However, this connectivity also introduces potential vulnerabilities that hackers could exploit to gain unauthorized access.

2. Weak Passwords:

  • One of the most common security risks associated with smart devices is the use of weak or default passwords. If users fail to change the default password or choose a strong, unique password, hackers may be able to guess or brute-force their way into the device’s settings, granting them control over the garage door opener.

3. Software Vulnerabilities:

  • Like any software-based system, smart garage door openers may contain vulnerabilities that could be exploited by hackers to gain unauthorized access. These vulnerabilities could include flaws in the device’s firmware, software bugs, or weaknesses in the encryption protocols used to secure communications between the device and the user’s smartphone or other devices.

4. Man-in-the-Middle Attacks:

  • Hackers may attempt to intercept communications between the smart garage door opener and the user’s smartphone, allowing them to eavesdrop on or manipulate commands sent to the device. This type of attack, known as a man-in-the-middle attack, could potentially allow hackers to open or close the garage door without the user’s knowledge or consent.

5. Phishing Attacks:

  • Hackers may also attempt to trick users into revealing their login credentials or other sensitive information through phishing attacks. These attacks typically involve sending fraudulent emails or text messages that appear to come from legitimate sources, such as the manufacturer of the smart garage door opener, and prompt users to enter their username and password on a fake website.

6. Physical Security Risks:

  • In addition to cyber threats, smart garage door openers may also be vulnerable to physical security risks. For example, an attacker could gain unauthorized access to the device by physically tampering with it or by exploiting weaknesses in the physical security of the user’s home, such as unlocked doors or windows.

Precautions to Enhance Security:

  • Change Default Passwords: Always change the default password of your smart garage door opener to a strong, unique password that is not easily guessable.
  • Keep Firmware Up-to-Date: Regularly check for and install firmware updates provided by the manufacturer to patch known vulnerabilities and improve security.
  • Enable Two-Factor Authentication: If supported, enable two-factor authentication (2FA) for an additional layer of security when accessing the smart garage door opener remotely.
  • Use Secure Wi-Fi Networks: Connect your smart garage door opener to a secure Wi-Fi network with WPA2 or WPA3 encryption to prevent unauthorized access to your home network.
  • Be Cautious of Phishing Attempts: Be wary of unsolicited emails, text messages, or phone calls requesting personal or login information and avoid clicking on suspicious links or downloading attachments from unknown sources.

Conclusion:

By following best practices for securing smart devices and remaining vigilant against potential threats, users can help minimize the risk of their smart Garage Door Repair Rockwall TXbeing hacked or compromised.

BH Garage Doors and Gates

4035 N Goliad St, Rockwall, TX 75087, United States

1-214-206-5231

https://maps.app.goo.gl/iYdGkyhiGAiUXN3G7

How To Program A Genie Garage Door – Southern Home Creations Garage Doors & Openers


Programming a Genie Garage Door Repair Suwanee GA involves a series of steps to synchronize the remote control with the opener unit.

Here’s a comprehensive guide to programming a Genie garage door opener

1. Locate the Learn Button:

  • The first step is to locate the “Learn” button on your Genie garage door opener unit. This button is typically found on the back or side of the opener motor unit. It may be colored red, green, orange, or purple, depending on the model.

2. Clear Existing Codes (Optional):

  • If you’re reprogramming a remote or keypad, it’s a good idea to clear the existing codes from the opener memory. To do this, press and hold the “Learn” button until the indicator light on the opener turns off, indicating that the codes have been cleared.

3. Choose a Remote Control:

  • Decide which remote control you want to program to the opener. Genie garage door openers typically come with a handheld remote, and you may have additional remotes or keypads that you want to program.

4. Press the Learn Button:

  • Press the “Learn” button on the opener unit and release it. The indicator light on the opener will begin flashing, indicating that it is in programming mode and ready to learn a new remote control code.

5. Program the Remote:

  • Within 30 seconds of pressing the Learn button, press and release the button on the remote control you wish to program. You may need to do this multiple times for multi-button remotes, such as those with separate buttons for opening and closing the door.

6. Test the Remote:

  • After programming the remote, test it to ensure it works correctly. Stand within range of the opener unit and press the button on the remote control. The garage door should respond by opening or closing. If it does not, repeat the programming steps.

7. Program Additional Remotes (Optional):

  • If you have additional remotes or keypads to program, repeat steps 4-6 for each device within the 30-second programming window. Each remote must be programmed individually.

8. Program Keypad (Optional):

  • If your Genie garage door opener has a wireless keypad, you can program it using a similar process. Enter the programming code provided in the opener’s instruction manual, then press the “Learn” button on the opener and enter your desired PIN on the keypad.

9. Finalize Programming:

  • Once all remotes and keypads are programmed, press the “Learn” button on the opener unit again to exit programming mode. The indicator light should stop flashing, indicating that the programming process is complete.

10. Test All Controls:

  • Test all programmed remotes and keypads to ensure they operate the garage door correctly. If any issues arise, repeat the programming steps or consult the opener’s instruction manual for troubleshooting tips.

Conclusion:

  • Garage Door Repair Suwanee GA By following these steps carefully and referring to the opener’s instruction manual as needed, you can easily program your remote controls and keypads for seamless operation of your garage door.

Southern Home Creations Garage Doors & Openers

4110 Tench Rd Suite D, Suwanee, GA 30024, United States

1-770-831-0301

https://maps.app.goo.gl/1sSeEcj3whKsA8wN7

How To Make Garage Door Close Tighter – Bridgeport Best Garage & Overhead Doors


Ensuring that your Garage Door Repair Bridgeton TX  closes tightly is crucial for security, energy efficiency, and protection against the elements.

Here’s a comprehensive guide on how to make your garage door close tighter:

1. Check Alignment:

  • Begin by inspecting the alignment of your garage door. Look for any gaps between the door and the frame when it is closed. Misalignment can prevent the door from closing tightly and may require adjustments to the tracks or rollers.

2. Tighten Hardware:

  • Check all the nuts, bolts, and screws on the garage door and track system. Loose hardware can cause the door to sag or shift, resulting in gaps when closed. Use a wrench or screwdriver to tighten any loose hardware securely.

3. Replace Weather Stripping:

  • Weather stripping around the perimeter of the garage door helps create a tight seal and prevents drafts, moisture, and debris from entering the garage. Inspect the weather stripping for signs of wear or damage and replace it if necessary. Ensure the weather stripping is properly installed and forms a complete seal when the door is closed.

4. Adjust Limit Switches:

  • Most garage door openers are equipped with limit switches that control the door’s travel distance. If the door is not closing tightly, adjusting the limit switches can help. Consult your garage door opener’s manual for instructions on how to adjust the limit switches properly.

5. Lubricate Moving Parts:

  • Lubricating the moving parts of your garage door system, including the tracks, rollers, hinges, and springs, can help ensure smooth operation and a tighter seal when the door is closed. Use a silicone-based lubricant to avoid attracting dirt and debris.

6. Inspect Rollers and Tracks:

  • Examine the rollers and tracks for any signs of damage, wear, or obstruction. Clean the tracks thoroughly to remove dirt, debris, or rust buildup that may prevent the door from closing tightly. Replace damaged rollers or tracks as needed to maintain smooth operation.

7. Adjust Tension Springs:

  • Torsion springs located above the door or extension springs mounted on the sides of the door may require adjustment to ensure proper tension. Consult a professional garage door technician to adjust the tension springs safely and accurately for optimal performance.

8. Install Bottom Seal:

  • If your garage door does not have a bottom seal or if the existing seal is worn or damaged, installing a new bottom seal can help create a tighter seal when the door is closed. Measure the width of the door opening and purchase a bottom seal of appropriate size. Install the seal according to the manufacturer’s instructions.

9. Consider Insulation:

  • Insulating your garage door can not only improve energy efficiency but also help create a tighter seal. Insulated garage doors are available with various insulation materials, such as foam or reflective foil, that provide additional thermal protection and soundproofing.

10. Professional Inspection:

  • If you’re unable to achieve a tight seal with DIY methods or if your garage door requires significant repairs or adjustments, consider hiring a professional garage door technician. They can inspect the door, identify any underlying issues, and recommend the best course of action to ensure a tight seal and optimal performance.

Conclusion:

Bridgeport Best Garage & Overhead Doors

701 E Cates St, Bridgeport, TX 76426, United States

1-940-532-8593

https://maps.app.goo.gl/YBR9xXjnZMPhUNvy9

How Do You Program A Clicker Garage Door Keypad – Southern Home Creations Garage Doors & Openers


Clicker keypads are compatible with most major Garage Door Repair Suwanee GA  brands and models.

Here’s a comprehensive guide on how to program a Clicker garage door keypad

Step 1: Identify Your Garage Door Opener Model:

Before programming the Clicker keypad, identify the brand and model of your garage door opener. This information is usually located on the motor unit of the opener or in the owner’s manual. Knowing the make and model of your opener will ensure compatibility with the Clicker keypad.

Step 2: Determine Keypad Location:

Decide where you want to mount the Clicker keypad outside your garage. Choose a location near the garage door but out of reach of children and away from direct exposure to sunlight and moisture.

Step 3: Clear Existing Codes (if necessary):

If the Clicker keypad has been previously programmed to another garage door opener, you may need to clear the existing codes before programming new ones. Refer to the keypad’s instruction manual for specific instructions on clearing existing codes.

Step 4: Access the Keypad Programming Button:

Locate the programming button on the Clicker keypad. This button is typically located on the back of the keypad or behind the battery cover. Press and release the programming button to enter programming mode.

Step 5: Enter the Manufacturer’s Programming Code:

Each Clicker keypad comes with a manufacturer’s programming code that corresponds to specific garage door opener brands. Consult the instruction manual or the Clicker website to find the programming code for your opener’s brand.

Step 6: Enter Your Garage Door Opener’s Brand Code:

Using the keypad, enter the manufacturer’s programming code for your garage door opener’s brand. The keypad’s indicator light will flash to confirm that the code has been accepted.

Step 7: Enter Your Opener’s Learn Button Code:

Press and release the “Learn” or “Smart” button on the motor unit of your garage door opener. This button is typically located near the hanging antenna wire or on the back or side of the motor unit. The opener’s indicator light will illuminate or flash to indicate that it is ready to receive programming signals.

Step 8: Program the Keypad Code:

Using the keypad, enter your desired four-digit PIN code for operating the garage door. The keypad’s indicator light will flash to confirm that the code has been accepted.

Step 9: Test the Keypad:

Test the Clicker keypad by entering the programmed PIN code and pressing the “Enter” or “Open/Close” button. The garage door should open or close in response to the keypad command. If the door does not respond, repeat the programming steps or refer to the troubleshooting section in the keypad’s instruction manual.

Step 10: Mount the Keypad:

Once the Clicker keypad is programmed and tested, mount it securely to the outside of your garage using the provided mounting screws or adhesive strips. Ensure that the keypad is mounted level and securely attached to the wall or door frame.

Step 11: Maintain and Secure the Keypad:

Regularly check the Clicker keypad for signs of wear or damage and replace the batteries as needed. Keep your PIN code confidential and avoid sharing it with others to maintain security.

Conclusion:

Garage Door Repair Suwanee GA  If you encounter any difficulties during the programming process, consult the troubleshooting section in the keypad’s manual or contact the manufacturer for assistance.

Southern Home Creations Garage Doors & Openers

4110 Tench Rd Suite D, Suwanee, GA 30024, United States

1-770-831-0301

https://maps.app.goo.gl/RooJByBqbJz28knC8

How To Paint Fiberglass Garage Door – Garage Door Wizard


In this comprehensive guide, we’ll walk you through the step-by-step process of programming multiple Garage Door Cypress TX  for various opener brands, including Chamberlain, Genie, and others.

Before programming multiple garage door remotes, it’s essential to gather some information and ensure you have the necessary tools and equipment:

  1. Opener Brand and Model: Identify the brand and model of your garage door opener. This information is typically located on the opener itself or in the owner’s manual.
  2. Number of Remotes: Determine how many remotes you need to program. Most garage door openers support multiple remote controls, so you can program as many as needed.
  3. New Remote(s): If you’re adding new remotes, make sure they are compatible with your garage door opener. Check the manufacturer’s recommendations or consult the owner’s manual for compatibility information.
  4. Access to Opener: You’ll need access to the garage door opener unit itself, typically located in the garage ceiling or wall.
  5. Step Ladder: Depending on the location of your garage door opener, you may need a step ladder to reach it comfortably.

Step-by-Step Guide:

Follow these general steps to program multiple garage door remotes for various opener brands:

Step 1: Access Learn/Program Button:

Locate the “Learn” or “Program” button on your garage door opener unit. This button is usually located near the antenna wire or on the back panel of the opener. Consult your opener’s manual if you’re unsure where to find it.

Step 2: Clear Existing Remotes (Optional):

If you’re reprogramming all remotes or starting fresh, you may need to clear the opener’s memory first. Press and hold the “Learn” or “Program” button until the indicator light turns off or blinks, indicating that the memory has been cleared.

Step 3: Program First Remote:

Follow these general steps to program the first remote:

  1. Press and release the “Learn” or “Program” button on the garage door opener unit. The indicator light will illuminate or start blinking, indicating that the opener is in programming mode.
  2. Within 30 seconds, press and hold the desired button on the remote you wish to program. Hold the button until the indicator light on the opener blinks or turns off, indicating that the remote has been successfully programmed.
  3. Release the button on the remote. Test the remote by pressing the programmed button to open or close the garage door. If the door operates correctly, the programming was successful.

Step 4: Program Additional Remotes:

Once you’ve programmed the first remote, repeat the process for each additional remote you wish to program. Follow the same steps, pressing and releasing the “Learn” or “Program” button on the opener and then pressing and holding the desired button on the remote within the 30-second window.

Step 5: Test Remotes:

After programming all remotes, test each one to ensure they open and close the garage door correctly. If any remotes do not work as expected, repeat the programming process or consult the opener’s manual for troubleshooting tips.

Specific Programming Instructions:

Depending on the brand and model of your garage door opener, the programming process may vary slightly. Here are specific programming instructions for some popular opener brands:

Chamberlain/LiftMaster:

  1. Press and release the “Learn” button on the opener.
  2. Within 30 seconds, press and hold the button on the remote you wish to program.
  3. Release the button when the opener’s lights blink or you hear a click.
  4. Repeat for each additional remote.

Genie:

  1. Press and release the “Learn Code” button on the opener.
  2. Within 30 seconds, press and release the button on the remote you wish to program.
  3. Repeat for each additional remote.

Craftsman:

  1. Press and release the “Smart/Learn” button on the opener.
  2. Within 30 seconds, press and release the button on the remote you wish to program.
  3. Repeat for each additional remote.

Additional Tips:

  • Ensure that all remotes are within range of the opener when programming.
  • If you encounter any issues, refer to the opener’s manual for specific troubleshooting steps.
  • Keep track of which buttons on the remotes correspond to which garage doors if you have multiple doors.

Conclusion:


Garage Door Cypress TX  By following the steps outlined in this guide and referring to the specific instructions for your opener brand, you can quickly and easily program multiple remotes to work with your garage door opener. With the added convenience of multiple remotes, you’ll enjoy seamless access to your garage and home security.

Garage Door Wizard

17302 House & Hahl Rd Suit 208, Cypress, TX 77433, United States

1-832-373-7681

https://maps.app.goo.gl/JxtfMsEMw6LLsS6V8

How To Keep A Garage Door From Freezing Shut – All Good Garage Doors


Keeping a Garage Door Las Vegas Nevada  from freezing shut is essential to ensure smooth operation and prevent damage to the door and its components during cold weather. Freezing temperatures can cause moisture and ice buildup, leading to the door sticking to the ground or tracks.

Here are several steps you can take to prevent your garage door from freezing shut:

1. Apply a Lubricant: Before the onset of cold weather, apply a silicone-based lubricant to the moving parts of the garage door, including hinges, rollers, tracks, and springs. Lubrication helps reduce friction and prevents moisture from accumulating, making it less likely for the door to freeze shut.

2. Clean the Tracks: Regularly clean the tracks along the sides of the garage door to remove any dirt, debris, or ice buildup. Use a stiff brush or vacuum cleaner to clear away any obstructions that may prevent the door from opening and closing smoothly.

3. Adjust the Seal: Inspect the weatherstripping and bottom seal along the bottom edge of the garage door for signs of wear or damage. Replace any worn or damaged weatherstripping and ensure that the bottom seal forms a tight seal against the garage floor to prevent cold air and moisture from entering.

4. Install a Heater: Consider installing a garage door heater or a portable space heater to keep the temperature inside the garage above freezing. A warmer garage environment helps prevent moisture from freezing on the door and tracks, reducing the likelihood of the door freezing shut.

5. Use a De-Icing Solution: Apply a commercial de-icing solution or a homemade mixture of warm water and vinegar to melt ice buildup on the garage door and tracks. Allow the solution to sit for several minutes to dissolve the ice before attempting to open the door.

6. Warm the Garage: If possible, park a vehicle inside the garage overnight to generate heat and raise the temperature inside. Alternatively, use a portable heater or heat lamp to warm the garage space before attempting to open the door in the morning.

7. Clear Snow and Ice: After a snowfall or freezing rain, clear snow and ice from the driveway and around the garage door to prevent them from accumulating and freezing. Use a snow shovel, ice scraper, or snowblower to remove snow and ice from the area to facilitate easy operation of the garage door.

8. Prevent Water Leakage: Check for any sources of water leakage or drainage issues around the garage door. Ensure that gutters and downspouts are clear and functioning properly to prevent water from pooling near the garage door and freezing.

9. Install a Threshold Seal: Consider installing a threshold seal along the bottom edge of the garage door to create a barrier against moisture and cold air infiltration. Threshold seals are designed to provide a tight seal against the garage floor, preventing water and ice from seeping under the door.

10. Regular Maintenance: Perform regular maintenance on your garage door, including lubricating moving parts, tightening hardware, and inspecting for signs of wear or damage. Addressing any issues promptly can help prevent problems and ensure that the door operates smoothly throughout the winter months.

Regular maintenance and proper care help ensure the longevity and functionality of your Garage Door Las Vegas Nevada  system, even in freezing temperatures.

All Good Garage Doors

494 Cape Alan Dr, Henderson, NV 89052, USA

702-343-2252

https://maps.app.goo.gl/Ra96tSSbVGCtGmSj7