How To Rewind Garage Door Spring – Springtown Gates & Garage Doors

Rewinding a Springtown Garage Door Repair can be a challenging task that requires precision and caution.

It’s important to note that adjusting or rewinding garage door springs can be dangerous, and if you’re not comfortable with this task, it’s recommended to seek professional help. However, if you feel confident in doing it yourself, here’s a detailed guide on how to rewind a garage door spring.

: Gather Necessary Tools and Materials

Before you start, make sure you have all the required tools and materials. This typically includes winding bars, a ladder, safety glasses, gloves, and a socket wrench set.

: Identify the Type of Spring

There are two main types of garage door springs: torsion springs and extension springs. Torsion springs are mounted above the door and are wound up using a winding mechanism. Extension springs are mounted on either side of the door and extend when the door is closed. Identify the type of spring you have before proceeding.

: Release Tension on the Spring

For safety reasons, it’s crucial to release tension from the spring before attempting to rewind it. If you have a torsion spring, use winding bars to unwind it until there is no tension left. If you have extension springs, open the door and secure it in the open position using clamps.

: Remove the Old Spring

Once the tension is released, carefully remove the old spring. Use a socket wrench to loosen and remove the bolts securing the spring in place. Keep in mind that the spring will still have some weight, so handle it with care.

: Measure the Old Spring

Before winding the new spring, measure the length of the old spring, including the coils. This will help you determine the number of turns needed to achieve the proper tension.

: Install the New Spring

Place the new spring on the torsion tube and secure it with the necessary hardware. Make sure it is centered and aligned properly.

: Begin Winding the Spring

Using winding bars, begin winding the spring in the direction specified by the manufacturer. Refer to the measurements you took earlier to ensure you wind the spring the correct number of turns. Take your time and be cautious throughout this process.

: Test the Door

After winding the spring, carefully remove the winding bars and test the door. Open and close it a few times to ensure smooth operation. If the door feels unbalanced or there are any unusual sounds, stop immediately and reassess the tension on the spring.

: Make Adjustments if Necessary

If the door is not operating as expected, you may need to make adjustments to the spring tension. Refer to the manufacturer’s instructions for guidance on making minor adjustments.

: Final Safety Checks

Perform a final safety check to ensure all bolts and hardware are securely tightened. Double-check the tension on the spring and make any necessary adjustments.

Remember, safety is paramount when working with Springtown Garage Door Repair. If you’re unsure or uncomfortable with any step of the process, it’s best to consult with a professional garage door technician to avoid accidents or injuries.

Springtown Gates & Garage Doors

104 Adalida Ln, Springtown, TX 76082, United States

1-817-631-1036

How Much Is A New Garage Door Installed – Springtown Gates & Garage Doors

Installing a new Garage Door Repair Springtown TX involves various factors that contribute to the overall cost.

The price can vary based on the type of garage door, materials used, additional features, and installation charges. Let’s explore these factors in detail.

1. Type of Garage Door:

There are several types of garage doors, each with its own set of features and costs. Common types include:

  • Sectional Garage Doors: Comprising multiple horizontal panels that lift vertically, these are popular and versatile. Prices vary based on materials.
  • Roll-Up Garage Doors: Typically made of steel or aluminum, these doors roll up into a coil above the opening. They are durable and space-saving.
  • Side-Hinged Garage Doors: These doors swing open like traditional carriage doors. They are often made of wood and can be customized.
  • Tilt-Up/Up and Over Garage Doors: These doors tilt up and slide into the garage space. They are known for their simplicity.

2. Material:

The material of the garage door significantly influences the cost. Common materials include:

  • Steel: Durable and relatively affordable, steel doors are low-maintenance and provide good insulation.
  • Wood: Wooden garage doors offer a classic and elegant look. However, they are pricier and require more maintenance.
  • Aluminum: Lightweight and resistant to rust, aluminum doors are a popular choice. They are also less expensive than wood.
  • Fiberglass: Resistant to dents and corrosion, fiberglass doors are lightweight and low-maintenance.

3. Insulation:

Garage door insulation is crucial, especially in regions with extreme temperatures. Insulated doors help regulate the temperature inside the garage and can lower energy bills. The level of insulation affects the overall cost.

4. Design and Style:

Customization and design intricacies contribute to the cost. Intricate patterns, windows, and unique finishes increase the overall price of the garage door.

5. Size of the Door:

The size of the garage door opening directly affects the cost. Larger doors require more materials and labor for installation.

6. Additional Features:

  • Windows: Adding windows to the garage door enhances aesthetics but also increases costs.
  • Automation: Opting for a motorized garage door with remote control or smart home integration adds to the overall expense.
  • Security Features: Enhanced security features, such as smart locks and alarms, contribute to the cost.

7. Professional Installation:

While some homeowners opt for DIY installation, hiring a professional ensures proper installation and reduces the risk of mistakes. Professional installation costs vary based on location and the complexity of the job.

8. Local Market Conditions:

The cost of garage door installation can be influenced by local market conditions, including labor costs and the availability of materials.

9. Warranties:

Garage doors often come with warranties. Doors with longer and more comprehensive warranties may have a higher upfront cost.

Conclusion:

In summary, the cost of a new Garage Door Repair Springtown TX can range widely based on factors such as the type of door, materials used, insulation, design features, size, additional elements, professional installation, and local market conditions. It’s essential to consider your specific needs, budget constraints, and the long-term benefits of the chosen garage door before making a decision. Researching and obtaining multiple quotes from reputable suppliers and installers can help you make an informed choice that meets both your functional and aesthetic preferences.

Springtown Gates & Garage Doors

104 Adalida Ln, Springtown, TX 76082, United States

1-817-631-1036

How Wide Is A Garage Door – Springtown Gates & Garage Doors

A Garage Door Repair Springtown TX an often overlooked yet essential element of a home, serves not only as a functional entry point for vehicles but also plays a significant role in the overall aesthetics of the property. When it comes to determining the width of a garage door, several factors come into play, ranging from standard dimensions to customization options tailored to individual preferences.

Standard garage door widths typically fall within a range of 8 to 20 feet. The most common width, found in many residential properties, is 9 feet. This dimension allows for the accommodation of standard-sized vehicles such as sedans and smaller SUVs. However, as the variety of vehicles on the road continues to expand, so does the need for larger garage door openings.

In instances where homeowners own larger vehicles, such as trucks or SUVs, opting for a wider garage door becomes imperative. A width of 10 to 12 feet is often recommended for those seeking to comfortably park vehicles with broader dimensions. Customization options provide flexibility in tailoring the garage door width to specific needs, ensuring that it aligns seamlessly with the homeowner’s lifestyle.

The process of determining the appropriate garage door width involves considering not only the dimensions of the vehicles to be parked but also the available space within the garage itself. A garage with limited lateral space may pose constraints on the width of the door. Additionally, factors such as the inclusion of storage cabinets or workbenches within the garage must be taken into account to guarantee a functional and well-designed space.

Beyond the practical considerations of vehicle accommodation, garage doors contribute significantly to the curb appeal of a home. Homeowners often seek to harmonize the garage door width with the architectural style of the property. This may involve selecting a specific design, material, or color that complements the overall aesthetic, creating a cohesive and visually pleasing exterior.

The material chosen for the garage door also influences its width and overall performance. Traditional materials like wood offer a classic and timeless appearance but may require additional maintenance. On the other hand, steel and aluminum doors are known for their durability and resistance to elements, making them suitable for a wider range of climates.

In recent years, technological advancements have introduced smart garage door systems, allowing homeowners to control and monitor their garage doors remotely. These systems may include features such as smartphone integration, automated opening and closing, and security enhancements. When selecting the width of a garage door, compatibility with such technological advancements should be considered for a seamless integration into the home automation ecosystem.

It’s worth noting that the garage door width is just one aspect of the overall garage design. The height of the door is equally crucial, especially for those who own taller vehicles or recreational vehicles (RVs). Standard garage door heights range from 7 to 8 feet, with customization options available for those requiring more vertical clearance.

In conclusion, the width of a Garage Door Repair Springtown TX is a multifaceted consideration that extends beyond mere functionality. It involves a thoughtful assessment of vehicle dimensions, available space, architectural harmony, material choices, and technological integration. Whether adhering to standard dimensions or opting for a customized solution, the garage door width plays a pivotal role in enhancing both the practicality and aesthetic appeal of a home’s exterior.

Springtown Gates & Garage Doors

104 Adalida Ln, Springtown, TX 76082, United States

1-817-631-1036

Garage Door Replacement: When to Trust the Pros – Springtown Gates & Garage Doors

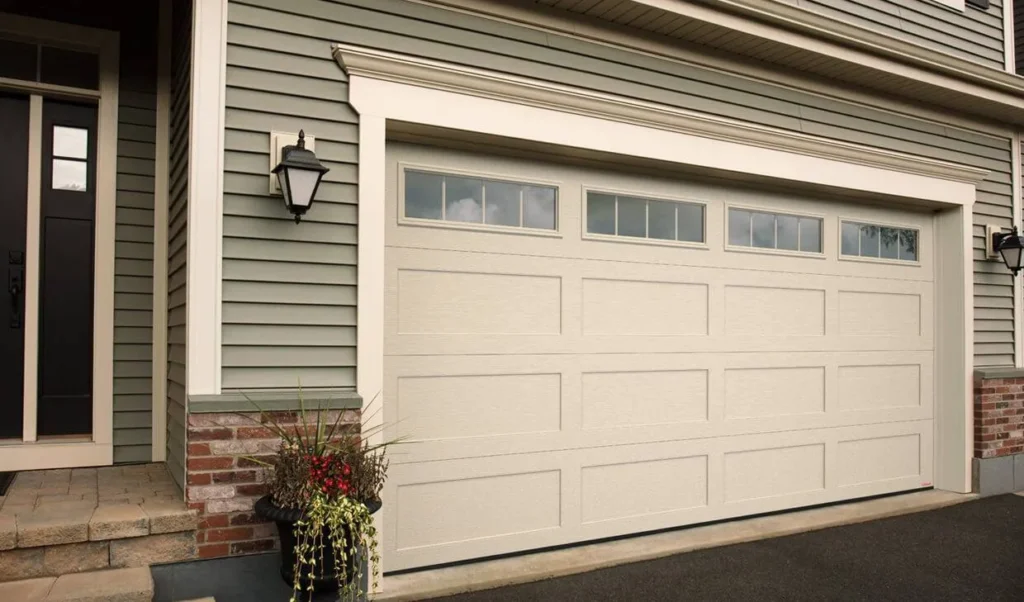
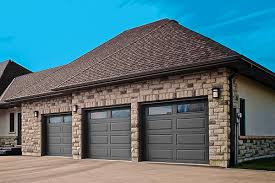
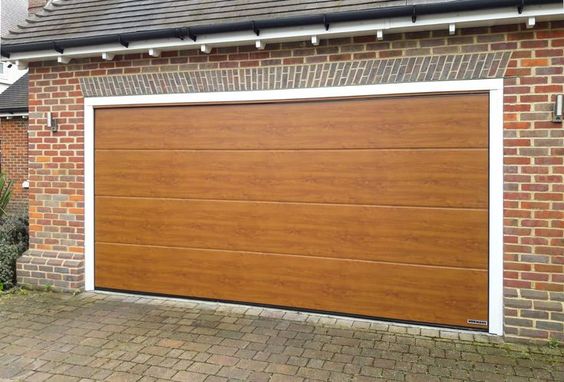
As a homeowner, I’ve always taken pride in tackling various DIY projects around the house. From painting walls to fixing minor plumbing issues, I’ve enjoyed the satisfaction of improving my home on my own. However, there comes a time when certain tasks require professional expertise, and garage door replacement is one of those critical undertakings.

In Garage Door Repair, I’ll discuss when to trust the pros with garage door replacement.

1. The Aging Garage Door Dilemma

Over the years, I noticed that my garage door had begun showing signs of wear and tear. It creaked and groaned when opening or closing, and its appearance had lost its former luster. While I initially thought of attempting a DIY makeover, it soon became apparent that the door’s problems were more than skin deep.

2. Safety First

One of the primary reasons why I decided to trust the pros with my garage door replacement was safety. Garage doors are heavy and operated by complex systems involving springs, cables, and various mechanical components. Attempting to replace a garage door without the necessary knowledge and equipment can lead to accidents and injuries.

My Experience: I once tried to replace a garage door spring on my own, thinking it was a simple task. The experience taught me the importance of safety, as I narrowly escaped a potentially life-threatening accident when the spring suddenly released with incredible force.

3. Expertise and Precision

Professional garage door technicians possess the knowledge and experience required to replace a garage door correctly. They understand the intricacies of garage door systems, including the adjustment of tension, alignment, and balance. These factors are critical for ensuring the door operates smoothly and safely.

My Experience: When I attempted a DIY garage door replacement in the past, I struggled with aligning the tracks and balancing the door. As a result, the door would frequently get stuck, leading to frustration and potential damage.

4. Customized Solutions

Every garage door replacement is unique, depending on factors like the size and style of the door, the type of materials used, and the layout of the garage. Professional technicians assess these factors and provide customized solutions that meet your specific needs and preferences.

My Experience: The first time I attempted a garage door replacement, I underestimated the importance of selecting the right door style and size. The result was a door that didn’t fit well and looked out of place. Professional technicians ensure a seamless fit and appearance.

5. Proper Tools and Equipment

Garage door replacement requires specialized tools and equipment to complete the job safely and efficiently. Professional technicians come equipped with everything needed to handle the task, from lifting mechanisms to precise measurement tools.

My Experience: During my initial DIY garage door replacement attempt, I struggled with lifting the heavy door and lacked the necessary equipment to make precise measurements. This made the task far more challenging and time-consuming than anticipated.

6. Codes and Regulations Compliance

Garage door replacements often involve compliance with local building codes and regulations. Professional technicians are familiar with these requirements and ensure that the new door meets all safety and structural standards.

My Experience: When I attempted a DIY replacement, I was unaware of certain local regulations regarding garage door installations. This oversight resulted in having to redo parts of the installation to meet code requirements, adding both time and frustration to the project.

7. Warranty and Accountability

Reputable garage door companies offer warranties on their products and services. This means that if any issues arise after the replacement, you have recourse for repairs or replacements at no additional cost. This warranty and accountability provide peace of mind.

My Experience: My DIY garage door replacement didn’t come with any warranty. When issues arose shortly after the replacement, I had to bear the full cost of repairs, which was an unexpected financial burden.

8. Time and Convenience

Replacing a garage door is a time-consuming process, especially for those without prior experience. Professional technicians can complete the job efficiently, allowing you to get back to your routine without unnecessary delays.

My Experience: My DIY garage door replacement project took far longer than anticipated, causing disruptions to my daily life. It also left me feeling drained and frustrated by the end.

9. Comprehensive Assessment

Before replacing a garage door, professional technicians conduct a comprehensive assessment of the entire garage door system, including the springs, cables, tracks, and opener. They identify any additional issues that may need attention, ensuring the long-term reliability of your garage door.

My Experience: During my DIY replacement project, I focused solely on the door itself and neglected to address other components. As a result, I encountered ongoing issues with the garage door opener and springs, requiring additional repairs and costs.

10. Cost-Effective in the Long Run

While it might seem cost-effective to embark on a DIY garage door replacement, the reality is that professional installation can save you money in the long run. By ensuring the job is done correctly the first time, you avoid costly repairs and replacements down the road.

My Experience: My DIY replacement project ended up costing me more than I initially anticipated due to the need for additional repairs and adjustments. In hindsight, I realized that investing in professional installation from the start would have been more cost-effective.

Conclusion

As stated in Garage Door Repair and from my experience as a homeowner, trusting the pros with garage door replacement is a decision I don’t regret. Their expertise, safety precautions, precision, and accountability make the process smooth and worry-free. While I enjoy tackling DIY projects around the house, I’ve learned that some tasks, like garage door replacement, are best left in the capable hands of professionals. It’s an investment that not only ensures safety and functionality but also saves time, money, and frustration in the long term.

Springtown Gates & Garage Doors

104 Adalida Ln, Springtown, TX 76082, United States

817-631-1036

How to Insulate Garage Door – Springtown Gates & Garage Doors

Insulating your Garage Door Repair Springtown, TX can make a significant difference in maintaining a comfortable temperature inside your garage, reducing energy costs, and enhancing the overall usability of this space.

Whether you use your garage as a workshop, storage area, or simply to protect your vehicles, insulating the garage door is a practical and cost-effective solution. This comprehensive guide will walk you through the steps to properly insulate your garage door, ensuring that you achieve maximum insulation efficiency.

  1. Gather the Necessary Materials:

Before you begin insulating your garage door, it’s essential to gather all the required materials and tools. Here’s a list of items you’ll need:

  • Insulation material (options discussed later)
  • Measuring tape
  • Utility knife or scissors
  • Straightedge or ruler
  • Adhesive or tape (e.g., double-sided tape)
  • Gloves
  • Safety goggles
  • Face mask (for dust and insulation particles)
  • Protective clothing
  1. Choose the Right Insulation Material:

There are several insulation materials to choose from, each with its own advantages and disadvantages. The most common options include:

a. Reflective Foil Insulation: Reflective foil insulation has a layer of foil on both sides and is excellent for heat reflection. It’s relatively easy to install but may not provide as much thermal resistance as other materials.

b. Foam Board Insulation: Rigid foam board insulation offers high R-values (a measure of thermal resistance) and is easy to cut and install. It’s a popular choice for garage door insulation.

c. Batt Insulation: Fiberglass or mineral wool batt insulation comes in rolls or pre-cut pieces. It’s effective at insulating but may be more challenging to install due to its flexibility.

d. Garage Door Insulation Kits: These kits come with pre-cut insulation panels designed specifically for garage doors. They often include installation hardware and are a convenient option for many.

  1. Measure and Prepare:

Start by measuring the dimensions of each panel on your garage door. Record these measurements accurately to ensure you purchase the correct amount of insulation material.

Next, thoroughly clean the surface of the garage door panels. Remove any dust, dirt, or debris, as a clean surface is essential for proper adhesion.

  1. Install the Insulation:

The installation process may vary slightly depending on the chosen insulation material, but here’s a general step-by-step guide:

a. Cut the Insulation: Using a utility knife or scissors, cut the insulation material to fit the measurements of each garage door panel. Make sure to wear gloves, safety goggles, and a face mask during this step to protect yourself from any dust or insulation particles.

b. Attach the Insulation: Depending on the insulation type, use adhesive, double-sided tape, or other recommended fasteners to secure the insulation to the garage door panels. Be sure to follow the manufacturer’s instructions for the specific material you’re using.

c. Seal the Edges: To maximize insulation effectiveness, seal the edges of each panel with tape or adhesive to prevent drafts from entering or heat from escaping.

d. Repeat for Each Panel: Continue this process for all the panels on your garage door, taking care to align the insulation material properly.

  1. Insulate Windows and Cracks:

If your garage door has windows or any gaps or cracks, it’s crucial to address these areas as well. You can use weatherstripping or caulk to seal gaps and cracks effectively. For windows, consider using clear insulating film to maintain visibility while improving insulation.

  1. Test for Effectiveness:

After insulating your garage door, it’s a good idea to test its effectiveness. On a hot or cold day, go into your garage and assess the temperature. If you notice a significant improvement in maintaining a comfortable temperature, you’ve successfully insulated your garage door.

  1. Additional Tips:

a. Check for Garage Door Maintenance: Inspect your garage door for any issues, such as damaged panels, gaps, or worn weatherstripping, and address these problems before insulating.

b. Consider an Insulated Garage Door: If your garage door is old or in poor condition, it might be worth investing in an insulated garage door. These doors come with built-in insulation and can offer better energy efficiency.

c. Monitor Moisture: Keep an eye out for moisture buildup inside your insulated garage, as improper insulation can sometimes lead to condensation issues. Address any moisture problems promptly to prevent damage.

Conclusion:

Insulating your Garage Door Repair Springtown, TX is a worthwhile home improvement project that can result in energy savings, improved comfort, and enhanced functionality of your garage space. By following the steps outlined in this comprehensive guide and selecting the right insulation material, you can effectively insulate your garage door and enjoy the benefits for years to come.

Springtown Gates & Garage Doors

104 Adalida Ln, Springtown, TX 76082, United States

1-817-631-1036

How To Board Up Garage Door – Springtown Gates & Garage Doors

Boarding up a Springtown Gates & Garage Doors is a temporary solution used to secure the opening and protect the interior from damage, weather, and unwanted access. Whether you’re preparing for a storm, repairing a damaged door, or securing a vacant property, boarding up a garage door requires careful planning and execution.

Here’s a step-by-step guide on how to board up a garage door:

Materials You’ll Need:

  • Plywood sheets (exterior-grade)
  • Measuring tape
  • Circular saw or hand saw
  • Nails or screws
  • Hammer or drill
  • Pry bar
  • Safety goggles and gloves
  • Paint and paintbrush (optional, for sealing)

Step-by-Step Guide to Boarding Up a Garage Door:

1. Assess the Situation:
Determine the reason for boarding up the garage door. Are you protecting against a storm, securing a vacant property, or temporarily covering a damaged door? Understanding the purpose will guide your approach.

2. Measure the Opening:
Measure the width and height of the garage door opening. Add a few inches to both dimensions to ensure the plywood will cover the entire opening.

3. Choose Plywood:
Select exterior-grade plywood that is sturdy and weather-resistant. Plywood thickness should be at least 1/2 inch or thicker for optimal strength and security.

4. Cut Plywood Sheets:
Use a circular saw or hand saw to cut the plywood sheets to the dimensions of the garage door opening. Ensure that the plywood fits snugly within the opening.

5. Mark Window Locations (If Applicable):
If your garage door has windows, mark their locations on the plywood sheets. You can cut holes in the plywood to maintain visibility if desired.

6. Install the Plywood:
Follow these steps to install the plywood over the garage door opening:

  • Place the plywood sheets over the opening, aligning them with the edges of the door frame.
  • Use a hammer or drill to attach the plywood to the door frame. You can use nails or screws, depending on what’s available and the level of security required.
  • Space the fasteners about 12-16 inches apart along the edges of the plywood. For added security, drive fasteners through the middle of the plywood as well.

7. Secure the Plywood:
Once the plywood is attached, make sure it’s securely fastened and won’t easily come loose.

8. Seal the Edges (Optional):
To protect the edges of the plywood from moisture, you can paint them with exterior-grade paint. This helps prevent the wood from absorbing water and warping.

9. Test the Installation:
Gently push and pull on the plywood to ensure that it’s securely in place. If it feels loose or unstable, reinforce the attachment points.

10. Secure Windows (If Applicable):
If you cut holes for windows, secure any coverings or plastic sheeting to the holes to prevent debris and weather from entering.

11. Document and Inspect:
Take photos of the boarded-up garage door for documentation purposes. This can be useful for insurance claims or legal matters. Inspect the installation to ensure it’s solid and secure.

12. Plan for Removal:
Consider how long the garage door will need to remain boarded up. If it’s a temporary solution, plan for the removal process. Ensure you have the necessary tools to quickly and safely remove the plywood when needed.

Additional Tips:

  • Safety First: Wear safety goggles and gloves when cutting and handling plywood to protect yourself from splinters and dust.
  • Sturdy Fasteners: Use sturdy nails or screws that are appropriate for outdoor use. Make sure they’re long enough to secure the plywood to the door frame.
  • Seal the Edges: Painting the edges of the plywood helps extend its lifespan and prevents water damage.
  • Secure Windows: If the garage door has windows, consider covering them with plastic sheeting or other materials to prevent breakage and water infiltration.
  • Temporary Solution: Boarding up a garage door is a temporary measure. If you need a permanent solution, consider replacing or repairing the door.

Conclusion:

Boarding up a Springtown Gates & Garage Doors is a practical way to secure the opening temporarily and protect the interior from various threats. By following these steps and using the right materials, you can ensure that the garage door remains secure, weather-resistant, and properly sealed. Whether you’re preparing for a storm, addressing damage, or securing a vacant property, proper boarding-up techniques provide a sense of security and protection until a more permanent solution can be implemented.

Springtown Gates & Garage Doors

104 Adalida Ln, Springtown, TX 76082, United States

1-817-631-1036

How to Reset Vivint Garage Door Opener-Springtown Best Garage & Overhead Doors

Resetting a Vivint Garage Door Repair Springtown TX opener can vary depending on the specific model and setup.

While it is not possible to provide an exact step-by-step guide without knowing the specific model, I can provide you with general instructions that can help you reset most Vivint garage door openers. Please note that it is crucial to refer to the manufacturer’s manual or contact Vivint customer support for model-specific instructions to ensure proper reset and avoid any damage or malfunction.

  1. Locate the power source: Identify the power source for your Vivint garage door opener. This can usually be found near the ceiling of the garage. Disconnect the power by unplugging the opener from the electrical outlet or turning off the circuit breaker dedicated to the garage door opener.
  2. Remove the batteries: If your Vivint garage door opener uses batteries, remove them from the unit. This step is not applicable to all models, as some may not have batteries.
  3. Wait for a few minutes: Allow a few minutes to pass before proceeding. This time frame can vary depending on the model, but generally, waiting for about five minutes is sufficient. This waiting period allows any residual power to drain from the system, ensuring a complete reset.
  4. Reconnect the power: Plug the Vivint garage door opener back into the electrical outlet or turn on the circuit breaker dedicated to the opener. If your opener has batteries, reinsert them.
  5. Identify the reset button: Look for a reset button on your Vivint garage door opener. The location of the reset button can vary depending on the model. It is typically found on the main control panel or near the wiring terminals. Refer to the manufacturer’s manual to locate the exact position of the reset button for your model.
  6. Press and hold the reset button: Once you have located the reset button, press and hold it for about 10-15 seconds. This action helps clear any stored data or settings in the opener’s memory.
  7. Release the reset button: After holding the reset button for the specified duration, release it. The Vivint garage door opener will now be reset to its factory default settings.
  8. Reconfigure the opener: Once the reset is complete, you will need to reconfigure the garage door opener. Follow the manufacturer’s instructions to set up the opener according to your preferences. This may involve connecting the opener to your Wi-Fi network, programming the remote control, or adjusting other settings.
  9. Test the garage door: After reconfiguring the Vivint garage door opener, test its functionality. Use the remote control or wall-mounted control panel to open and close the garage door to ensure that everything is working correctly.
  10. Troubleshooting: If the reset process does not resolve any issues you are experiencing, or if you encounter difficulties during the reset, it is advisable to consult the manufacturer’s manual or contact Vivint customer support for further assistance. They will have specific troubleshooting steps for your model and can provide personalized guidance.

Remember, these instructions are general guidelines and may not apply to all Vivint Garage Door Repair Springtown TX opener models. Always refer to the manufacturer’s manual or contact Vivint customer support for precise instructions to ensure a successful reset.

Springtown Best Garage & Overhead Doors

205 Ave A, Springtown, TX 76082

817-373-5963

How to Keep Your Garage Door Seal from Sticking – Springtown TX Garage Door

A garage door seal is designed to keep out drafts, moisture, and debris from entering your garage. However, if the seal is sticking to the garage door, it can create friction and make it difficult to open and close the door.

Here are some tips from Garage Door Repair Springtown TX to keep your garage door seal from sticking:

  1. Clean the garage door seal Dirt, debris, and dust can accumulate on the garage door seal, causing it to stick. Clean the seal with a damp cloth or sponge to remove any buildup. Be sure to dry the seal completely after cleaning.
  2. Lubricate the garage door seal Applying a lubricant to the garage door seal can help it move more smoothly and reduce friction. Spray a silicone-based lubricant or garage door lubricant onto the seal and wipe off any excess with a clean cloth.
  3. Adjust the seal If the garage door seal is too tight against the door, it can create unnecessary friction and cause the seal to stick. Adjust the seal by loosening the screws or nails that hold it in place, and shift the seal slightly away from the door.
  4. Adjust the garage door If the garage door is misaligned or rubbing against the seal, it can cause the seal to stick. Adjust the garage door by following these steps:
  • Open the garage door fully.
  • Use a level to check whether the door is level. If it’s not, you’ll need to adjust the tension rods that hold the door in place.
  • Locate the tension rods, which are usually located near the top of the door. Use a wrench to loosen the nuts on the rods.
  • Adjust the rods to level the door. Turn the rods clockwise to raise the door and counter-clockwise to lower it.
  • Once the door is level, tighten the nuts on the tension rods.
  1. Replace the garage door seal If the garage door seal is worn or damaged, it can cause it to stick to the door. Replace the seal by following these steps:
  • Measure the length of the old seal and purchase a replacement seal that matches the length.
  • Remove the old seal by unscrewing or prying it off the door.
  • Clean the area where the seal was attached to remove any dirt, debris, or adhesive residue.
  • Apply a bead of adhesive along the bottom of the garage door.
  • Press the new seal onto the adhesive and hold it in place for a few minutes until it adheres.
  1. Check the weatherstripping If your garage door has weatherstripping in addition to the seal, it may be causing the seal to stick. Check the weatherstripping for signs of wear or damage and replace it if necessary.

To sum it up, as per Garage Door Repair Springtown TX, you can keep your garage door seal from sticking and ensure that your garage is protected from the elements. Remember to clean and lubricate the seal regularly, adjust it if necessary, and replace it if it’s worn or damaged.

Springtown TX Garage Door

205 Ave A, Springtown, TX 76082

817-373-5963