How Do I Open My Electric Garage Door Without Power – Sanger Garage Door Experts

Power outages are unpredictable, and being prepared to manually open your electric Garage Door Repair Sanger TX ensures that you’re not inconvenienced when you need access.

Whether you need to retrieve your car during a blackout or the power is out for an extended period, knowing how to open your garage door manually is a valuable skill.

Locate the Emergency Release Cord

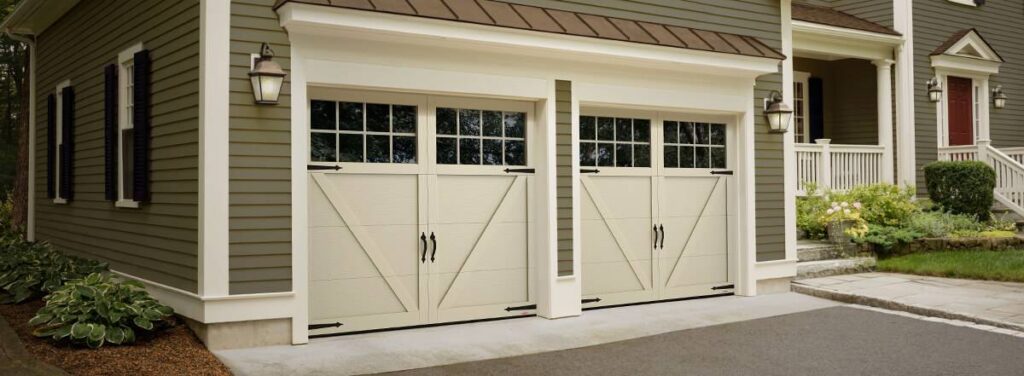
Most modern electric garage doors are equipped with an emergency release cord. This cord is a crucial component that disengages the door from the automatic opener, allowing you to open and close the door manually. The emergency release cord is usually located near the top of the garage door, connected to the trolley or carriage.

Identify the Red Handle or Cord

The emergency release cord is often distinguished by a red handle or cord. Take a moment to visually inspect your garage door system and locate this distinctive feature. If your garage door has a different color or design for the emergency release, refer to your garage door opener’s manual for guidance.

Pull Down on the Emergency Release Cord

Once you’ve identified the emergency release cord, pull it down in the direction of the garage door. This action disengages the door from the automatic opener, allowing it to move freely along the tracks. You should feel minimal resistance when pulling the cord.

Manually Lift the Garage Door

With the emergency release cord engaged, you can now manually lift the garage door. Place your hands on the bottom of the door, near the sides, and lift it carefully. The door should move smoothly along the tracks without resistance. Take caution, especially if your garage door is heavy, and ask for assistance if needed.

Secure the Garage Door in the Open Position

Once you’ve manually opened the garage door, secure it in the open position using a clamp or another method to prevent accidental closure. This is essential for safety, especially if you need to enter or exit the garage frequently during a power outage.

Re-Engage the Emergency Release Cord

When power is restored, or you no longer need to operate the garage door manually, re-engage the emergency release cord. This is a critical step to ensure that the automatic opener can once again control the garage door. Simply lift the door slightly, pull the emergency release cord toward the opener until it clicks back into place, and then lower the door.

Consider a Manual Release Kit

If your electric garage door opener does not have an easily accessible emergency release cord or if you want a more convenient solution, consider installing a manual release kit. These kits typically include a handle and a cable that allows you to disengage the opener from inside the garage, eliminating the need to access the emergency release cord outside.

Regularly Test the Manual Operation

To ensure that your garage door is always ready for manual operation, periodically test the emergency release cord or manual release kit. This helps you familiarize yourself with the process and ensures that the manual operation features are in proper working condition.

Install Battery Backup

For added convenience and peace of mind during power outages, consider installing a battery backup system for your electric garage door opener. Battery backups provide temporary power to the opener, allowing you to operate the door even when the main power source is unavailable. Check with your garage door opener manufacturer for compatible battery backup options.

Keep a Flashlight Handy

During a power outage, visibility in your garage may be limited. Keep a flashlight or portable lantern in an easily accessible location to assist you in locating the emergency release cord, securing the door, and navigating the space safely.

Consult Professional Assistance

If you encounter difficulties or are unsure about manually opening your electric garage door, consult with a professional garage door technician. They can provide guidance, inspect your system for any issues, and ensure that your garage door is in optimal condition for manual operation.

Conclusion:

Knowing how to open your electric Garage Door Repair Sanger TX is a practical skill that ensures you can access your garage even during unexpected outages. By familiarizing yourself with the emergency release cord, considering a manual release kit, and installing a battery backup, you can navigate power outages with confidence and convenience.

Sanger Garage Door Experts

600 N Stemmons St, Sanger, TX 76266, United States

1-940-308-2092

How to Prevent Garage Door Freeze-Ups in Cold Weather – Sanger Garage Door Experts

Winter is a beautiful season, but it can be a challenging time for homeowners, especially when it comes to our garage doors. Like many others, I’ve faced the frustration of dealing with a frozen garage door on a bitter winter morning. However, after years of trial and error, I’ve learned effective strategies to prevent these freeze-ups.

By following Garage Door Repair Sanger TX, I’ll share my first-person perspective on how to keep your garage door running smoothly, even in the harshest cold weather.

Understanding the Problem: Why Garage Doors Freeze

Before diving into the solutions, it’s essential to understand why garage doors freeze in cold weather. Several factors contribute to this issue:

  1. Moisture Accumulation: When snow or rain enters the garage and freezes, it can create ice on the garage door’s various components, causing them to stick.
  2. Weather Stripping Problems: Over time, weather stripping can degrade and crack, allowing moisture to seep in. If it freezes, it can prevent the door from moving smoothly.
  3. Lubrication Issues: Lubricants used on garage door tracks and rollers can thicken or become ineffective in low temperatures, leading to freeze-ups.

Preventing Garage Door Freeze-Ups: 2023 Strategies

In my quest to find solutions for preventing garage door freeze-ups in cold weather, I’ve adopted several effective strategies. Here’s what I’ve learned and implemented over the years:

1. Weather-Proofing Your Garage:

The first line of defense against garage door freeze-ups is ensuring your garage is as weather-tight as possible. This involves inspecting and repairing any gaps or cracks that might allow cold air and moisture to enter. Proper insulation also helps maintain a more stable temperature inside the garage.

2. Upgrading Weather Stripping:

Old, cracked, or ineffective weather stripping is a common culprit behind garage door freeze-ups. In 2023, there are advanced weather stripping materials that are more resilient in cold weather. Replacing weather stripping is a relatively simple and cost-effective solution that can make a significant difference.

3. Lubricating with Cold-Weather Grease:

Choosing the right lubricant for your garage door’s moving parts is crucial in cold weather. Standard lubricants can thicken or freeze in low temperatures, causing the door to stick. Cold-weather grease or lubricants designed for winter use are more resilient and prevent freeze-ups.

4. Heat Source in the Garage:

For those who use their garage frequently in winter, having a heat source like a space heater can help maintain a temperature above freezing. This not only prevents freeze-ups but also makes working in the garage more comfortable.

5. Deicing Solutions:

When dealing with an existing freeze-up, deicing solutions can be a quick fix. Deicing sprays or granules can help melt ice and snow around the garage door. However, be cautious when using these products, as some can damage the door or the floor.

6. Insulated Garage Door:

Investing in an insulated garage door can make a significant difference. Insulation helps maintain a more stable temperature inside the garage, reducing the likelihood of freeze-ups. Additionally, insulated doors are more energy-efficient.

7. Regular Maintenance:

Staying on top of regular garage door maintenance is vital. This includes inspecting all components, tightening hardware, and ensuring tracks and rollers are in good condition. Regular maintenance can identify potential issues before they lead to freeze-ups.

My Experience with Preventing Freeze-Ups

I’ve put several of these strategies into practice over the years, which have significantly reduced the frequency of garage door freeze-ups. One of the most effective measures I took was upgrading my weather stripping. The new, cold-resistant material kept moisture out and maintained a better seal, preventing ice from forming.

I also switched to a cold-weather grease for lubricating the garage door’s moving parts. This small change made a big difference in the door’s performance during the winter months. I found it to be more effective in preventing sticking and freeze-ups.

In addition, I installed an insulated garage door. This not only helped prevent freeze-ups but also improved the overall energy efficiency of my home. I’ve noticed a difference in heating costs during the winter as the garage now stays at a more moderate temperature.

Ongoing Maintenance and Vigilance

Preventing garage door freeze-ups is an ongoing effort. I’ve established a regular maintenance routine, which includes checking weather stripping, lubricating moving parts, and inspecting for any potential issues. By staying vigilant and addressing any problems promptly, I’ve managed to keep freeze-ups to a minimum.

Conclusion

Based from Garage Door Repair Sanger TX, dealing with garage door freeze-ups during the winter can be frustrating and inconvenient. However, with the right strategies and maintenance, you can significantly reduce the chances of encountering this problem. Investing in weather-proofing, insulation, and using the correct lubricants are key steps to maintaining a smoothly functioning garage door throughout the cold season.

My personal experience with these strategies has not only made my life easier but also improved the overall functionality and efficiency of my garage door. By taking proactive measures, you can ensure that your garage door operates reliably, regardless of the harsh winter conditions outside.

Sanger Garage Door Experts

600 N Stemmons St, Sanger, TX 76266, United States

940-308-2092

How Do I Reset My Garage Door Emergency Release – Sanger Garage Door Experts

Resetting a Garage Door Repair Sanger TX involves understanding the mechanism and following a set of careful steps.

In this comprehensive guide, we’ll navigate through the process, ensuring a clear understanding of how to reset your garage door emergency release for smooth and secure operation.

: Understand the Emergency Release Mechanism

Before attempting to reset the emergency release, it’s essential to understand how it works. The emergency release is a manual release mechanism that allows you to disengage the garage door from the opener in case of a power outage or malfunction. It typically involves a red cord or handle that hangs from the garage door opener rail.

: Locate the Emergency Release Cord

Locate the emergency release cord or handle in your garage. It is usually red and hangs from the garage door opener rail near the motor unit. The cord is connected to the carriage that engages with the trolley on the rail.

: Pull the Cord Downward

To disengage the garage door opener from the door, pull the emergency release cord downward. This action releases the carriage from the trolley on the rail, allowing you to manually open and close the garage door.

: Open and Close the Door Manually

With the emergency release cord pulled down, manually lift the garage door to the fully open position. Then, close the door manually to test its smooth operation without the assistance of the garage door opener.

: Re-Engage the Emergency Release

After testing the manual operation, it’s time to re-engage the emergency release mechanism. Lift the garage door slightly to relieve pressure on the trolley, and then push the emergency release cord upward. This action re-engages the carriage with the trolley, allowing the garage door opener to regain control.

: Verify Proper Engagement

Ensure that the emergency release cord is fully pushed upward and engaged with the trolley. You should hear a click or feel a secure connection. This step is crucial to ensure the proper functioning of the garage door opener when power is restored.

: Test the Automatic Operation

Test the automatic operation of your garage door opener by using the remote control or wall-mounted button. The garage door should now operate normally with the assistance of the opener. If there are any issues, revisit the emergency release mechanism to ensure proper engagement.

: Lubrication and Maintenance

As part of the reset process, consider lubricating the moving parts of your garage door, including hinges, rollers, and the emergency release mechanism. Use a garage door lubricant to keep these components operating smoothly.

: Power Restoration

If the emergency release was activated due to a power outage, ensure that power has been restored to your garage door opener. Check that the opener is plugged in or that the circuit breaker for the garage door opener is in the “on” position.

: Troubleshooting Touch

In case the garage door still exhibits issues after following these steps, consider troubleshooting specific aspects of the opener or consulting the user manual for your garage door system. If problems persist, it may be necessary to seek professional assistance.

: Professional Assistance

If you encounter persistent issues or are unsure about resetting the emergency release, it’s advisable to seek professional assistance. Certified garage door technicians have the expertise to diagnose and address complex problems, ensuring the safety and proper functioning of your garage door system.

In conclusion, this comprehensive guide serves as your roadmap to resetting your Garage Door Repair Sanger TX. Understanding the mechanism and following these steps will help ensure smooth and secure operation, whether you need to manually operate the door or engage the opener.

Sanger Garage Door Experts

600 N Stemmons St, Sanger, TX 76266

1-940-308-2092

How To Program Garage Door Remote Clicker Liftmaster – Sanger Gates & Garage Doors

Programming a LiftMaster Garage Door Repair Sanger TX is a straightforward process, and I’ll guide you through it in detail, using fewer than.

: Gather Your Equipment

Before you begin, make sure you have the following items ready:

  1. LiftMaster garage door opener.
  2. Garage door remote clicker.
  3. A ladder (if needed).
  4. A pen and paper to jot down the remote’s code (optional).

: Locate the Learn Button

Your LiftMaster garage door opener should have a “Learn” or “Learn Code” button. This button is typically located on the back or side of the opener unit, near the hanging antenna wire. The color of this button varies depending on the model, but it’s often purple, yellow, red, or green.

: Clear Existing Codes (if necessary)

If you’re reprogramming your remote or have recently moved to a new home, it’s a good idea to clear any existing codes before proceeding. To do this, press and hold the “Learn” button until the indicator light next to it turns off. Release the button to complete the clearing process.

: Program the Remote

Now, it’s time to program your remote:

  1. Stand close to the garage door opener, within a few feet, for a strong signal.
  2. Press and release the “Learn” button on the opener unit. The indicator light will turn on, indicating it’s in programming mode.

Option A: Remote with DIP Switches

If your remote has DIP switches (small, numbered switches inside the battery compartment), follow these steps:

  1. Open the battery compartment on your remote.
  2. Match the position of the DIP switches on the remote with those on the opener unit. Ensure they are set to the same code.
  3. Once the switches are set correctly, press the remote button you want to use to control the door. The opener unit’s indicator light should flash or click to confirm the programming.
  4. Test the remote to ensure it operates the garage door correctly.

Option B: Rolling Code Remote

If your remote uses a rolling code system (most modern LiftMaster remotes), follow these steps:

  1. Press and release the “Learn” button on the opener unit.
  2. Within 30 seconds, press and hold the button on your remote that you want to use to operate the door. Hold it until the opener unit’s lights blink or the motor engages.
  3. Release the remote button. The opener unit has now learned your remote’s code.
  4. Test the remote to ensure it operates the garage door correctly.

: Test the Remote

Stand back a few feet from the garage door, press the programmed remote button, and observe if the door opens or closes. Make sure the remote works consistently.

: Additional Remotes (if needed)

If you have more remotes to program, repeat the programming steps for each remote one at a time.

: Final Notes

  • Keep the remote in a safe place and out of reach of children.
  • If you ever need to remove a programmed remote, you can repeat Step 3 to clear all codes or follow your opener’s manual for specific instructions.

Programming your LiftMaster Garage Door Repair Sanger TX is simple once you understand the process. Always consult your opener’s manual for model-specific instructions, and follow safety precautions during installation.

Sanger Gates & Garage Doors

940-748-1866

How To Program A Universal Garage Door Opener – Sanger Garage Door Experts


Programming a universal Garage Door Repair Sanger TX allows you to use a single remote to operate multiple garage doors, regardless of their brand or model.

The process may vary slightly depending on the specific universal remote and the type of garage door opener you have. Follow this comprehensive guide, broken down into detailed steps, to program a universal garage door opener successfully.

: Choose a Compatible Universal Garage Door Opener Remote

Before starting the programming process, ensure that the universal remote you have is compatible with your garage door opener. Universal remotes are designed to work with a wide range of garage door opener brands, but it’s crucial to check compatibility to avoid issues.

: Gather Necessary Information

Collect essential information about your garage door opener, including the brand and model. You may find this information in the user manual of your garage door opener or on the motor unit itself. Additionally, identify the type of garage door opener system, such as a dip switch or rolling code system.

: Locate the “Learn” or “Program” Button on the Garage Door Opener

Most garage door openers have a “Learn” or “Program” button located on the motor unit. This button is typically near the antenna wire and may be labeled as such or have a small LED light nearby.

: Clear Existing Codes (if necessary)

If you are programming a universal remote to a new or different garage door opener, clear any existing codes on the remote. This step ensures a clean slate for programming.

: Power On the Universal Remote

Ensure that the universal remote has fresh batteries and is powered on. If the remote has a battery compartment cover, remove it and insert the batteries according to the manufacturer’s instructions.

: Access the Program Mode on the Universal Remote

Consult the user manual for your specific universal remote to find instructions on how to access the programming mode. This may involve pressing and holding specific buttons or a combination of buttons until a light on the remote blinks or illuminates.

: Press and Release the “Learn” or “Program” Button on the Garage Door Opener

After accessing the programming mode on the universal remote, press and release the “Learn” or “Program” button on the garage door opener. The LED light on the opener may blink or remain steady to indicate that it is ready to learn a new code.

: Press and Hold the Desired Button on the Universal Remote

While the garage door opener is in programming mode, press and hold the button on the universal remote that you want to use to control the garage door. Hold the button until the LED light on the remote blinks or illuminates, indicating that the code has been successfully transmitted.

: Test the Universal Remote

After programming the universal remote, test its functionality by pressing the programmed button. The garage door should respond by opening or closing. If the door does not respond, repeat the programming process.

: Program Additional Buttons (if needed)

If your universal remote has multiple buttons and you want to control multiple garage doors or devices, repeat the programming process for each additional button. Follow the same steps, ensuring that you access the programming mode and press the corresponding “Learn” or “Program” button on each garage door opener.

: Set Dip Switches (if applicable)

For older garage door openers that use dip switches, ensure that the dip switch settings on the universal remote match those on the garage door opener motor unit. This step is essential for proper communication between the remote and the opener.

: Secure the Universal Remote

Once you have successfully programmed the universal remote, secure it in a convenient and accessible location. Avoid placing it where it may accidentally activate or interfere with other devices.

: Write Down or Document the Codes

Keep a record of the codes programmed into the universal remote, especially if you have multiple remotes or devices. This documentation will be useful for future reference or if you need to reprogram the remote.

: Regular Maintenance and Troubleshooting

Periodically check the batteries in the universal remote and replace them as needed. If the remote stops working or the garage door does not respond, consult the user manual for troubleshooting tips or consider reprogramming the remote.

: Consider Smart Home Integration (optional)

If your universal remote supports smart home integration, explore additional features such as connecting it to a smart home hub or using voice commands with compatible virtual assistants.

By following these detailed steps, you’ve successfully programmed a universal Garage Door Repair Sanger TX. Remember to refer to the specific instructions provided by the manufacturer of your universal remote and garage door opener for accurate and model-specific guidance.

Sanger Garage Door Experts

600 N Stemmons St, Sanger, TX 76266, United States

1-940-308-2092