How Much Is It To Fix A Garage Door – Denzels Garage Doors


Garage Door Repair Las Vegas  the materials and components involved, the location of the garage door, and the labor rates of the service provider.

While it’s challenging to provide an exact cost without knowing the specific details of the repair job, I’ll outline the typical expenses associated with fixing common garage door issues and factors that can influence the overall cost.

1. Repair Services and Labor Costs:

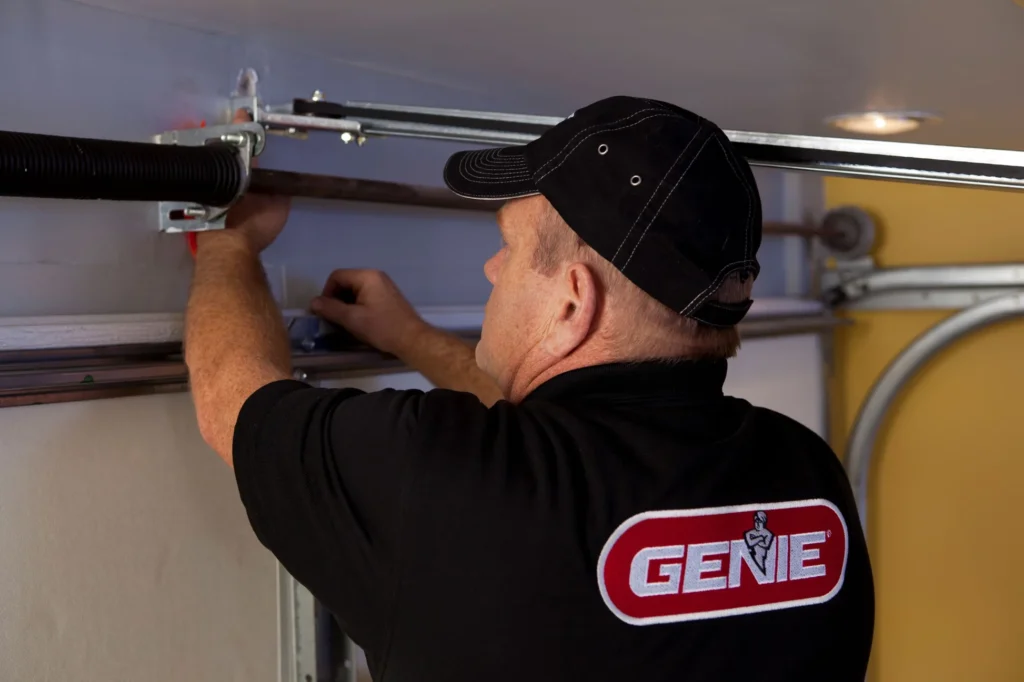
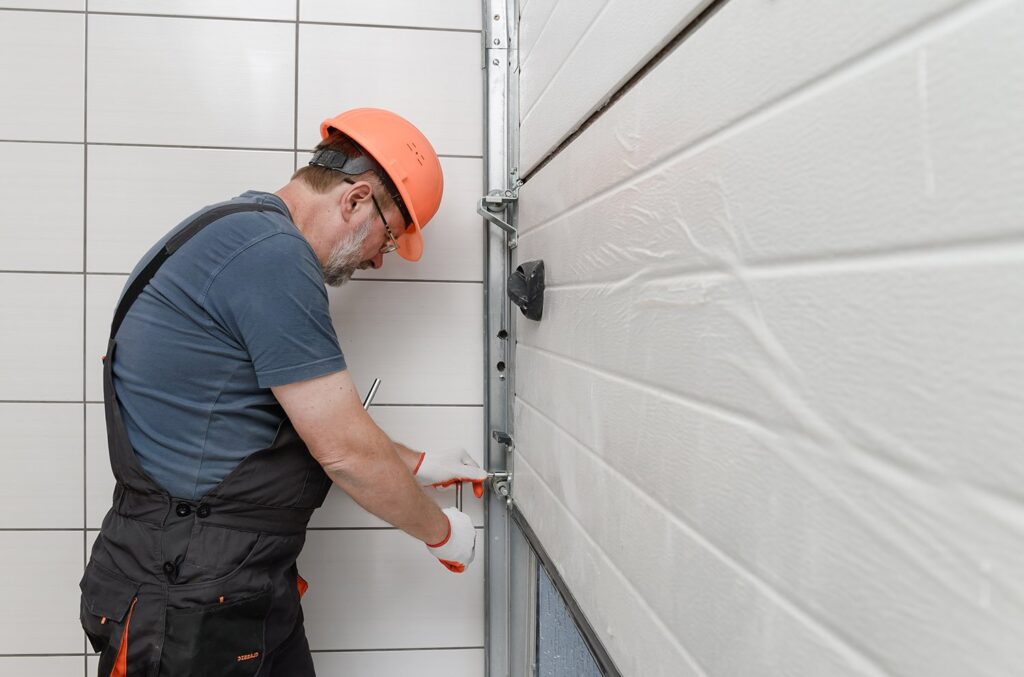
The cost of labor is a significant factor in the total expense of fixing a garage door. Garage door repair technicians typically charge an hourly rate for their services, which can vary depending on their level of expertise, location, and the complexity of the repair job. Simple repairs such as adjusting the tracks or replacing a broken spring may require less time and labor compared to more extensive repairs like replacing the entire door panel or opener unit.

2. Type and Extent of Repairs:

The type and extent of repairs needed will also impact the overall cost. Minor repairs such as tightening loose bolts, lubricating moving parts, or replacing damaged rollers may be relatively inexpensive. However, more extensive repairs such as replacing broken springs, cables, or panels can be more costly due to the need for specialized parts and additional labor.

3. Replacement Parts and Materials:

The cost of replacement parts and materials required for the repair will also contribute to the total expense. Common replacement parts for garage doors include springs, cables, rollers, hinges, tracks, panels, and opener components. The price of these parts can vary depending on their quality, brand, and compatibility with your specific garage door model. Additionally, if custom or specialty parts are needed, they may come at a higher cost.

4. Emergency or After-Hours Service:

If you require emergency or after-hours garage door repair services, you may incur additional charges for expedited service or service outside of normal business hours. Emergency repairs are typically more expensive due to the urgency and inconvenience of the situation, so it’s essential to inquire about any additional fees or surcharges before scheduling service.

5. Geographic Location:

The cost of garage door repair services can vary depending on your geographic location and local market conditions. Service providers in urban areas or regions with higher costs of living may charge higher rates for labor and services compared to rural areas or regions with lower overhead expenses. It’s advisable to obtain multiple quotes from local service providers to compare prices and ensure you’re getting a fair estimate.

6. Maintenance and Preventive Services:

In addition to repair services, many garage door companies offer maintenance and preventive services to keep your door in optimal condition and prevent future issues. These services may include routine inspections, lubrication of moving parts, adjustment of tracks and springs, and testing of safety features. While preventive maintenance can help extend the lifespan of your garage door and prevent costly repairs, it may involve additional costs beyond basic repair services.

7. Warranty Coverage:

If your garage door is still under warranty, some or all of the repair costs may be covered by the manufacturer or installer, depending on the terms of the warranty. Be sure to review your warranty coverage and consult with the manufacturer or installer to determine if the repairs are eligible for reimbursement or coverage.

8. DIY vs. Professional Repairs:

While some minor garage door repairs can be tackled as do-it-yourself projects, more complex or safety-critical repairs should be left to professional technicians. Attempting to repair a garage door without the necessary skills, tools, or knowledge can lead to further damage, injury, or safety hazards. Professional repair services may involve higher upfront costs but can provide peace of mind and ensure the job is done correctly and safely.


Garage Door Repair Las Vegas  warranty coverage, and preventive maintenance options to make an informed decision and ensure the long-term functionality and safety of your garage door.

Denzels Garage Doors

1-619-496-9419

How To Open Liftmaster Garage Door Opener – Affordable Garage Door Repairs of Indianapolis, LLC

Opening a Garage Door Repair Indianapolis IN  involves a few different methods, depending on whether you’re inside or outside of the garage, and whether you have access to the remote control or the manual release mechanism.

Here’s a detailed guide on how to open a LiftMaster garage door opener:

  1. Using the Remote Control:
    • If you’re outside the garage, simply press the designated button on your LiftMaster remote control to activate the door opener. Most LiftMaster remote controls feature a large button with an icon resembling a garage door.
    • If you’re inside the garage, you can also use the wall-mounted control panel to operate the door opener. Press the appropriate button on the control panel to open the door.
  2. Using the Keypad:
    • If your LiftMaster garage door opener is equipped with a wireless keypad, you can enter the access code to open the door. Enter the code and press the “Enter” or “Open” button on the keypad to activate the door opener.
  3. Using the Manual Release Mechanism:
    • In the event of a power outage or malfunction, you can manually open the garage door using the manual release mechanism. This mechanism disengages the door opener from the door, allowing you to lift the door manually.
    • Locate the manual release cord and handle, which is usually red and hangs from the door opener’s trolley mechanism. It’s typically located near the center of the garage door tracks.
    • Pull down on the manual release cord to disengage the door opener. You may need to apply some force to release the mechanism.
    • Once the door opener is disengaged, you can manually lift the garage door by grasping the handle or the bottom edge of the door. Lift the door carefully and steadily until it’s fully open.
    • To re-engage the door opener, pull down on the manual release cord again until you hear a click, indicating that the mechanism is engaged. Test the door opener by pressing the remote control or wall-mounted control panel to ensure it’s functioning properly.
  4. Using the Emergency Key Release:
    • Some LiftMaster garage door openers are equipped with an emergency key release mechanism, which allows you to manually open the door using a key. This mechanism is useful in case the manual release cord is inaccessible or damaged.
    • Locate the emergency key release slot on the outside of the garage door opener unit. It’s usually located near the bottom of the unit and is marked with a key symbol.
    • Insert the key into the slot and turn it clockwise to disengage the door opener.
    • Once the door opener is disengaged, lift the garage door manually as described earlier.
    • To re-engage the door opener, turn the key counterclockwise in the slot until it stops. Remove the key and test the door opener’s operation.
  5. Using the Smartphone App (optional):
    • If your LiftMaster garage door opener is compatible with the MyQ smartphone app, you can use the app to open and close the door remotely. Simply open the app on your smartphone, select the appropriate garage door, and press the “Open” button to activate the door opener.

By following these steps, you can open your Garage Door Repair Indianapolis IN  using various methods, including remote control, keypad, manual release mechanism, emergency key release, or smartphone app. Familiarize yourself with these methods to ensure you can access your garage door opener efficiently in different situations, such as power outages or emergencies.

Affordable Garage Door Repairs of Indianapolis, LLC

1-317-372-5337

How To Program Car To Genie Garage Door Opener – EDM Garage Doors, LLC


Programming your car to a  Garage Door Repair Volo IL allows you to operate your garage door using the built-in remote system in your vehicle.

Here’s a comprehensive guide on how to program your car to a Genie garage door opener:

1. Prepare Your Vehicle:

  • Park your car inside the garage within range of the Genie garage door opener.

2. Identify the Learn Button on the Genie Opener:

  • Locate the motor unit of your Genie garage door opener. On the motor unit, you’ll find a “Learn” button. This button is usually located near the antenna wire hanging from the unit. The button may be colored red, yellow, green, or purple, depending on the model.

3. Clear Existing Codes (Optional):

  • If you’re reprogramming your opener or adding a new car remote, it’s recommended to clear existing codes first. Press and hold the “Learn” button on the opener unit until the indicator light turns off, typically for about 6-10 seconds.

4. Enter Programming Mode in Your Car:

  • Sit inside your car and turn the ignition switch to the “On” position. Do not start the engine.

5. Locate the Car’s Garage Door Opener Buttons:

  • Look for the built-in garage door opener buttons in your car. These buttons are usually located on the overhead console, sun visor, or rearview mirror, depending on the vehicle make and model.

6. Press and Hold the Opener Button:

  • Press and hold the button designated for programming the garage door opener. Hold the button until the indicator light on the Genie opener unit flashes, indicating that it’s ready to receive a signal from the car.

7. Press the Opener Button on Your Car:

  • While still holding the programming button in your car, press the button that you want to use to operate the garage door. Hold the button until the opener unit’s lights flash or you hear two clicks.

8. Release the Opener Button:

  • Release the button in your car. The Genie opener unit should confirm successful programming by flashing its lights or emitting a click sound.

9. Test the Remote:

  • Exit your car and test the programmed button by pressing it to operate the garage door. Ensure that the door opens and closes as expected.

10. Repeat if Necessary:

  • If you have multiple cars or additional buttons to program, repeat the above steps for each vehicle or button.

11. Finalize Programming (Optional):

  • Some models may require additional steps to finalize programming or adjust settings. Consult your Genie opener’s user manual for specific instructions.

12. Troubleshooting:

  • If you encounter any issues during programming, such as the opener not responding or the indicator light not illuminating, double-check the programming steps and ensure you’re within range of the opener unit.
  • If problems persist, refer to your Genie opener’s user manual or contact customer support for assistance.

Always refer to your opener’s Garage Door Repair Volo IL procedures and troubleshooting tips.

EDM Garage Doors, LLC

596 Richard Brown Blvd, Volo, IL 60073, United States

1-847-416-3036

How To Program A Clicker Keypad For Garage Door – First Call Garage Doors

Garage Door Repair Richmond TX The exact procedure may vary slightly depending on the brand and model of your clicker keypad and garage door opener.

Here’s a step-by-step guide to programming a clicker keypad for a garage door:

1. Locate the Learn Button on the Garage Door Opener:

  • Before programming the clicker keypad, you’ll need to locate the “Learn” or “Smart” button on your garage door opener. This button is typically located on the back or side of the motor unit, near the antenna wire. It may be labeled with a small LED indicator light.

2. Clear Existing Codes (Optional):

  • If you’re reprogramming the clicker keypad or have previously programmed it to another garage door opener, you may need to clear the existing codes first. To do this, locate the “Learn” button on the garage door opener and press and hold it for about 10 seconds until the LED indicator light turns off. This clears all existing codes from the opener’s memory.

3. Determine Programming Method:

  • Check the user manual or instructions provided with your clicker keypad to determine the programming method required for your specific model. Some clicker keypads require entering a PIN code directly into the keypad, while others use a “Learn” button on the keypad itself.

4. Enter PIN Code (If Required):

  • If your clicker keypad requires entering a PIN code directly into the keypad, follow the instructions to enter the desired PIN code. This typically involves pressing a sequence of buttons on the keypad in a specific order. Choose a memorable PIN code that is easy to remember but difficult for others to guess.

5. Access Programming Mode:

  • To access programming mode on the clicker keypad, you may need to enter a special code or press a specific button combination. Refer to the user manual or instructions for your clicker keypad to determine how to enter programming mode.

6. Press Learn Button on Garage Door Opener:

  • Once in programming mode, you’ll need to press the “Learn” or “Smart” button on the garage door opener. This activates the programming mode on the opener and prepares it to receive the new code from the clicker keypad.

7. Enter PIN Code (If Required):

  • If prompted, enter the PIN code you selected earlier into the clicker keypad. This associates the keypad with the garage door opener and allows it to control the door.

8. Test Operation:

  • After programming the clicker keypad, test its operation to ensure it is working correctly. Close the garage door using the keypad and then open it again to verify that the code was accepted and the door responds accordingly.

9. Mount Clicker Keypad:

  • Once programming is complete, mount the clicker keypad in a convenient location outside the garage door. Use the provided mounting hardware to securely attach the keypad to the wall or door frame.

10. Secure Keypad Cover (If Applicable): – If your clicker keypad has a removable cover or battery compartment, make sure it is securely closed and latched to protect the keypad from the elements and unauthorized access.

11. Additional Programming Options (If Available): – Some clicker keypads offer additional programming options, such as setting temporary access codes, adjusting backlight settings, or enabling vacation mode. Refer to the user manual or instructions for your specific model to explore these features.

12. Troubleshooting (If Necessary): – If you encounter any issues during the programming process, refer to the troubleshooting section of the user manual or contact the manufacturer’s customer support for assistance. Common issues may include entering the wrong PIN code, weak battery power, or interference with the wireless signal.

Conclusion:

Garage Door Repair Richmond TX By following these instructions and referring to the user manual or instructions provided with your clicker keypad and garage door opener, you can quickly and easily set up secure access to your garage door. Once programmed, the clicker keypad provides convenient and reliable access to your garage without the need for keys or remote controls.

First Call Garage Doors

20527 Farm to Market 1093 Unit B205, Richmond, TX 77407, United States

1-713-248-2684

How To Replace Battery Chamberlain Garage Door Openers – Roadrunner Garage Doors


Garage Door Repair Grand Prairie TX Regular maintenance, including battery replacement, ensures that your garage door opener operates smoothly and reliably.

The worker is installing the lifting gates of the garage.

Here’s a comprehensive guide on how to replace the battery in your Chamberlain garage door opener:

1. Prepare for the Replacement:

Before starting the battery replacement process, gather the necessary tools and materials:

  • New battery compatible with your Chamberlain garage door opener (check the model number for compatibility)
  • Step ladder or stool (if needed to access the garage door opener)
  • Safety glasses (optional but recommended for eye protection)

2. Identify the Battery Compartment:

Locate the battery compartment on your Chamberlain garage door opener. The battery compartment is typically located on the motor unit, which is mounted on the ceiling of your garage near the center of the garage door.

3. Power Off the Garage Door Opener:

To ensure safety during the battery replacement process, disconnect power to the garage door opener by unplugging it from the electrical outlet or turning off the circuit breaker that supplies power to the opener. This prevents accidental activation of the garage door opener while you’re working on it.

4. Remove the Old Battery:

Once the power is off, locate the battery compartment cover on the garage door opener motor unit. The battery compartment cover is usually secured with screws or tabs that can be easily removed with a screwdriver or by hand. Carefully remove the cover to access the old battery.

Take note of the orientation of the old battery before removing it to ensure proper installation of the new battery. Most Chamberlain garage door openers use a 3-volt lithium coin cell battery, such as CR2032 or CR2025.

Using your fingers or a small tool, carefully remove the old battery from the compartment. Dispose of the old battery according to local regulations for recycling or hazardous waste disposal.

5. Install the New Battery:

Insert the new battery into the battery compartment, ensuring that it is oriented correctly according to the polarity markings (+ and -) on the battery and inside the compartment. Press the battery firmly into place to ensure a secure connection.

6. Replace the Battery Compartment Cover:

Once the new battery is installed, replace the battery compartment cover and secure it in place using the screws or tabs. Make sure the cover is properly aligned and seated to prevent dust or debris from entering the compartment.

7. Restore Power to the Garage Door Opener:

After replacing the battery and securing the battery compartment cover, restore power to the garage door opener by plugging it back into the electrical outlet or turning on the circuit breaker. Wait a few moments for the opener to power up and initialize.

8. Test the Garage Door Opener:

Test the functionality of the garage door opener by pressing the wall-mounted control button or using the remote control to open and close the garage door. Ensure that the garage door operates smoothly and that the opener responds correctly to commands.

9. Dispose of the Old Battery:

Properly dispose of the old battery by recycling it according to local regulations. Many retailers and recycling centers accept used batteries for recycling to prevent environmental contamination.

10. Perform Regular Maintenance:

To ensure optimal performance and longevity of your Chamberlain garage door opener, perform regular maintenance, including battery replacement, according to the manufacturer’s recommendations. Check the battery status periodically and replace the battery as needed to prevent downtime and inconvenience.

Garage Door Repair Grand Prairie TX Regular maintenance, including battery replacement, helps prevent unexpected failures and ensures that your garage door opener is always ready when you need it.

Roadrunner Garage Doors

1-214-427-1335

How To Replace Glass In A Garage Door – Grapevine Garage Door & Gates

Garage Door Repair Grapevine TX But with the right tools and careful attention, it can be done effectively. Here’s a detailed guide with step-by-step instructions to help you replace glass in a garage door:

Step 1: Gather Necessary Tools and Materials Before you begin, gather all the tools and materials you’ll need for the job. This typically includes:

  • Safety glasses
  • Work gloves
  • Tape measure
  • Putty knife
  • Glazing compound or silicone caulk
  • Glass cutter (if resizing glass)
  • Replacement glass pane
  • Pry bar or screwdriver
  • Masking tape
  • Hammer
  • Vacuum cleaner
  • Towels or rags

Step 2: Choose the Right Replacement Glass Measure the dimensions of the existing glass pane carefully using a tape measure. Note down the measurements accurately to ensure you purchase the correct size of replacement glass. If necessary, you can take the old glass pane to a hardware store to find a matching replacement.

Step 3: Prepare the Work Area Before starting, ensure the garage door is fully closed and secure. Lay down towels or rags beneath the door to catch any broken glass or debris that may fall during the replacement process. It’s also a good idea to cover nearby surfaces to protect them from damage.

Step 4: Remove the Broken Glass Wearing safety glasses and work gloves, carefully remove any remaining glass shards from the frame using a putty knife or pry bar. Be cautious to avoid injury, and use a vacuum cleaner to clean up any small glass fragments.

Step 5: Remove the Glazing Compound If the glass was held in place by glazing compound or silicone caulk, use a putty knife to carefully scrape away the old material from around the edges of the frame. Take your time to ensure all remnants of the old compound are removed.

Step 6: Prepare the Frame Inspect the frame for any damage or debris that may interfere with installing the new glass pane. Use a vacuum cleaner or brush to remove any dirt, dust, or debris from the frame. Ensure the frame is clean and smooth to provide a secure surface for the new glass.

Step 7: Install the New Glass Carefully place the new glass pane into the frame, ensuring it fits snugly and evenly. If necessary, use masking tape to hold the glass in place temporarily while you work. Be sure to position the glass with the correct side facing outward.

Step 8: Secure the Glass Depending on the type of garage door and frame, you may need to use glazing compound or silicone caulk to secure the glass in place. Apply a thin, even bead of glazing compound or caulk around the edges of the glass, sealing it securely to the frame.

Step 9: Smooth the Sealant Use a putty knife or your finger to smooth the sealant around the edges of the glass, ensuring it forms a tight seal between the glass and the frame. Take care to remove any excess sealant to achieve a neat finish.

Step 10: Allow the Sealant to Dry Allow the glazing compound or caulk to dry completely according to the manufacturer’s instructions. This may take several hours or overnight, depending on the type of sealant used and environmental conditions.

Step 11: Clean Up Once the sealant is dry, carefully remove any masking tape and clean up any excess sealant or debris from the work area. Dispose of any broken glass and other waste materials safely and responsibly.

Step 12: Test the Door Manually operate the garage door to ensure it opens and closes smoothly without any obstructions or issues. Check that the new glass pane is securely in place and properly sealed to the frame.

Garage Door Repair Grapevine TX Always prioritize safety throughout the process and don’t hesitate to seek professional assistance if needed.

Grapevine Garage Door & Gates

Grapevine Doors and Gates
2958 Wentwood Dr.
Grapevine, TX 76051

1-817-809-2507

Who provides the most reliable maid services in Coppell – Coppell’s Best Maid Services


House Cleaning Coppell TX involves thorough research, considering factors like customer reviews, reputation, range of services, pricing, and professionalism.

While I can’t provide an exhaustive list of specific companies, I can guide you on how to identify the most reliable maid services in the area:

1. Online Research:

  • Start by conducting online research to identify maid services operating in Coppell. Utilize search engines, business directories, and review websites like Google, Yelp, or Angie’s List to compile a list of potential companies.

2. Read Reviews:

  • Pay close attention to customer reviews and ratings for each maid service on your list. Look for consistent positive feedback regarding reliability, punctuality, trustworthiness, consistency, and overall satisfaction with the cleaning services provided.

3. Check Ratings and Accreditations:

  • Check if the maid services have high ratings and accreditations from reputable organizations like the Better Business Bureau (BBB) or professional cleaning associations. These credentials can indicate reliability and adherence to high standards of service.

4. Evaluate Services Offered:

  • Review the range of services offered by each maid service. Ensure they provide the specific cleaning tasks you require, whether it’s regular house cleaning, deep cleaning, move-in/move-out cleaning, or specialized cleaning services.

5. Assess Experience and Expertise:

  • Consider the experience and expertise of the cleaning staff employed by each maid service. Experienced cleaners with proper training and background checks are more likely to provide reliable and high-quality cleaning services.

6. Request Quotes:

  • Contact the top-rated maid services on your list and request quotes for the cleaning services you need. Compare the pricing structures, including hourly rates, flat fees, and any additional charges for special requests or cleaning supplies.

7. Inquire About Insurance and Bonding:

  • Ensure that the maid services you’re considering are fully insured and bonded. This provides you with protection in case of accidents, damages, or theft that may occur during the cleaning process.

8. Ask for References:

  • Don’t hesitate to ask maid services for references from satisfied customers. Contact these references to inquire about their experiences with the company’s reliability, punctuality, and consistency in delivering cleaning services.

9. Consider Green Cleaning Options:

  • If you prefer eco-friendly cleaning products and practices, look for maid services that offer green cleaning options. Verify the types of cleaning products they use and their commitment to environmentally-friendly cleaning practices.

10. Review Terms and Conditions:

  • Before hiring a maid service, carefully review the terms and conditions outlined in their service agreement or contract. Pay attention to cancellation policies, rescheduling procedures, and any guarantees or warranties offered.

11. Schedule a Trial Cleaning:

  • Consider scheduling a trial cleaning session with a maid service before committing to a long-term arrangement. This allows you to assess their reliability, consistency, and overall quality of service firsthand.

12. Trust Your Instincts:

  • Ultimately, trust your instincts when selecting a maid service. Choose a company that communicates effectively, listens to your needs, and demonstrates a genuine commitment to customer satisfaction and reliability.

House Cleaning Coppell TX to meet your cleaning needs and preferences. Remember to prioritize reliability and consistency when making your decision.

Coppell’s Best Maid Services

440 Shadowcrest Ln, Coppell, TX 75019, United States

1-469-437-7286

How To Program Highlander Garage Door Opener – Circle B Overhead Door

Garage Door Repair Bryan TX for a Toyota Highlander involves a straightforward process, typically requiring you to follow a series of steps.

While the specifics may vary slightly depending on the model year of your Highlander and the type of garage door opener you have, I can provide you with a general guide covering the essential steps:

1. Gather Required Materials:

  • Toyota Highlander owner’s manual
  • Garage door opener remote control
  • Step ladder (if needed)

2. Read the Owner’s Manual:

  • Familiarize yourself with the section in your Toyota Highlander owner’s manual that covers programming garage door opener remotes. This manual will provide specific instructions tailored to your vehicle model and year.

3. Prepare Your Garage Door Opener:

  • Before you begin programming, make sure your garage door opener is compatible with the Highlander’s remote control system. Most modern garage door openers are compatible, but it’s essential to check the compatibility information in your owner’s manual.

4. Locate the “Learn” Button on the Garage Door Opener:

  • Most garage door openers have a “Learn” button, which is typically located on the motor unit of the opener. Pressing this button puts the opener into programming mode.

5. Access the Programming Mode on the Opener:

  • Follow the instructions provided in your Toyota Highlander owner’s manual to access the programming mode for the garage door opener. This often involves pressing and holding a specific button on the vehicle’s interior.

6. Program the Remote:

  • Once your Highlander is in programming mode, press and hold the button on the garage door opener remote that you want to program. Hold the button until you see a light or hear a beep from the garage door opener, indicating that it has learned the remote’s code.

7. Test the Remote:

  • After programming the remote, test it to ensure it works properly. Stand outside the garage door and press the button on the remote. The garage door should open or close depending on the button you pressed.

8. Repeat for Additional Remotes (if needed):

  • If you have multiple remotes to program, repeat the above steps for each remote. Each remote can be programmed in the same way.

9. Exit Programming Mode on the Opener:

  • After programming all the remotes, follow the instructions in your owner’s manual to exit programming mode on the garage door opener.

10. Secure Remotes and Documentation:

  • Once programming is complete, ensure the remotes are securely stored in your vehicle, and that programming instructions are documented for future reference.

11. Troubleshooting:

  • If you encounter any issues during the programming process, refer to the troubleshooting section of your Toyota Highlander owner’s manual. Common issues include interference from other electronic devices or incorrect programming sequences.

Garage Door Repair Bryan TX and enjoy convenient access to your garage. Remember to always consult the specific instructions provided in your owner’s manual for your particular vehicle model and year. If you’re unsure about any step, consult a professional for assistance.

Circle B Overhead Door

1818 Drillers Dr, Bryan, TX 77808, United States

1-979-324-6733

What Are The Installation Options Available For Superior Garage Door Products – Superior Doors

Superior Garage Door Omaha NE offers a wide range of installation options to ensure that customers receive personalized service and solutions tailored to their specific needs and preferences.

Whether it’s a new garage door installation, replacement, or upgrade, Superior Garage Door’s experienced technicians are equipped to handle various installation scenarios with precision and professionalism. Let’s explore the installation options available for Superior Garage Door products:

1. New Garage Door Installation

For customers in need of a brand-new garage door, Superior Garage Door provides comprehensive installation services from start to finish. Their team works closely with customers to assess their requirements, preferences, and budgetary constraints to recommend suitable garage door options. Whether it’s a traditional steel door, a contemporary aluminum design, or a custom-made wooden door, Superior Garage Door ensures seamless installation for optimal functionality and aesthetics.

2. Replacement Installation

In situations where existing garage doors are damaged, outdated, or no longer functional, Superior Garage Door offers replacement installation services. Their skilled technicians carefully remove the old garage door and replace it with a new one, taking care to address any underlying issues such as misalignment or structural damage. With attention to detail and expertise, Superior Garage Door ensures that the replacement installation is executed smoothly and efficiently, minimizing disruption to the customer’s daily routine.

3. Custom Installation Solutions

Superior Garage Door understands that every customer has unique preferences and requirements when it comes to their garage doors. That’s why they offer custom installation solutions to accommodate various architectural styles, design preferences, and functional needs. Whether it’s modifying the dimensions of standard doors, integrating specific features or accessories, or incorporating innovative technology, Superior Garage Door’s custom installation services allow customers to create garage doors that reflect their individuality and enhance the curb appeal of their properties.

4. Retrofit Installation

For customers looking to upgrade their existing garage doors with modern features or improved functionality, Superior Garage Door provides retrofit installation services. Whether it’s adding insulation, upgrading to energy-efficient materials, or installing smart technology components, their technicians can retrofit existing garage doors to meet contemporary standards and enhance performance. Retrofit installations offer a cost-effective way to improve the efficiency, security, and convenience of garage doors without the need for complete replacement.

5. Commercial Installation Projects

Superior Garage Door caters to the installation needs of commercial properties, including warehouses, storefronts, industrial facilities, and parking garages. Their team has extensive experience handling commercial installation projects of all sizes and complexities, from sectional doors and rolling steel doors to high-speed roll-up doors and specialty applications. With attention to safety, durability, and compliance with industry regulations, Superior Garage Door ensures that commercial installations meet the specific requirements of each business and provide reliable performance for years to come.

6. Emergency Installation Services

In situations where urgent installation needs arise, such as garage door failures or security breaches, Superior Garage Door offers emergency installation services. Their team is available round-the-clock to respond to emergency installation requests promptly and efficiently, providing customers with peace of mind and restoring security and functionality to their properties without delay. Whether it’s a residential emergency or a commercial crisis, Superior Garage Door’s emergency installation services are designed to address urgent needs and minimize downtime.

Conclusion:

Superior Garage Door Omaha NE diverse range of installation options ensures that customers receive tailored solutions and professional service for all their garage door needs. Whether it’s new installations, replacements, custom projects, retrofitting, commercial installations, or emergency services, Superior Garage Door’s experienced technicians are committed to delivering superior results with efficiency, expertise, and attention to detail. With installation services that prioritize quality, reliability, and customer satisfaction, Superior Garage Door remains a trusted provider of garage door solutions for residential and commercial properties alike.

Superior Doors

8840 S 137th Cir #3, Omaha, NE 68138, United States

1-402-571-2999

How To Seal Bottom Of Garage Door – MF Solutions

Garage Door Repair Buffalo Grave IL is a relatively simple yet effective way to improve the comfort and security of your garage.

By following the steps outlined in this guide and using the right materials and techniques, you can successfully seal your garage door and enjoy the benefits of a well-protected space.

: Preparation

1. Gather Tools and Materials

Before you begin, gather the necessary tools and materials for the sealing process, including a tape measure, pencil, hacksaw or utility knife, and a suitable garage door sealant.

2. Clean the Bottom of the Door

Use a broom or vacuum cleaner to remove any dirt, debris, or obstructions from the bottom of the garage door and the surrounding area.

3. Measure the Width of the Door

Use a tape measure to determine the width of the bottom of the garage door. This measurement will help you select the appropriate size of sealant.

: Selecting the Right Sealant

1. Choose the Correct Type of Seal

Select a garage door sealant that is suitable for your specific garage door type and climate conditions. Common options include rubber, vinyl, or brush seals.

2. Consider Additional Features

Look for sealants with additional features such as weather resistance, durability, and ease of installation to ensure long-term effectiveness.

: Measuring and Cutting the Seal

1. Measure the Length of the Seal

Use the tape measure to measure the width of the bottom of the garage door. Add a few inches to this measurement to allow for overlap on both sides.

2. Cut the Seal to Size

Use a hacksaw or utility knife to cut the garage door sealant to the measured length. Ensure that the cut is straight and clean for a proper fit.

: Installing the Seal

1. Position the Seal

Place the cut sealant along the bottom edge of the garage door, ensuring that it is centered and evenly aligned.

2. Secure the Seal

Use screws or adhesive, depending on the type of sealant, to secure the seal in place along the bottom of the garage door. Ensure that it is firmly attached and does not sag or buckle.

3. Test the Seal

Close the garage door and observe the seal to ensure that it makes full contact with the ground and creates a tight seal. Make any necessary adjustments to ensure proper alignment and effectiveness.

: Maintenance and Inspection

1. Regularly Inspect the Seal

Periodically inspect the garage door seal for signs of wear, damage, or deterioration. Replace the seal as needed to maintain optimal effectiveness.

2. Keep the Area Clean

Regularly clean the bottom of the garage door and the surrounding area to prevent debris buildup and ensure the seal remains effective.

Conclusion:

Garage Door Repair Buffalo Grave IL is a simple yet effective way to improve energy efficiency, prevent pests and debris infiltration, and protect your belongings from weather damage. By following the step-by-step instructions outlined in this guide and using the right materials and techniques, you can successfully seal your garage door and enjoy a more comfortable and secure garage space.

MF Solutions

1-224-434-1780

How Much New Garage Door- Atlas Door Company

Garage Door Repair Joshua TX is a significant investment that can enhance the aesthetics, functionality, and value of your home.

Understanding the factors that contribute to the cost of a new garage door can help you make informed decisions and budget accordingly for this important home improvement project.

Factors Influencing the Cost of a New Garage Door

1. Materials

Garage doors are available in a variety of materials, each with its own unique characteristics and price points. Common materials include:

  • Steel: Affordable and durable, steel garage doors offer excellent strength and security.
  • Wood: Elegant and traditional, wood garage doors are prized for their natural beauty but tend to be more expensive and require more maintenance.
  • Aluminum: Lightweight and corrosion-resistant, aluminum garage doors are an affordable option with modern appeal.
  • Vinyl: Low-maintenance and energy-efficient, vinyl garage doors are a cost-effective choice for homeowners seeking durability and insulation.

2. Size and Style

The size and style of the garage door will also impact its cost. Larger doors and custom designs may command higher prices due to increased materials and labor costs.

3. Insulation

Insulated garage doors offer improved energy efficiency, temperature regulation, and noise reduction compared to non-insulated doors. While insulated doors may have a higher upfront cost, they can provide long-term savings on heating and cooling bills.

4. Additional Features

Additional features such as windows, decorative hardware, and smart technology can add to the cost of a garage door but may enhance its functionality and aesthetic appeal.

Average Price Ranges for New Garage Doors

1. Single-Car Garage Doors

  • Steel: $400 – $1,200
  • Wood: $800 – $3,000
  • Aluminum: $600 – $1,500
  • Vinyl: $500 – $1,200

2. Double-Car Garage Doors

  • Steel: $800 – $2,500
  • Wood: $1,500 – $6,000
  • Aluminum: $1,000 – $2,500
  • Vinyl: $800 – $2,000

Tips for Selecting a New Garage Door Within Your Budget

  1. Set a budget: Determine how much you’re willing to spend on a new garage door and stick to it.
  2. Research options: Explore different materials, styles, and features to find a door that meets your needs and fits your budget.
  3. Get multiple quotes: Obtain quotes from several reputable garage door companies to compare prices and services.
  4. Consider long-term costs: While a higher upfront cost may seem daunting, consider the long-term savings and benefits of investing in a quality, energy-efficient door.
  5. Factor in installation costs: Remember to budget for installation costs, which may vary depending on the complexity of the job and any additional services required.

Conclusion:

Garage Door Repair Joshua TX can vary depending on factors such as materials, size, style, insulation, and additional features. By understanding these factors and considering your budget and needs, you can select a garage door that enhances the aesthetics, functionality, and value of your home while providing a valuable return on investment for years to come.

Atlas Door Company

6817 Sundance Cir W, Joshua, TX 76058, United States

1-817-295-3660

How To Program A Universal Garage Door Opener – Larson Engineering of Ga

Programming a Garage Door Repair Norcross GA allows you to control multiple garage doors with a single remote or keypad, providing added convenience and flexibility for your home.

Whether you’re replacing a lost remote or adding a new opener to your garage door system, programming a universal opener is a simple process that can be completed in just a few steps. In this guide, we’ll walk you through the step-by-step process of programming a universal garage door opener, ensuring seamless operation and control for your garage doors.

: Choose a Compatible Universal Opener

Before you can program a universal garage door opener, you’ll need to choose a compatible model that works with your existing garage door system. Universal openers are available in various brands and models, so be sure to check the compatibility requirements and specifications to ensure that the opener is compatible with your garage door opener.

: Prepare the Opener

Once you’ve chosen a compatible universal opener, prepare it for programming by inserting the batteries (if applicable) and following any initial setup instructions provided by the manufacturer. Familiarize yourself with the buttons, functions, and features of the opener to ensure a smooth programming process.

: Access the Programming Mode

Put your garage door opener into programming mode by locating the “Learn” or “Smart” button on the motor unit. This button is typically located on the back or side of the motor unit and may be labeled as such or identified by a specific color, such as red, yellow, or purple. Press and release the “Learn” button to activate programming mode.

: Program the Remote or Keypad

Once your garage door opener is in programming mode, it’s time to program the universal remote or keypad. Follow the manufacturer’s instructions for your specific opener model, which may involve pressing a sequence of buttons or entering a code using the keypad. Ensure that the remote or keypad is within range of the garage door opener receiver during programming.

: Test the Programming

After programming the remote or keypad, test the programming to ensure that it works correctly. Press the programmed button on the remote or keypad to activate the garage door opener and test the operation of the door. If the door opens and closes smoothly, the programming was successful. If not, double-check the programming instructions and try again.

: Repeat if Necessary

If you have multiple garage doors or additional remotes or keypads to program, repeat the programming process for each device. Follow the same steps as before, ensuring that each device is programmed correctly and operates smoothly before moving on to the next one.

: Secure the Opener

Once you’ve programmed all of your universal remotes or keypads, secure the garage door opener by closing the cover or panel and ensuring that it is securely fastened in place. This helps protect the opener from dust, debris, and tampering, ensuring long-term reliability and performance.

Conclusion:

Programming a Garage Door Repair Norcross GA is a simple process that can be completed in just a few steps. By choosing a compatible opener, preparing the device, accessing programming mode, programming the remote or keypad, testing the programming, and securing the opener, you can ensure seamless operation and control of your garage doors. Enjoy the added convenience and flexibility of your universal opener, knowing that you can easily open and close your garage doors with the touch of a button or the press of a code.

Larson Engineering of Ga

5950 Live Oak Pkwy # 300, Norcross, GA 30093, United States

1-770-279-6010

How To Extend The Range Of My Garage Door Opener – Ohio Garage Door Repair

Your Garage Door Repair Solon OH provides convenient access to your garage, but if you’ve ever experienced limited range when trying to operate it from a distance, you know how frustrating it can be.

Fortunately, there are several effective methods for extending the range of your garage door opener. In this guide, we’ll explore these methods step by step, helping you optimize the performance of your garage door opener for greater convenience and peace of mind.

Understanding Garage Door Opener Range

Before we delve into the methods for extending the range of your garage door opener, let’s first understand what determines its range. The range of a garage door opener refers to the maximum distance from which the remote control or keypad can effectively communicate with the opener unit. Several factors can influence the range of your garage door opener:

  • Frequency Interference: Nearby electronic devices or sources of radio frequency interference can disrupt the signal transmission between the remote and the opener, leading to diminished range.
  • Obstructions: Physical barriers such as walls, trees, or other structures can obstruct the signal between the remote and the opener, reducing range.
  • Antenna Position: The position and orientation of the antenna on the opener unit can significantly impact signal reception and range.

Methods to Extend Garage Door Opener Range

  1. Upgrade to a Higher-Powered Opener:
    • Consider upgrading to a garage door opener with a higher transmitting power. Newer models often feature enhanced technology and increased range capabilities, allowing you to operate the opener from a greater distance. Consult with a garage door professional to explore available options and choose a model that best suits your needs.
  2. Install an External Antenna:
    • If your garage door opener’s internal antenna is not providing sufficient range, consider installing an external antenna. An external antenna can be mounted on the exterior of the garage, away from potential obstructions and interference sources, to improve signal reception and extend range. Follow the manufacturer’s instructions for installation and positioning to ensure optimal performance.
  3. Use a Range Extender or Repeater:
    • Range extenders or repeaters are devices designed to amplify and extend the range of wireless signals. You can install a range extender specifically designed for garage door openers to enhance the signal strength and increase the range of your opener. These devices typically plug into a power outlet near the opener unit and work by capturing the signal from the remote or keypad and retransmitting it at a higher power.
  4. Adjust Antenna Position:
    • Experiment with adjusting the position of the antenna on your garage door opener to find the optimal orientation for maximum range. In general, positioning the antenna vertically and away from metal objects or electronic devices can help improve signal reception. You may need to test different orientations to find the best position for optimal range.
  5. Minimize Interference:
    • Identify and eliminate sources of interference that may be affecting the signal transmission between your remote or keypad and the opener. Electronic devices such as cordless phones, Wi-Fi routers, or nearby power lines can generate electromagnetic interference that disrupts the signal. Minimize or relocate these devices to reduce interference and improve opener range.

Conclusion

Extending the range of your Garage Door Repair Solon OH is essential for maximizing convenience and ensuring smooth operation. By implementing the methods outlined in this guide, such as upgrading to a higher-powered opener, installing an external antenna, using a range extender or repeater, adjusting antenna position, and minimizing interference, you can optimize the range of your garage door opener and enjoy seamless operation from a greater distance.

Ohio Garage Door Repair

7201 Longview Dr, Solon, OH 44139

1-440-773-2246

How To Connect Liftmaster Remote To Garage Door – Garage Door Experts

Connecting a LiftMaster remote to your Garage Door Repair San Diego CA allows you to conveniently open and close your garage door with the touch of a button, adding convenience and security to your home.

Whether you’re setting up a new remote or replacing an existing one, this guide will walk you through the step-by-step process to ensure a successful connection.

: Identify Your Garage Door Opener Model

Before you begin, it’s crucial to identify the model of your LiftMaster garage door opener. Different models may have slightly different procedures for connecting a remote control, so consult your owner’s manual or check the LiftMaster website for specific instructions tailored to your model.

: Prepare Your Remote Control

If you’re setting up a new remote control, ensure that it is compatible with your LiftMaster garage door opener. LiftMaster offers a variety of remote controls with different features and capabilities, so choose one that meets your needs. Make sure the remote has fresh batteries installed and is ready for programming.

: Access the Programming Feature

To connect your remote to the garage door opener, you’ll need to access the programming feature on the opener itself. This is typically done using the control panel located on the motor unit. Use a step ladder if necessary to reach the motor unit safely.

: Enter Programming Mode

Once you’ve located the control panel on the motor unit, you’ll need to enter programming mode. The exact steps to enter programming mode may vary depending on your model, so refer to your owner’s manual for detailed instructions. In most cases, you’ll need to press a specific sequence of buttons on the control panel to enter programming mode.

: Program the Remote

With the garage door opener in programming mode, it’s time to program the remote control. Follow the instructions provided with your remote to sync it with the opener. This may involve pressing a button on the remote or entering a specific code into the control panel.

: Test the Remote

After programming the remote, it’s essential to test its functionality to ensure that it’s working correctly. Stand within range of the garage door opener and press the button on the remote to open and close the door. If the door responds as expected, congratulations! You’ve successfully connected your LiftMaster remote to the garage door opener.

: Securely Store Your Remote

Once you’ve connected the remote to your LiftMaster garage door opener, be sure to securely store the remote in a safe and accessible location. Avoid leaving it in plain sight in your vehicle, as this could make your home vulnerable to break-ins.

Conclusion:

Connecting a remote control to your Garage Door Repair San Diego CA is a simple process that allows you to enjoy the convenience of operating your garage door with the touch of a button. By following the step-by-step instructions outlined in this guide and referring to your owner’s manual for specific details, you can easily connect your remote and ensure smooth operation of your garage door.

Garage Door Experts

3921 Fourth Ave, San Diego, CA 92103, United States

1-619-828-3886

How To Change Code On Clicker Garage Door Opener – JT’s Overhead Doors

Changing the code on your Garage Door Repair Mesa AZ is a simple yet important step in ensuring the security of your home.

By regularly updating your garage door opener’s access code, you can prevent unauthorized access and keep your belongings safe. In this comprehensive guide, we’ll walk you through the step-by-step process of changing the code on your Clicker garage door opener.

: Identify Your Clicker Model

Before you begin, it’s essential to identify the model of your Clicker garage door opener. Different models may have slightly different procedures for changing the code, so it’s crucial to consult the owner’s manual or manufacturer’s website for specific instructions tailored to your model.

: Locate the “Learn” Button on Your Opener

Next, locate the “Learn” button on your Clicker garage door opener. The Learn button is typically located on the back or side of the motor unit and may be labeled as “Learn” or “Program.” Press and release the Learn button to put your garage door opener into programming mode.

: Choose a New Code

With the garage door opener in programming mode, it’s time to choose a new code for your Clicker garage door opener. Select a code that is easy for you to remember but difficult for others to guess. Avoid using common combinations such as “1234” or your birthdate, as these are easily compromised. Instead, opt for a unique combination of numbers that you can easily recall.

: Program the New Code into Your Opener

Now that you’ve chosen a new code, it’s time to program it into your Clicker garage door opener. The programming process may vary depending on the model of your opener, so refer to the owner’s manual or manufacturer’s website for specific instructions. In general, you’ll need to press a combination of buttons on the opener in a specific sequence to enter the new code.

: Test the New Code

Once you’ve programmed the new code into your Clicker garage door opener, it’s essential to test it to ensure that it’s working correctly. Stand within range of your garage door opener and enter the new code using the keypad or remote control. If the door responds as expected, congratulations! You’ve successfully changed the code on your Clicker garage door opener.

: Update Additional Devices

If you have additional remotes or keypads that are programmed to your garage door opener, you’ll need to update them with the new code as well. Follow the same process outlined above to program the new code into each remote or keypad, ensuring that all devices are synchronized with the updated code.

: Securely Store Your Remote and Keypad

Finally, once you’ve changed the code on your Clicker garage door opener, be sure to securely store your remote controls and keypads. Avoid leaving them in your car where they could be stolen or accessed by unauthorized individuals. Instead, keep them in a secure location inside your home where only you can access them when needed.

Conclusion:

In conclusion, changing the code on your Garage Door Repair Mesa AZ is a simple yet effective way to enhance the security of your home and protect your belongings. By following the step-by-step process outlined in this guide, you can update the code on your garage door opener quickly and easily, giving you peace of mind knowing that your home is secure. Remember to choose a unique code, program it into your opener, and test it to ensure proper functionality. With a few simple steps, you can enjoy added security and convenience with your Clicker garage door opener.

JT’s Overhead Doors

307 N Sandal, Mesa, AZ 85205, United States

1-480-662-3315

How Much Power Does Garage Door Opener Use – Collin County Garage Door and Gates

The power consumption of a Garage Door Repair Collin County TX depends on various factors, including its motor type, horsepower rating, usage frequency, and additional features.

Understanding these factors is crucial for homeowners to estimate energy usage accurately and make informed decisions regarding energy efficiency and cost-effectiveness. In this comprehensive guide, we’ll explore the factors that influence the power consumption of garage door openers, providing detailed insights and practical advice.

  1. Motor Type and Horsepower Rating: Garage door openers typically use one of three motor types: AC (alternating current), DC (direct current), or hybrid. AC motors are common in traditional garage door openers and tend to consume more power during operation. On the other hand, DC motors are more energy-efficient and offer variable speed control, allowing them to adjust power consumption based on the door’s movement. Additionally, the horsepower rating of the motor affects power consumption, with higher horsepower motors generally consuming more power to lift heavier doors.
  2. Usage Frequency: The frequency at which the garage door is operated directly impacts power consumption. Homes with high garage door usage, such as multiple daily openings and closings, will consume more energy compared to homes with infrequent usage. Consider the household’s lifestyle and usage patterns when estimating power consumption and selecting a garage door opener.
  3. Door Size and Weight: The size and weight of the garage door influence the amount of power required to lift and lower it. Larger and heavier doors require more power to operate, especially during the initial lifting phase. It’s essential to match the garage door opener’s horsepower rating to the door’s size and weight to ensure smooth and efficient operation while minimizing unnecessary power consumption.
  4. Additional Features: Modern garage door openers often come equipped with additional features such as battery backup, smart connectivity, and built-in lighting. While these features offer added convenience and functionality, they may also increase power consumption. For example, battery backup systems require power to charge and maintain the backup battery, while smart connectivity features require continuous operation of Wi-Fi and communication modules.
  5. Energy Efficiency Considerations: When selecting a garage door opener, consider energy efficiency ratings and features that help reduce power consumption. Look for models with Energy Star certification or energy-efficient motors that minimize power usage without sacrificing performance. Additionally, consider installing LED lighting instead of traditional incandescent bulbs for built-in lighting, as LEDs consume less power and last longer.
  6. Proper Maintenance: Regular maintenance of the garage door opener is essential for optimizing energy efficiency and prolonging its lifespan. Keep moving parts lubricated, check for proper alignment and tension settings, and inspect for any signs of wear or damage. A well-maintained opener operates more efficiently and consumes less power over time.
  7. Monitoring and Adjustments: Monitor energy usage periodically to identify any abnormal patterns or spikes in power consumption. Consider making adjustments to usage habits, such as minimizing unnecessary door openings or reducing the duration of lighting usage, to conserve energy and reduce costs. Additionally, explore energy-saving settings and features available on the garage door opener, such as timer controls and motion sensors.

In conclusion, the power consumption of a Garage Door Repair Collin County TX is influenced by factors such as motor type, horsepower rating, usage frequency, door size and weight, additional features, energy efficiency considerations, proper maintenance, and monitoring. By understanding these factors and implementing energy-saving measures, homeowners can optimize the energy efficiency of their garage door opener, reduce power consumption, and lower energy costs over time. With careful consideration and proactive maintenance, homeowners can enjoy the convenience of a well-operating garage door opener while minimizing its environmental impact.

Collin County Garage Door and Gates

6 Bowling Ln, Blue Ridge, TX 75424, United States

1-972-472-2845

What Are The Top-Rated Maid Services In Coppell? – Coppell’s Best Maid Services

House Cleaning Coppell TX, a suburb located in the Dallas-Fort Worth metropolitan area, offers a plethora of options when it comes to maid services.

Whether you’re looking for residential cleaning, commercial cleaning, or specialized services, finding the top-rated maid service requires careful consideration of various factors.

1. Online Research and Reviews

Begin your search for top-rated maid services in Coppell by leveraging online resources. Websites like Yelp, Google Reviews, Angie’s List, and Thumbtack provide platforms for customers to leave feedback and ratings for local businesses, including maid services. Pay attention to overall ratings, the number of reviews, and specific comments regarding the quality of service, reliability, and professionalism.

2. Recommendations and Referrals

Word-of-mouth recommendations from friends, family, neighbors, or colleagues can be invaluable in your search for top-rated maid services. Reach out to individuals who have used maid services in Coppell and ask about their experiences. Personal referrals often provide insights that online reviews may not capture, giving you a more holistic understanding of a company’s reputation and service quality.

3. Professional Associations and Certifications

Look for maid services in Coppell that are members of professional associations or hold relevant certifications. Affiliation with organizations such as the Association of Residential Cleaning Services International (ARCSI) or the Cleaning Industry Management Standard (CIMS) certification can indicate a commitment to industry best practices, professionalism, and continuous improvement.

4. Transparency and Communication

When evaluating maid services, prioritize companies that demonstrate transparency and clear communication. A reputable maid service will be responsive to inquiries, provide detailed information about their services, pricing, and scheduling, and address any concerns or questions you may have. Clear communication is essential for establishing expectations and ensuring a positive cleaning experience.

5. Quality of Service and Satisfaction Guarantees

Top-rated maid services in Coppell prioritize customer satisfaction and consistently deliver high-quality cleaning results. Look for companies that offer satisfaction guarantees or re-cleanings in the event that you are not fully satisfied with the service provided. A commitment to customer satisfaction demonstrates a dedication to excellence and accountability.

6. Eco-Friendly Practices

If environmental sustainability is important to you, consider choosing a maid service in Coppell that prioritizes eco-friendly cleaning practices. Look for companies that use environmentally friendly cleaning products, practices water conservation, and minimizes waste generation. Eco-conscious maid services not only contribute to a healthier environment but also prioritize the well-being of their clients and communities.

7. Employee Training and Background Checks

Evaluate maid services based on their approach to employee training, screening, and background checks. Reputable companies invest in comprehensive training programs to ensure that their staff are equipped with the necessary skills and knowledge to deliver exceptional cleaning results. Additionally, thorough background checks and screening processes help ensure the safety and security of both clients and employees.

8. Flexibility and Customization

Choose a maid service in Coppell that offers flexibility and customization to accommodate your unique needs and preferences. Whether you require regular cleaning on a weekly, bi-weekly, or monthly basis, or need a one-time deep cleaning for a special occasion, look for companies that can tailor their services to meet your specific requirements. Flexibility in scheduling and service offerings allows you to receive the level of cleaning support that best fits your lifestyle and needs.

9. Value for Money

While price is certainly a factor to consider, prioritize value for money over simply choosing the cheapest option. Evaluate maid services based on the overall value they provide, taking into account factors such as service quality, reliability, professionalism, and customer satisfaction. Remember that investing in a top-rated maid service may yield long-term benefits in terms of time savings, peace of mind, and a clean and healthy living environment.

10. Local Reputation and Longevity

Consider the local reputation and longevity of maid services in Coppell when making your decision. Established companies with a strong presence in the community and a history of satisfied customers are more likely to provide reliable and consistent service. While newer companies may offer competitive pricing or promotions, prioritize those with a proven track record of excellence and customer satisfaction.

Conclusion:

In conclusion, finding the top-rated House Cleaning Coppell TX requires thorough research, careful evaluation, and consideration of various factors. By leveraging online resources, seeking recommendations, evaluating transparency and communication, prioritizing quality of service and satisfaction guarantees, and considering factors such as eco-friendliness, employee training, flexibility, value for money, and local reputation, you can make an informed decision and choose a maid service that meets your needs and exceeds your expectations.

Coppell’s Best Maid Services

440 Shadowcrest Ln, Coppell, TX 75019, United States

1-469-437-7286

How Adjust Garage Door Opener – Bridgeport Best Garage & Overhead Doors

Adjusting a Garage Door Repair Bridgeport TX is essential for ensuring smooth and efficient operation of your garage door.

Whether your garage door is closing too quickly, making unusual noises, or not opening and closing evenly, making adjustments to the opener can often resolve these issues. Here’s a comprehensive guide on how to adjust a garage door opener:

1. Safety First: Before making any adjustments to your garage door opener, prioritize safety. Ensure that the door is fully closed and disconnect the power to the opener by unplugging it from the electrical outlet or turning off the circuit breaker. Wear safety goggles and gloves to protect yourself from any potential hazards.

2. Check Balance and Alignment: Start by inspecting the balance and alignment of your garage door. Manually open and close the door halfway and observe if it stays in place or moves on its own. A properly balanced door should stay in position when released. If it moves, it may indicate a balance or alignment issue that needs to be addressed before adjusting the opener.

3. Adjust Close Limit Settings: If your garage door closes too quickly or doesn’t close all the way, you may need to adjust the close limit settings on the opener. Locate the close limit adjustment screw on the opener unit, typically found on the side or bottom. Use a flathead screwdriver to turn the adjustment screw clockwise to decrease the close limit and counterclockwise to increase it. Make small adjustments and test the door after each adjustment until it closes properly.

4. Adjust Open Limit Settings: Similarly, if your garage door doesn’t open all the way or opens too quickly, you can adjust the open limit settings on the opener. Locate the open limit adjustment screw on the opener unit and use a flathead screwdriver to turn it clockwise to decrease the open limit and counterclockwise to increase it. Test the door after each adjustment until it opens fully and smoothly.

5. Adjust Force Settings: If your garage door encounters resistance when opening or closing, you may need to adjust the force settings on the opener. Locate the force adjustment screws on the opener unit, typically labeled “up force” and “down force.” Use a flathead screwdriver to turn the screws clockwise to increase the force and counterclockwise to decrease it. Make small adjustments and test the door after each adjustment to ensure smooth operation without excessive force.

6. Lubricate Moving Parts: Regular lubrication of moving parts is essential for maintaining the smooth operation of your garage door opener. Apply a lubricant specifically designed for garage doors to the rollers, tracks, hinges, and springs. Be sure to clean any debris or dirt buildup before applying the lubricant.

7. Check and Adjust Safety Sensors: Ensure that the safety sensors located near the bottom of the garage door tracks are properly aligned and free from obstructions. If the sensors are misaligned or blocked, the door may not close properly. Adjust the sensors as needed and test the door to ensure it closes without any issues.

8. Test and Fine-Tune: After making adjustments to your garage door opener, test the door multiple times to ensure that it operates smoothly and evenly. Pay attention to any unusual noises, jerky movements, or signs of resistance. Make additional adjustments as needed until the door operates to your satisfaction.

9. Regular Maintenance: To prevent future issues and prolong the lifespan of your garage door opener, perform regular maintenance tasks such as lubrication, tightening hardware, and inspecting for wear and tear. Address any problems promptly to avoid more significant issues down the road.

10. Professional Assistance: If you encounter difficulties or are unsure about making adjustments to your garage door opener, consider seeking professional assistance from a qualified technician. Professional garage door technicians have the expertise and tools necessary to diagnose and resolve issues with your opener safely and effectively.

By following these steps and prioritizing safety, you can successfully adjust your Garage Door Repair Bridgeport TX to ensure smooth and efficient operation. Regular maintenance and periodic checks will help prevent problems and keep your garage door system in optimal condition for years to come.

Bridgeport Best Garage & Overhead Doors

701 E Cates St, Bridgeport, TX 76426, United States

1-940-532-8593

How To Open Garage Door Manually From Outside Without Key – Team Taylor Doors

Opening a Garage Door Repair Kansas City MO is possible in certain situations, such as when the power is out or the key is unavailable.

While it may seem challenging, most garage doors are equipped with emergency release mechanisms that allow for manual operation. In this guide, we’ll walk you through the step-by-step process of opening a garage door without a key from the outside using the emergency release mechanism.

Understanding Garage Door Emergency Release Mechanism

The emergency release mechanism on a garage door allows you to disengage the door from the opener carriage, enabling manual operation. This mechanism is typically activated by pulling a cord or handle, which is often red and located near the opener motor unit. When pulled, the emergency release disengages the door from the opener carriage, allowing you to lift the door manually.

Tools and Materials Needed

Before you begin, gather the following tools and materials:

  • Step ladder
  • Flashlight (if necessary)
  • Assistant (optional)

Step-by-Step Guide to Opening a Garage Door Manually from the Outside Without a Key

Follow these steps to manually open a garage door from the outside without a key:

1. Locate the Emergency Release Cord

  • Use a step ladder to access the garage door opener motor unit. Look for a red cord or handle hanging from the opener carriage. This is the emergency release mechanism.

2. Pull the Emergency Release Cord

  • Once you’ve located the emergency release cord, pull it down firmly to disengage the garage door from the opener carriage. You may need to use some force, but be careful not to pull too hard and damage the mechanism.

3. Manually Lift the Door

  • With the emergency release cord pulled, manually lift the garage door using the bottom edge of the door. Use caution and lift with your legs, not your back, to avoid injury. If the door is too heavy to lift alone, enlist the help of an assistant.

4. Secure the Door

  • Once the door is partially open, use C-clamps to secure the door to the tracks on both sides. This prevents the door from unexpectedly closing while you work.

5. Prop the Door Open (Optional)

  • If necessary, prop the door open using a sturdy object such as a piece of wood or a brick. Place the prop underneath the door to support its weight and keep it from closing unexpectedly.

6. Exercise Caution

  • Exercise caution when manually operating a garage door from the outside. The door may be heavier than usual, and there is a risk of the door falling unexpectedly. Avoid standing directly underneath the door when opening or closing it.

7. Seek Professional Repair

  • While it may be possible to manually open a garage door without a key, it’s essential to seek professional repair as soon as possible to restore normal operation. Attempting to use the door with a malfunctioning opener can cause further damage and increase the risk of injury.

Additional Tips and Considerations

  • Test the emergency release mechanism periodically to ensure that it’s functioning properly. If the cord is difficult to pull or feels stuck, it may need to be lubricated or adjusted.
  • Keep children and pets away from the garage door area when attempting to manually open or close the door.

Conclusion:

Opening a Garage Door Repair Kansas City MO is possible using the emergency release mechanism. By following the steps outlined above and exercising caution, you can safely open your garage door even without access to a key.

Team Taylor Doors

210 SW Market St Suite 144, Lee’s Summit, MO 64063, United States

1-816-408-6999

How To Adjust Liftmaster Garage Door Opener – Southern Home Creations Garage Doors & Openers

Adjusting a LiftMaster Garage Door Repair Suwanee GA is essential for ensuring smooth and reliable operation of your garage door system. LiftMaster is a trusted brand known for its quality and innovation in garage door openers.

In this comprehensive guide, we’ll walk you through the step-by-step process of adjusting a LiftMaster garage door opener to optimize performance and address common issues.

Understanding LiftMaster Garage Door Openers

LiftMaster offers a range of garage door openers, including belt-drive, chain-drive, and screw-drive models. These openers are equipped with various features and technologies designed to enhance convenience, security, and safety.

Tools and Materials Needed

Before you begin adjusting your LiftMaster garage door opener, gather the following tools and materials:

  • Step ladder
  • Screwdriver (Phillips and flathead)
  • Adjustable wrench
  • Lubricant (optional)
  • Safety glasses (optional)

Step-by-Step Guide to Adjusting a LiftMaster Garage Door Opener

Follow these steps to adjust your LiftMaster garage door opener:

1. Safety First

  • Before you start any work on your garage door opener, ensure that the power is turned off to prevent accidental operation. Disconnect the power cord from the outlet or switch off the circuit breaker.

2. Check for Loose Hardware

  • Inspect the garage door opener for any loose or damaged hardware, including bolts, nuts, screws, and brackets. Tighten any loose hardware using an adjustable wrench or screwdriver.

3. Inspect and Lubricate Moving Parts

  • Inspect the moving parts of the garage door opener, including the chain, belt, and screw drive. Apply lubricant to these components if necessary to ensure smooth operation and reduce friction.

4. Adjust the Travel Limits

  • Locate the travel limit adjustment screws on the side or rear of the garage door opener. These screws control how far the door opens and closes. Use a screwdriver to adjust the travel limits as needed. Turn the screw clockwise to decrease the travel distance and counterclockwise to increase it.

5. Adjust the Force Settings

  • Locate the force adjustment knobs on the garage door opener. These knobs control the amount of force applied when opening and closing the door. Use a screwdriver to adjust the force settings as needed. Increase the force if the door does not close completely or decrease it if the door reverses when closing.

6. Test the Safety Features

  • Test the safety features of the garage door opener, including the auto-reverse mechanism and photoelectric sensors. Place an object, such as a roll of paper towels, in the path of the closing door. The door should reverse immediately upon contact with the object.

7. Test the Remote Control

  • Test the remote control or wall-mounted keypad to ensure that it operates the garage door opener correctly. Replace the batteries in the remote control if necessary and reprogram it according to the manufacturer’s instructions.

8. Reconnect Power

  • Once you have completed the adjustments, reconnect the power to the garage door opener by plugging in the power cord or switching on the circuit breaker.

9. Test the Door Operation

  • Test the operation of the garage door opener by opening and closing the door several times using the remote control or wall-mounted keypad. Ensure that the door operates smoothly and without any issues.

Additional Tips and Considerations

  • If you encounter any problems or difficulties during the adjustment process, refer to the owner’s manual or contact LiftMaster customer support for assistance.
  • Regular maintenance and inspection of your LiftMaster garage door opener can help prevent issues and prolong the lifespan of the opener.

Conclusion:

Adjusting a LiftMaster Garage Door Repair Suwanee GA is a straightforward process that can help optimize performance and address common issues such as improper travel limits or force settings. By following the step-by-step guide outlined above and taking proper safety precautions, you can ensure that your LiftMaster garage door opener operates smoothly and reliably for years to come.

Southern Home Creations Garage Doors & Openers

4110 Tench Rd Suite D, Suwanee, GA 30024, United States

1-770-831-0301