How Much is a New Garage Door – Grayson County Garage Door Repair

The cost of a new garage door can vary depending on several factors, such as the type of door, material, size, style, and installation fees. The most common types of garage doors are sectional, roll-up, and side-hinged.

Here is a guide from Garage Door Repair Sherman TX:

The material of the garage door is another significant factor in the cost. Wooden garage doors are the most expensive option, steel garage doors are a popular choice due to their durability and low maintenance, aluminum garage doors are lightweight and require little maintenance, and fiberglass garage doors are a good option for those looking for a lightweight and durable door.

The size and style of the garage door can also affect the cost. Standard size doors are typically 8 to 10 feet wide and 7 to 8 feet tall. Larger doors can cost more, depending on the size. The style of the door, such as a traditional or contemporary design, can also affect the cost.

Installation fees vary depending on the contractor, location, and complexity of the installation. The cost of installation can range from $200 to $1,000 or more.

Overall, as stated in Garage Door Repair Sherman TX, the cost of a new garage door can range from $750 to $4,000 or more, depending on the type, material, size, style, and installation fees. It’s essential to do your research and compare prices from different manufacturers and contractors to find the best deal.

Grayson County Garage Door Repair

1940 Everheart Rd, Bells, TX 75414, United States

903-500-7205

How to Program Garage Door Opener to Car – South Denton Overhead Garage Door

Programming a garage door opener to a car can be a bit tricky, but with some patience and following the right steps, you can easily accomplish it.

In this article, we will guide you through the process step by step:

Before we begin, it’s essential to note that different car models may have different methods of programming a Garage Door Repair Roanoke TX opener. Therefore, we recommend that you always consult your car’s owner manual to ensure that you follow the correct procedure.

Step 1: Determine Your Garage Door Opener Type

The first step is to determine what type of garage door opener you have. There are three common types of garage door openers: chain-driven, belt-driven, and screw-driven. To find out what type of garage door opener you have, look for the motor unit located above the garage door. Once you have determined the type of garage door opener you have, you can proceed to the next step.

Step 2: Locate the Learn Button on Your Garage Door Opener

The next step is to locate the learn button on your garage door opener. The learn button is usually located on the back of the motor unit or on the control panel. It’s essential to note that the learn button color may vary depending on the manufacturer. The button is usually round and may have the word “learn” or “smart” written on it.

Step 3: Clear All the Codes

Before programming a new remote control, it’s crucial to clear all the existing codes on the garage door opener. To do this, press and hold the learn button on the garage door opener until the LED light turns off. This may take about 10 to 15 seconds.

Step 4: Prepare Your Car

Now it’s time to prepare your car for programming. Start by turning the ignition on and make sure the car is in the “Park” position. Also, ensure that all the car windows and doors are closed.

Step 5: Program the Remote Control

The next step is to program the remote control to the garage door opener. To do this, press and hold the learn button on the garage door opener until the LED light turns on. While the LED light is on, press and hold the button on the remote control that you want to use to open the garage door. Hold the button until the LED light on the garage door opener blinks, indicating that the remote control has been programmed.

Step 6: Test the Remote Control

Once you have programmed the remote control, it’s time to test it. Stand outside the garage door and press the button on the remote control. The garage door should open or close depending on the button you pressed. If the garage door does not respond, repeat the programming process from step 3.

Step 7: Repeat the Process for Other Remote Controls

If you have multiple remote controls that you want to program, repeat the process from step 5 for each remote control.

Conclusion

Programming a Garage Door Repair Roanoke TX opener to a car is a simple process that requires following the right steps. However, if you encounter any difficulties, always refer to your car’s owner manual or contact a professional garage door technician for assistance. Remember to always take safety precautions when working with garage door openers, such as unplugging the unit before servicing it.

South Denton Overhead Garage Door

112 US-377 #9, Roanoke, TX 76262, United States

1-817-873-2942

How to Fix Garage Door Opener – BH Garage Door & Gates of Celina

If you’re experiencing problems with your garage door opener, don’t worry, you’re not alone. As someone who has gone through this before, I understand how frustrating it can be.

However, with a few simple steps from Garage Door Repair Celina TX, you can easily fix your garage door opener and have it working like new again.

First, I would check the power source. I’ve had issues with the outlet before, and simply plugging it in or resetting the breaker fixed the problem. If the opener is battery-operated, I would replace the batteries and try again.

Next, I would check the sensors. I’ve had times when the sensors were dirty or misaligned, and this prevented the door from closing properly. Cleaning or adjusting the sensors can usually fix the issue.

If the remote control isn’t working, I would check the batteries and make sure that the remote control is within range of the opener. I’ve also had instances where an object was blocking the signal, so I would make sure that there are no obstructions in the way.

If the garage door isn’t opening or closing all the way, I would check the door balance. The door should be able to move up and down smoothly, and if it’s not balanced, it can put strain on the opener and cause it to malfunction.

If the opener is making a strange noise, I would check the chain or belt. A loose or damaged chain or belt can cause the opener to malfunction, and tightening or replacing it can usually fix the problem.

Lastly, I would lubricate the moving parts of the opener, including the chain or belt, rollers, and hinges. This can help the opener work more smoothly and prevent it from breaking down.

If after all these steps the opener still isn’t working, it may be time to call a professional. They can diagnose the problem and make the necessary repairs to get your opener working again.

In conclusion, as stated in Garage Door Repair Celina TX, fixing a garage door opener can seem daunting, but with a bit of troubleshooting, it can be easily fixed. By following these steps, I’ve been able to fix my garage door opener and have it working like new again.

BH Garage Door & Gates of Celina

102 N Ohio St #4A, Celina, TX 75009, United States

214-949-4432

How to Insulate a Garage Door – BH Garage Door & Gate of Frisco

As someone who has recently insulated my own garage door, I can share with you the steps that I took. Insulating your garage door can make a huge difference in the temperature and comfort of your garage, as well as help you save on energy costs.

Here’s how I did it as stated in Garage Door Repair Frisco TX:

  1. Determine the Type of Garage Door The first thing I did was determine the type of garage door I had. Mine was a metal door, which required a different type of insulation than wood or fiberglass doors.
  2. Choose the Insulation Material Next, I researched different insulation materials and decided to go with fiberglass batt insulation. It was affordable, easy to install, and provided good thermal insulation.
  3. Measure the Garage Door Panels I measured the panels of my garage door to determine how much insulation material I would need. I measured each panel individually to account for any variations in size.
  4. Clean the Garage Door Panels Before installing the insulation material, I cleaned the garage door panels with a damp cloth to remove any dirt, dust, or debris.
  5. Install the Insulation Material To install the fiberglass batt insulation, I followed these steps:
  • Cut the insulation material to the size of each panel.
  • Place the insulation material into each panel, ensuring it fits snugly.
  • Use duct tape to secure the insulation material in place.
  1. Install a Garage Door Insulation Kit I also considered buying a garage door insulation kit, which would have made installation even easier. However, I decided to go with the DIY approach.
  2. Install Weatherstripping To maximize the insulation benefits of the garage door, I installed weatherstripping around the edges of the door. I bought weatherstripping at a hardware store and installed it using adhesive.
  3. Seal the Garage Door Windows Finally, I sealed the windows on my garage door to prevent heat loss. I used a window insulation kit, which contained plastic film and double-sided tape. I cut the plastic film to the size of the windows, applied the double-sided tape around the edges of the window frame, and stuck the plastic film onto the tape. I used a hairdryer to shrink the plastic film and remove any wrinkles.

Overall, in reference to Garage Door Repair Frisco TX, insulating my garage door was a relatively simple and straightforward process. It has made a noticeable difference in the temperature and comfort of my garage, and I’m already seeing savings on my energy bills. I would definitely recommend this project to anyone looking to make their garage more energy-efficient and comfortable.

BH Garage Door & Gate of Frisco

4350 Main St Suite 160, Frisco, TX 75034

972-366-4079

How to Adjust a Garage Door? – Plano East Garage Door

If you’re like me and want to save money by adjusting your garage door yourself, it’s important to take the proper safety precautions and follow the right steps.

Here’s how I adjusted my garage door based from Garage Door Repair Plano TX:

Step 1: Checked the Springs

Before I started adjusting my garage door, I checked the springs to make sure they weren’t damaged. I made sure the door was closed and disconnected from the opener before checking the springs. If I noticed any damage or wear, I would have called a professional garage door technician to make any necessary repairs.

Step 2: Checked the Tracks

I checked the tracks on the garage door to make sure they were properly aligned. I looked for gaps between the rollers and the track. If I noticed any gaps, I loosened the bolts on the track brackets and gently tapped the track into place with a rubber mallet. Once the track was aligned, I tightened the bolts back up.

Step 3: Adjusted the Springs

Since my garage door was difficult to open and close, I needed to adjust the springs. However, I knew that adjusting the springs can be dangerous, so I called a professional garage door technician to make the necessary adjustments.

Step 4: Adjusted the Limit Switches

I noticed that my garage door didn’t close all the way, so I needed to adjust the limit switches. I located the switches on the side of the opener unit and used a screwdriver to turn the switches in small increments until the door opened and closed smoothly and fully.

Step 5: Adjusted the Force

My garage door opener was putting too much pressure on objects in its path, so I needed to adjust the force. I located the force adjustment screws on the opener unit and used a screwdriver to turn the screws in small increments until the door opened and closed smoothly and without reversing.

Step 6: Tested the Door

After making all the necessary adjustments, I tested the door to make sure it operated smoothly and safely. I closed the door and tested the opener to make sure it stopped when it was supposed to and reversed when it hit an object.

Adjusting my garage door took some time and effort, but it was worth it to save money on professional repairs.

By following these steps from Garage Door Repair Plano TX and taking the proper safety precautions, you can adjust your garage door to ensure it operates smoothly and safely. However, if you’re not comfortable making adjustments yourself, it’s always best to call a professional garage door technician to make any necessary repairs.

Plano East Garage Door

1201 E Plano Pkwy B, Plano, TX 75074, United States

972-640-7299

Why Won’t my Garage Door Close? – MF Solutions

If your garage door won’t close, there are several potential reasons why based from Garage Door Repair. In this guide, I’ll walk you through some of the most common causes of this problem and what you can do to fix them.

  1. Obstructions in the Path of the Door

One of the most common reasons why a garage door won’t close is because there are obstructions in the path of the door. Check for anything that might be blocking the door, such as a bike or a tool, and remove it. The garage door opener has a safety feature that prevents the door from closing if it senses an obstruction.

  1. Misaligned Photo Eye Sensors

Another common reason why a garage door won’t close is because the photo eye sensors are misaligned or dirty. These sensors are located on each side of the garage door and send an invisible beam across the opening. If the beam is broken, the door won’t close. Check to make sure that the sensors are properly aligned and clean. Wipe them down with a clean, dry cloth if necessary.

  1. Broken Springs

The springs on your garage door are responsible for helping to support the weight of the door as it opens and closes. If one or both of these springs are broken, the door won’t close properly. If you suspect that this is the issue, it’s best to call a professional to repair or replace the springs.

  1. Malfunctioning Garage Door Opener

Another potential cause of a garage door that won’t close is a malfunctioning garage door opener. The opener may be experiencing a technical issue that is preventing it from functioning properly. Try resetting the opener by unplugging it and plugging it back in. If that doesn’t work, you may need to contact a professional to diagnose and repair the problem.

  1. Power Outage

If there has been a power outage, the garage door opener may not be functioning properly.

Something went wrong

Check to see if the lights on the opener are working, as this will indicate whether or not it is receiving power. If the lights are not working, try plugging in a different device to the outlet to confirm whether or not there is power. If the outlet is not working, you may need to call an electrician to fix it.

  1. Broken or Damaged Cables

The cables on your garage door are responsible for helping to lift and lower the door. If one or more of these cables are broken or damaged, the door may not close properly. If you suspect that this is the issue, it’s best to call a professional to repair or replace the cables.

  1. Incorrect Settings on the Garage Door Opener

Finally, it’s possible that the settings on your garage door opener are incorrect. Make sure that the travel limit settings are set correctly, as this can affect the door’s ability to close. Consult the owner’s manual for your garage door opener for instructions on how to adjust the settings.

In conclusion, in reference to Garage Door Repair, there are many potential reasons why a garage door won’t close. If you’ve checked for obstructions, aligned the sensors, and reset the opener and it still won’t close, it’s best to call a professional to diagnose and repair the problem. By addressing the issue promptly, you can ensure that your garage door remains functional and secure.

MF Solutions

9118 Elmwood Dr, Niles, IL 60714, United States

224-434-1780

How to Replace Garage Door Opener – Affordable Garage Door Repairs of Indianapolis, LLC

Replacing a garage door opener may seem like a daunting task, but it is not as difficult as it may seem. Recently, I replaced my garage door opener, and I can say that it was a relatively easy process once I understood the steps involved. In this guide from Garage Door Repair Indianapolis, I’ll walk you through the steps that I followed to replace my garage door opener.

Step 1: Preparation

Before you start replacing your garage door opener, make sure that you have all the necessary tools at your disposal. You will need a ladder, a socket wrench set, pliers, a screwdriver, and of course, the new garage door opener. Ensure that the new opener is compatible with your garage door, and that it has all the necessary components for installation.

Step 2: Disconnect the Power

The first step in replacing a garage door opener is to disconnect the power to the existing opener. This can be done by unplugging the opener from the power source or turning off the circuit breaker that controls the opener. This step is essential for your safety.

Step 3: Remove the Old Opener

With the power disconnected, the next step is to remove the old opener. Start by using your socket wrench set to remove the brackets that hold the old opener in place. Be careful not to damage the mounting brackets or any other components of the garage door.

Step 4: Install the New Opener

Once you have removed the old opener, it is time to install the new one. Begin by following the manufacturer’s instructions for installing the mounting brackets for the new opener. Ensure that the brackets are securely attached to the ceiling and that they are level.

Next, attach the rail to the mounting bracket, following the manufacturer’s instructions. Attach the trolley to the rail and connect the arm to the trolley. Finally, attach the motor unit to the mounting bracket and connect the wires according to the manufacturer’s instructions.

Step 5: Test the New Opener

Once the new opener is installed, you should test it to ensure that it works correctly. This involves adjusting the opener’s settings, including the force and travel limit settings. Follow the manufacturer’s instructions for adjusting these settings, and test the opener by opening and closing the garage door several times.

Step 6: Connect the Power

After testing the new opener, it is time to connect the power. This is typically done by plugging the opener into the power source or turning on the circuit breaker that controls the opener. Double-check to ensure that the power is connected correctly and that there are no loose wires.

Step 7: Secure the Opener

Finally, secure the new opener in place by using your socket wrench set to tighten the mounting brackets. Ensure that the opener is securely attached to the ceiling, and that all the components are appropriately aligned.

In conclusion, based on Garage Door Repair Indianapolis, replacing a garage door opener is a relatively easy process that requires some preparation, care, and attention to detail. Following these steps will help you successfully replace your garage door opener and keep your garage door functioning properly and safely. Always ensure that you follow the manufacturer’s instructions and take all necessary safety precautions to ensure a successful outcome. With some patience and care, you can replace your garage door opener with confidence.

Affordable Garage Door Repairs of Indianapolis, LLC

Indianapolis

317-372-5337

How to Reset a LiftMaster Garage Door Opener – Team Taylor Doors

I can guide you through the process of resetting your LiftMaster garage door opener. Before we begin, it’s important to note that the specific steps for resetting your LiftMaster garage door opener may vary depending on the model and age of your opener. Therefore, it’s always a good idea to consult your owner’s manual for specific instructions.

I can provide you with detailed instructions on what to do based from Kansas City Garage Door Repair.

Step 1: Disconnect the Power

To begin the reset process, you will first need to disconnect the power to your LiftMaster garage door opener. You can do this by unplugging the opener from the electrical outlet or by turning off the circuit breaker that powers the opener.

Step 2: Locate the Learn Button

Next, you will need to locate the “Learn” button on your garage door opener. This button is typically located near the antenna wire on the back or side of the opener. It may be labeled “Learn” or “Program.”

Step 3: Press and Hold the Learn Button

Once you have located the Learn button, press and hold it down for about 6 seconds. You should see the LED light on the opener flash once, indicating that the opener’s memory has been cleared.

Step 4: Release the Learn Button

After holding down the Learn button for 6 seconds, release the button. The LED light on the opener should turn off.

Step 5: Program the Remote

Next, you will need to reprogram your remote control to work with your LiftMaster garage door opener. To do this, press and release the Learn button on the opener. The LED light on the opener should start flashing.

Step 6: Press the Remote Button

While the LED light on the opener is flashing, press the button on your remote control that you want to use to open and close your garage door. The LED light on the opener should flash again, indicating that the remote has been programmed.

Step 7: Test the Remote

To make sure that the remote control is working properly, stand in your garage and press the button on the remote control. The garage door should open and close. If it doesn’t, repeat steps 5 and 6 to reprogram the remote control.

Step 8: Reconnect the Power

Once you have successfully reset and reprogrammed your LiftMaster garage door opener, you can reconnect the power to the opener by plugging it back in or turning the circuit breaker back on.

In summary, according to Kansas City Garage Door Repair, to reset your LiftMaster garage door opener, you will need to disconnect the power, locate the Learn button, press and hold the Learn button, release the Learn button, program the remote, test the remote, and finally, reconnect the power. Always refer to your owner’s manual for specific instructions for your particular model.

Team Taylor Doors

210 SW Market St Suite 144, Lee’s Summit, MO 64063, United States

816-408-6999

How to Align Garage Door Sensors – South Arlington Overhead & Garage Door

Aligning garage door sensors is an important maintenance task to ensure that your garage door operates safely and effectively.

Here’s how I go about aligning garage door sensors based from Garage Door Repair South Arlington TX:

First, I make sure to turn off the power source to the garage door opener. Safety is always the top priority, so it’s important to disconnect the power before doing any work on the garage door.

Next, I locate the sensors on either side of the garage door near the bottom. I check to make sure the lenses of the sensors are clean and free of debris. Any dirt or debris can cause the sensors to malfunction and prevent the garage door from functioning properly.

Then, I use a level to make sure the sensors are aligned horizontally. I place the level on top of each sensor to make sure they’re at the same height. If one sensor is higher or lower than the other, the beam of light won’t align properly and the garage door won’t operate correctly.

If the sensors are misaligned, I adjust them by gently moving one or both of the sensors until they’re level. Most sensors have an adjustable mounting bracket that can be moved up or down or side to side to fine-tune the alignment.

After adjusting the sensors, I use a piece of string or a laser level to make sure the sensors are pointing directly at each other. The beam of light should be parallel and uninterrupted between the sensors.

Once the sensors are properly aligned, I tighten the mounting screws to make sure they’re secure. I also check the wiring to make sure it’s properly connected to both sensors and the garage door opener.

Finally, I test the garage door by opening and closing it several times to make sure it’s functioning smoothly without any interruptions.

Overall, based from Garage Door Repair South Arlington TX, aligning garage door sensors is an important maintenance task that can help keep your garage door operating safely and effectively. With a bit of patience and attention to detail, you can easily align your garage door sensors yourself and prevent any accidents or damage to your garage door. However, if you’re not comfortable doing it yourself, it’s always best to hire a professional to ensure the job is done safely and correctly.

South Arlington Overhead & Garage Door

3330 Matlock Rd #204, Arlington, TX 76015, United States

817-383-2173

How to Program Chamberlain Garage Door Opener – Garage Door Experts of North Arlington

As the owner of a Chamberlain garage door opener, I want to make sure that it is properly programmed to operate safely and efficiently.

Here are the steps from that I follow Garage Door Repair North Arlington TX to program my Chamberlain garage door opener:

As the owner of a Chamberlain garage door opener, I want to make sure that it is properly programmed to operate safely and efficiently. Here are the steps I follow to program my Chamberlain garage door opener:

  1. Locate the “Learn” button on the garage door opener. This button is typically located on the back or side of the motor unit.
  2. Press and release the “Learn” button. The indicator light on the motor unit will turn on and remain lit for 30 seconds, indicating that the garage door opener is ready to learn a new remote control or keypad code.
  3. Within 30 seconds of pressing the “Learn” button, press the button on the remote control or keypad that you want to program. The motor unit will emit two clicks to confirm that the code has been learned.
  4. Test the remote or keypad by pressing the button to open or close the garage door. If the door doesn’t respond, repeat the programming steps.
  5. If you have multiple garage door openers, repeat the programming process for each opener.
  6. To erase all remote and keypad codes from the garage door opener’s memory, press and hold the “Learn” button until the indicator light turns off.
  7. To reprogram a remote or keypad, repeat the programming process.
  8. If you encounter any problems during programming, consult the owner’s manual or contact Chamberlain customer service for assistance.

It’s important to note that Chamberlain garage door openers may have slightly different programming procedures depending on the model and year of manufacture. Always refer to the owner’s manual or contact Chamberlain customer service for specific instructions for your garage door opener.

By following these steps from Garage Door Repair North Arlington TX, I can program my Chamberlain garage door opener with ease and ensure that it operates smoothly and reliably. It’s essential to have a properly programmed garage door opener to ensure the safety of your family and property, and to prevent any damage to the door or opener.

Garage Door Experts of North Arlington

711 Trinity Cir, Arlington, TX 76006, United States

817-383-2114

How to Replace Garage Door Seal – Tarrant County Door & Gate

Here’s a step-by-step guide from Garage Door Repair Services on how I personally replace a garage door seal:

  1. First, I gather all the necessary tools and materials. I make sure to have a new garage door seal, a utility knife or scissors, a measuring tape, a ladder, a flathead screwdriver, and safety goggles.
  2. I start by measuring the existing garage door seal using a measuring tape. This helps me determine the length of the new seal I need to purchase.
  3. Next, I visit a local home improvement store or search online to find a replacement garage door seal that matches the type and size of my existing seal. I ensure it’s the correct length based on the measurement I took earlier.
  4. With the tools and materials ready, I prepare the garage door by closing it completely and switching off the power to the garage door opener. This is an important safety precaution to avoid any accidental activation of the door while I’m working on it.
  5. Using a flathead screwdriver, I carefully remove the fasteners or release the retaining clips that hold the existing seal in place. Starting from one end, I gently pull the old seal away from the bottom of the door, being cautious not to damage the door or the seal track.
  6. Once the old seal is removed, I inspect the seal track for any debris or dirt. If necessary, I use a clean cloth or a brush to remove any accumulated dirt, leaves, or other debris from the track. This ensures a smooth installation of the new seal.
  7. I unroll the new garage door seal and place it along the bottom edge of the door. Using a utility knife or scissors, I trim the seal to the appropriate length based on the measurement I took earlier. It’s important to cut the seal straight and even for a proper fit.
  8. Starting from one end, I insert the trimmed edge of the new seal into the seal track at the bottom of the door. I apply firm pressure to push the seal into the track, ensuring a snug fit. I work my way along the bottom edge of the door, carefully inserting the seal into the track until it reaches the other end.
  9. To secure the new seal in place, I use the provided fasteners or retaining clips. I ensure that the seal is aligned properly and there are no gaps or overlaps. If needed, I use a ladder to reach the higher sections of the door.
  10. Finally, I test the seal by closing the garage door and observing it closely. I check for any gaps or areas where the seal may not be properly aligned. To further test its effectiveness, I open and close the door a few times to ensure the seal provides a tight and effective barrier against drafts, pests, and debris.

By following these steps from Garage Door Repair Services, I can successfully replace a garage door seal, improving insulation and providing better protection for my garage. It’s important to prioritize safety throughout the process and refer to the manufacturer’s instructions for specific guidance on replacing your garage door seal.

Please note that the specific steps may vary depending on the type and brand of your garage door seal. Always consult the manufacturer’s instructions for detailed guidance on replacing your specific garage door seal.

Tarrant County Door & Gate

6408 Marlette Court,North Richland Hills, TX

817-456-2958

Can Someone Copy My Garage Door Opener? – LMS Garage Doors, LLC

As a homeowner, the security of my garage door opener is a top priority for me. While it is technically possible for someone to copy my garage door opener, I take several precautions to minimize the risk and ensure the safety of my home.

Here are some important steps I follow from Garage Door Repair:

  1. Protecting my Remote: I make sure to keep my garage door remote secure at all times. I avoid lending it to unknown individuals and keep it in a safe place, such as inside my house or in a locked drawer. This reduces the chances of someone gaining unauthorized access to the remote.
  2. Rolling Code Technology: I chose a garage door opener that utilizes rolling code technology. This means that each time I use my remote, the code transmitted to the opener changes. This makes it extremely difficult for someone to intercept and duplicate the code, providing an extra layer of security.
  3. Physical Security: I ensure that my garage is properly secured with strong locks on both the garage door and the entry door. This prevents unauthorized individuals from gaining access to my garage and potentially obtaining my remote or tampering with the opener.
  4. Regular Inspections: I conduct regular inspections of my garage door opener system to look for any signs of tampering or suspicious activity. I check for loose wires, unfamiliar devices near the opener, or any other indications that someone might have attempted to copy my opener. If I notice anything unusual, I immediately contact a professional technician for assistance.
  5. Additional Security Measures: To further enhance the security of my garage door opener, I consider implementing additional security measures. For example, I might install a keypad entry system, which requires a unique code to open the door. This adds an extra layer of security and reduces the reliance on a physical remote.
  6. Education and Awareness: I stay informed about the latest security risks and advancements in garage door opener technology. By staying up to date, I can better understand potential vulnerabilities and take proactive steps to mitigate them. I also educate my family members about the importance of garage door opener security and encourage them to follow best practices.

In summary, as stated in Garage Door Repair, while the possibility of someone copying my garage door opener exists, I believe that by following these precautions and being vigilant, I can greatly reduce the risk. It’s important to stay informed, take appropriate security measures, and consult with professionals if needed. By doing so, I can maintain peace of mind and ensure the safety of my home and family.

LMS Garage Doors, LLC

Sacramento County, CA

916-899-2333

How to Replace Garage Door Springs – Don and Son’s Garage Doors

Replacing garage door springs can be a challenging task, but with proper care and attention to safety, it can be done. Please note that working with garage door springs can be dangerous, so I highly recommend hiring a professional garage door technician for this job.

However, if you still wish to proceed with caution, here’s a general guide from Garage Door Repair Services on how to replace garage door springs:

Step 1: Gather the necessary tools and equipment Before starting, gather all the tools and equipment you’ll need. This typically includes safety goggles, work gloves, a wrench, a winding bar or rods, and replacement springs. Make sure you have the correct type and size of springs for your specific garage door.

Step 2: Disconnect the garage door opener To ensure safety, disconnect the garage door opener from the power source. This will prevent any accidental activation of the door while you’re working on the springs.

Step 3: Release tension from the old springs Releasing tension from the old springs requires careful attention. Here’s how I typically do it:

3.1. Locate the winding cone on one end of the spring. It is usually positioned on the stationary cone.

3.2. Insert a winding bar into one of the holes on the winding cone. Ensure that the bar is securely in place.

3.3. Slowly rotate the winding cone in the opposite direction of the spring’s coil. This will release tension from the spring. Be prepared for the sudden release of tension once the cone is fully unwound.

3.4. Repeat this process for the other spring, ensuring that you release tension from both sides of the door evenly.

Step 4: Remove the old springs With the tension released, carefully remove the old springs from the garage door. Make sure to handle them with caution, as they may still have some residual tension.

Step 5: Install the new springs Now it’s time to install the new springs. Here’s how I typically do it:

5.1. Slide the new springs onto the torsion tube or extension rail, positioning them in the same location as the old springs.

5.2. Use the winding bars to wind the new springs. Start by winding the spring with the fewest coils, gradually increasing the tension as you wind the other spring.

5.3. Pay close attention to ensure that the springs are properly secured and tightly wound. This step is crucial for the safe and efficient operation of the garage door.

Step 6: Test the door’s balance Once the new springs are installed, it’s essential to test the balance of the garage door. Manually raise and lower the door several times to ensure it moves smoothly and evenly. The door should stay in place when opened halfway without drifting up or down.

Step 7: Reconnect the garage door opener If the door is properly balanced, you can now reconnect the garage door opener to the power source. Test the opener to ensure it operates smoothly and without any issues with the new springs.

Remember, the process of replacing garage door springs can be hazardous, so it’s crucial to prioritize safety. If you’re unsure or uncomfortable with any step, it’s best to contact a professional garage door technician to handle the job. They have the knowledge, experience, and tools necessary to complete the task safely and effectively.

Overall, by following step from Garage Door Repair Services, I hope this guide helps you understand the general process of replacing garage door springs. However, please remember that it’s always best to consult a professional for this type of work.

Don and Son’s Garage Doors

Lewisville, TX

214-415-4109

How to Reset Garage Door Opener – BH Garage Doors and Gates

Here’s my personal experience and step-by-step account of how I reset my garage door opener according to Garage Door Repair:

  1. Disconnecting the power:
    • The first thing I did was locate the power cord of my garage door opener and unplug it from the electrical outlet. This ensured that the opener was completely disconnected from power and made it safe to work on.
  2. Identifying the type of garage door opener:
    • I identified that I had a belt-drive garage door opener. It’s important to know the type of opener you have because the reset process may vary depending on the type.
  3. Waiting for a few minutes:
    • After disconnecting the power, I waited for a few minutes. This allowed any residual electrical charge to dissipate and ensured a complete reset of the opener.
  4. Locating the reset button:
    • Next, I located the reset button on my garage door opener. In my case, it was located on the back of the motor unit. I referred to the user manual to confirm the exact location for my specific model.
  5. Pressing and holding the reset button:
    • I pressed and held the reset button for about 10 seconds. Holding the button initiated the reset process for the opener. During this time, I kept my finger on the button and made sure to maintain a steady pressure.
  6. Restoring power:
    • After holding the reset button, I restored power to the garage door opener by plugging the power cord back into the electrical outlet. This supplied power to the opener and allowed it to restart.
  7. Testing the opener:
    • With the power restored, I tested the garage door opener to see if it had been successfully reset. I pressed the wall-mounted control panel and used the remote control to open and close the garage door. I observed if the door responded and operated smoothly.
  8. Reconfiguring settings:
    • After the reset, I reviewed the user manual to determine if any settings needed to be reconfigured. In my case, I had to reprogram my remote controls and adjust the travel limits to ensure proper door operation.

Overall, as stated in Garage Door Repair, it’s important to note that the steps I described are based on my personal experience with my garage door opener. The process may vary depending on the specific model and manufacturer of your opener. Always consult the user manual or contact the manufacturer for detailed instructions tailored to your specific opener. If you’re unsure or encounter any difficulties, it’s best to seek assistance from a professional garage door technician.

BH Garage Doors and Gates

Rockwall, TX

972-807-7936

How to Reset Universal Garage Door Keypad-BLUEGRASS GARAGE DOOR LLC

To reset a universal Garage Door Repair keypad, you will need to follow a series of steps. Keep in mind that the exact process may vary depending on the model and manufacturer of your keypad.

Here’s a general guide that should help you reset your universal garage door keypad:

  1. Locate the “Program” button: Look for a button on your garage door opener or keypad labeled “Program.” This button is usually found on the back or side of the device.
  2. Clear the existing code: Press and hold down the “Program” button until the LED light on the keypad turns off. This action clears any existing codes stored in the keypad’s memory.
  3. Enter the manufacturer’s code: Consult the instruction manual or the manufacturer’s website to find the specific manufacturer’s code for your garage door opener. This code is a sequence of numbers that you need to enter into the keypad.
  4. Enter the manufacturer’s code on the keypad: Press the numbers on the keypad that correspond to the manufacturer’s code. The keypad may emit a beep or flash its LED lights to indicate that the code has been entered successfully.
  5. Test the manufacturer’s code: Press the “Enter” or “Send” button on the keypad to test if the manufacturer’s code was accepted. If the code was accepted, the garage door should start moving.
  6. Set a new personal code: After confirming that the manufacturer’s code works, you can proceed to set a new personal code for your keypad. Press the “Program” button on the opener or keypad again, but this time release it quickly.
  7. Enter your new personal code: Decide on a new personal code that you can easily remember. Enter the numbers on the keypad to create your new code. Most keypads require a minimum of four digits for the personal code.
  8. Confirm the new personal code: Enter the new personal code a second time to confirm it. This step ensures that you haven’t made any errors while entering the code.
  9. Test the new personal code: Press the “Enter” or “Send” button to test the new personal code. The garage door should move if the code was accepted. If the door doesn’t open or close, repeat the previous steps to ensure that the code was entered correctly.
  10. Secure the keypad: After successfully resetting and testing the new personal code, close the keypad cover or replace the batteries if needed. Make sure the keypad is securely mounted to prevent tampering or damage.

Remember to consult your specific keypad’s instruction manual if you encounter any difficulties during the reset process. The above steps provide a general guideline, but the exact procedure may vary depending on the model and manufacturer of your universal Garage Door Repair keypad.

BLUEGRASS GARAGE DOOR LLC

138 Portor St.
Mount Washington, KY 44047

1-502-203-7878

How to Rewire Garage Door-A 24 Hour Door Service

Rewiring a Garage Door Repair is a task that requires careful planning and execution. Whether you’re replacing old wiring or troubleshooting electrical issues, it’s essential to prioritize safety throughout the process.

In this guide, we’ll provide you with a detailed step-by-step procedure to rewire your garage door, ensuring a smooth and efficient operation.

Before You Begin:

  1. Safety First:
    • Ensure the power supply to the garage door opener is turned off.
    • Use insulated gloves and safety goggles to protect yourself from any potential electrical hazards.
  2. Gather the Tools:
    • Screwdriver
    • Wire cutters/strippers
    • Electrical tape
    • Wire connectors
    • Voltage tester
    • Replacement wires (if necessary)

Step 1: Disconnect the Power: Locate the circuit breaker box in your garage or house and switch off the power supply specifically designated for the garage door opener. Verify that the power is indeed off by using a voltage tester on the garage door opener’s wiring.

Step 2: Remove the Old Wiring: Carefully remove any existing wiring from the garage door opener, tracking the wires back to their respective connection points. Take note of the wire colors and connections to ensure proper reinstallation later.

Step 3: Prepare the New Wiring: If you are replacing the wiring, measure the required length and cut the new wires accordingly. Strip about half an inch of insulation from the ends of each wire to expose the bare metal.

Step 4: Reconnect the Wiring: Connect the new wiring to the appropriate terminals on the garage door opener unit, following the colors and connections you noted earlier. Twist the stripped ends of the wires around the corresponding terminals and secure them tightly.

Step 5: Insulate the Connections: Wrap each wire connection with electrical tape to prevent any accidental contact or short circuits. Ensure that all exposed metal parts are adequately covered, leaving no gaps.

Step 6: Secure the Wiring: Use wire clips or cable ties to secure the new wiring along the garage door opener’s track or any other suitable location. This step ensures that the wiring remains in place and doesn’t interfere with the door’s movement.

Step 7: Test the Connections: Once the wiring is securely in place, turn the power supply back on at the circuit breaker box. Test the connections using a voltage tester to verify that the electricity is flowing correctly.

Step 8: Perform a Trial Run: With the power supply restored, test the garage door opener to ensure it operates smoothly. Open and close the door a few times, observing the movement and listening for any unusual sounds. If everything functions properly, proceed to the next step.

Step 9: Finalize the Installation: Secure any loose wiring using additional clips or ties. Verify that there are no exposed wires or potential hazards. Consider labeling the wires for future reference, especially if you’ve made changes to the original wiring configuration.

Conclusion: Rewiring a Garage Door Repair requires attention to detail and adherence to safety precautions. By following this step-by-step guide, you can successfully rewire your garage door, ensuring a reliable and efficient operation. Remember to exercise caution throughout the process and consult a professional if you encounter any complex electrical issues.

A 24 Hour Door Service

417 Post Oak Cove, Madison, MS 39110

1-601-664-8935

How to Grease Garage Door? – MF Solutions Inc

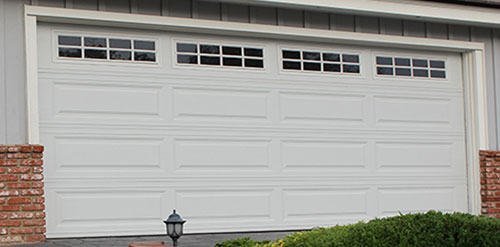
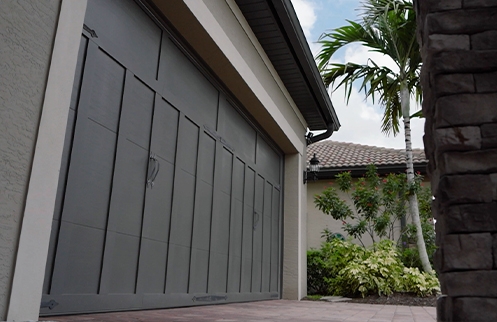
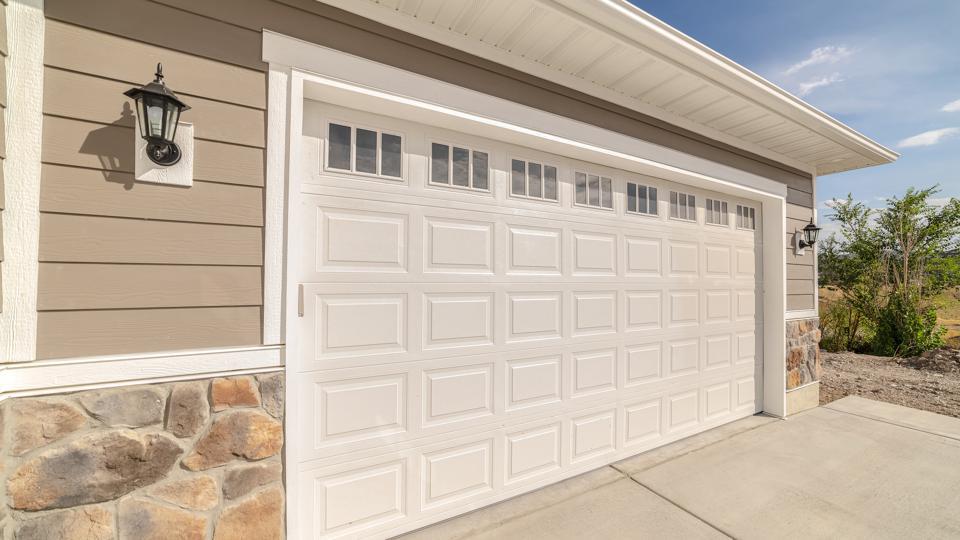
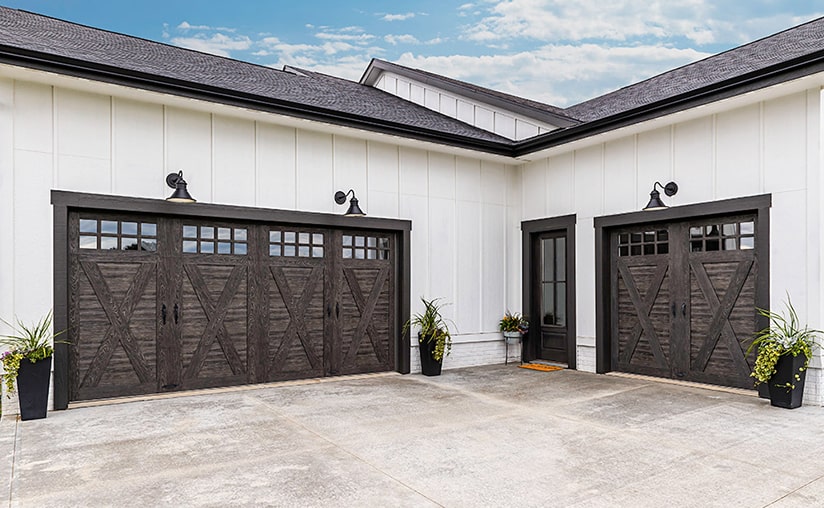
Greasing your garage door is an important maintenance task that helps ensure smooth and quiet operation. Lubricating the moving parts of the door reduces friction and prevents wear and tear.

Here’s a step-by-step guide on how I would grease a garage door based from Garage Door Repair Services:

Step 1: Prepare the door To begin, I would make sure the garage door is fully closed and disconnected from the opener. This ensures that the door remains stationary and prevents any accidental movement while I work on greasing the components.

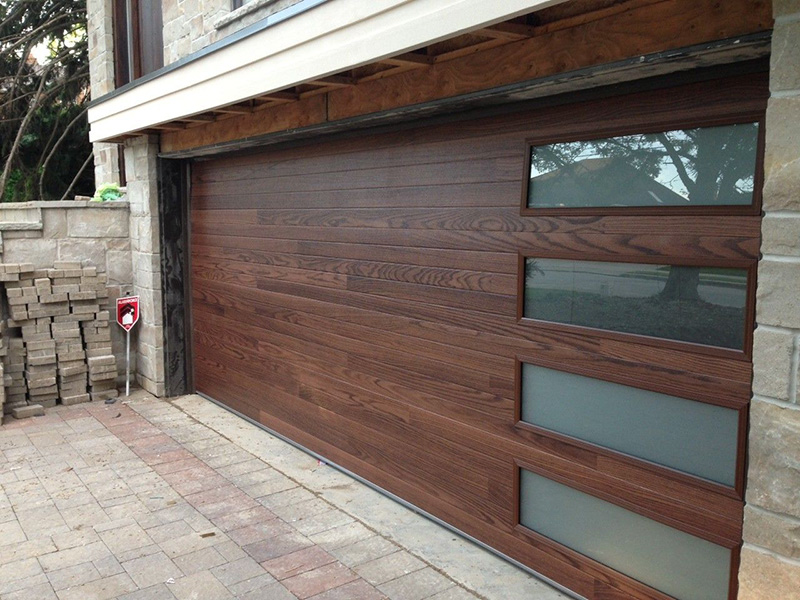
Step 2: Inspect the moving parts Using a stepladder, I would carefully examine all the moving parts of the garage door. This includes the hinges, rollers, tracks, springs, and any other components that contribute to the door’s operation. I would keep an eye out for any signs of wear, rust, or debris that might affect the door’s smooth movement.

Step 3: Clean the parts If I notice any dirt, dust, or debris on the moving parts, I would take a clean cloth or rag and wipe them down. Clearing away any buildup ensures that the lubricant can penetrate properly and provide effective lubrication.

Step 4: Choose the lubricant Next, I would select a suitable lubricant for the garage door. Silicone-based garage door lubricants or white lithium grease are commonly recommended options. These lubricants offer good performance and help reduce friction.

Step 5: Apply lubricant to the hinges Starting with the hinges, which are the points where the door panels are connected, I would apply a small amount of lubricant to each hinge. I would focus on the pivot points and any moving parts within the hinge. To distribute the lubricant evenly, I would open and close the door a few times.

Step 6: Lubricate the rollers Moving on to the rollers, I would apply lubricant to the roller bearings and the area where the roller shaft meets the hinge. It’s important to lubricate both sides of each roller. Operating the door a few times helps the lubricant spread evenly across the rollers.

Step 7: Grease the track To ensure smooth movement along the track, I would apply a thin layer of lubricant to the inside of the track where the rollers travel. I would be careful not to use excessive amounts of lubricant, as it can attract dirt and lead to buildup. After applying the lubricant, I would use a cloth or rag to wipe away any excess.

Step 8: Lubricate the springs If the garage door has torsion springs, I would proceed with caution. I would apply a light coating of lubricant to the springs, ensuring that I cover the entire length. Torsion springs are under tension and can be dangerous, so I would take extra care when working with them. After lubricating the springs, I would use a cloth or rag to spread the lubricant evenly.

Step 9: Check other moving parts I would inspect other moving parts such as pulleys, cables, and any additional components that require lubrication. If necessary, I would apply a small amount of lubricant to these parts, making sure to wipe away any excess to prevent the accumulation of dirt and debris.

Step 10: Test the door Once I have completed greasing all the necessary parts, I would manually operate the garage door to test its smoothness. The lubrication should result in quieter and smoother movement. If I notice any areas that still feel stiff or make noise, I would reapply lubricant to those specific parts.

By following these steps from Garage Door Repair Services, I would be able to effectively grease the garage door and maintain its optimal performance. Regular lubrication, typically done at least once a year or as needed, helps extend the lifespan of the door and ensures its reliable operation.

MF Solutions Inc

9118 Elmwood Dr, Niles, IL 60714

302 Cherrywood Rd Buffalo Grove, IL 60089

224-434-1780

Where to Buy Garage Doors? – Dynamo Overhead Garage Doors LLC

When I was in the market for a new garage door, I explored various options to find the perfect one for my home.

Here’s a guide based from Garage Door Repair and on my personal experience on where to buy garage doors:

  1. Local Garage Door Suppliers and Installers: I started my search by reaching out to local garage door suppliers and installers in my area. These professionals specialize in garage doors and have a wide range of options to choose from. They were able to provide expert advice, assist me in selecting the right door for my needs, and handle the installation process as well. I found them by searching online, checking local directories, and asking for recommendations from friends or neighbors.
  2. Home Improvement Stores: I also visited several large home improvement stores such as Home Depot, Lowe’s, and Menards. These stores have dedicated sections for garage doors where I could explore different styles, materials, and sizes. The advantage of shopping at these stores is that they usually have knowledgeable staff who can help you make an informed decision. Additionally, they may offer installation services or provide recommendations for local contractors.
  3. Online Retailers: The internet provided me with the convenience of browsing through a wide range of garage door options from the comfort of my home. Online retailers like Amazon, Overstock, and Wayfair offered a variety of garage doors at competitive prices. I could compare different styles, materials, and prices, read customer reviews, and make an informed decision. However, keep in mind that installation services may not be included, and you may need to arrange for that separately.
  4. Garage Door Manufacturers: I visited the websites of various garage door manufacturers such as Clopay, Amarr, Wayne Dalton, and CHI Overhead Doors. These websites provided detailed information about their products, including specifications, features, and design options. I could easily browse through their offerings, request a quote, and find local authorized dealers or distributors who could assist with the purchase and installation process.
  5. Local Classifieds and Online Marketplaces: As an alternative, I checked local classifieds and online marketplaces like Craigslist, Facebook Marketplace, and eBay. Sometimes, individuals or contractors list new or used garage doors for sale. While this option can offer potential cost savings, it’s important to carefully evaluate the condition and quality of the doors before making a purchase. Additionally, I needed to consider transportation and installation arrangements separately.

Before making a purchase, I recommend considering the following:

  • Determine your budget and the style of garage door that suits your home.
  • Measure the dimensions of your garage opening to ensure you select the right size.
  • Research different materials, such as steel, wood, or aluminum, to understand their pros and cons.
  • Check the warranty offered by the manufacturer or retailer.
  • Consider professional installation services if you’re not confident in your own skills.

Keep in mind that garage doors are often large and heavy, so delivery and installation can be challenging. If you’re not comfortable handling the installation yourself, I highly recommend hiring a professional garage door installer or working with a reputable company that provides installation services.

By exploring these options from Garage Door Repair, comparing prices, considering quality and warranty, and seeking professional advice when needed, you’ll be well-prepared to find the perfect garage door for your home.

Dynamo Overhead Garage Doors LLC

Conroe, TX

832-270-3373

How to Sync Garage Door Opener – BH Garage Doors and Gates

To sync my garage door opener, I first locate the instruction manual that came with it. It contains all the specific steps and information I need to successfully complete the process.

Based from Garage Door Repair Services and after reading the manual, I identify the syncing method my opener uses. In my case, it involves using a handheld remote control. I make sure I have the remote control and that it is in good working condition.

Before starting the syncing process, I need to clear any existing codes from the garage door opener. To do this, I locate the “learn” or “program” button on the opener. I press and hold this button until the indicator light blinks, indicating that the previous codes have been cleared.

With the existing codes cleared, I prepare the remote control. I remove the battery cover and check that the batteries are properly installed. I also inspect the battery contacts for any dirt or corrosion and clean them if necessary. If the batteries are low, I replace them with fresh ones.

Now, it’s time to enter the programming mode on the garage door opener. Following the instructions in the manual, I press and release the “learn” or “program” button on the opener. This puts the opener in a state ready to receive the syncing signal from the remote control.

With the opener in programming mode, I press and hold the button on the remote control that I want to sync. I keep holding the button until I see the indicator light on the garage door opener blink or flash. This indicates that the syncing process is in progress. Once the light blinks, I release the button on the remote control.

To ensure that the syncing was successful, I test the synchronization by pressing the synced button on the remote control. I observe the garage door’s response, checking if it opens or closes accordingly. If the door doesn’t respond or operates incorrectly, I repeat the syncing process, ensuring I follow each step precisely.

If I have additional remotes or devices to sync, I repeat the steps for each one. I enter the programming mode on the opener, hold the button on the remote or device, and release it when I see the indicator light blink or flash. I then test each device to ensure they operate the garage door correctly.

After syncing all the remotes and devices, I finalize the syncing process by pressing the “learn” or “program” button on the garage door opener. This exits the programming mode and saves all the synced codes.

To complete the process, I perform a final test by using each synced remote control and device to operate the garage door. I make sure that the door opens and closes smoothly and without any issues.

If I encounter any problems during the syncing process or if the devices aren’t functioning properly, I refer to the troubleshooting section in the manual. It provides helpful guidance on common issues and their solutions.

Remember, according to Garage Door Repair Services, it’s essential to consult the instruction manual specific to your garage door opener model for precise instructions. If you’re unsure or encounter difficulties, don’t hesitate to seek assistance from a professional garage door technician.

BH Garage Doors and Gates

Rockwall, TX

972-807-7936

How to Repair Garage Door Opener-Garage Door Wizard

A malfunctioning Garage Door Repair opener can be a frustrating issue to deal with. However, with the right knowledge and tools, you can often repair it yourself.

In this guide, we will walk you through the step-by-step process of troubleshooting and fixing common problems with a garage door opener. By following these instructions, you can save time and money by avoiding the need to call a professional repair service. Let’s dive in!

Step 1: Safety First Before starting any repairs, ensure your safety by disconnecting the power to the garage door opener. Locate the power cord and unplug it from the electrical outlet or switch off the breaker in the electrical panel. This precaution will prevent any accidental activation of the opener during the repair process.

Step 2: Identify the Problem Begin by examining the opener to determine the underlying issue. Common problems include:

  1. No response from the opener: If pressing the remote or wall switch does not trigger any response from the opener, check if the power source is connected correctly, the outlet has power, or the circuit breaker is not tripped.
  2. Unusual noises: Grinding, scraping, or squeaking sounds may indicate a problem with the motor or the opener’s moving parts. Inspect the chain or belt, pulleys, and other components for damage or misalignment.
  3. Door reverses unexpectedly: If the door opens but immediately closes or reverses, the opener’s safety sensors may be misaligned, dirty, or obstructed. Clean the sensors and ensure they are properly aligned.
  4. Door gets stuck: If the door doesn’t move smoothly or gets stuck, examine the tracks, rollers, and hinges for debris, rust, or damage. Lubricate these parts with silicone-based lubricant if necessary.

Step 3: Basic Troubleshooting Perform some initial troubleshooting steps to eliminate simple causes:

  1. Replace the batteries: If the remote control or keypad is not working, replace their batteries with fresh ones.
  2. Check the wall switch: Ensure the wires connecting the wall switch to the opener are intact. If damaged, replace them.
  3. Inspect the remote control: If the opener responds to the wall switch but not the remote control, the remote may be faulty. Try reprogramming it or replace it if necessary.

Step 4: Adjusting the Opener’s Settings Most modern garage door openers come with adjustable settings. Refer to the owner’s manual to find instructions on adjusting the force, travel limits, and other settings. By making appropriate adjustments, you can often resolve issues related to door operation and force settings.

Step 5: Lubrication and Maintenance Regular lubrication is essential for keeping the garage door opener and its moving parts in good working condition. Use a silicone-based lubricant to grease the chain, belt, rollers, and hinges. Additionally, inspect and tighten any loose bolts or screws that may affect the performance of the opener.

Step 6: Replacing Faulty Parts If the above steps do not resolve the problem, it may be necessary to replace certain components. Common parts that may require replacement include:

  1. Safety sensors: If the sensors are faulty or damaged, they may need to be replaced. Follow the manufacturer’s instructions to install the new sensors properly.
  2. Gear or sprocket: If you hear grinding or clicking sounds from the opener, the gear or sprocket may be worn out. Replacing these components can restore normal operation.
  3. Motor: If the opener’s motor is malfunctioning, it may need to be replaced. This task can be more complex and may require professional assistance.

Conclusion: Repairing a Garage Door Repair opener can often be done without professional help. By following these steps, you can troubleshoot and fix common issues with your opener. However, if you encounter more complex problems or are uncomfortable performing the repairs yourself, it is always advisable to seek the assistance of a qualified technician. Remember, safety should be your top priority throughout the repair process.

Garage Door Wizard

17807 Lake Crestview Dr. Apt 10301
Cypress, TX 77433

1-832-373-7681