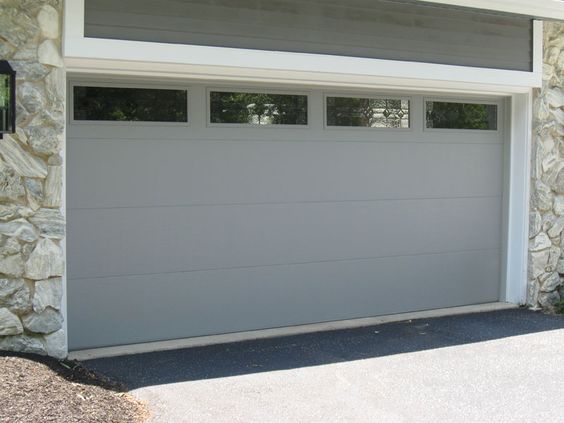
As a dedicated homeowner and DIY enthusiast, I’ve always taken pride in maintaining and improving my property. Recently, I encountered a common yet vexing issue with my garage door – a noticeable gap between the panels. This gap not only compromised the door’s appearance but also allowed in unwanted elements like dust, pests, and cold drafts.
I’ll share my journey of addressing a garage door panel gap, along with a comprehensive guide on how to repair it effectively as stated in Garage Door Repair Riverside CA.
Understanding the Impact of a Garage Door Panel Gap
A garage door panel gap is not merely a cosmetic concern. It can lead to various issues, including:
- Reduced Energy Efficiency: Gaps in the door allow cold or hot air to enter, affecting the temperature inside the garage and potentially the adjacent rooms.
- Increased Energy Costs: The reduced energy efficiency results in higher heating or cooling bills.
- Dust and Pest Infiltration: Gaps serve as entry points for dust, pests, and debris, leading to a dirty and potentially infested garage.
- Security Risks: A noticeable gap may attract unwanted attention and compromise the security of your garage and home.
Identifying the Causes of a Garage Door Panel Gap
Before embarking on the repair process, it’s essential to identify the root cause of the panel gap. Common reasons include:
- Wear and Tear: Over time, the garage door panels may experience wear, leading to gaps between them.
- Impact or Collision: A collision with a vehicle, equipment, or any heavy object can cause dents and gaps in the panels.
- Loose or Damaged Hardware: Loose hinges or hardware can result in misaligned panels, creating gaps.
- Warping or Bowing: Wooden garage door panels are prone to warping or bowing due to moisture and weather conditions.
A Step-by-Step Guide to Repairing a Garage Door Panel Gap
Now, let’s walk through the process of addressing and repairing a garage door panel gap:
Tools and Materials:
Before you begin, gather the necessary tools and materials:
- Safety goggles and work gloves
- Screwdriver or drill
- Replacement panel (if necessary)
- Hammer
- Clamps
- Wood glue (for wooden doors)
- Paint or finish (if applicable)
- Weatherstripping (optional)
Step 1: Ensure Safety
Always prioritize safety. Wear safety goggles to protect your eyes and work gloves to safeguard your hands.
Step 2: Inspect the Damage
Examine the garage door panels to assess the extent of the damage and the cause of the gap. Pay attention to any loose or damaged hardware, dents, or warping.
Step 3: Tighten Loose Hardware
If the panel gap is caused by loose hinges or hardware, use a screwdriver or drill to tighten all screws and bolts. This simple step can often resolve the issue.
Step 4: Repair Small Dents
For small dents in metal panels, use a hammer to gently tap out the dented area from the inside. Be cautious not to create further damage or deform the panel.
Step 5: Address Warping or Bowing (Wooden Doors)
If you have a wooden garage door and notice warping or bowing, apply moisture to the concave side using a damp cloth. Then, apply heat using a heat gun or hairdryer to the convex side. This should help the panel return to its original shape. Once the panel is straight, apply wood glue along the seam and use clamps to hold it in place until the glue dries.
Step 6: Replace a Damaged Panel
If the panel is severely damaged or cannot be repaired, you may need to replace it. Measure the dimensions of the damaged panel and order a replacement. Remove the old panel by unscrewing it from the door frame and install the new one in its place.
Step 7: Apply Finish (Wooden Doors)
If you’ve made repairs to a wooden garage door, apply a finish or paint to protect the wood from future moisture-related issues. This will also ensure a uniform appearance.
Step 8: Consider Weatherstripping
To enhance the door’s energy efficiency and prevent dust and pests from entering, you can add weatherstripping to the gaps around the door. Measure the gaps and purchase the appropriate weatherstripping material, then install it according to the manufacturer’s instructions.
Step 9: Test the Door
After making the necessary repairs, test the garage door to ensure it operates smoothly and that the panel gap is resolved. Open and close the door multiple times to check for any signs of binding or further issues.
Expert Tip: “Preventing future panel gaps in wooden garage doors can be achieved by applying a high-quality sealant or finish to protect the wood from moisture. Regular inspections and maintenance can help you identify and address issues early.”
Conclusion
According to Garage Door Repair Riverside CA, addressing a garage door panel gap can be a satisfying DIY project that not only enhances the appearance of your home but also improves energy efficiency and security. My own experience in tackling this issue has taught me the importance of identifying the cause, whether it’s loose hardware, dents, warping, or damage, and applying the appropriate repair techniques.
Remember that safety should always come first, and it’s crucial to wear protective gear and exercise caution when using tools. By following this step-by-step guide and making necessary repairs, you can enjoy a well-functioning garage door that not only protects your belongings but also enhances the overall aesthetics and comfort of your home.
Riverside Garage & Overhead Doors
3410 Torrey St, Riverside, CA 92503, United States
951-494-6436