Energy-Efficient Garage Doors: Saving Money in 2023 – EDM Garage Doors, LLC

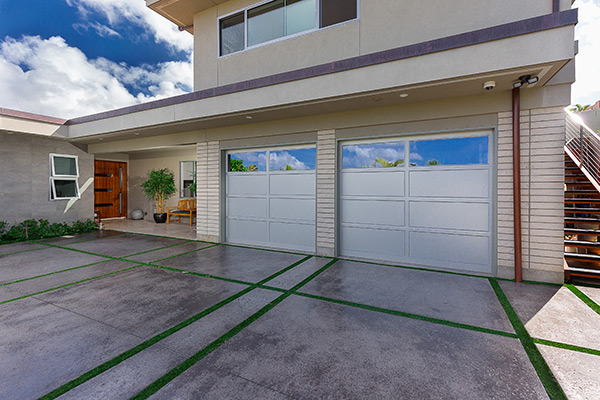
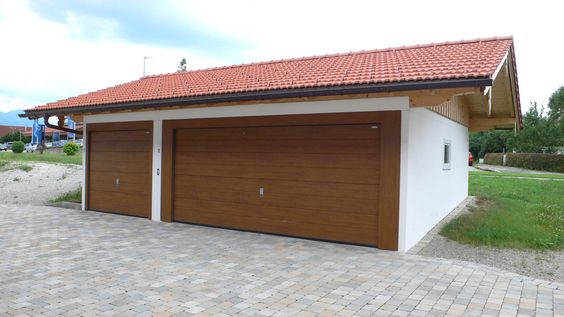
As the world pivots toward sustainable living and mindful energy consumption, the quest for ways to make my home more energy-efficient led me to an often-overlooked area—the garage. In 2023, the decision to upgrade to an energy-efficient garage door became a focal point not only for reducing my environmental footprint but also for substantial savings.

In this personal exploration, I share the insights gained, challenges faced, and the financial benefits of transitioning to an energy-efficient garage door based from Garage Door Repair.

Introduction: The Call for Sustainability in Everyday Living

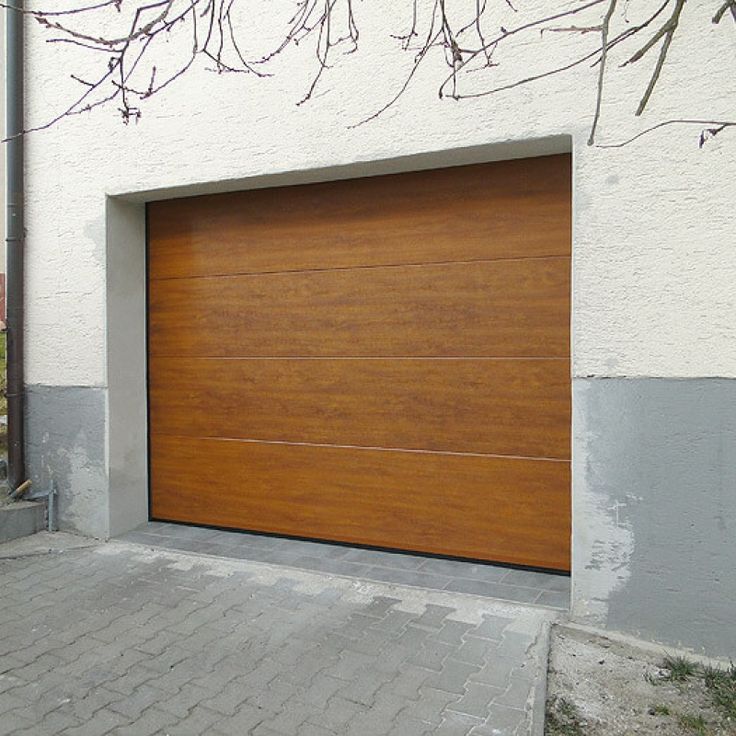
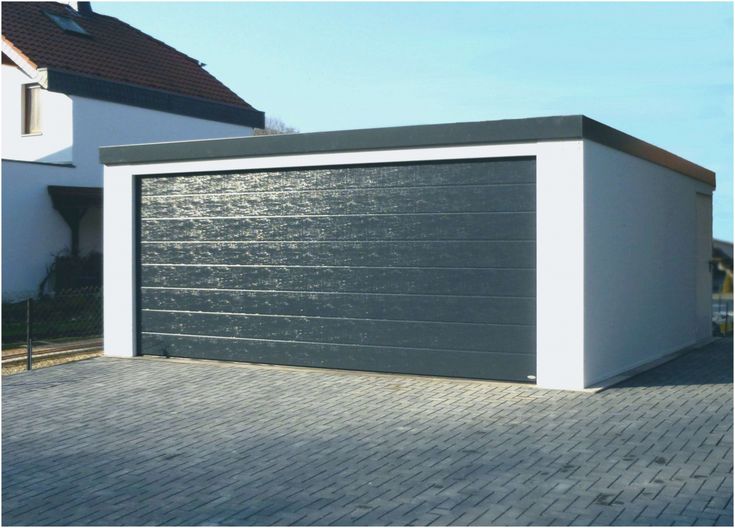
The garage, typically a utilitarian space, emerged as a potential avenue for contributing to a more sustainable lifestyle. The realization that energy efficiency extended beyond the walls of my home prompted a comprehensive assessment, with the garage door taking center stage. In the journey toward an eco-conscious living space, the garage door became a symbol of both environmental responsibility and financial prudence.

Understanding the Significance of Energy-Efficient Garage Doors:

1. Impact on Home Energy Consumption:

  • Reflect on the often-underestimated role of garage doors in impacting overall home energy consumption.
  • Discuss the potential for energy loss through non-insulated or inefficient garage doors.

2. Seasonal Temperature Regulation:

  • Explore the connection between garage door efficiency and temperature regulation within the garage space.
  • Discuss the implications for energy consumption related to heating and cooling efforts.

The Benefits of Energy-Efficient Garage Doors in 2023

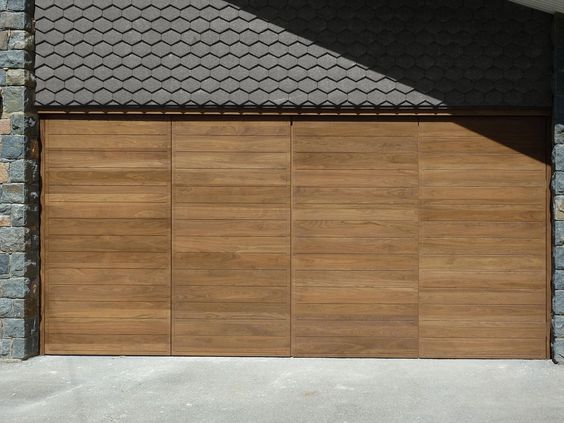
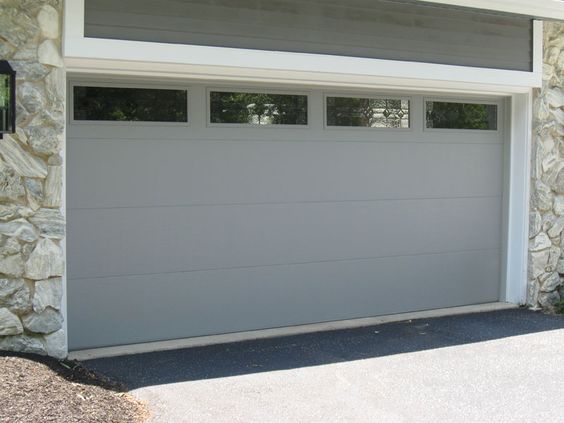
1. Thermal Insulation:

  • Pros:
    • Discuss the thermal insulation properties of energy-efficient garage doors, particularly in extreme weather conditions.
    • Explore the potential for reducing reliance on heating or cooling systems within the home.
  • Cons:
    • Address potential challenges in installation and cost considerations associated with highly insulated materials.

2. Reduced Energy Bills:

  • Pros:
    • Reflect on the financial benefits of reduced energy consumption, leading to lower utility bills.
    • Discuss the potential for long-term savings and return on investment.
  • Cons:
    • Address potential upfront costs associated with purchasing and installing energy-efficient garage doors.

3. Environmental Impact:

  • Pros:
    • Explore the positive environmental impact of reducing energy consumption.
    • Discuss the contribution to a more sustainable and eco-friendly living space.
  • Cons:
    • Address potential challenges in finding materials that align with both energy efficiency and environmental sustainability.

4. Enhanced Comfort:

  • Pros:
    • Reflect on the improved comfort within the garage space, with better temperature regulation.
    • Discuss personal experiences of creating a more usable and comfortable area.
  • Cons:
    • Address potential limitations in design options or materials compared to traditional garage doors.

Considerations in Choosing Energy-Efficient Garage Doors: Balancing Act

1. Climate-Specific Solutions:

  • Reflect on the impact of local climate conditions on the decision to invest in energy-efficient garage doors.
  • Discuss personal experiences of addressing specific weather challenges.

2. Budgetary Constraints:

  • Explore the alignment of energy-efficient options with budget considerations.
  • Discuss the balance between upfront costs and long-term savings associated with these doors.

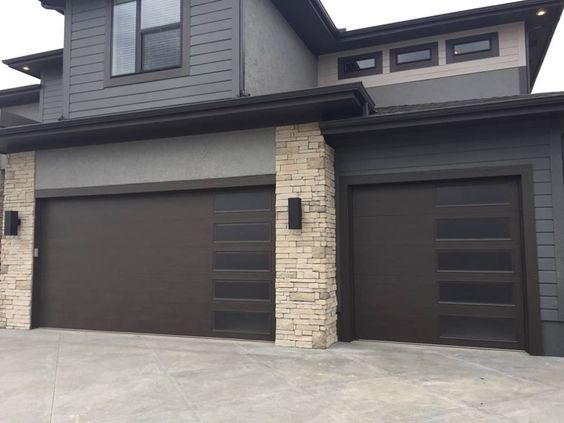
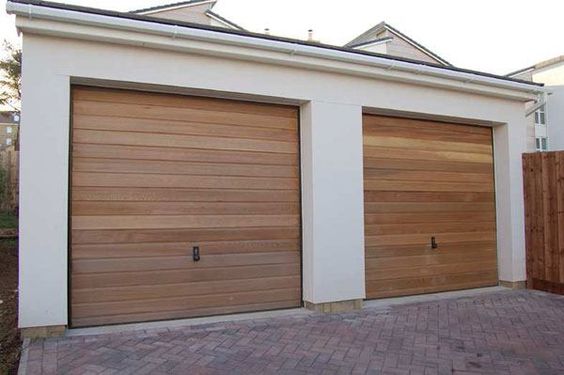
3. Architectural Harmony:

  • Narrate the process of aligning energy-efficient choices with the architectural style of the home.
  • Share personal considerations in choosing doors that complement the overall aesthetic.

4. Security Features:

  • Discuss the role of energy-efficient garage doors in enhancing the security features of a home.
  • Share personal insights into the connection between enhanced insulation and overall safety.

My Decision-Making Process: Prioritizing Sustainability and Savings

1. Assessing Energy Loss:

  • Reflect on the realization of energy loss through the existing garage door.
  • Discuss personal considerations in understanding the need for improvement.

2. Researching Energy-Efficient Options:

  • Narrate the research undertaken to explore available energy-efficient garage door options.
  • Discuss the role of expert advice in shaping decisions related to energy efficiency.

3. Weighing Cost and Benefit:

  • Explore the process of weighing the upfront costs against the long-term benefits.
  • Discuss personal considerations in evaluating the return on investment.

4. Professional Installation:

  • Describe the decision to opt for professional installation to ensure optimal energy efficiency.
  • Discuss the role of experts in ensuring proper insulation and functionality.

Lessons Learned and the Impact of Energy Efficiency

1. The Intersection of Sustainability and Savings:

  • Acknowledge the intersection of sustainability goals and financial savings through energy-efficient garage doors.
  • Discuss the satisfaction derived from contributing to both personal and global well-being.

2. Realizing the True Value:

  • Reflect on the realization of the true value of energy-efficient choices beyond financial savings.
  • Discuss personal insights into the broader impact on lifestyle and the environment.

3. Commitment to Sustainable Living:

  • Narrate the commitment to embracing a more sustainable lifestyle through conscious choices.
  • Discuss personal reflections on the ripple effect of small changes on a larger scale.

4. A Home Transformed:

  • Conclude with the joy of experiencing a home that is not only more energy-efficient but also aligned with personal values.
  • Discuss the satisfaction derived from a decision that extends beyond financial considerations.

Conclusion: A Beacon of Sustainability and Savings

In summary, according to Garage Door Repair and as I stand before my energy-efficient garage door, the culmination of a journey that sought both sustainability and financial prudence, I reflect on the lessons learned. What started as a quest for reduced energy consumption evolved into a nuanced exploration of options that aligned with both environmental responsibility and cost-effectiveness. The garage door, once a functional element, now stands as a beacon of sustainability and savings, a choice that speaks to the evolving landscape of responsible living. In the realm of energy-efficient garage doors, the home becomes not just a shelter but a testament to the transformative power of conscious choices in the pursuit of a more sustainable and economical lifestyle in 2023.

EDM Garage Doors, LLC

596 Richard Brown Blvd, Volo, IL 60073, United States

847-416-3036

Garage Door Strut Installation – Denzel Garage Door of Long Beach

As a homeowner passionate about DIY projects, the decision to reinforce my garage door with struts was a game-changer. The installation of garage door struts not only bolstered the structural integrity of the door but also added an extra layer of support against the daily wear and tear.

In this article, I share my personal experience and insights into the process of garage door strut installation, offering a step-by-step guide and highlighting the transformative impact on both functionality and longevity by following Garage Door Repair.

Understanding the Need for Garage Door Struts:

Before diving into the installation process, it’s crucial to understand why garage door struts are a valuable addition to your home. Garage doors, especially larger ones, are prone to sagging over time due to their weight and the constant strain of opening and closing. This sagging can lead to various issues, including difficulty in operation, increased stress on the opener, and compromised security. Garage door struts serve as horizontal supports that reinforce the door sections, distributing the weight more evenly and preventing sagging.

Tools and Materials Needed:

Tools:

  1. Power drill
  2. Screwdriver
  3. Adjustable wrench
  4. Level
  5. Tape measure
  6. Saw (if adjustments to the struts are necessary)

Materials:

  1. Garage door struts
  2. Lag screws
  3. Washers
  4. Lock washers
  5. Nuts
  6. Safety glasses
  7. Ladder

Step-by-Step Guide to Garage Door Strut Installation:

Step 1: Gather Necessary Tools and Materials:

Before beginning the installation, gather all the required tools and materials. Safety glasses are essential to protect your eyes during the installation process.

Step 2: Open the Garage Door:

Fully open the garage door to provide easy access to the sections where the struts will be installed. Use a ladder to reach the top section of the door.

Step 3: Measure and Cut Struts (If Necessary):

Measure the width of each door section to determine the length of the struts needed. If the struts are longer than required, use a saw to trim them to the appropriate length. Remember to wear safety glasses during this step.

Step 4: Position the Struts:

Position the struts horizontally on the inside of the garage door sections. The struts should be placed on the top section first. If your garage door has multiple sections, additional struts can be placed on the middle and bottom sections.

Step 5: Align and Level:

Ensure that the struts are aligned with the top edge of the door section. Use a level to check that the struts are straight and level. Proper alignment is crucial for the effective distribution of weight.

Step 6: Mark Hole Locations:

Mark the hole locations on both the garage door section and the strut. This ensures accurate placement of screws and prevents any misalignment during the installation.

Step 7: Pre-Drill Holes:

Using a power drill, pre-drill holes at the marked locations on both the garage door section and the strut. This step makes it easier to insert the lag screws during the next phase of the installation.

Step 8: Attach Struts with Lag Screws:

With the pre-drilled holes in place, attach the struts to the garage door using lag screws. Insert a washer between the lag screw and the strut for added stability. Tighten the lag screws securely using an adjustable wrench.

Step 9: Add Lock Washers and Nuts:

On the backside of the garage door section, add lock washers and nuts to the ends of the lag screws. Tighten the nuts until they are secure, ensuring that the struts are firmly attached to the door.

Step 10: Repeat for Additional Sections:

If your garage door has multiple sections, repeat the process for each section where you want to install struts. Ensure consistent alignment and levelness across all sections.

Step 11: Test the Garage Door:

After installing struts on all intended sections, test the garage door by opening and closing it several times. Pay attention to any changes in the smoothness of operation and listen for any unusual sounds. The struts should enhance the door’s stability and reduce any sagging.

Benefits of Garage Door Strut Installation:

1. Reinforced Structural Integrity:

The primary benefit of installing garage door struts is the reinforced structural integrity they provide. By distributing the weight more evenly across the door sections, struts prevent sagging and improve overall stability.

2. Reduced Stress on Garage Door Opener:

A sagging garage door can place additional stress on the garage door opener, potentially leading to premature wear and tear. Struts help alleviate this stress, extending the lifespan of the opener.

3. Enhanced Security:

A sagging or misaligned garage door is a security risk. Struts contribute to a more robust door structure, reducing the likelihood of forced entry and enhancing overall security.

4. Improved Smoothness of Operation:

Garage door struts contribute to the smooth operation of the door. By preventing sagging, they ensure that the door opens and closes with ease, reducing strain on the hinges and rollers.

5. Prolonged Lifespan of the Door:

The preventive nature of garage door strut installation can contribute to a prolonged lifespan for the garage door. With reduced stress on the door sections, components such as springs and rollers are less prone to premature wear.

My Personal Experience: Transformative Impact on Functionality:

When I decided to install garage door struts, my primary motivation was to address the noticeable sagging in my aging garage door. The process, although initially intimidating, proved to be a transformative experience.

1. Visual Transformation:

The immediate visual impact was striking. The addition of struts along the top section of the door rectified the sagging, giving the door a rejuvenated and lifted appearance.

2. Effortless Operation:

The garage door’s operation underwent a noticeable improvement. It glided open and closed with newfound smoothness, and the strain on the garage door opener was visibly reduced.

3. Security Assurance:

The reinforced structural integrity provided a sense of security assurance. I felt confident that my garage door was now less susceptible to forced entry, enhancing the overall safety of my home.

4. Extended Lifespan:

As a DIY enthusiast, the idea of prolonging the lifespan of my garage door through a relatively simple installation was gratifying. The preventive measure of installing struts promised long-term benefits.

5. DIY Satisfaction:

Completing the garage door strut installation myself added to the satisfaction. Witnessing the positive impact on functionality reaffirmed the value of proactive home maintenance.

Conclusion: Elevating Strength, One Strut at a Time:

Garage door strut installation is not just a practical enhancement; it’s a transformative journey toward a more robust and efficient home. From reinforcing structural integrity to reducing stress on vital components, the impact of struts extends beyond mere sag prevention.

As a homeowner and based from Garage Door Repair, embracing the process of garage door strut installation empowers you with the ability to proactively address potential issues and enhance the overall functionality of your garage door. It’s a DIY endeavor that transcends the physical installation, offering a tangible upgrade to the daily operation and longevity of one of your home’s essential elements.

Denzel Garage Door of Long Beach

1635 Cedar Ave, Long Beach, CA 90813, United States

562-337-3432

Garage Door Opener Capacitor for Craftsman – Camco Commercial Door Company

The seamless operation of my Craftsman garage door opener has been a testament to reliability and efficiency—until the day it exhibited a perplexing behavior, hinting at a potential issue with the capacitor.

I delve into the intricacies of the garage door opener capacitor, the challenges faced in diagnosing the problem, and the empowering journey of unraveling the mystery to restore the smooth functionality of my Craftsman garage door opener as stated in Garage Door Repair.

Introduction: The Unexpected Glitch

The hum of my Craftsman garage door opener had become the anthem of my daily comings and goings. However, one day, a disruption in the routine caught my attention. The door seemed to hesitate, displaying an uncharacteristic sluggishness in its ascent. This anomaly led me down a path of exploration, eventually pinpointing the culprit as a potential issue with the garage door opener capacitor.

Understanding the Role of the Capacitor:

1. Power and Efficiency:

  • Reflect on the integral role of the capacitor in providing the necessary power for the garage door opener.
  • Discuss how it contributes to the efficiency and smooth operation of the opener.

2. Start and Stop Assistance:

  • Emphasize the capacitor’s involvement in initiating the motor and providing the necessary power for smooth starts and stops.
  • Share personal anecdotes of the noticeable impact on the garage door’s performance.

Signs of Capacitor Issues: Recognizing the Red Flags

1. Sluggish Operation:

  • Describe the initial observation of sluggish or delayed movements in the garage door.
  • Share personal experiences of the door struggling to open or close with its usual agility.

2. Unusual Noises:

  • Explore the audible signs that may accompany capacitor issues, such as strange noises or vibrations.
  • Discuss the impact on the overall user experience and the concern prompted by these sounds.

3. Intermittent Operation:

  • Discuss the frustration of experiencing intermittent functionality, with the garage door opener working inconsistently.
  • Share insights into the unpredictability of when the issue might manifest.

Diagnosing the Capacitor Issue: A Journey of Exploration

1. Visual Inspection:

  • Narrate the initial visual inspection to identify any visible signs of capacitor damage.
  • Share experiences of checking for bulging or leaking, common indicators of capacitor issues.

2. Testing Capacitor Voltage:

  • Explore the decision to test the capacitor’s voltage as a method of diagnosis.
  • Discuss the use of a multimeter and the process of interpreting the results.

3. Capacitor Replacement Consideration:

  • Discuss the contemplation of replacing the capacitor as a potential solution.
  • Share insights into the decision-making process, considering factors such as the age of the opener and the severity of the capacitor issue.

4. Online Resources and Forums:

  • Reflect on turning to online resources and forums for insights from others who may have experienced similar capacitor issues.
  • Discuss the challenges of sifting through information and discerning reliable troubleshooting advice.

DIY Capacitor Replacement: The Triumphs and Trials

1. Sourcing the Replacement Capacitor:

  • Narrate the process of researching and sourcing a compatible replacement capacitor for the Craftsman garage door opener.
  • Share personal considerations, including the importance of matching specifications.

2. Capacitor Replacement Procedure:

  • Describe the hands-on process of replacing the capacitor, including the necessary tools and precautions.
  • Discuss the sense of accomplishment and empowerment derived from successfully completing the replacement.

3. Challenges Encountered:

  • Acknowledge the challenges faced during the DIY capacitor replacement.
  • Share personal reflections on navigating technicalities and the potential setbacks encountered.

4. Testing and Validation:

  • Discuss the testing phase post-replacement to ensure that the garage door opener resumed its smooth operation.
  • Share the satisfaction of witnessing the positive results and the resolution of the capacitor-related issues.

Professional Consultation: When DIY Falls Short

While the DIY attempt brought a sense of accomplishment, there are times when the complexities of garage door opener issues may necessitate professional consultation.

1. Recognizing the Limitations:

  • Discuss the realization that certain issues may go beyond the scope of DIY repairs.
  • Share personal reflections on acknowledging the limitations of individual expertise.

2. Seeking Certified Technicians:

  • Explore the process of researching and selecting certified technicians or garage door repair professionals.
  • Discuss considerations such as expertise, reviews, and recommendations.

3. Professional Diagnosis and Repairs:

  • Reflect on the benefits of having a professional conduct a comprehensive diagnostic assessment.
  • Discuss the insights gained from their examination and their ability to address intricate issues beyond the scope of DIY repairs.

4. Value in Professional Services:

  • Discuss the financial investment in professional services as a worthwhile contribution to the longevity and optimal performance of the garage door opener.
  • Share personal satisfaction in the thoroughness and expertise demonstrated by the professionals.

Lessons Learned and the Road to Empowerment

1. Understanding Home Systems:

  • Reflect on the deeper understanding gained about the complexities of home systems, particularly garage door openers.
  • Discuss the educational aspect of troubleshooting and resolving issues independently.

2. The Satisfaction of DIY Success:

  • Acknowledge the sense of satisfaction and empowerment derived from successfully diagnosing and addressing the capacitor issue through DIY efforts.
  • Share personal reflections on the newfound confidence in handling certain home repairs.

3. Knowing When to Seek Professional Help:

  • Emphasize the importance of recognizing when DIY efforts fall short and when professional intervention is necessary.
  • Discuss the value of professional expertise in resolving intricate issues.

4. Regular Maintenance Practices:

  • Conclude with the commitment to incorporating regular maintenance practices for the Craftsman garage door opener.
  • Discuss the proactive approach to prevent future issues and extend the lifespan of essential components.

Conclusion: Capacitor Conundrum Unraveled

As I stand in my garage, the once-sluggish Craftsman garage door opener now operates with the same precision and efficiency that initially captivated me. The capacitor conundrum, once a source of frustration, has transformed into a story of empowerment, learning, and a deeper connection with the systems that make a house a home.

Overall, based from Garage Door Repair, unraveling the mystery of the garage door opener capacitor for my Craftsman opener was not just a technical triumph; it was a journey that underscored the importance of understanding, troubleshooting, and the realization that sometimes, the path to empowerment involves both DIY efforts and seeking professional expertise. The garage door opener, once a source of mystery, is now a symbol of resilience—a reminder that with curiosity, determination, and a willingness to learn, we can navigate the complexities of home maintenance and ensure the seamless operation of the systems that enhance our daily lives.

Camco Commercial Door Company

853 East Wolf Valley Rd. Heiskell, TN 37754

865-776-9455

How to Measure for a New Garage Door – Denzel Garage Door Repair

As a homeowner contemplating the prospect of a new garage door, I found myself immersed in the intricacies of the measurement process. The idea of a fresh, stylish door to enhance curb appeal and functionality is undoubtedly exciting, but it all hinges on accurate measurements.

In this comprehensive guide from Garage Door Repair, join me on a journey through the steps of measuring for a new garage door – a task that demands precision, attention to detail, and a thorough understanding of the space you’re working with.

1. Gather the Necessary Tools:

Before diving into the measuring process, it’s essential to arm yourself with the right tools. Here’s a checklist of items you’ll need:

  • Measuring Tape: A reliable measuring tape is the linchpin of this operation. Ensure it’s in good condition and provides accurate measurements.
  • Pencil and Paper: Keep a notepad and pencil handy to jot down measurements and any notes.
  • Step Ladder: A sturdy step ladder is crucial for reaching higher points, especially when measuring the height of the garage door.

2. Measure the Width:

Start by measuring the width of the garage opening. Position yourself inside the garage and measure the distance between the left and right sides of the opening. Take measurements at the top, middle, and bottom of the opening to account for any irregularities. Record the smallest width measurement to ensure a proper fit for the new garage door.

3. Measure the Height:

Next, measure the height of the garage opening. Similar to measuring the width, take measurements on the left, right, and center of the opening. Again, record the smallest measurement. This step is crucial for ensuring that the new garage door fits perfectly within the available space.

4. Measure the Headroom:

Headroom refers to the space between the top of the garage door opening and the ceiling. To measure the headroom, position the measuring tape vertically from the top of the door opening to the ceiling. Ensure there are no obstructions, as this measurement is essential for accommodating the vertical tracks and the upward movement of the garage door.

5. Measure the Backroom:

Backroom, also known as the depth of the garage, is the space required for the garage door to open fully. Measure from the back of the opening to the nearest obstruction, such as a wall or another door. This measurement ensures that the garage door can open and close without hindrance.

6. Determine the Side Room:

Side room refers to the space on each side of the garage door opening. Measure the distance from the edge of the opening to the nearest wall or obstruction on both sides. This measurement is crucial for accommodating the horizontal tracks and the movement of the garage door rollers.

7. Check for Obstructions:

While measuring, be vigilant for any potential obstructions that could interfere with the installation or operation of the new garage door. Look out for light fixtures, pipes, or any structural elements that might pose challenges. Note down the location and dimensions of these obstructions.

8. Consider the Opening Shape:

Garage door openings come in various shapes, including rectangular, arched, or custom designs. Take note of the specific shape of your garage door opening, as this information will influence the type of garage door that best suits your space.

9. Choose the Right Type of Garage Door:

Based on your measurements and the characteristics of your garage, explore the various types of garage doors available. Common options include:

  • Single Panel Garage Doors: These doors consist of a single, solid panel that tilts up and back when opened.
  • Sectional Garage Doors: Comprising multiple panels that roll up vertically, sectional doors are popular for their space-saving design.
  • Roll-Up Garage Doors: Ideal for spaces with limited ceiling space, roll-up doors coil into a cylinder above the door opening.
  • Side-Hinged Garage Doors: These doors swing open like traditional doors and are a suitable option for those who prefer a classic look.

10. Consider Material and Style:

The material and style of the garage door contribute significantly to its aesthetic appeal and maintenance requirements. Common materials include steel, wood, aluminum, and fiberglass. Choose a material that complements the architectural style of your home and suits your preferences in terms of durability and maintenance.

11. Consult with Professionals:

If the measuring process feels overwhelming or if you have unique considerations, don’t hesitate to consult with garage door professionals. They have the expertise to guide you through the process, recommend suitable options, and ensure accurate measurements for a seamless installation.

12. Explore Additional Features:

As you embark on the journey of selecting a new garage door, consider additional features that enhance functionality and convenience. These may include insulation for energy efficiency, windows for natural light, decorative hardware for aesthetic appeal, and smart technology for remote operation and monitoring.

Conclusion: Precision Paves the Way

In the quest for a new garage door that seamlessly integrates with your home’s architecture and meets your functional needs, precision in measurement is paramount. Taking the time to measure accurately ensures that the new garage door fits like a glove, operates smoothly, and enhances the overall aesthetic of your home.

As I navigated through the steps of measuring for a new garage door, I realized that this task is not just about dimensions; it’s about creating a tailored solution for your unique space. Whether you’re drawn to the classic elegance of a single-panel door or the modern functionality of a sectional door, each measurement contributes to the canvas of possibilities.

In conclusion, according to Garage Door Repair, as you embark on the exciting journey of selecting a new garage door, remember that precision in measurement paves the way for a seamless installation and long-term satisfaction. Armed with accurate measurements and a clear understanding of your space, you’re ready to open the door to a transformative upgrade that elevates both the form and function of your home.

Denzel Garage Door Repair

12127 Mall Blvd SUITE A251, Victorville, CA 92392, United States

760-377-8735

Hormann Garage Doors – Denzel Garage Door of Miami

As a homeowner with an appreciation for quality and design, I’ve always sought ways to enhance the aesthetics and functionality of my home. When it came to choosing a garage door, I was on a quest for a combination of durability, style, and European craftsmanship. This quest led me to Hormann Garage Doors, a brand that embodies the essence of European design and engineering.

I’ll share my experiences and insights into Hormann Garage Doors, explaining why they have become a top choice for homeowners seeking a touch of European craftsmanship to elevate their homes based from Garage Door Repair.

The Elegance of European Craftsmanship

European craftsmanship has long been associated with precision, attention to detail, and a commitment to quality. When it comes to garage doors, Hormann has carved a niche for itself by infusing these very qualities into their products. Here’s why I believe Hormann Garage Doors are a top choice for homeowners seeking to elevate their homes with European craftsmanship:

Unparalleled Quality

One of the defining features of Hormann Garage Doors is their unparalleled quality. These doors are crafted with meticulous attention to detail and built to withstand the test of time. From the selection of materials to the assembly process, Hormann takes pride in delivering garage doors that exemplify European excellence in craftsmanship.

Innovative Engineering

European craftsmanship often goes hand in hand with innovative engineering, and Hormann Garage Doors are no exception. These doors are designed with cutting-edge technology that enhances their functionality and durability. The result is a garage door that operates smoothly and efficiently, offering convenience to homeowners.

Versatile Design

Hormann Garage Doors offer a wide range of design options, allowing homeowners to select a door that seamlessly complements the architecture and style of their homes. From classic to modern designs, these doors are versatile and can be customized to match the homeowner’s unique preferences.

Energy Efficiency

European craftsmanship places a strong emphasis on energy efficiency, and Hormann Garage Doors reflect this commitment. Their insulated doors help regulate the temperature inside the garage, improving energy efficiency and providing additional protection to items stored in the garage. This not only contributes to a more comfortable living environment but also reduces energy costs.

Durability

European craftsmanship is synonymous with longevity and durability, and Hormann Garage Doors live up to these expectations. Their doors are constructed using high-quality materials and finishes that ensure they can withstand various weather conditions and everyday wear and tear. As a homeowner, the durability of Hormann doors offers peace of mind that my investment will last for years.

A Wide Range of Design Options

Hormann Garage Doors provide homeowners with an extensive range of design options, allowing them to tailor their garage doors to their specific preferences. Here are some of the key design offerings that have impressed me:

Classic Elegance

For homeowners who appreciate a timeless and classic look, Hormann Garage Doors offer designs that exude elegance. Raised panel doors with intricate details and understated charm provide a sophisticated appearance that enhances the overall aesthetic of your home.

Modern Simplicity

If your home has a more contemporary or minimalist design, Hormann Garage Doors offer modern and sleek designs that blend seamlessly with modern architecture. The clean lines, flush panels, and minimalist finishes create a refined and uncluttered look.

Carriage House Styles

Hormann’s carriage house style garage doors are a tribute to European architecture. These doors often feature crossbuck patterns, decorative hardware, and optional windows, evoking a sense of Old World charm and adding character to your home’s exterior.

Customization

Hormann Garage Doors also provide customization options, allowing homeowners to create a garage door that reflects their unique style. Whether it’s choosing a specific color, texture, or hardware, customization ensures that your garage door aligns with your vision for your home.

Cutting-Edge Technology

Hormann Garage Doors incorporate cutting-edge technology into their products, enhancing their functionality and convenience. Here are some of the technological features that have impressed me:

Quiet Operation

Hormann doors are engineered for quiet and smooth operation. Whether you’re leaving for work early in the morning or arriving home late at night, the silent performance of these doors ensures that you won’t disturb your household or neighbors.

Safety and Security

European craftsmanship places a strong emphasis on safety and security, and Hormann Garage Doors reflect this commitment. Their doors come equipped with safety features, including anti-pinch technology and secure locking systems, providing added protection to your home and family.

Remote Control

Hormann offers advanced remote control options for their garage doors, allowing homeowners to conveniently open and close their doors with the push of a button. These systems are not only convenient but also enhance the security of your home.

Environmental Responsibility

Hormann is committed to environmental responsibility and sustainability. Their dedication to eco-friendly manufacturing processes and the use of environmentally responsible materials aligns with the values of homeowners who want to make environmentally conscious choices.

Warranty and Customer Support

In my experience with Hormann Garage Doors, their warranty coverage and customer support have been exemplary. Their warranties provide peace of mind, offering protection against unexpected defects or issues. Additionally, their customer support team is responsive and knowledgeable, ready to assist with any inquiries or concerns.

An Investment in European Craftsmanship

Hormann Garage Doors provide homeowners with a unique opportunity to invest in European craftsmanship. These doors exemplify precision, quality, and attention to detail, enhancing the aesthetics and functionality of any home. As a homeowner who values both style and performance, Hormann doors have been a significant asset to my home.

Conclusion

According to Garage Door Repair, Hormann Garage Doors offer European craftsmanship that elevates the aesthetics and functionality of homes. The blend of unparalleled quality, innovative engineering, versatile design options, energy efficiency, and durability makes them a top choice for homeowners seeking garage doors that reflect European excellence in craftsmanship.

Whether your home has a classic, modern, or European architectural style, Hormann Garage Doors can be tailored to match your unique preferences. Their commitment to quality, durability, and environmental responsibility ensures that your investment in these doors will enhance the overall value and comfort of your home.

If you’re in the market for garage doors that deliver European craftsmanship, Hormann Garage Doors is a brand that deserves your consideration. Their exceptional design, cutting-edge technology, and dedication to quality offer homeowners the opportunity to infuse a touch of European sophistication into their homes.

Denzel Garage Door of Miami

310 NW 25th St, Miami, FL 33127, United States

786-882-8745

Craftsman Garage Door Openers: Pros and Cons – Denzel Garage Door of Fort Lauderdale

As a homeowner who recently upgraded my garage door opener, I know how vital it is to make an informed decision when choosing the right product for your home. One of the brands that caught my attention during my search was Craftsman, known for its long-standing reputation in the tool and home improvement industry.

By following Garage Door Repair, I’ll share my experiences and insights into Craftsman garage door openers, discussing the pros and cons of these systems to help you decide if they are the right choice for your home.

Pros of Craftsman Garage Door Openers

1. Reliability

One of the standout features of Craftsman garage door openers is their reputation for reliability. Craftsman, a trusted name in the tool industry, extends that reputation to their garage door openers. I’ve been using a Craftsman garage door opener for several years, and it has consistently performed without any significant issues. The peace of mind that comes from knowing my garage door will operate reliably day in and day out is a definite pro.

2. Affordable Options

Craftsman offers a range of garage door opener models that are budget-friendly, making them an attractive choice for homeowners looking for a cost-effective solution. While they offer more basic models, Craftsman doesn’t skimp on quality. You can find a reliable and durable garage door opener without breaking the bank.

3. Ease of Installation

Craftsman garage door openers are generally easy to install. The clear and comprehensive instructions provided in the manual, along with the helpful online resources, make the installation process manageable for DIY enthusiasts. While professional installation is always an option, the simplicity of setting up Craftsman openers can save you money if you prefer a DIY approach.

4. Safety Features

Safety is a paramount consideration for Craftsman. Their garage door openers are equipped with essential safety features, including photo-eye sensors that detect obstructions in the door’s path. This ensures that the door won’t accidentally close on objects, pets, or people, enhancing the overall safety of your garage.

5. Durability

Durability is another significant advantage of Craftsman garage door openers. The construction and components used in their openers are built to last, even under heavy use. This level of durability means fewer repairs and replacements, saving you time and money in the long run.

6. Quiet Operation

Craftsman offers garage door openers with belt-drive systems, which are known for their quiet operation. I personally opted for a Craftsman belt-drive opener to minimize noise disturbances in my home. It’s particularly beneficial if you have living spaces near or above the garage, as it ensures that opening or closing the garage door won’t disrupt daily activities.

Cons of Craftsman Garage Door Openers

1. Limited Smart Technology

While Craftsman has made strides in incorporating smart technology into their garage door openers, they may lag behind some competitors in this area. If you’re looking for advanced features like smartphone control and real-time notifications, you may find that Craftsman’s smart technology options are somewhat limited compared to other brands.

2. Limited Model Variety

Craftsman’s product range, while reliable, is more limited in terms of variety when compared to some other brands. If you’re seeking highly specialized or unique features in a garage door opener, you might find that Craftsman’s offerings are more straightforward and lack the customization options available from other manufacturers.

3. Lacking Some High-End Features

Craftsman garage door openers, particularly the more budget-friendly models, may lack some high-end features that you’ll find in premium options. For example, advanced security and encryption technologies present in high-end openers might be absent from Craftsman’s more affordable models. While this is understandable given the price point, it’s something to consider if you have specific security requirements.

4. Customer Support Variability

While some homeowners have reported positive experiences with Craftsman’s customer support, others have encountered challenges. The quality and responsiveness of customer support can vary, so it’s important to keep in mind that your experience may not always align with the positive experiences of other customers.

5. Limited Warranty Coverage

Craftsman’s warranty coverage for their garage door openers can be more limited compared to some competitors. This may mean fewer years of coverage or less comprehensive terms, depending on the specific model you choose. Be sure to review the warranty details before making a purchase to understand what is covered and for how long.

Conclusion

In conclusion, Craftsman garage door openers offer several advantages, including reliability, affordability, ease of installation, safety features, durability, and quiet operation. These pros make Craftsman openers an attractive choice for homeowners seeking a cost-effective and dependable solution for their garage door automation needs.

However, there are also cons to consider, such as the limited smart technology options, the more straightforward model variety, the absence of some high-end features, variability in customer support experiences, and limited warranty coverage. These factors may be important considerations depending on your specific requirements and preferences.

In my experience and based from Garage Door Repair, Craftsman garage door openers have served me well and met my basic automation needs. They offer a reliable and budget-friendly solution, and the ease of installation makes them accessible to DIY enthusiasts. However, if you have advanced requirements for smart technology or specialized features, you may want to explore other brands with a more extensive range of options. Ultimately, the right choice for you depends on your unique needs and priorities as a homeowner

Denzel Garage Door of Fort Lauderdale

1782 NW 38th Ave, Fort Lauderdale, FL 33311, United States

954-287-2263

How Professional Insulation Can Extend the Lifespan of Your Garage Door – Hollywood Garage & Overhead Door Co.

As a homeowner who values the functionality and durability of my garage door, I’ve come to appreciate the profound impact that professional insulation can have on its overall lifespan. Garage doors are more than just entry points to our homes; they provide security, convenience, and protection for our vehicles and belongings. Insulating your garage door professionally not only enhances energy efficiency and comfort but also plays a crucial role in extending the lifespan of this essential component of your home.

By following Garage Door Repair, I’ll share my experiences and insights into how professional insulation can significantly contribute to the longevity and performance of your garage door.

The Role of Garage Door Insulation

A garage door is exposed to various environmental elements and weather conditions. These external factors can take a toll on the door’s mechanical components, such as springs, tracks, and openers. Insulation serves as a protective shield against these elements and plays a pivotal role in extending the garage door’s lifespan. Here are some of the key ways in which professional insulation contributes to the longevity of your garage door:

1. Temperature Regulation:

Temperature fluctuations can have a significant impact on the garage door. Extreme heat or cold can affect the materials, causing them to expand and contract. Over time, this can lead to wear and tear on the door’s components. Professional insulation creates a stable interior environment, reducing the stress placed on the door and its mechanisms.

2. Moisture Control:

Excess moisture is a common issue in garages. It can lead to rust, corrosion, and mold growth, all of which can harm your garage door’s integrity. Professional insulation helps maintain a consistent climate within the garage, minimizing the risk of moisture-related damage.

3. Reduced Stress on Components:

Garage doors are comprised of several mechanical components, including springs, hinges, and openers. Temperature extremes can cause these components to work harder and wear out faster. Proper insulation acts as a buffer, reducing the stress on these parts and prolonging their lifespan.

4. Enhanced Durability:

The materials used in garage door insulation, such as polyurethane or foam board, are durable and resistant to environmental factors. When applied professionally, they provide an extra layer of protection to the door, enhancing its overall durability.

Types of Garage Door Insulation

There are several types of insulation materials commonly used in garage doors. The choice of insulation material depends on factors like climate, budget, and your specific needs. Here are some of the most common insulation materials:

1. Polystyrene Insulation:

Polystyrene, also known as foam board, is a lightweight and cost-effective insulation material. It is available in varying thicknesses and is installed between the garage door panels. Polystyrene insulation provides a reliable barrier against temperature fluctuations and is an economical choice.

2. Polyurethane Insulation:

Polyurethane insulation is a high-performance option known for its excellent thermal resistance. It is typically injected as a foam into the garage door’s panels, providing superior insulation and structural support. Polyurethane is ideal for regions with extreme temperatures.

3. Reflective Foil Insulation:

Reflective foil insulation consists of layers of foil and foam that reflect heat. This type of insulation is effective at reducing radiant heat transfer and is a great choice for garages exposed to direct sunlight. Reflective foil insulation can be applied to the inside of the garage door.

4. Batt Insulation:

Batt insulation is a common insulation material used in residential buildings. It consists of fiberglass or mineral wool, which is installed between the garage door’s panels. Batt insulation is cost-effective but may not provide the same level of insulation as foam board or polyurethane.

How Professional Insulation Extends the Lifespan of Your Garage Door

Now that we’ve explored the significance of garage door insulation and the types of insulation materials, let’s delve into how professional insulation extends the lifespan of your garage door:

1. Enhanced Temperature Control:

Professional insulation effectively regulates the temperature inside your garage. By providing a consistent climate, it reduces the stress on the garage door’s mechanical components. Temperature fluctuations can lead to expansion and contraction, causing parts like springs and tracks to wear out more quickly. With professional insulation, these components experience less strain, contributing to a longer lifespan for your garage door.

2. Reduced Risk of Rust and Corrosion:

Moisture is a common issue in garages, and it can lead to rust and corrosion, especially on metal components of the garage door. Professional insulation creates a stable environment that minimizes moisture buildup. This, in turn, reduces the risk of rust and corrosion, helping to preserve the structural integrity of the door.

3. Minimized Stress on Moving Parts:

Garage doors have moving parts, including springs, hinges, and rollers. These components are crucial for the door’s operation, but they can wear out over time. Temperature extremes can lead to increased stress on these moving parts, causing them to deteriorate faster. Professional insulation helps maintain a stable interior climate, reducing the strain on these components and extending their lifespan.

4. Enhanced Durability of Insulation Material:

Professional installation ensures that the insulation material is applied correctly and securely. This means it is less likely to become damaged or dislodged over time. The insulation material itself, such as polyurethane or foam board, is durable and resistant to environmental factors. When installed professionally, it provides an extra layer of protection to the garage door, enhancing its overall durability.

5. Improved Energy Efficiency:

An insulated garage door contributes to the overall energy efficiency of your home. By maintaining a consistent temperature inside the garage, your heating and cooling systems don’t have to work as hard. This leads to lower energy bills and less strain on your HVAC system, which can indirectly contribute to the extended lifespan of your garage door.

The Professional Insulation Process

Professional garage door insulation is a service offered by experienced technicians who are trained in insulating garage doors effectively. The process typically involves the following steps:

  1. Assessment: The technician assesses the condition of your garage door and the insulation needs. They may measure the garage door panels and check for any existing insulation.
  2. Material Selection: Based on the assessment and your preferences, the technician selects the appropriate insulation material for your garage door.
  3. Installation: The insulation material is installed between the garage door panels, ensuring a secure and even fit. Professional installers have the expertise to prevent gaps or spaces that can compromise the insulation’s effectiveness.
  4. Sealing: In addition to insulation material, professionals also ensure that edges and gaps are properly sealed. This includes sealing the bottom and sides of the garage door, as well as any seams where the insulation material is inserted.
  5. Testing: After the installation, the technician tests the garage door to ensure it opens and closes smoothly. Any adjustments needed are made promptly to prevent interference with the insulation.
  6. Post-Installation Evaluation: The technician may perform a post-installation evaluation to ensure that the insulation is in place, secure, and functioning as intended.

In Conclusion

According to Garage Door Repair, professional garage door insulation is an investment that not only enhances energy efficiency and comfort but also plays a vital role in extending the lifespan of your garage door. By providing temperature control, moisture protection, reduced stress on mechanical components, and enhanced durability, professional insulation contributes to a garage door that remains reliable and functional for years to come. If you value the security and longevity of your garage door, considering professional insulation is a wise decision that can provide long-lasting benefits for your home and your peace of mind.

Hollywood Garage & Overhead Door Co.

6592 Taft St, Hollywood, FL 33024, United States

954-716-8336

Garage Door Emergency Release Mechanism: Understanding Its Use – Laguna Hills Garage & Overhead Doors

As a homeowner, I’ve always been aware of the vital role our garage door plays in our daily lives. It’s not just a convenient way to access our home, but it’s also a significant security feature. However, there may come a time when the power goes out or the garage door malfunctions, leaving you in a situation where you need to manually operate it. That’s where the garage door emergency release mechanism comes into play.

In this article, I’ll delve into the importance of understanding and using the garage door emergency release mechanism to ensure your safety and peace of mind based from Garage Door Repair.

The Role of the Garage Door Emergency Release Mechanism

The garage door emergency release mechanism is a crucial safety feature designed to help you manually open and close your garage door when there’s no power or if the door becomes stuck. It’s essentially your lifeline in situations where the automated system fails or when you need to access your garage without electricity.

While garage door openers are convenient and efficient, they rely on electricity to function. In the event of a power outage or a malfunction with the opener, the emergency release mechanism allows you to manually operate the garage door without the need for electricity.

When to Use the Emergency Release Mechanism

Understanding when to use the garage door emergency release mechanism is essential. Here are some scenarios in which you might need to employ this feature:

1. Power Outage

During a power outage, your garage door opener won’t work, and you’ll need to use the emergency release mechanism to open or close the door.

2. Opener Malfunction

If your garage door opener experiences a malfunction or stops working, the emergency release allows you to continue using the door.

3. Emergency Situations

In the event of an emergency, such as a fire or a need to quickly access or exit your garage, the emergency release mechanism can be a lifesaver.

4. Maintenance and Testing

Regularly testing and using the emergency release mechanism is important to ensure it functions correctly. This should be part of your garage door maintenance routine.

Locating the Emergency Release Mechanism

The emergency release mechanism is typically located on the garage door opener itself. To access it, follow these steps:

  1. Locate the garage door opener: The garage door opener is usually installed on the ceiling of your garage, near the center of the door. It’s connected to the door with an arm and track system.
  2. Find the emergency release rope: Hanging down from the garage door opener, you’ll see a red cord or rope. This is the emergency release mechanism.
  3. Understand the handle: At the end of the red cord, there’s a handle or a T-shaped pull. This is what you’ll use to disengage the opener from the door.

How to Use the Emergency Release Mechanism

Using the garage door emergency release mechanism is a straightforward process, but it’s essential to follow the steps carefully to ensure safety and prevent damage to the door. Here’s a step-by-step guide on how to use it:

  1. Close the garage door: If the door is open when you need to use the emergency release, close it manually. Make sure the door is in the down position before proceeding.
  2. Locate the emergency release cord: As mentioned earlier, find the red cord hanging from the garage door opener.
  3. Pull the cord: Gently pull the cord down, which will disengage the opener from the door. You’ll feel the tension release when the opener is disconnected.
  4. Manually operate the door: With the opener disengaged, you can now manually open or close the garage door. To do this, place your hands on both sides of the door, near the bottom, and lift or lower it as needed.
  5. Re-engage the opener: Once the power is restored or the issue with the opener is resolved, you’ll need to re-engage the opener to automate the door again. To do this, simply pull the emergency release cord back towards the garage door opener and secure it in its original position.

Safety Precautions

While the emergency release mechanism is a valuable tool, it’s essential to exercise caution when using it. Here are some safety precautions to keep in mind:

  1. Do not force the door: If the door is stuck or difficult to move manually, avoid forcing it. This could cause damage to the door or track. Instead, consult a professional for assistance.
  2. Beware of falling doors: When manually operating the garage door, be aware that it can be heavy. Take precautions to prevent it from falling on you or anyone else.
  3. Ensure the area is clear: Before using the emergency release, make sure the area around the garage door is clear of any obstructions or objects that may impede its movement.
  4. Test the mechanism regularly: To ensure the emergency release mechanism is in good working order, test it periodically as part of your garage door maintenance routine.
  5. Consult the user manual: If you’re unsure how to use the emergency release, refer to your garage door opener’s user manual for specific instructions.

Conclusion

The garage door emergency release mechanism is not just a backup plan; it’s a vital component of your garage door’s safety system. As a homeowner, understanding how and when to use this mechanism is essential for ensuring that you can manually operate your garage door in emergencies or during power outages.

According to Garage Door Repair, by familiarizing yourself with the location and operation of the emergency release, you’ll have the confidence and knowledge to handle unexpected situations that may arise with your garage door. Remember that safety should always be a top priority when using the emergency release, and if you have any doubts or encounter difficulties, it’s best to consult a professional for assistance.

Laguna Hills Garage & Overhead Doors

25361 McIntyre St #5, Laguna Hills, CA 92653, United States

949-776-5549

Wooden Garage Door Maintenance and Care – Denzel Garage Door Repair of Chula Vista

Wooden garage doors exude timeless elegance and charm, adding a touch of warmth and sophistication to any home’s facade. However, maintaining the natural beauty of wooden garage doors requires some effort and dedication.

I will share my personal experience and insights on wooden garage door maintenance and care, helping you preserve the aesthetics and functionality of this classic choice for your home as stated in Garage Door Repair.

The Beauty of Wooden Garage Doors

When I decided to install a wooden garage door for my home, I was captivated by the natural beauty and uniqueness of the material. Wood offers a warmth and character that can’t be replicated by other materials. It harmonizes with various architectural styles, from traditional to modern, and complements the natural surroundings of your property.

Types of Wood for Garage Doors

  1. Cedar: Known for its natural resistance to decay and insects, cedar is a popular choice. It has a distinctive, reddish-brown hue and a fine grain pattern.
  2. Redwood: Redwood offers a rich, reddish-brown color and is naturally resistant to decay, making it a durable option for garage doors.
  3. Mahogany: Mahogany is prized for its deep reddish-brown color and fine grain. It exudes a sense of luxury and elegance.
  4. Oak: Oak is a strong and durable wood with a prominent grain pattern. It can be stained or painted to achieve your desired look.
  5. Pine: Pine is an affordable option that can be easily customized with various stains and finishes to match your home’s aesthetics.

Wooden Garage Door Maintenance

Preserving the beauty of wooden garage doors involves regular maintenance. Here’s a breakdown of the steps I take to ensure my wooden garage door remains in top condition.

1. Cleaning

I make it a point to clean my wooden garage door at least twice a year. To do this, I follow these steps:

  • Start by removing loose dirt and debris with a soft-bristle brush.
  • Use a mild detergent mixed with water to clean the surface of the door. Ensure that you rinse thoroughly to avoid residue buildup.
  • For stubborn stains or mildew, a mixture of equal parts vinegar and water can work wonders.
  • Do not use harsh chemicals, abrasive brushes, or pressure washers, as they can damage the wood’s finish.

2. Inspect for Damage

Regular inspections are vital for identifying issues early and preventing extensive damage. During my inspections, I look for the following:

  • Cracks or splits in the wood.
  • Signs of rot or decay.
  • Loose or damaged hardware such as hinges, handles, and locking mechanisms.
  • Peeling or cracked paint or finish.

3. Repainting or Refinishing

Over time, the finish on a wooden garage door can wear down due to exposure to the elements. When I notice signs of peeling or cracking, I take the following steps:

  • Sand the door’s surface to remove old paint or finish.
  • Apply a primer to prepare the wood for a new finish.
  • Choose a high-quality exterior paint or stain that suits your desired look and the wood’s type.
  • Apply at least two coats of paint or stain, allowing proper drying time between each coat.

4. Sealing and Waterproofing

To protect the wood from moisture and UV damage, I apply a wood sealer or water-repellent finish to my garage door every one to two years. This step helps prevent warping, cracking, and fading, ensuring the wood’s longevity.

5. Lubricate Hardware

Properly functioning hardware is essential for the smooth operation of your wooden garage door. I apply a lubricant, like silicone-based spray or white lithium grease, to hinges, rollers, and tracks to reduce friction and noise.

Wooden Garage Door Care Tips

Here are some additional care tips that I’ve found to be particularly useful in maintaining the beauty and functionality of my wooden garage door:

1. Regularly Clean Your Garage Door Opener

Dust and dirt can accumulate on your garage door opener’s sensors, potentially causing issues with the door’s operation. I make sure to clean these sensors periodically to ensure they work correctly.

2. Trim Vegetation

If you have trees or shrubs near your garage, regularly trim them to prevent branches from scratching or damaging your wooden garage door. This step also helps reduce the accumulation of leaves and debris on the door.

3. Be Mindful of Environmental Conditions

Extreme weather conditions can affect wooden garage doors. In areas with high humidity, proper ventilation inside the garage can help reduce moisture-related issues. In regions with intense sun exposure, you may want to invest in a garage door with UV-resistant finish or use a canopy or awning to provide shade.

4. Seasonal Checks

Perform thorough checks before the changing seasons. This includes ensuring that weatherstripping is in good condition to prevent drafts and moisture intrusion during the winter months.

5. Professional Maintenance

While I handle many maintenance tasks myself, I also schedule professional inspections and maintenance at least once a year. A trained technician can identify potential problems and provide expert solutions.

Conclusion

Based from Garage Door Repair, maintaining a wooden garage door requires time and effort, but the rewards are worth it. A well-cared-for wooden garage door not only enhances your home’s appearance but also ensures its longevity. With regular cleaning, inspections, refinishing, and attention to details, you can enjoy the natural beauty of wood while protecting your investment for years to come. Wooden garage door maintenance is not just a chore; it’s a labor of love that keeps your home looking its best.

Denzel Garage Door Repair of Chula Vista

2015 Birch Rd #25, Chula Vista, CA 91915, United States

619-815-7461

Garage Door Remote Programming: Leave It to the Professionals – Torrey Pines Garage & Overhead Doors

As a homeowner, I understand the appeal of tackling DIY projects and saving some money. It’s satisfying to take matters into your own hands and complete home improvement tasks, but there are certain areas where it’s best to leave the work to the professionals. One such area is garage door remote programming. While it may seem like a straightforward task, there are compelling reasons to entrust this job to experts.

In Garage Door Repair, I’ll discuss the intricacies of garage door remote programming and why it’s often wiser to hire a professional technician to handle it.

Understanding Garage Door Remote Programming:

Before we delve into the reasons for choosing professional help, let’s clarify what garage door remote programming involves. In essence, it’s the process of synchronizing your garage door opener with the remote control, keypad, or even your smartphone app. This synchronization is crucial for the remote control to communicate effectively with the garage door opener, allowing you to open and close the door with ease.

Why Choose Professional Garage Door Remote Programming:

  1. Technical Expertise: Garage door systems are becoming increasingly complex, with various remote control models and smart technology integration. Professional technicians have the technical expertise and knowledge of different systems to ensure a seamless setup. They are up to date with the latest technology and can handle the programming without a hitch.
  2. Time-Saving: While programming a garage door remote may seem simple, it can turn into a time-consuming task if you encounter any issues or make errors. Professional technicians are adept at troubleshooting and can complete the task efficiently, saving you time and frustration.
  3. Avoiding Errors: Garage door remote programming errors can lead to issues such as the door not responding correctly or even safety hazards. A professional technician is less likely to make errors during programming, ensuring that your garage door functions as intended.
  4. Customization and Security: Professionals can help you customize your garage door remote settings to match your specific needs. This may include setting different access codes, configuring limited access for guests, and ensuring the highest level of security. DIY programming may not provide the same level of customization.
  5. Warranty Considerations: Many garage door manufacturers offer warranties on their products. However, these warranties often stipulate that professional installation and programming are required for the warranty to remain valid. Attempting DIY programming may void the warranty, leaving you responsible for any future repairs or replacements.
  6. Safety First: Garage doors can be heavy and pose safety risks if not properly programmed. Professional technicians understand safety protocols and ensure that the garage door is functioning safely, reducing the risk of accidents or injuries.
  7. Synchronization Challenges: Troubleshooting synchronization issues can be frustrating for a DIY enthusiast. Professional technicians have the expertise to identify and resolve synchronization problems, ensuring that your garage door opens and closes smoothly.
  8. Reliable Results: By hiring a professional, you’re more likely to achieve reliable and consistent results. The last thing you want is for your garage door to respond unpredictably or malfunction due to improper programming.
  9. Customer Support: Reputable garage door companies provide ongoing customer support. If you ever encounter issues or have questions about your remote control, a professional technician can offer assistance and guidance.

Conclusion:

Based from Garage Door Repair, while DIY projects can be satisfying, garage door remote programming is best left to the professionals. Their technical expertise, time-saving abilities, and commitment to safety make them the ideal choice for this task. By opting for professional garage door remote programming, you can enjoy a hassle-free and reliable garage door operation, knowing that the job has been done correctly and that your warranty remains intact. In the world of home maintenance and improvement, certain tasks are best suited for experts, and garage door remote programming is unquestionably one of them.

Torrey Pines Garage & Overhead Doors

8980 Villa La Jolla Dr #5, La Jolla, CA 92037, United States

858-207-4777

How to Prevent Garage Door Freeze-Ups in Cold Weather – Sanger Garage Door Experts

Winter is a beautiful season, but it can be a challenging time for homeowners, especially when it comes to our garage doors. Like many others, I’ve faced the frustration of dealing with a frozen garage door on a bitter winter morning. However, after years of trial and error, I’ve learned effective strategies to prevent these freeze-ups.

By following Garage Door Repair Sanger TX, I’ll share my first-person perspective on how to keep your garage door running smoothly, even in the harshest cold weather.

Understanding the Problem: Why Garage Doors Freeze

Before diving into the solutions, it’s essential to understand why garage doors freeze in cold weather. Several factors contribute to this issue:

  1. Moisture Accumulation: When snow or rain enters the garage and freezes, it can create ice on the garage door’s various components, causing them to stick.
  2. Weather Stripping Problems: Over time, weather stripping can degrade and crack, allowing moisture to seep in. If it freezes, it can prevent the door from moving smoothly.
  3. Lubrication Issues: Lubricants used on garage door tracks and rollers can thicken or become ineffective in low temperatures, leading to freeze-ups.

Preventing Garage Door Freeze-Ups: 2023 Strategies

In my quest to find solutions for preventing garage door freeze-ups in cold weather, I’ve adopted several effective strategies. Here’s what I’ve learned and implemented over the years:

1. Weather-Proofing Your Garage:

The first line of defense against garage door freeze-ups is ensuring your garage is as weather-tight as possible. This involves inspecting and repairing any gaps or cracks that might allow cold air and moisture to enter. Proper insulation also helps maintain a more stable temperature inside the garage.

2. Upgrading Weather Stripping:

Old, cracked, or ineffective weather stripping is a common culprit behind garage door freeze-ups. In 2023, there are advanced weather stripping materials that are more resilient in cold weather. Replacing weather stripping is a relatively simple and cost-effective solution that can make a significant difference.

3. Lubricating with Cold-Weather Grease:

Choosing the right lubricant for your garage door’s moving parts is crucial in cold weather. Standard lubricants can thicken or freeze in low temperatures, causing the door to stick. Cold-weather grease or lubricants designed for winter use are more resilient and prevent freeze-ups.

4. Heat Source in the Garage:

For those who use their garage frequently in winter, having a heat source like a space heater can help maintain a temperature above freezing. This not only prevents freeze-ups but also makes working in the garage more comfortable.

5. Deicing Solutions:

When dealing with an existing freeze-up, deicing solutions can be a quick fix. Deicing sprays or granules can help melt ice and snow around the garage door. However, be cautious when using these products, as some can damage the door or the floor.

6. Insulated Garage Door:

Investing in an insulated garage door can make a significant difference. Insulation helps maintain a more stable temperature inside the garage, reducing the likelihood of freeze-ups. Additionally, insulated doors are more energy-efficient.

7. Regular Maintenance:

Staying on top of regular garage door maintenance is vital. This includes inspecting all components, tightening hardware, and ensuring tracks and rollers are in good condition. Regular maintenance can identify potential issues before they lead to freeze-ups.

My Experience with Preventing Freeze-Ups

I’ve put several of these strategies into practice over the years, which have significantly reduced the frequency of garage door freeze-ups. One of the most effective measures I took was upgrading my weather stripping. The new, cold-resistant material kept moisture out and maintained a better seal, preventing ice from forming.

I also switched to a cold-weather grease for lubricating the garage door’s moving parts. This small change made a big difference in the door’s performance during the winter months. I found it to be more effective in preventing sticking and freeze-ups.

In addition, I installed an insulated garage door. This not only helped prevent freeze-ups but also improved the overall energy efficiency of my home. I’ve noticed a difference in heating costs during the winter as the garage now stays at a more moderate temperature.

Ongoing Maintenance and Vigilance

Preventing garage door freeze-ups is an ongoing effort. I’ve established a regular maintenance routine, which includes checking weather stripping, lubricating moving parts, and inspecting for any potential issues. By staying vigilant and addressing any problems promptly, I’ve managed to keep freeze-ups to a minimum.

Conclusion

Based from Garage Door Repair Sanger TX, dealing with garage door freeze-ups during the winter can be frustrating and inconvenient. However, with the right strategies and maintenance, you can significantly reduce the chances of encountering this problem. Investing in weather-proofing, insulation, and using the correct lubricants are key steps to maintaining a smoothly functioning garage door throughout the cold season.

My personal experience with these strategies has not only made my life easier but also improved the overall functionality and efficiency of my garage door. By taking proactive measures, you can ensure that your garage door operates reliably, regardless of the harsh winter conditions outside.

Sanger Garage Door Experts

600 N Stemmons St, Sanger, TX 76266, United States

940-308-2092

Top Steps to Grease Your Garage Door – Coppell Gates & Garage Doors

Garage doors, often an overlooked part of our homes, are essential components that require regular maintenance to function correctly. One crucial aspect of garage door maintenance is keeping it well-lubricated. Recently, I delved into the world of DIY garage door maintenance and learned the importance of greasing a garage door for smooth and quiet operation.

By following Garage Door Repair Coppell TX, I will share my experience and provide you with a step-by-step guide on how to grease your garage door.

Why Greasing Your Garage Door Matters

Your garage door comprises various moving parts, such as rollers, tracks, springs, and hinges. Over time, these components can become stiff and noisy due to the accumulation of dirt and lack of lubrication. Regularly greasing your garage door not only helps prevent wear and tear on these parts but also prolongs the door’s lifespan and ensures quieter, smoother operation.

Materials and Tools You’ll Need:

Before you begin, gather the necessary materials and tools:

  1. White lithium grease or garage door lubricant
  2. Rag or clean cloth
  3. Step ladder or sturdy platform
  4. Safety glasses and gloves

Step 1: Safety First

Your safety should always be a top priority. Wear safety glasses and gloves to protect your eyes and hands from any debris, dust, or grease that may fall during the process.

Step 2: Close the Garage Door

For safety reasons, close your garage door completely before starting the greasing process. This ensures that the door is stable and stationary during lubrication.

Step 3: Locate the Key Components

To grease your garage door effectively, you need to identify the key components that require lubrication. These typically include:

  1. Rollers: The wheels that run in the tracks, allowing the door to move up and down.
  2. Hinges: The points where door panels are connected, allowing the door to bend as it moves.
  3. Springs: Both the torsion (above the door) and extension (on the sides) springs benefit from lubrication.
  4. Tracks: The metal channels on either side of the door where the rollers move.
  5. Bearing Plates: Found near the ends of the torsion spring rod.

Step 4: Clean the Components

Before applying any lubricant, it’s essential to clean the components to remove any dirt, debris, or old lubricant that may have built up over time. Use a rag or clean cloth to wipe down the rollers, hinges, springs, tracks, and bearing plates.

Step 5: Lubricate the Rollers

Start with the rollers. Apply a generous amount of white lithium grease or garage door lubricant to each roller. Roll the door up and down a few times to distribute the lubricant evenly. This should significantly improve the door’s smoothness and reduce noise.

Step 6: Lubricate the Hinges

Next, move on to the hinges. Apply lubricant to all the hinge points on each door panel. This is where the sections of the door bend as it opens and closes. Lubricating the hinges helps reduce friction and wear.

Step 7: Lubricate the Springs

Both the torsion and extension springs can benefit from lubrication. Apply a light coating of lubricant to the springs. Be careful when working with torsion springs, as they are under tension and can be dangerous. If you’re uncomfortable lubricating the torsion spring, it’s best to call a professional.

Step 8: Lubricate the Tracks

Apply a small amount of lubricant to the tracks on both sides of the door. Ensure that the lubricant is spread evenly to prevent any binding or jerky movement.

Step 9: Lubricate the Bearing Plates

Finally, lubricate the bearing plates at the ends of the torsion spring rod. This helps ensure that the rod moves smoothly as the door opens and closes.

Step 10: Operate the Door

Once you’ve applied lubricant to all the key components, open and close the garage door a few times to ensure the lubricant is evenly distributed and to remove any excess grease. The door should operate quietly and smoothly.

Step 11: Check for Excess Lubricant

After operating the door, check for any excess lubricant that may have dripped onto the garage floor. Clean up any spills to prevent slipping hazards.

Step 12: Regular Maintenance

Regular garage door maintenance should include greasing the door at least once a year. However, if you notice any unusual noises, stiffness, or jerky movements, it’s a good idea to lubricate the door more frequently.

Additional Tips:

  1. Use the right lubricant: White lithium grease or garage door lubricant is best for this purpose. Avoid using WD-40 or other general-purpose lubricants, as they can attract dirt and grime.
  2. Don’t over-grease: While it’s essential to lubricate all the necessary components, using excessive amounts of grease can lead to dripping and attract dust and dirt. Use a moderate amount.
  3. Listen for noises: If your garage door continues to make unusual noises or experiences difficulties even after lubrication, it might be a sign of underlying issues. In such cases, it’s advisable to consult a garage door professional for a thorough inspection and repairs.

In conclusion, as stated in Garage Door Repair Coppell TX, greasing your garage door is a simple yet effective maintenance task that can greatly improve the performance and lifespan of your door. By following these steps and performing this maintenance regularly, you’ll enjoy a quieter and smoother garage door operation, and your garage door components will thank you with extended durability.

Coppell Gates & Garage Doors

755 Blue Jay Ln, Coppell, TX 75019, United States

972-449-7776

Evaluating Garage Door Damage: A Professional’s Guide – NRH’s Gates & Garage Doors

As a homeowner, I’ve always believed in taking a proactive approach to home maintenance. This philosophy led me to become familiar with various aspects of my house, including my garage door. However, when I noticed signs of damage to my garage door, I quickly realized that evaluating the extent of the problem required a professional’s expertise.

By following Garage Door Repair North Richland Hills TX, I’ll share my journey into understanding how to assess garage door damage effectively, guided by the knowledge of professionals.

Recognizing the Telltale Signs

It all began with subtle hints that something was amiss with my garage door. At first, it was an unusual creaking sound that accompanied its movements. Soon after, I observed visible dents on the door panels, and the operation of the door became less smooth. These signs were impossible to ignore, and it was evident that the time had come to assess the extent of the damage and determine the best course of action.

The DIY Inspection

My initial instinct was to conduct a thorough inspection myself. Armed with a checklist I found online, I embarked on an evaluation of my garage door. I examined the door panels, springs, tracks, and hinges, trying to identify any visible damage or wear and tear.

While my DIY inspection provided some insight, it was clear that I lacked the expertise to determine the full scope of the damage accurately. This realization was the turning point that led me to seek professional guidance.

The Professional’s Approach

With my concerns about the garage door’s condition mounting, I contacted a local garage door repair company. They dispatched a technician to assess the situation. What I learned from this expert was eye-opening and invaluable.

Here are the key insights I gained from the professional’s approach:

1. Systematic Inspection:

The technician began the evaluation by conducting a systematic inspection of the entire garage door system. This included the door panels, hinges, springs, tracks, rollers, cables, and the opener.

2. Focus on Safety:

One of the technician’s first priorities was ensuring the safety of the garage door. He emphasized that garage doors can be dangerous if not properly maintained. He carefully inspected the springs, cables, and other components to ensure that they were in good condition and functioning safely.

3. Identifying Hidden Damage:

One of the most significant advantages of a professional’s evaluation is the ability to identify hidden damage. While visible dents and wear are easy to spot, issues within the mechanisms of the garage door may not be apparent to the untrained eye. The technician used specialized tools and techniques to assess the integrity of the door.

4. Component Interdependence:

The professional explained the interdependence of various components in a garage door system. For instance, damage to a single spring or a misalignment in the tracks could affect the entire door’s operation. Understanding these interconnections was vital for a comprehensive evaluation.

Common Types of Garage Door Damage

The technician also shared insights into the most common types of garage door damage that homeowners may encounter:

1. Dented or Damaged Panels: These can result from accidental impacts, such as hitting the door with a vehicle or from natural wear and tear.

2. Spring Issues: Garage door springs are critical for counterbalancing the weight of the door. If they become damaged or worn, it can affect the door’s ability to open and close smoothly.

3. Track Misalignment: Misaligned tracks can cause the door to operate unevenly or become stuck.

4. Roller and Hinge Problems: Damaged or worn-out rollers and hinges can result in a noisy and inefficient garage door operation.

5. Cable Damage: Cables are essential for lifting and lowering the door. Damage to the cables can lead to the door becoming unbalanced.

6. Opener Troubles: The garage door opener can experience electrical issues, limit switch problems, or malfunctions that affect the door’s operation.

The Repair and Maintenance Plan

After a comprehensive evaluation, the technician provided a detailed report of the garage door’s condition. He identified the specific areas of damage and wear, and he recommended a repair and maintenance plan. This plan included immediate repairs to address critical issues, as well as a schedule for ongoing maintenance.

Preventive Measures

The professional also emphasized the importance of preventive measures to keep the garage door in good condition:

Regular Lubrication: Proper lubrication of moving parts, such as rollers, hinges, and springs, is crucial to reduce friction and wear.

Periodic Inspections: Conduct regular visual inspections to identify any signs of damage or wear.

Safety Checks: Test the garage door’s safety features, such as the auto-reverse mechanism, to ensure they function correctly.

Professional Maintenance: Schedule annual or bi-annual professional maintenance to keep the garage door in optimal condition.

Conclusion

My journey into evaluating garage door damage led me to appreciate the expertise of professionals in the field. While DIY inspections can be valuable for routine maintenance, a professional’s evaluation is indispensable when it comes to identifying hidden damage and assessing the overall condition of the garage door system.

Overall, according to Garage Door Repair North Richland Hills TX, understanding the interdependence of various components and recognizing the common types of garage door damage can help homeowners be proactive in maintaining their garage doors. Moreover, a comprehensive repair and maintenance plan, tailored to the specific needs of the garage door, is essential for ensuring its long-term functionality and safety. This experience has taught me the significance of regular professional evaluations and preventive measures to keep my garage door in optimal condition, and it’s a lesson I’ll carry with me in my ongoing journey as a responsible homeowner.

NRH’s Gates & Garage Doors

7048 Ridge Crest Dr, North Richland Hills, TX 76182, United States

817-533-4913

Signs Your Garage Door Needs Professional Attention – Garage Door Wizard of Tomball

As a diligent homeowner, I’ve come to realize that our garage doors are often taken for granted until they present us with a problem. Recently, my garage door started acting up, and I was faced with a common dilemma – should I attempt a DIY fix, or is it time to call in the professionals?

In this article, I’ll share my personal experience and the expert advice I received on the signs that indicate your garage door needs professional attention based from Garage Door Repair Tomball TX.

The Importance of a Functional Garage Door

Our garage doors are a vital part of our homes, offering several essential functions:

  1. Security: A functional garage door secures your vehicle, tools, and other valuable items stored in the garage.
  2. Convenience: It provides quick and convenient access to your vehicle and belongings.
  3. Weather Protection: A properly functioning door shields your garage’s contents from the elements, such as rain, snow, and extreme temperatures.
  4. Energy Efficiency: An insulated garage door helps maintain the temperature inside your garage, which can impact the energy efficiency of your home.

Common Signs Your Garage Door Needs Professional Attention

  1. Unusual Sounds: If your garage door begins making grinding, screeching, or banging noises that are out of the ordinary, it’s a sign that something is wrong. These sounds could indicate issues with the opener, springs, or other components that require professional inspection and repair.
  2. Slow or Erratic Movement: A garage door that moves sluggishly, jerks, or stops midway through its operation is a clear signal that something isn’t working correctly. It may be due to worn-out components, misalignment, or issues with the opener.
  3. Visible Damage: Dents, cracks, or significant wear and tear on the door panels are not just cosmetic concerns; they can affect the door’s functionality. Cracked or damaged panels can weaken the structure, impact insulation, and compromise security.
  4. Uneven Closing: If your garage door closes unevenly, leaving a noticeable gap at one side or corner, it can be due to issues with the tracks, rollers, or torsion springs. Correcting these problems requires professional expertise.
  5. Safety Reversal Problems: Garage doors are equipped with safety features that cause them to reverse if they encounter an obstruction while closing. If your door doesn’t reverse as it should, it’s a serious safety concern that necessitates professional attention.
  6. Inconsistent Remote Response: If your garage door opener responds inconsistently to the remote control or if you need to be very close to the door for it to work, it indicates a problem with the opener or its signal transmission.
  7. Persistent Sensor Issues: Modern garage doors have safety sensors that prevent the door from closing if there’s an obstruction in its path. If your sensors frequently malfunction or aren’t aligned correctly, it can disrupt the door’s operation and poses a safety risk.
  8. Broken Springs: Garage door springs have a limited lifespan and eventually wear out. If you notice a broken spring, don’t attempt to repair it yourself; it’s a highly dangerous task that should be left to professionals.

My Personal Experience

When I noticed my garage door exhibiting several of these signs, I initially considered attempting a DIY fix to save money. However, after some research and advice from a trusted friend who had a bad experience with a DIY garage door repair, I decided to consult a professional.

The technician arrived promptly and conducted a thorough inspection. They discovered that the door had several worn-out rollers and a frayed cable. Left unattended, this could have led to more severe issues and costly repairs down the line. The technician efficiently replaced the damaged components, realigned the door, and lubricated the moving parts. My garage door was back to its smooth and silent operation.

Expert Insights on Seeking Professional Help

To gain a deeper understanding of the importance of professional attention for garage door issues, I consulted an expert in the field. Here are some insights they shared:

1. Safety Concerns: “Safety should always be the top priority when dealing with garage door issues. The high tension in springs and the heavy weight of the door make it a risky DIY task. Professionals are trained to handle these situations safely and prevent accidents.”

2. Correct Diagnosis: “Garage door problems can have various underlying causes, and accurate diagnosis is critical. Professionals have the expertise to identify the root issue and recommend the appropriate solution.”

3. Prevent Further Damage: “Addressing garage door problems early can prevent them from escalating into more severe issues that are costly to repair. Professionals can fix the problem correctly, saving you time and money.”

4. Warranty and Quality: “Reputable professionals offer warranties on their work, providing assurance that the repair is reliable and long-lasting. Attempting a DIY fix may void warranties on certain components.”

5. Specialized Tools: “Professionals come equipped with specialized tools and replacement parts. This ensures that the repairs are conducted efficiently and effectively, reducing downtime.”

Conclusion

My experience with my malfunctioning garage door taught me that seeking professional attention for such issues is the wisest course of action. The signs of trouble, whether they’re unusual sounds, slow movement, visible damage, or safety concerns, shouldn’t be ignored. Professionals possess the expertise, specialized tools, and a commitment to safety that make them the best choice for garage door repairs.

Overall, according to Garage Door Repair Tomball TX, the expert insights emphasized that safety should always come first, and attempting DIY repairs on a garage door can be extremely risky. Additionally, professionals can accurately diagnose issues, prevent further damage, and provide reliable, long-lasting solutions. Seeking professional attention for your garage door issues is not just a matter of convenience; it’s a matter of safety, security, and protecting your valuable investment in your home.

Garage Door Wizard of Tomball

24759 Stanolind Rd, Tomball, TX 77375, United States

281-355-9735

Garage Door Vents: Installation for Ventilation and Cooling – Denzel Garage Door of Anaheim

As a homeowner, I’ve always been keen on improving the functionality of my home. One area that often gets overlooked is the garage. In this article, I’ll share my personal journey in exploring the benefits of garage door vents, the installation process, and how they can significantly enhance ventilation and cooling in your garage, making it a more comfortable and versatile space.

Understanding the Role of Garage Door Vents

Before diving into the installation process, it’s essential to understand why garage door vents are a valuable addition according to Garage Door Repair Anaheim CA:

  1. Ventilation: Garages can become hot and stuffy, particularly in warmer months. Vents allow for the exchange of air, preventing heat buildup and improving overall air quality.
  2. Cooling: By promoting air circulation, garage door vents help in cooling down the space, making it more comfortable for various activities, from working on DIY projects to simply parking your car.
  3. Moisture Control: Vents can help reduce humidity levels in the garage, preventing mold and mildew growth, which is especially important if you store valuable items in your garage.
  4. Odor Removal: Vents help disperse odors, chemicals, and fumes that might be present in the garage, creating a healthier environment.

Step 1: Choose the Right Type of Vent

Before you begin the installation process, it’s essential to choose the right type of vent. Here are some common options:

  • Louvre Vents: Louvre vents have angled slats that allow air to pass while keeping out debris and precipitation. They are suitable for areas with varying weather conditions.
  • Circular Vents: These vents are circular in shape and provide consistent ventilation. They are easy to install and are less prone to clogging.
  • Gable Vents: Gable vents are often used for roof ventilation, but they can also be placed on the garage door for added airflow.
  • Mesh Vents: Mesh vents feature a fine screen to prevent pests and debris from entering your garage. They are suitable for areas prone to insect infestations.

Step 2: Measure and Mark the Location

Once you’ve chosen the type of vent that suits your needs, you need to measure and mark the location on your garage door. Consider these factors:

  • Height: Vents are typically placed at the top section of the garage door to maximize air circulation. Measure the desired height and mark the center of the location.
  • Spacing: If you plan to install multiple vents, ensure they are spaced evenly for balanced airflow.

Step 3: Prepare the Garage Door

Before drilling or cutting, it’s crucial to prepare the garage door to prevent splintering and ensure a clean installation:

  • Marking the Area: Use a level and measuring tape to mark the exact area where you will install the vent. This ensures the vent will be straight and at the right height.
  • Masking Tape: Apply masking tape along the edges of the marked area. This helps prevent splintering when cutting or drilling.

Step 4: Cut or Drill the Opening

The method you choose for cutting or drilling the opening depends on the type of vent you’re installing. Here are the two most common methods:

  • Cutting: If you’re installing a louvered or circular vent, you’ll need to cut the opening. Use a jigsaw or reciprocating saw for this purpose. Make sure to follow the marked lines and take your time to achieve a clean cut.
  • Drilling: For mesh vents, you can use a hole saw attachment on a drill. Ensure the hole saw size matches the diameter of the vent.

Step 5: Install the Vent

With the opening in place, it’s time to install the vent. Here’s how to do it:

  • Position the Vent: Place the vent over the opening, ensuring it lines up correctly. If it has pre-drilled holes for screws, align them with the opening.
  • Secure with Screws: Attach the vent to the garage door using screws. Use a screwdriver or a drill with a screwdriver bit. Ensure the vent is firmly attached but don’t overtighten the screws, as this may cause the vent to warp.
  • Caulk the Edges: To ensure a weather-tight seal and prevent moisture from seeping in, apply a silicone caulk around the edges of the vent. Smooth the caulk with a caulk smoothing tool or your finger.

Step 6: Test the Vent

After installing the vent, it’s essential to test it for proper functionality. Open and close your garage door a few times to ensure the vent doesn’t obstruct the door’s movement. Additionally, monitor the air circulation and cooling in your garage to see if it meets your expectations.

My Personal Experience: A Breath of Fresh Air

After installing garage door vents, I noticed a significant improvement in my garage’s comfort and functionality:

  • Cooler Temperatures: The added ventilation helped keep the garage cooler, making it a more pleasant workspace, especially during the summer.
  • Improved Air Quality: The vents helped reduce the stagnant air, preventing musty odors and promoting a healthier environment.
  • Moisture Control: I observed a decrease in humidity levels, which was essential for preventing mold and rust on my tools and stored items.
  • Easy DIY Installation: The installation process was manageable, and I appreciated the cost savings compared to hiring a professional.

In conclusion, based from Garage Door Repair Anaheim CA, garage door vents are a simple yet effective addition to enhance ventilation and cooling in your garage. My personal experience confirmed that they make a notable difference in the overall comfort and functionality of the space. Whether you use your garage for hobbies, as a workspace, or just for parking your car, installing vents is a practical investment that improves air quality, temperature control, and overall usability.

Denzel Garage Door of Anaheim

623 N Lemon St, Anaheim, CA 92805, United States

714-410-2557

How to Repair Garage Door Keypad Signal Problems? – Ontario Garage & Overhead Doors

As a homeowner who values both convenience and security, my garage door keypad has been an essential part of my daily routine. It’s a device that grants easy access to my garage while ensuring its protection. However, when my garage door keypad signal started to act up, it became a source of frustration. If you’ve experienced similar issues with your garage door keypad, you’re not alone.

By following Garage Door Repair Ontario CA, I’ll share my personal journey of tackling garage door keypad signal problems and provide expert solutions to help you address and repair these issues effectively.

Understanding the Importance of a Functional Garage Door Keypad

A garage door keypad is a convenient and secure method of accessing your garage. When it malfunctions, it can lead to several problems:

  1. Inconvenience: A malfunctioning garage door keypad can disrupt your daily routine and cause delays in accessing your garage.
  2. Security Concerns: If the keypad signal is not working correctly, it can potentially compromise the security of your garage and, by extension, your home.
  3. Frustration: Dealing with a keypad that doesn’t respond can be a frustrating experience, especially when you’re in a hurry.
  4. Battery Drain: If the signal problems lead to excessive button pressing or the keypad constantly searching for a signal, it can drain the batteries quickly.

Diagnosing Garage Door Keypad Signal Problems

Before you embark on repairing your garage door keypad, it’s essential to diagnose the problem. Look for these common signs of signal issues:

  1. Non-Responsive Keypad: If you press the buttons on the keypad, and nothing happens, it’s a clear indication of a signal problem.
  2. Intermittent Operation: If the keypad works sporadically, only responding to button presses on occasion, you’re likely dealing with signal problems.
  3. Delayed Response: If there’s a significant delay between pressing a button and the door responding, it’s another signal issue.
  4. Low Battery Indicator: Most keypads have a low battery indicator. If this indicator is lit, it can lead to signal problems.

A Step-by-Step Guide to Repairing Garage Door Keypad Signal Problems

Now, let’s delve into the process of repairing your garage door keypad signal problems effectively:

Tools and Materials:

Before you start, gather the following tools and materials:

  • Safety goggles
  • Work gloves
  • A ladder or step stool
  • A Phillips screwdriver
  • Replacement batteries (if needed)

Step 1: Safety First

Safety should always be your top priority. Wear safety goggles to protect your eyes and work gloves to safeguard your hands.

Step 2: Check the Batteries

One of the most common causes of garage door keypad signal problems is depleted batteries. Open the keypad’s cover and check the batteries. If they’re low or dead, replace them with fresh batteries.

Step 3: Verify the Keypad Programming

Ensure that the keypad is correctly programmed with the garage door opener. Consult the owner’s manual for your specific opener to review the programming process. Re-enter the code to ensure it’s accurate.

Step 4: Inspect the Keypad for Damage

Examine the keypad for any physical damage or signs of wear. If the keypad is visibly damaged, it may need to be replaced.

Step 5: Check for Signal Interference

Signal interference from nearby electronic devices can disrupt the operation of your garage door keypad. Look for any new devices or appliances in the vicinity that may be causing interference.

Step 6: Clear Obstructions

Make sure there are no obstructions blocking the keypad or the garage door opener’s antenna. Remove any items that might hinder the signal’s transmission.

Step 7: Test the Keypad

After performing the above steps, test the garage door keypad to see if the signal problems have been resolved. Press the buttons to open and close the garage door, and observe the response time and consistency.

Expert Tip: “Regular maintenance of your garage door keypad, including battery replacement and cleaning, can prevent signal problems and ensure smooth operation.”

Conclusion

Dealing with garage door keypad signal problems can be a frustrating experience, but with the right knowledge and a systematic approach, it’s a challenge that can be overcome. My personal journey in addressing this issue has taught me the importance of regular maintenance and troubleshooting.

Overall, based from Garage Door Repair Ontario CA, by following this step-by-step guide and applying the expert tips provided, you can restore the functionality of your garage door keypad and enjoy the convenience and security it offers. Remember that if you’re unsure about any part of the process or if the problem persists, it’s always a good idea to consult the owner’s manual for your specific keypad or seek professional assistance. A well-functioning garage door keypad not only enhances your daily convenience but also ensures the security of your home and property

Ontario Garage & Overhead Doors

1353 E 7th St, Ontario, CA 91764, United States

909-442-4206

How to Repair a Garage Door Panel Gap? – Riverside Garage & Overhead Doors

As a dedicated homeowner and DIY enthusiast, I’ve always taken pride in maintaining and improving my property. Recently, I encountered a common yet vexing issue with my garage door – a noticeable gap between the panels. This gap not only compromised the door’s appearance but also allowed in unwanted elements like dust, pests, and cold drafts.

I’ll share my journey of addressing a garage door panel gap, along with a comprehensive guide on how to repair it effectively as stated in Garage Door Repair Riverside CA.

Understanding the Impact of a Garage Door Panel Gap

A garage door panel gap is not merely a cosmetic concern. It can lead to various issues, including:

  1. Reduced Energy Efficiency: Gaps in the door allow cold or hot air to enter, affecting the temperature inside the garage and potentially the adjacent rooms.
  2. Increased Energy Costs: The reduced energy efficiency results in higher heating or cooling bills.
  3. Dust and Pest Infiltration: Gaps serve as entry points for dust, pests, and debris, leading to a dirty and potentially infested garage.
  4. Security Risks: A noticeable gap may attract unwanted attention and compromise the security of your garage and home.

Identifying the Causes of a Garage Door Panel Gap

Before embarking on the repair process, it’s essential to identify the root cause of the panel gap. Common reasons include:

  1. Wear and Tear: Over time, the garage door panels may experience wear, leading to gaps between them.
  2. Impact or Collision: A collision with a vehicle, equipment, or any heavy object can cause dents and gaps in the panels.
  3. Loose or Damaged Hardware: Loose hinges or hardware can result in misaligned panels, creating gaps.
  4. Warping or Bowing: Wooden garage door panels are prone to warping or bowing due to moisture and weather conditions.

A Step-by-Step Guide to Repairing a Garage Door Panel Gap

Now, let’s walk through the process of addressing and repairing a garage door panel gap:

Tools and Materials:

Before you begin, gather the necessary tools and materials:

  • Safety goggles and work gloves
  • Screwdriver or drill
  • Replacement panel (if necessary)
  • Hammer
  • Clamps
  • Wood glue (for wooden doors)
  • Paint or finish (if applicable)
  • Weatherstripping (optional)

Step 1: Ensure Safety

Always prioritize safety. Wear safety goggles to protect your eyes and work gloves to safeguard your hands.

Step 2: Inspect the Damage

Examine the garage door panels to assess the extent of the damage and the cause of the gap. Pay attention to any loose or damaged hardware, dents, or warping.

Step 3: Tighten Loose Hardware

If the panel gap is caused by loose hinges or hardware, use a screwdriver or drill to tighten all screws and bolts. This simple step can often resolve the issue.

Step 4: Repair Small Dents

For small dents in metal panels, use a hammer to gently tap out the dented area from the inside. Be cautious not to create further damage or deform the panel.

Step 5: Address Warping or Bowing (Wooden Doors)

If you have a wooden garage door and notice warping or bowing, apply moisture to the concave side using a damp cloth. Then, apply heat using a heat gun or hairdryer to the convex side. This should help the panel return to its original shape. Once the panel is straight, apply wood glue along the seam and use clamps to hold it in place until the glue dries.

Step 6: Replace a Damaged Panel

If the panel is severely damaged or cannot be repaired, you may need to replace it. Measure the dimensions of the damaged panel and order a replacement. Remove the old panel by unscrewing it from the door frame and install the new one in its place.

Step 7: Apply Finish (Wooden Doors)

If you’ve made repairs to a wooden garage door, apply a finish or paint to protect the wood from future moisture-related issues. This will also ensure a uniform appearance.

Step 8: Consider Weatherstripping

To enhance the door’s energy efficiency and prevent dust and pests from entering, you can add weatherstripping to the gaps around the door. Measure the gaps and purchase the appropriate weatherstripping material, then install it according to the manufacturer’s instructions.

Step 9: Test the Door

After making the necessary repairs, test the garage door to ensure it operates smoothly and that the panel gap is resolved. Open and close the door multiple times to check for any signs of binding or further issues.

Expert Tip: “Preventing future panel gaps in wooden garage doors can be achieved by applying a high-quality sealant or finish to protect the wood from moisture. Regular inspections and maintenance can help you identify and address issues early.”

Conclusion

According to Garage Door Repair Riverside CA, addressing a garage door panel gap can be a satisfying DIY project that not only enhances the appearance of your home but also improves energy efficiency and security. My own experience in tackling this issue has taught me the importance of identifying the cause, whether it’s loose hardware, dents, warping, or damage, and applying the appropriate repair techniques.

Remember that safety should always come first, and it’s crucial to wear protective gear and exercise caution when using tools. By following this step-by-step guide and making necessary repairs, you can enjoy a well-functioning garage door that not only protects your belongings but also enhances the overall aesthetics and comfort of your home.

Riverside Garage & Overhead Doors

3410 Torrey St, Riverside, CA 92503, United States

951-494-6436

Cost-Effective Tips for Hiring Garage Door Professionals – All American Doors

As a homeowner, I’ve faced my fair share of unexpected repair costs. When it comes to garage door issues, finding the right professionals can make a significant difference not only in the functionality of your garage door but also in your wallet.

After navigating a few garage door repairs and installations, I’ve learned some cost-effective tips for hiring garage door professionals that I’m eager to share with fellow homeowners in this article as stated in Garage Door Repair.

1. Routine Maintenance Can Save You Money

The first and perhaps the most cost-effective tip I can offer is to invest in routine garage door maintenance. Regular maintenance can help prevent costly repairs down the road. Many garage door issues stem from neglect and lack of proper care.

Consider scheduling annual or bi-annual maintenance with a garage door professional. During these visits, they can inspect, lubricate, and adjust the necessary components, ensuring that your garage door continues to operate smoothly. This proactive approach can extend the lifespan of your garage door and minimize the likelihood of major repairs.

2. Learn Basic DIY Garage Door Maintenance

While some maintenance tasks require a professional’s expertise, there are simple DIY maintenance tasks that you can perform yourself. These tasks include:

  • Cleaning the tracks and rollers to remove dirt and debris.
  • Lubricating moving parts such as hinges, springs, and rollers.
  • Checking and tightening bolts, nuts, and screws.
  • Testing the balance of the door and adjusting the tension if necessary.

Performing these routine maintenance tasks can help you detect minor issues early and reduce the frequency of service calls.

3. Get Multiple Quotes for Repairs and Installations

When you do encounter a garage door issue that requires professional attention, it’s wise to obtain multiple quotes from different garage door professionals. This practice allows you to compare pricing and services to ensure that you’re getting the best value for your money.

Be sure to provide each professional with the same details about the issue, so you receive consistent quotes. Ask questions about the services included in the price and inquire about any additional fees that might apply. Comparing quotes can help you avoid overpaying for repairs or installations.

4. Opt for Repair Over Replacement When Feasible

Garage door professionals may suggest replacing certain components or even the entire door when repairs are possible. While some replacements may be necessary, it’s essential to consider the feasibility of repairs before committing to a full replacement.

In many cases, skilled professionals can repair components like springs, cables, and sensors, saving you money compared to the cost of a complete replacement. However, if your garage door is old and has numerous issues, a replacement might be a more cost-effective long-term solution.

5. Invest in Quality Parts and Materials

When it comes to garage door repairs or replacements, investing in quality parts and materials can be cost-effective in the long run. High-quality components may have a higher initial cost, but they tend to be more durable and reliable, reducing the need for frequent repairs.

Ask your garage door professional about the quality of the parts they use and consider opting for options with longer warranties. In the end, spending a bit more on quality materials can save you from frequent service calls and replacements.

6. Research Warranty Options

Before hiring a garage door professional, inquire about the warranties they offer on their services and the parts they install. A solid warranty provides you with peace of mind, knowing that if any issues arise shortly after the repair, you won’t have to incur additional costs for the same problem.

Carefully read and understand the terms and conditions of the warranty to ensure you know what is covered and for how long. Some warranties may also include provisions for regular maintenance, which can further reduce long-term costs.

7. Avoid Emergency Service Charges

Garage door emergencies can be stressful and costly. To avoid emergency service charges, maintain your garage door regularly and address any issues promptly. By being proactive and attentive to your garage door’s condition, you can prevent many emergency situations from arising.

Additionally, familiarize yourself with the operating manual of your garage door opener. Understanding how to manually operate the door in case of a power outage or malfunction can help you avoid emergency service calls.

8. Consider Energy Efficiency

In today’s eco-conscious world, energy efficiency is not only good for the environment but also for your wallet. When hiring a garage door professional for a replacement or installation, consider investing in an energy-efficient door.

Energy-efficient garage doors are often better insulated and can help regulate the temperature in your garage. This can result in cost savings on heating and cooling expenses, especially if your garage is attached to your home.

9. Ask About Discounts and Special Offers

Don’t hesitate to ask garage door professionals if they offer any discounts or special offers. Some companies may have promotions for specific services, such as maintenance packages or seasonal tune-ups. By taking advantage of these offers, you can save on routine maintenance costs.

Additionally, inquire about any available discounts for senior citizens, veterans, or members of homeowner associations. Garage door professionals often appreciate loyal customers and may provide discounts for repeat business.

10. Educate Yourself About Your Garage Door

Lastly, one of the most cost-effective tips is to educate yourself about your garage door. Understand how it operates, and familiarize yourself with the basic components and their functions. Knowing how to perform simple troubleshooting and maintenance tasks can help you address minor issues on your own, reducing the need for professional assistance.

Furthermore, learning about the signs of potential problems can help you detect issues early, preventing them from escalating into costly repairs.

In Conclusion: Cost-Effective Garage Door Care

Overall, in Garage Door Repair, hiring garage door professionals doesn’t have to break the bank. By adopting a proactive approach to maintenance, seeking multiple quotes, making informed decisions about repairs and replacements, and investing in quality materials, you can keep your garage door in excellent condition while minimizing long-term costs. Remember, knowledge is key, so educate yourself about your garage door to make wise choices and ensure that your home remains secure and functional.

All American Doors

8155 NW 93rd St, Medley, FL 33166, United States

305-885-8088

Solving Garage Door Opener Keypad Connectivity Issues – First Call Garage Door of Missouri City

As a homeowner, I’ve come to rely on my garage door opener keypad for convenient access to my home. However, like many modern devices, it occasionally runs into connectivity issues that can be frustrating. One day, I found myself locked out of my own garage due to a malfunctioning keypad. Determined to regain control, I embarked on a troubleshooting journey to solve the garage door opener keypad connectivity issues.

Based from Garage Door Repair, here are the steps I took to identify and fix the problem, and some useful tips for anyone facing a similar situation.

The Convenience of a Garage Door Opener Keypad

Before delving into the troubleshooting process, it’s crucial to understand the significance of a garage door opener keypad. These devices offer homeowners a convenient way to access their garages without the need for a remote control or keys. You simply enter a code, and the door opens, providing secure and straightforward entry.

Signs of Garage Door Opener Keypad Connectivity Issues

My journey began when I noticed several signs indicating that my garage door opener keypad was experiencing connectivity problems:

  1. Inconsistent Response: The keypad occasionally failed to respond when I entered the access code, leaving me locked out or stranded in the garage.
  2. Delayed Action: When the keypad did respond, there was a noticeable delay before the garage door started moving. This delay was inconvenient, especially during bad weather.
  3. Weak Signal: At times, the keypad’s signal seemed weak, requiring me to stand uncomfortably close to the garage door for it to work.
  4. Battery Check: I also checked the battery indicator on the keypad, and it showed a full battery, ruling out power issues.

These issues made it clear that something was amiss with the keypad’s connectivity, and I was determined to get to the bottom of it.

Common Causes of Keypad Connectivity Issues

Understanding the potential causes of garage door opener keypad connectivity problems is essential for effective troubleshooting. Here are some common culprits:

  1. Interference: Radio frequency interference from nearby devices, such as cordless phones, Wi-Fi routers, or electronic gadgets, can disrupt the keypad’s signal.
  2. Weak Battery: While my battery was fine, a weak or dying battery in the keypad can lead to erratic behavior.
  3. Keypad Placement: The keypad’s position on the wall can affect its signal strength. If it’s installed too far from the garage door opener, connectivity problems may arise.
  4. Dirt and Corrosion: Over time, dirt, dust, or corrosion on the keypad’s contacts or circuit board can hinder its performance.
  5. Frequency Mismatch: Occasionally, garage door opener keypads may operate on a different frequency than the opener itself, causing connectivity issues.

My Diagnostic Process

Armed with an understanding of the potential causes, I embarked on a systematic diagnostic process to pinpoint the source of my keypad’s connectivity problems:

  1. Interference Check: I began by identifying potential sources of interference in the vicinity of my garage. I temporarily powered down or moved electronic devices that might have been causing signal interference.
  2. Battery Inspection: Even though my battery was in good condition, I removed it from the keypad, cleaned the battery contacts, and reinserted it to ensure a secure connection.
  3. Keypad Placement: I inspected the keypad’s placement on the wall, ensuring it was within a reasonable range of the garage door opener. I also checked if there were any obstructions between the keypad and the opener.
  4. Cleaning and Maintenance: I carefully removed the keypad’s cover to inspect the circuit board and contacts. There, I found a slight buildup of dust and grime. I cleaned the contacts and circuit board using a soft brush and a can of compressed air.
  5. Frequency Matching: To ensure that the keypad and garage door opener were operating on the same frequency, I consulted the manufacturer’s manual for both devices. Fortunately, they matched.

Solving the Connectivity Issue

After these diagnostic steps, it was time to implement solutions to resolve the garage door opener keypad connectivity issues:

  1. Interference Resolution: My interference check revealed that a cordless phone base station was positioned too close to the garage. I relocated it to a different room, reducing potential interference.
  2. Battery Replacement: Although my battery was in good shape, I had a spare battery on hand just in case. Replacing the battery with a new one ensured that power issues weren’t contributing to the problem.
  3. Keypad Repositioning: I decided to reposition the keypad slightly closer to the garage door opener unit to strengthen the signal. This involved moving it about a foot closer to the door.
  4. Cleaning Routine: I added a regular cleaning routine for the keypad to my home maintenance schedule. Periodically, I now clean the keypad’s contacts and circuit board to prevent dust and grime buildup.
  5. Manufacturer Support: In rare cases, compatibility issues may persist. If none of the above solutions work, I recommend contacting the garage door opener manufacturer’s customer support for guidance or potential replacement.

Conclusion: Regaining Control

After implementing these solutions, my garage door opener keypad connectivity issues were resolved, and I regained seamless access to my garage. Troubleshooting and resolving such problems can be a satisfying experience, and it’s essential to be patient and systematic in your approach.

Overall, according to Garage Door Repair, remember that while I opted for a DIY solution, not all connectivity issues can be resolved easily, and some may require professional assistance. If you’re unsure about tackling the problem yourself or suspect a more significant underlying issue, don’t hesitate to seek expert help to ensure your garage door opener operates safely and efficiently.

First Call Garage Door of Missouri City

1718 Crescent Oak Dr, Missouri City, TX 77459, United States

281-595-8036

Replacing a Snapped Garage Door Cable: Safety First – First Call Garage Door of Sugarland

As a diligent homeowner, I understand that garage doors are an essential part of our daily lives, providing convenience and security. However, when I recently faced the challenge of a snapped garage door cable, I realized the importance of prioritizing safety in any DIY project.

According to Garage Door Repair, I’ll share my experiences and guide you through the process of safely replacing a snapped garage door cable.

The Significance of Garage Door Cables

Before delving into the replacement process, it’s crucial to grasp why garage door cables are vital components:

  1. Counterbalance: Garage door cables play a significant role in counterbalancing the weight of the door. They work in conjunction with the torsion springs to enable smooth and controlled door movement.
  2. Safety: Properly functioning cables ensure the safe opening and closing of the garage door. They prevent the door from falling abruptly, reducing the risk of accidents or injuries.
  3. Longevity: Regular maintenance and timely replacement of damaged cables can extend the lifespan of your garage door system, saving you money in the long run.

Step 1: Safety Precautions

Safety should always be the top priority when dealing with garage door repairs. Here’s how I ensured a safe working environment:

  • Disconnect the Power: Before starting any work on the garage door, I disconnected the power to the opener to prevent any accidental activation.
  • Release Tension: I released the tension in the garage door springs by pulling the release cord (usually red) hanging from the opener rail. This disengages the door from the opener.
  • Lock the Door: To prevent the door from accidentally falling, I locked it in place using locking pliers or c-clamps on both sides of the door track.

Step 2: Gather Your Tools

To replace a snapped garage door cable, you’ll need the following tools and materials:

  • New garage door cables (ensure they are the correct size and type for your door).
  • Safety glasses and gloves.
  • Wrenches and pliers.
  • A ladder.
  • A winding bar (for winding and unwinding the torsion spring).
  • A vice grip or clamp.
  • A socket set.

Step 3: Identify the Problem

Before proceeding, I inspected the garage door cables to confirm that one or both of them were indeed snapped. A snapped cable typically appears frayed or severed, and it’s crucial to identify which one needs replacement.

Step 4: Release Tension from the Torsion Spring

To safely replace the snapped cable, I needed to release the tension from the torsion spring. This involved using a winding bar to unwind the spring slightly. It’s essential to follow the manufacturer’s instructions for your specific garage door, as winding and unwinding torsion springs can be dangerous.

Step 5: Remove the Old Cable

With the tension released, I used pliers to grip the cable on the bottom bracket and slowly pulled it out of the pulley system, working my way up to the top.

Step 6: Install the New Cable

Installing the new cable required threading it through the pulleys, just as the old one had been. It’s essential to follow the same path to ensure proper functioning. Carefully secure the cable at both the top and bottom brackets.

Step 7: Reapply Tension to the Torsion Spring

With the new cable in place, I gradually wound the torsion spring back to its proper tension using the winding bar. This step is critical for the safe and smooth operation of the garage door. Again, I followed the manufacturer’s guidelines carefully.

Step 8: Test the Door

After reapplying tension to the torsion spring, I carefully removed the locking pliers or c-clamps from the door track. With the power to the opener still disconnected, I tested the door manually to ensure it moved smoothly and without any issues.

Step 9: Reconnect the Power

Once I was confident that the door was operating correctly, I reconnected the power to the garage door opener. I tested the door using the remote control to ensure that it responded as expected.

Step 10: Safety Check

Safety checks are essential after completing any garage door repair. I inspected the entire system, including the cables, springs, pulleys, and tracks, to ensure everything was in good working order. This final safety check provided peace of mind that my garage door was safe and ready for use.

Additional Tips for a Safe Cable Replacement

Here are some additional tips to keep in mind when replacing a snapped garage door cable:

  • Wear Safety Gear: Always wear safety glasses and gloves to protect your eyes and hands from potential hazards.
  • Double-Check the Cable Type: Ensure that you use the correct type and size of cable for your specific garage door model. Refer to your garage door’s manual if you’re uncertain.
  • Consult a Professional: If you’re uncomfortable with any part of the process or unsure about handling the torsion spring, it’s wise to consult a professional garage door technician.

My Personal Experience: A Safely Restored Garage Door

Replacing a snapped garage door cable was a challenging but rewarding DIY project. It not only restored the functionality of my garage door but also provided a valuable lesson in prioritizing safety.

Daily Convenience: With the new cable in place, my garage door resumed its smooth and reliable operation, making my daily routines more convenient.

Safety Assurance: Knowing that the door’s safety features were functioning correctly brought me peace of mind, particularly regarding the safety of my family and pets.

DIY Confidence: Successfully completing this repair boosted my confidence in handling other home maintenance tasks.

Conclusion: Safety First for a Reliable Garage Door

In conclusion, based from Garage Door Repair, replacing a snapped garage door cable is a task that requires careful attention to safety and proper procedure. By following these steps and prioritizing safety, you can ensure that your garage door operates smoothly, reliably, and, most importantly, safely.

My journey to repair the snapped cable was a valuable experience, and I encourage fellow homeowners to approach similar challenges with caution and confidence. It’s a fulfilling way to maintain your home’s efficiency while learning essential DIY skills.

First Call Garage Door of Sugarland

15500 Voss Rd ste 425, Sugar Land, TX 77498, United States

713-597-5105